Search & Redact Text
The Search & Redact feature allows users to quickly locate and redact specific words, phrases, or keywords throughout a document. Instead of manually scanning every page, you can enter search terms directly, upload a keyword list, and apply redactions to matching results in just a few clicks.
It enables targeted, repeatable redaction by letting users manually enter search terms, upload a CSV file containing up to 5,000 keywords, and save search lists for reuse across future projects.
This is ideal for recurring redaction workflows and large-scale projects where the same terms need to be found and redacted accurately across many documents.
Why it matters
The Search & Redact feature is designed to simplify keyword-based redaction workflows by:
- Automating term discovery: Locate every instance of a word, phrase, or keyword instantly without manually reviewing every page.
- Supporting large-scale searches: Upload a CSV file with up to 5,000 keywords or phrases to redact at scale in a single pass.
- Enabling reusable search lists: Save frequently used search terms as lists and apply them to future documents, to maintain consistency across workflows.
- Allowing precise matching: Use bracketed terms for exact-match searches so you redact only what you intend. Supporting compliance and audit tracking: Apply redaction reasons and FOIA exemptions directly from search results.
Using the Search & Redact feature
Accessing the tool
1. From your Redactable dashboard, open your document.
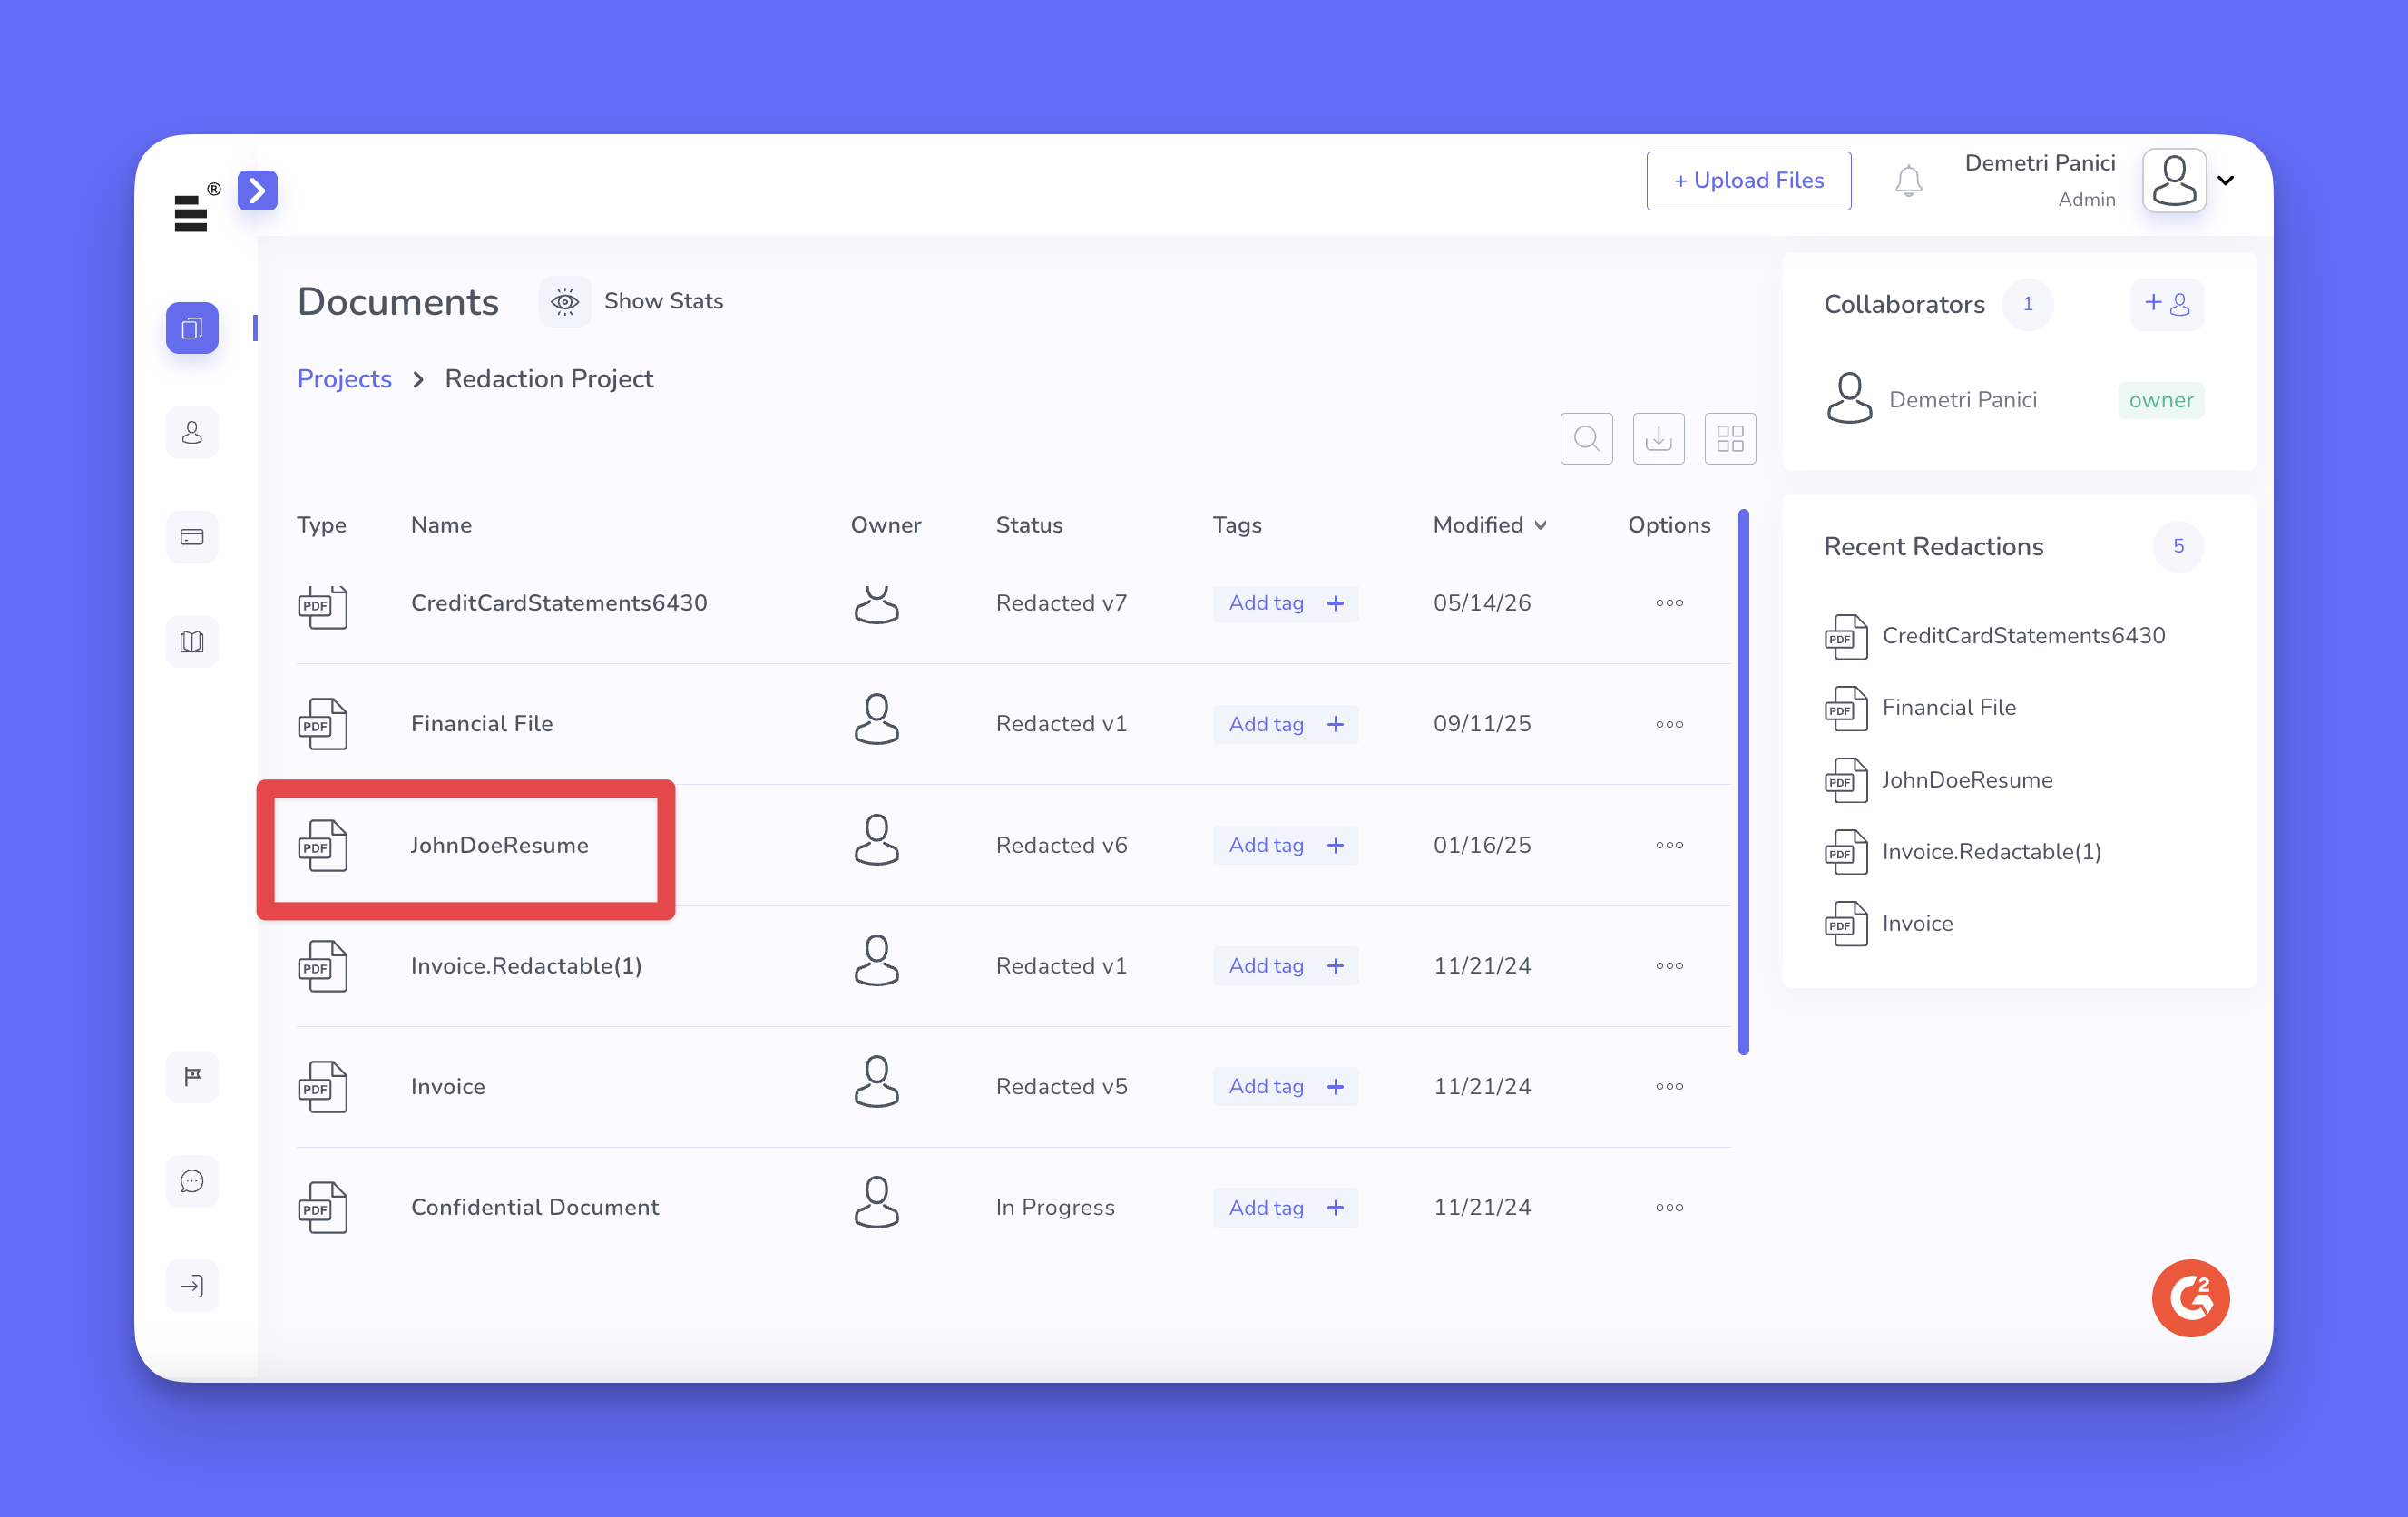
2. The “Redaction Wizard” appears automatically when the document opens. From the “Redaction Wizard” select the "Search Text".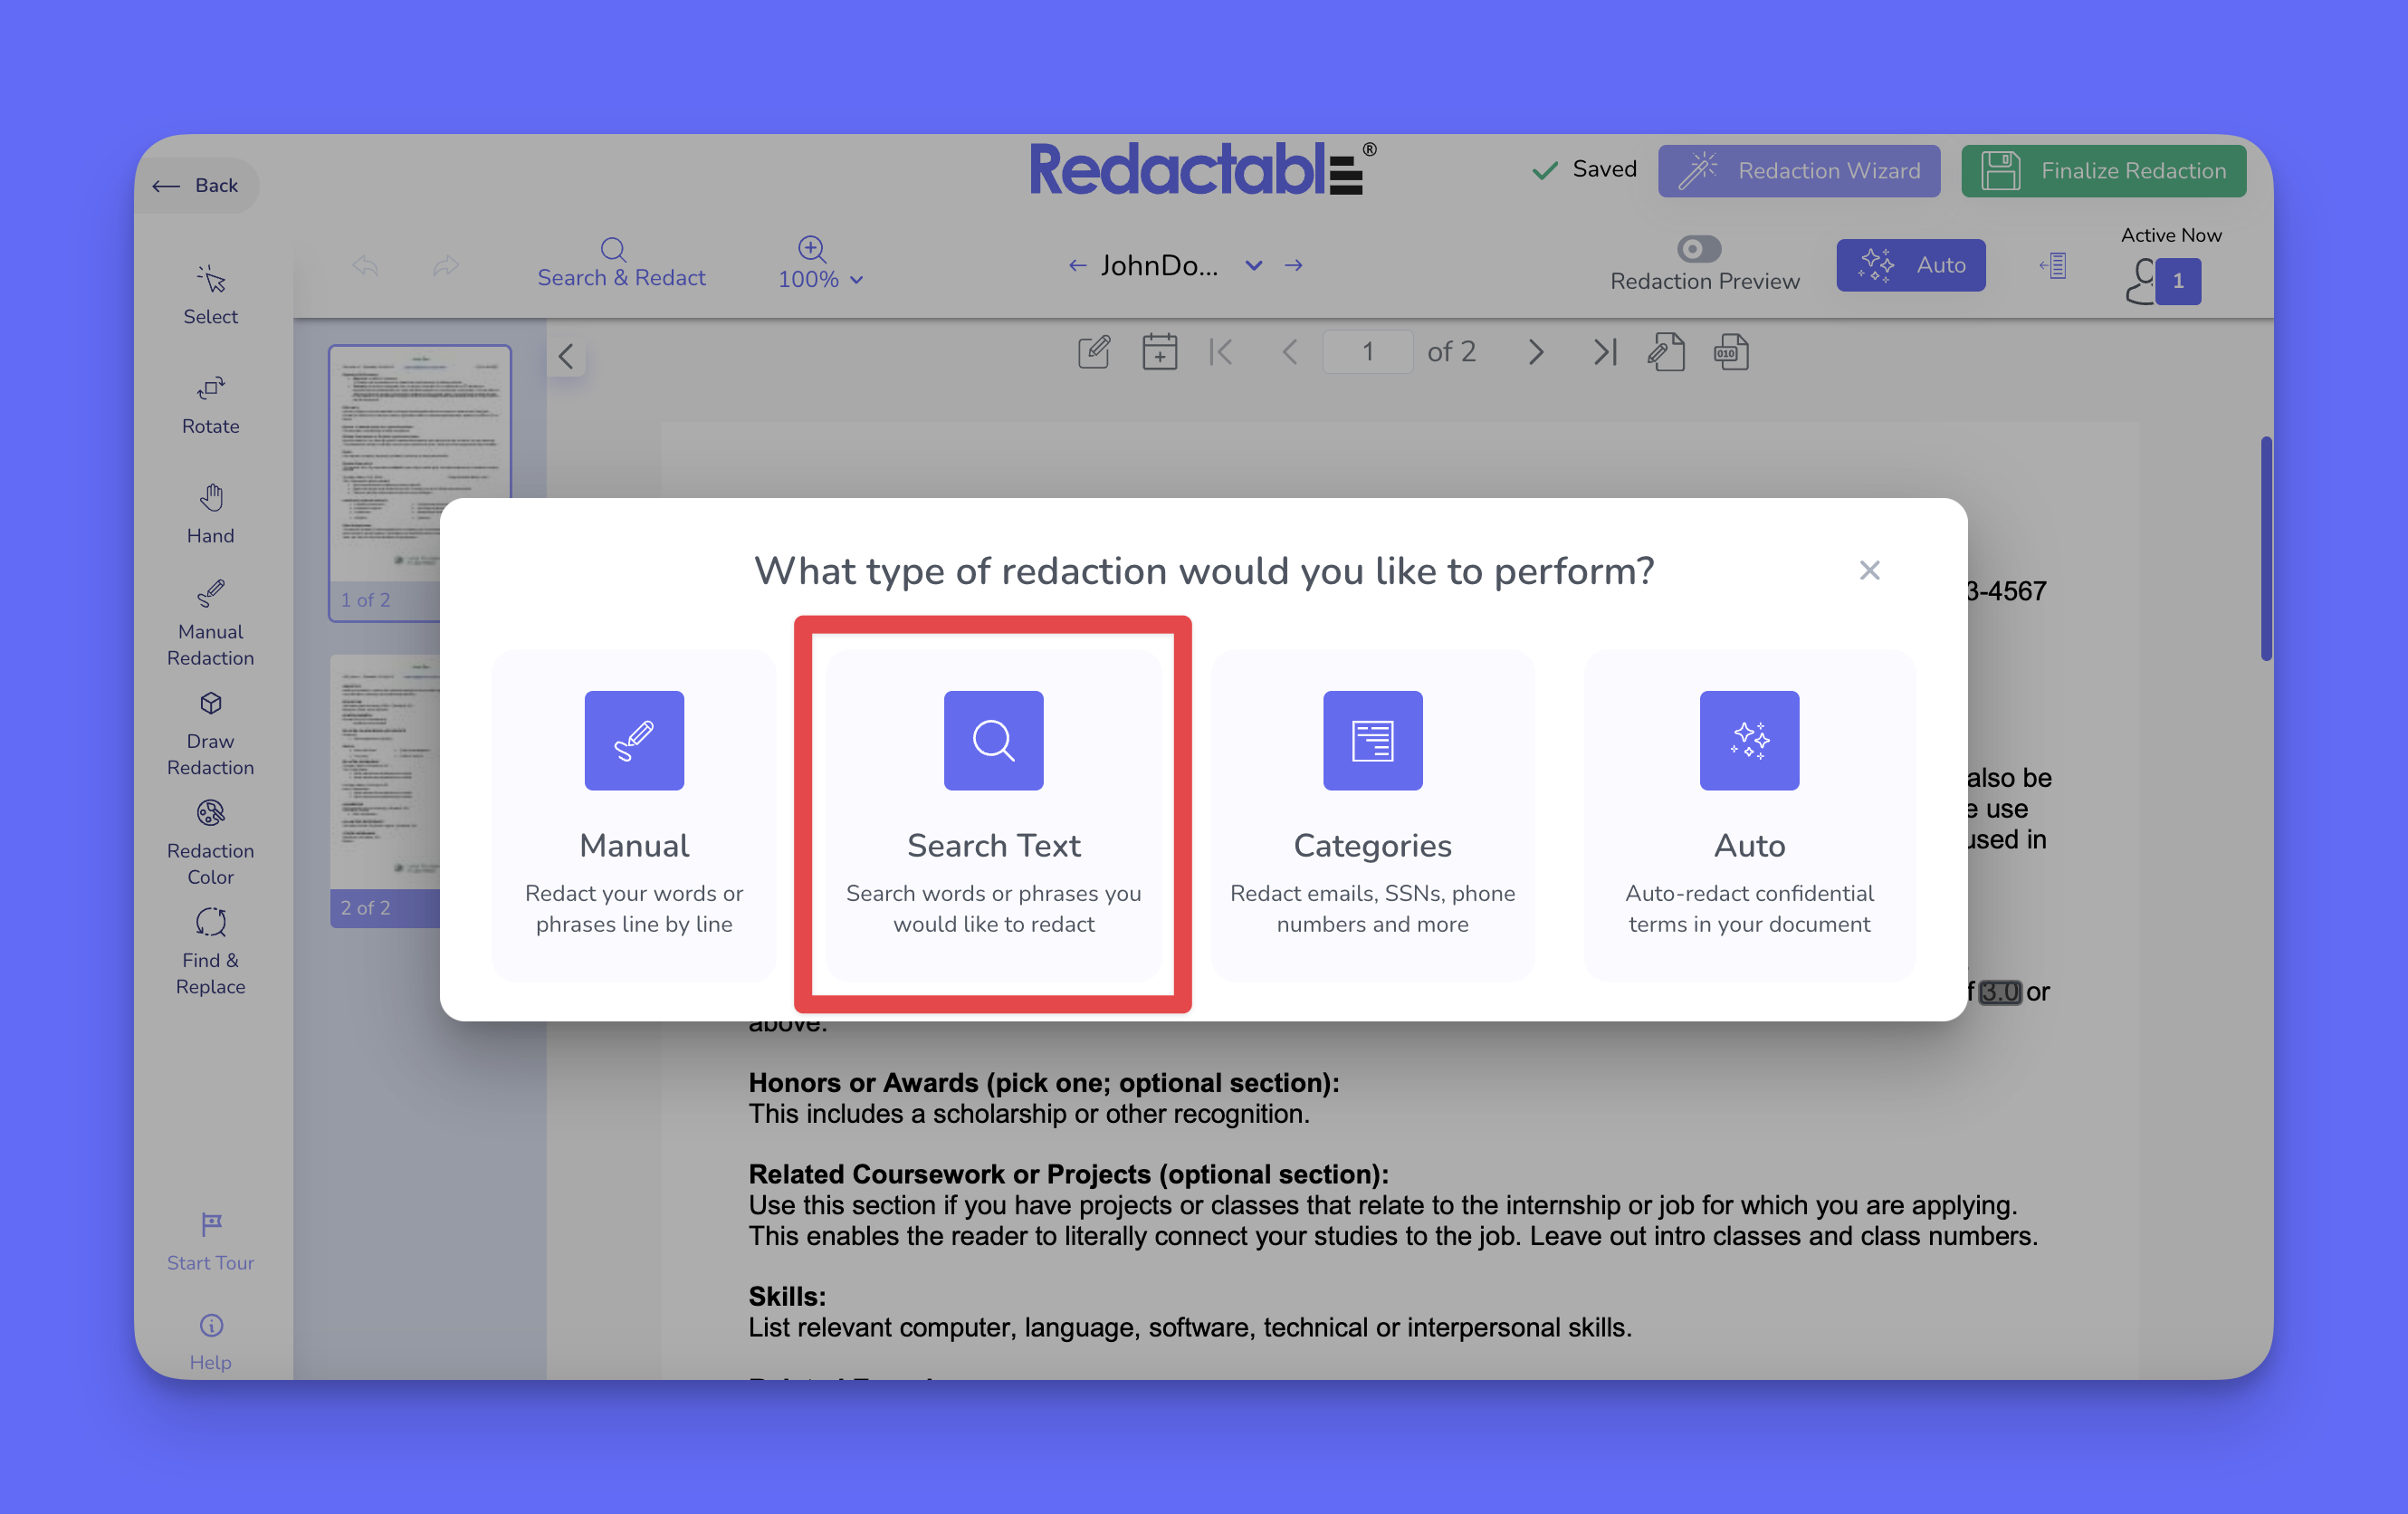
3. You can also access the Search & Redact feature by clicking the "Search & Redact" button in the top navigation bar.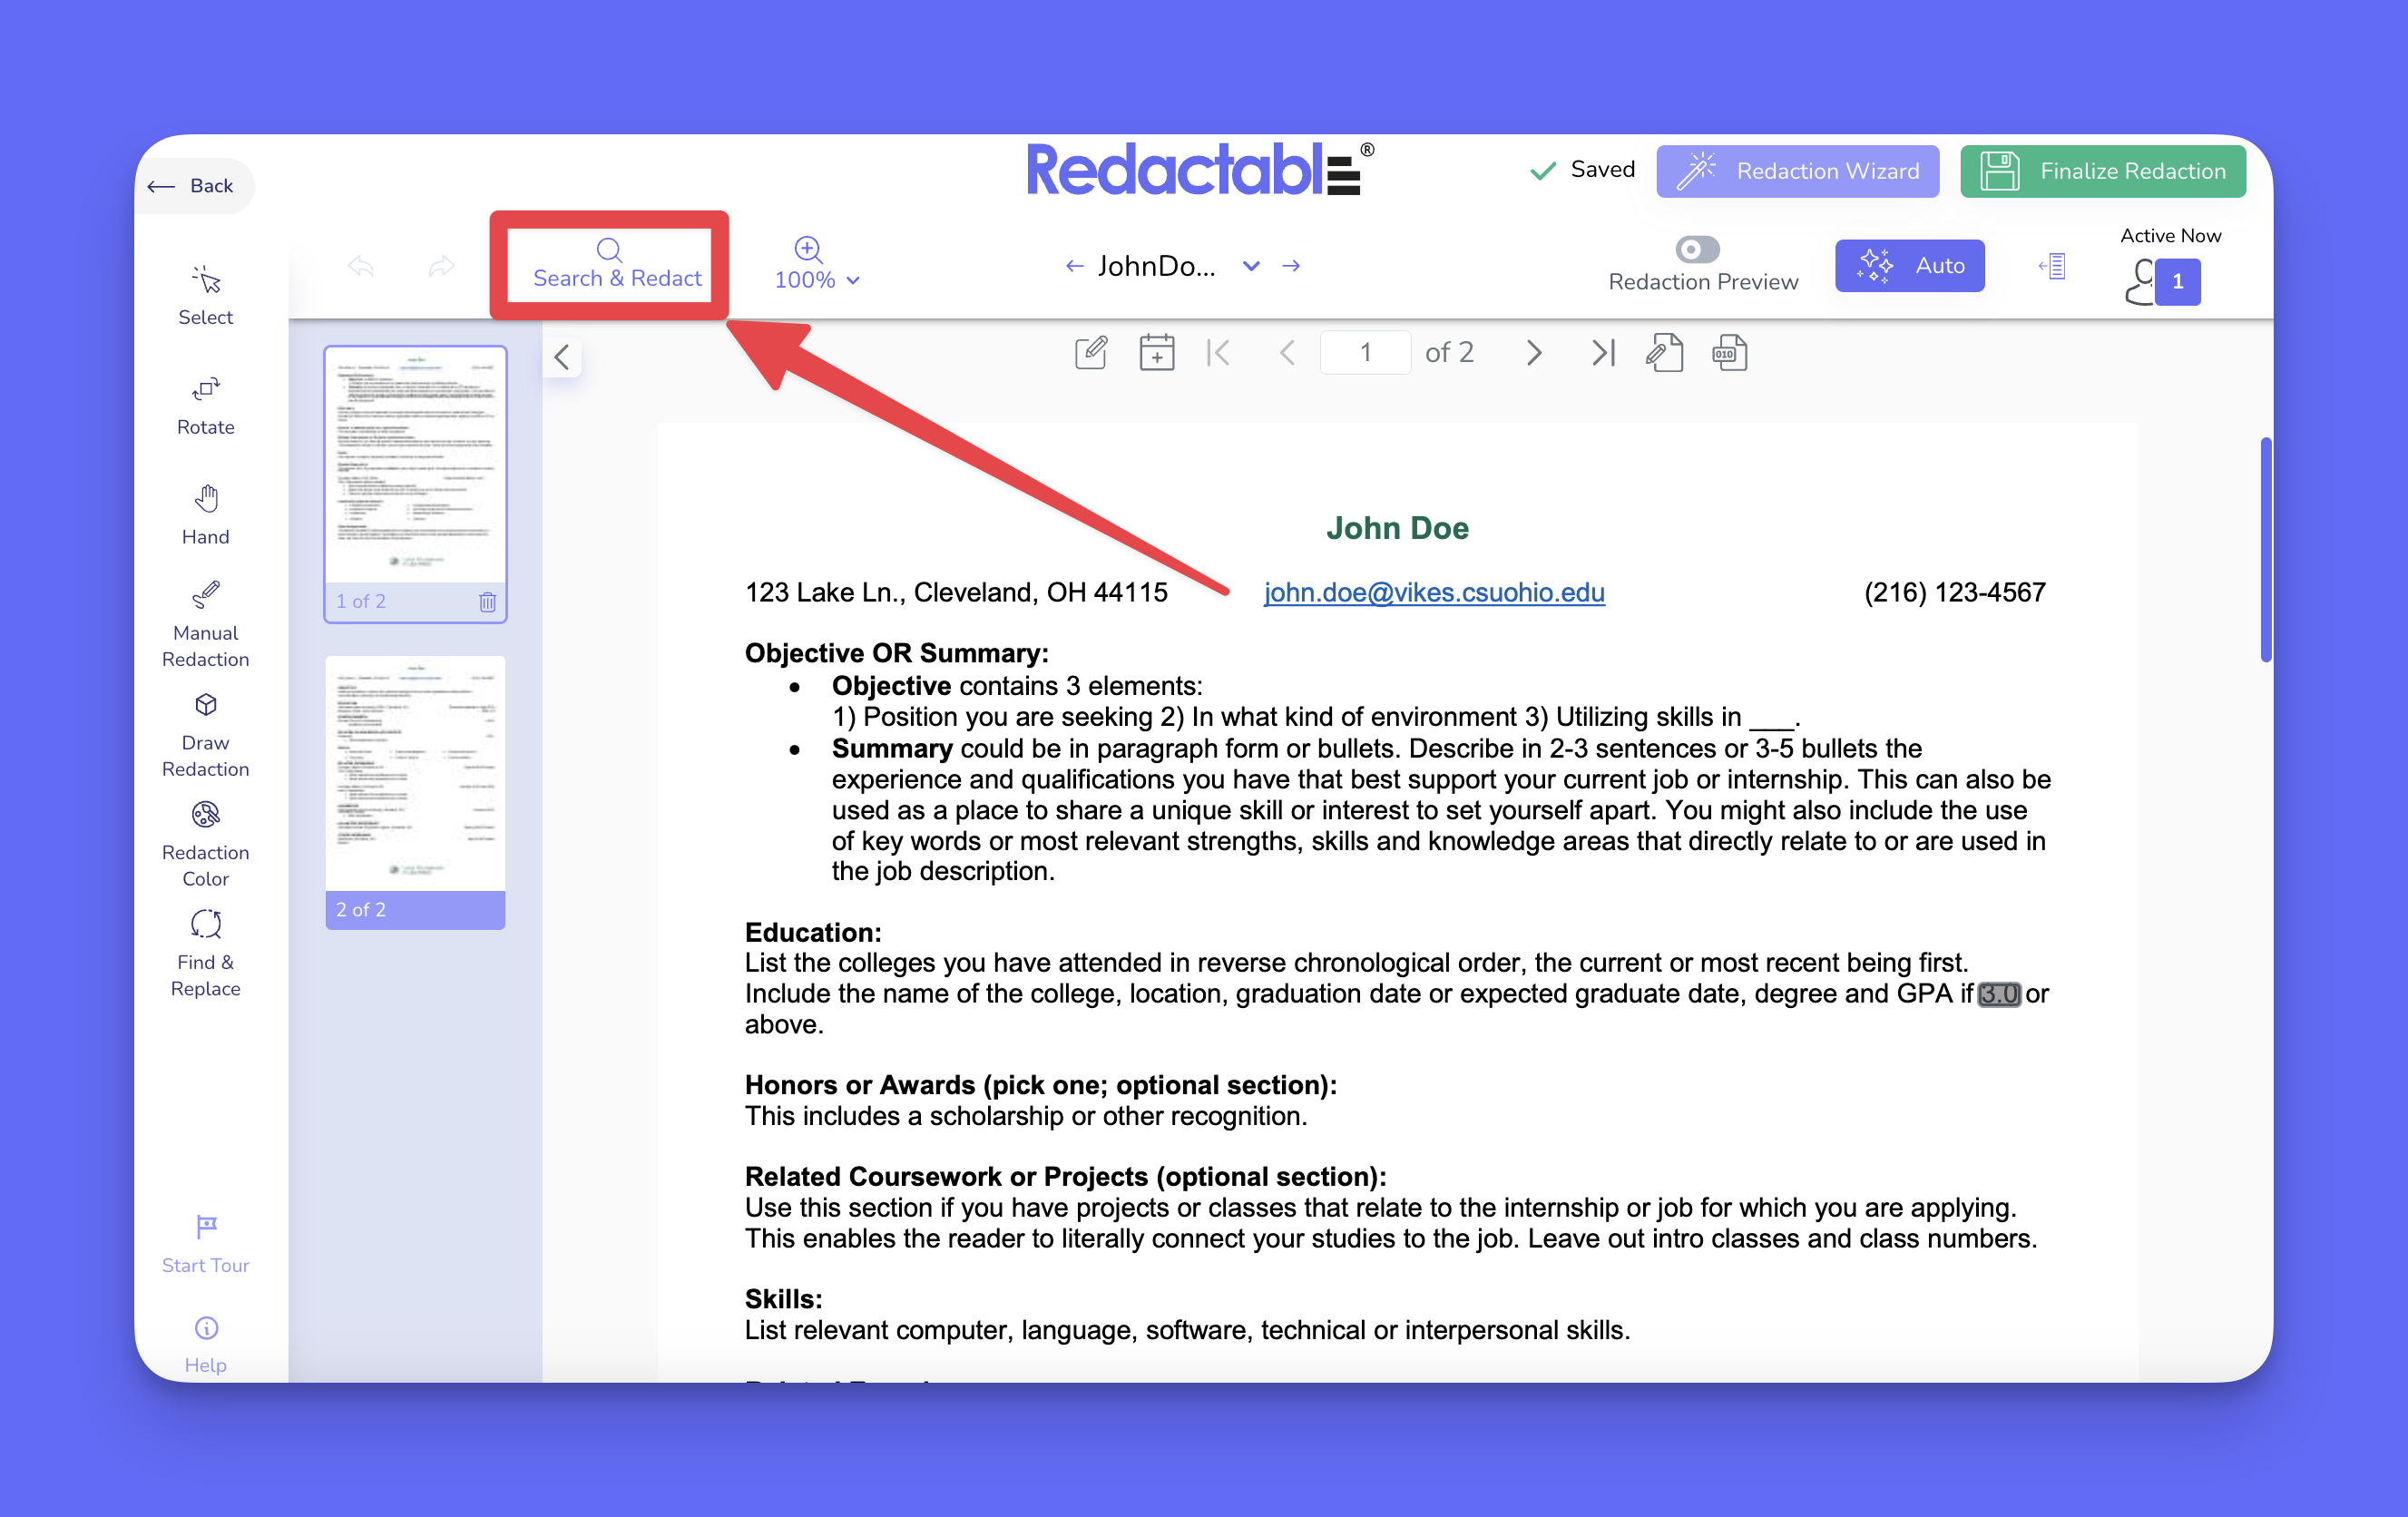
Searching for keywords
4. Enter the keywords or phrases you want to locate and click on the “Search” button.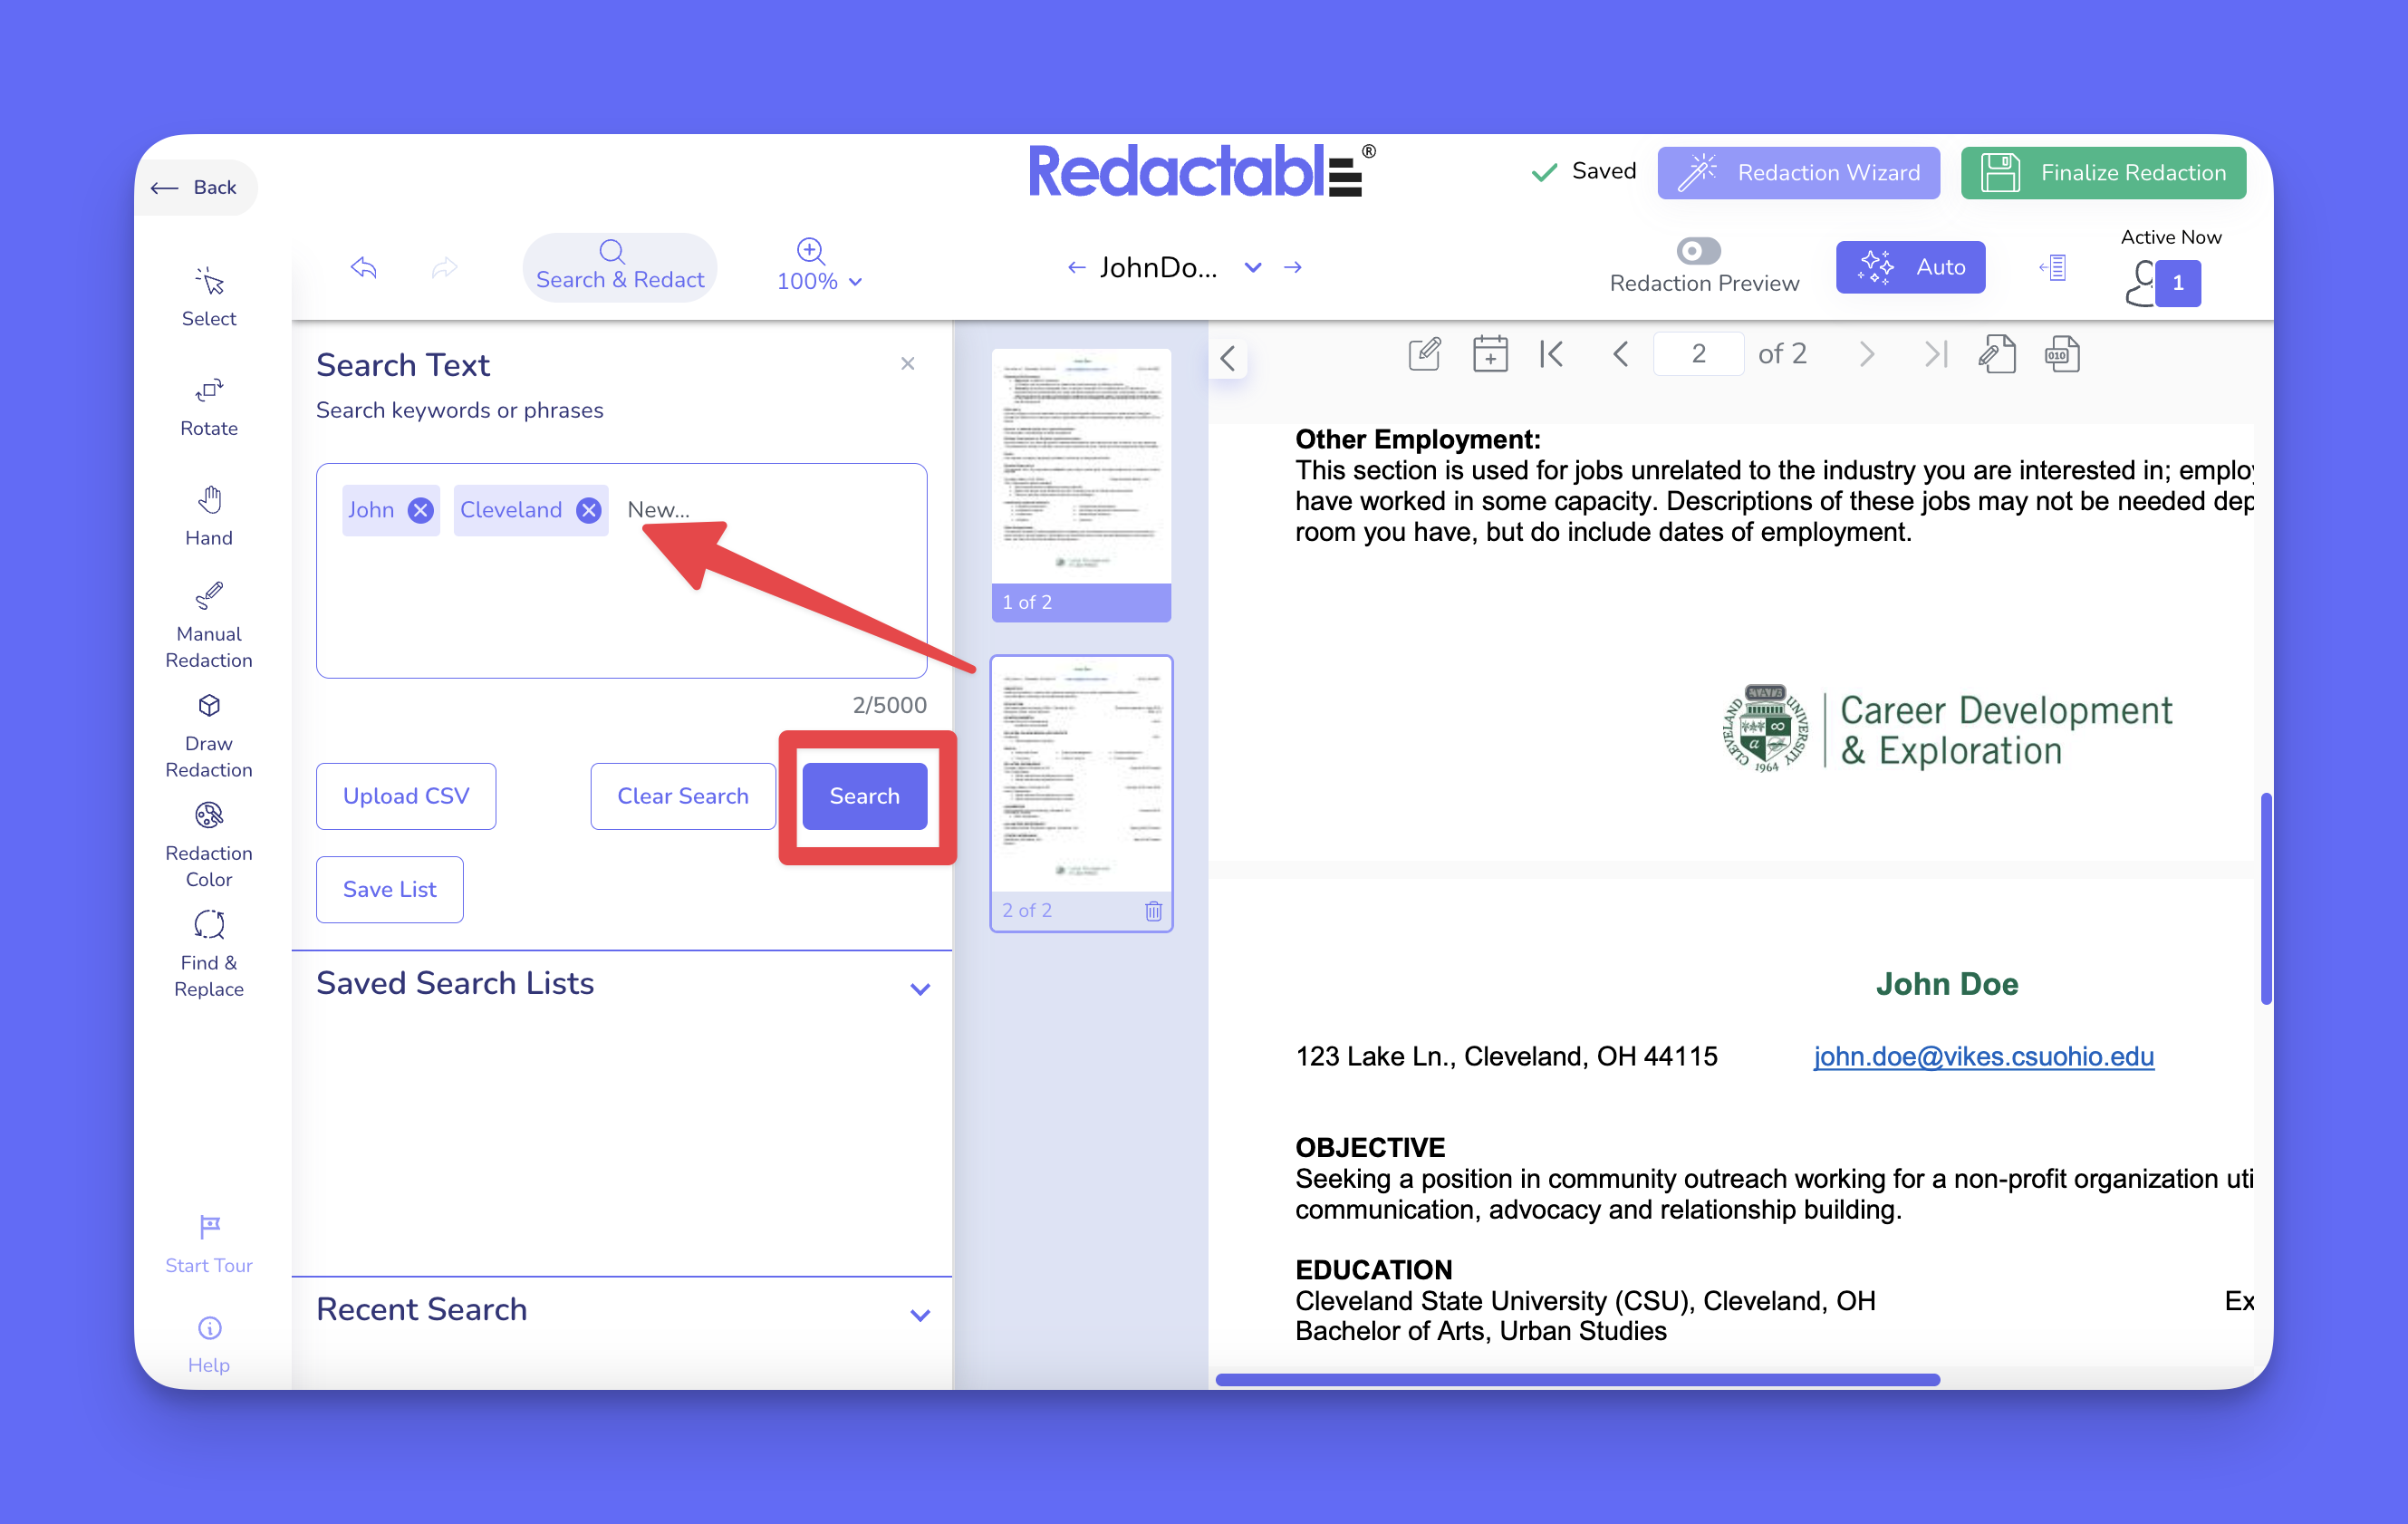
5. For exact-match searches, place the search term inside brackets and click on the “Search” button. For example, if you type [relate], the system will search only for the word "relate" and not partial matches such as "related".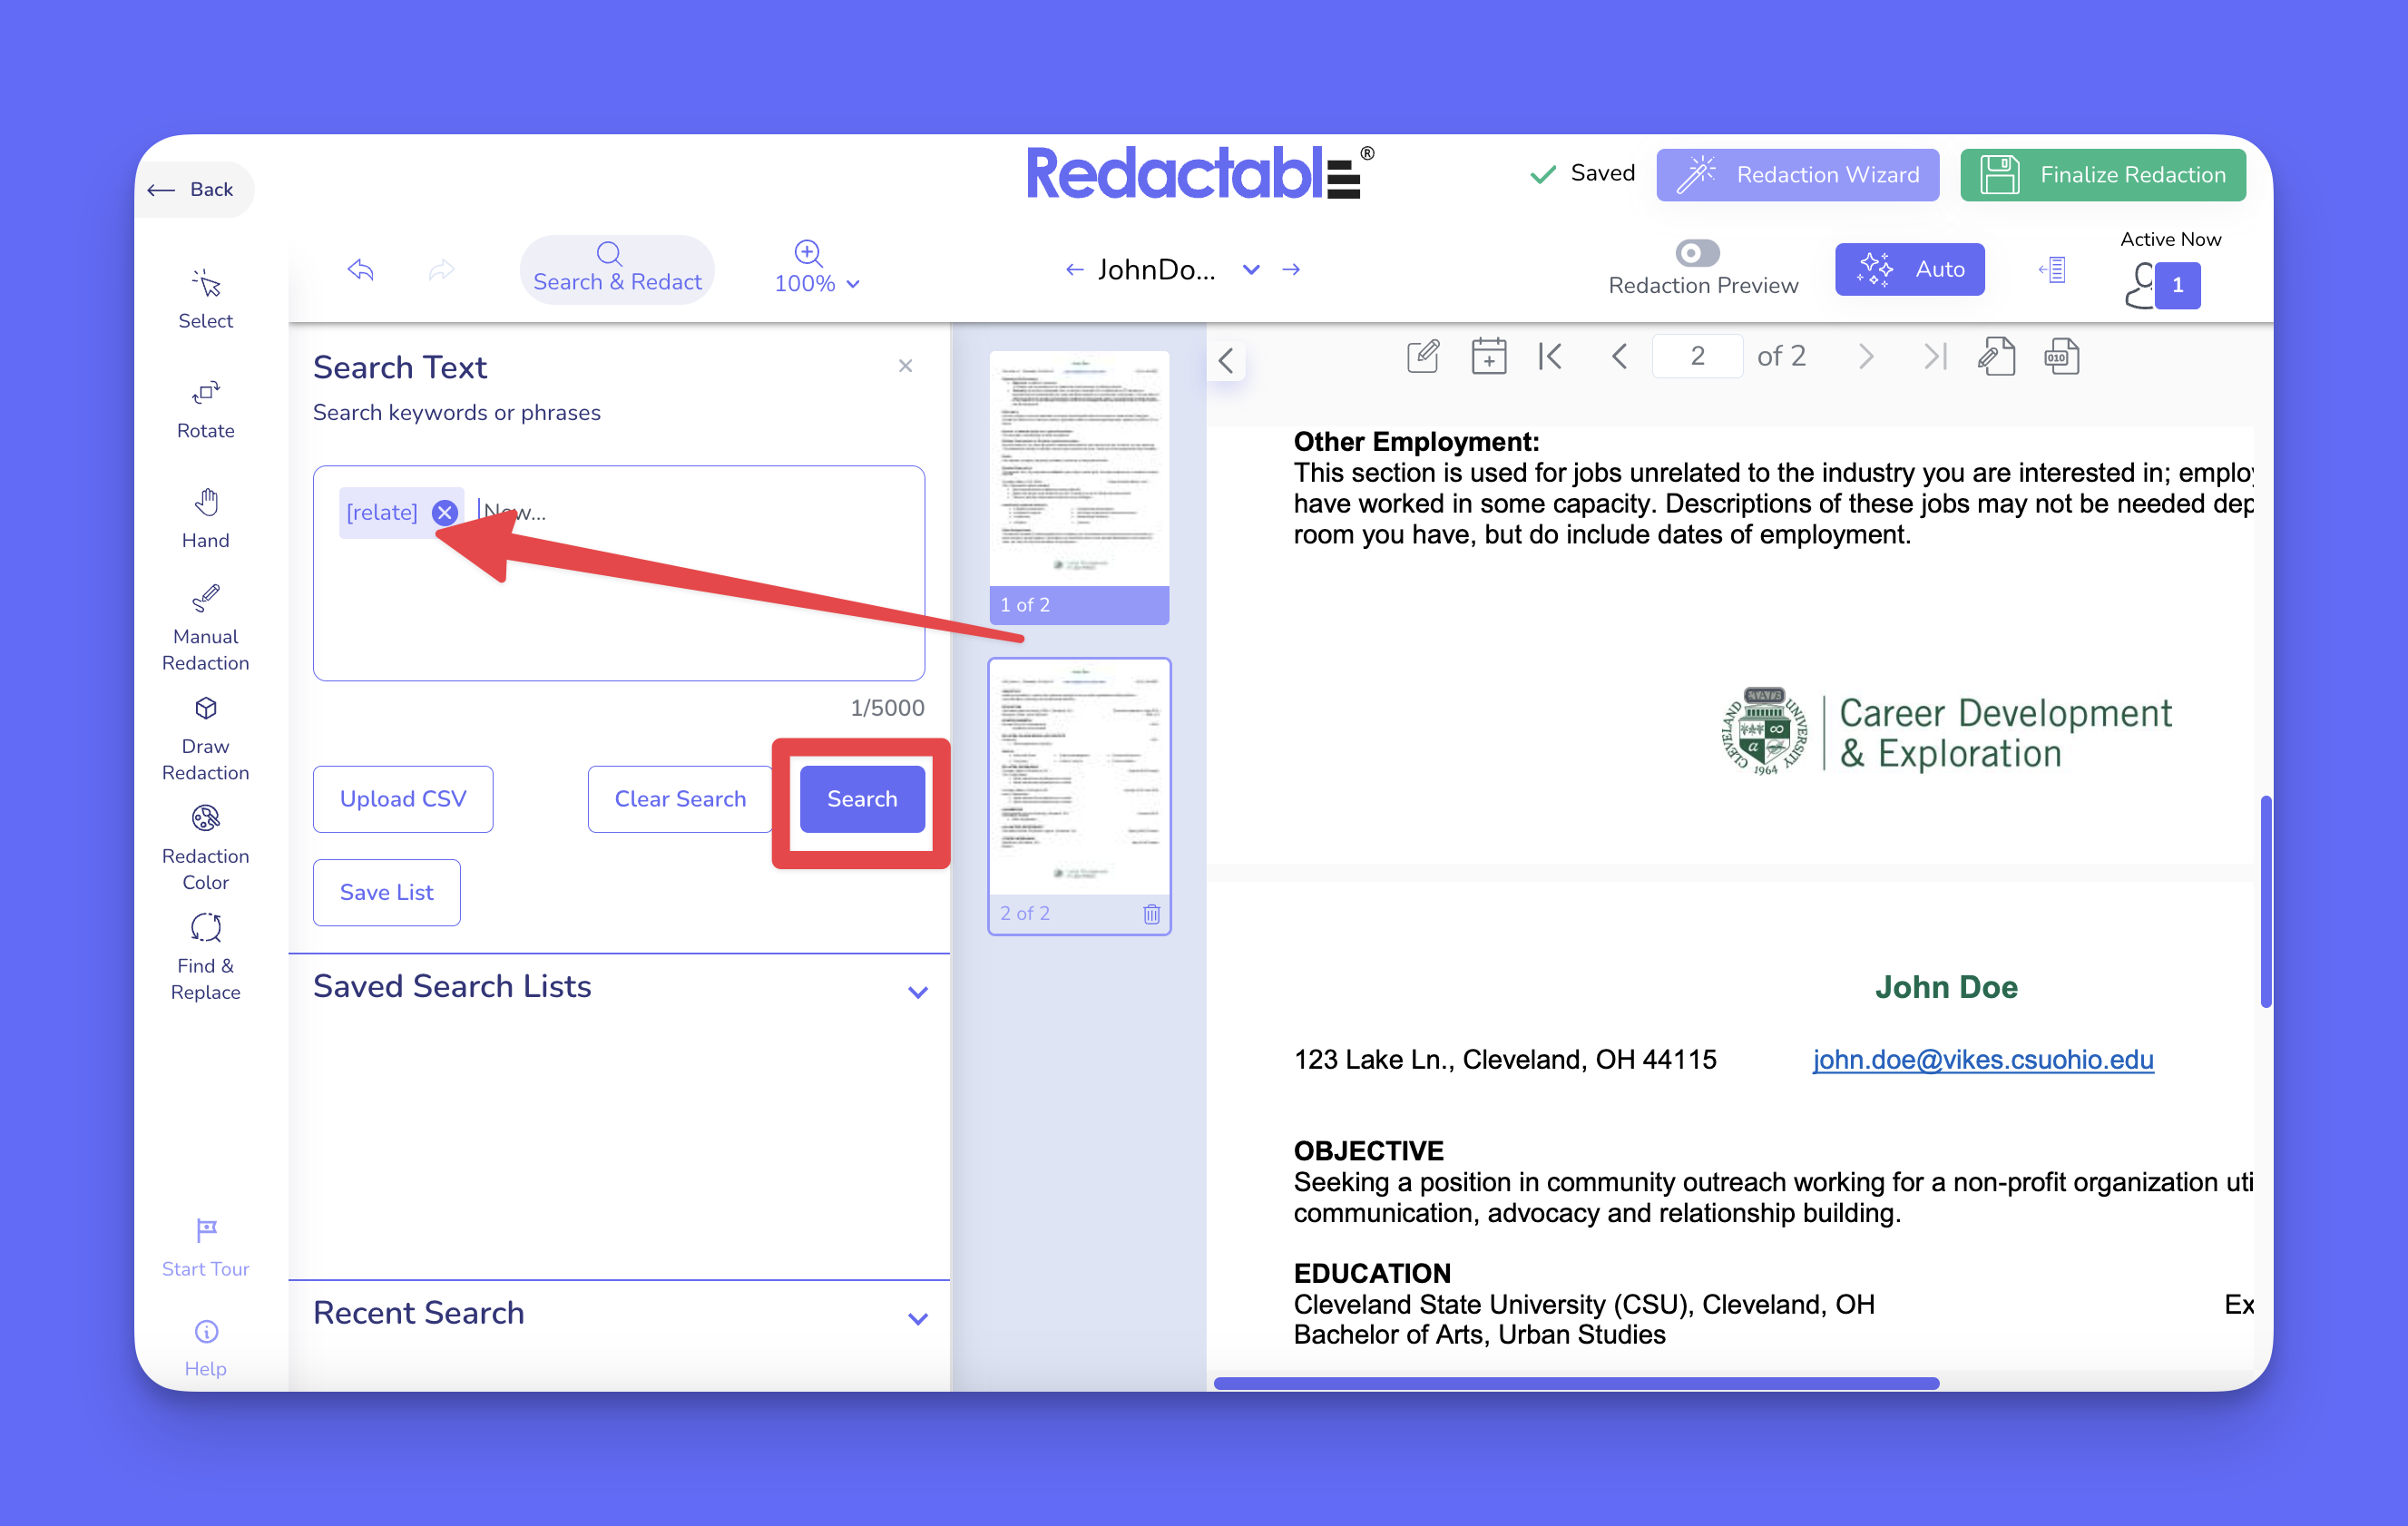
Uploading a keyword list
6. To search for multiple terms at once, click on the “Upload CVS” file option within the search terms area.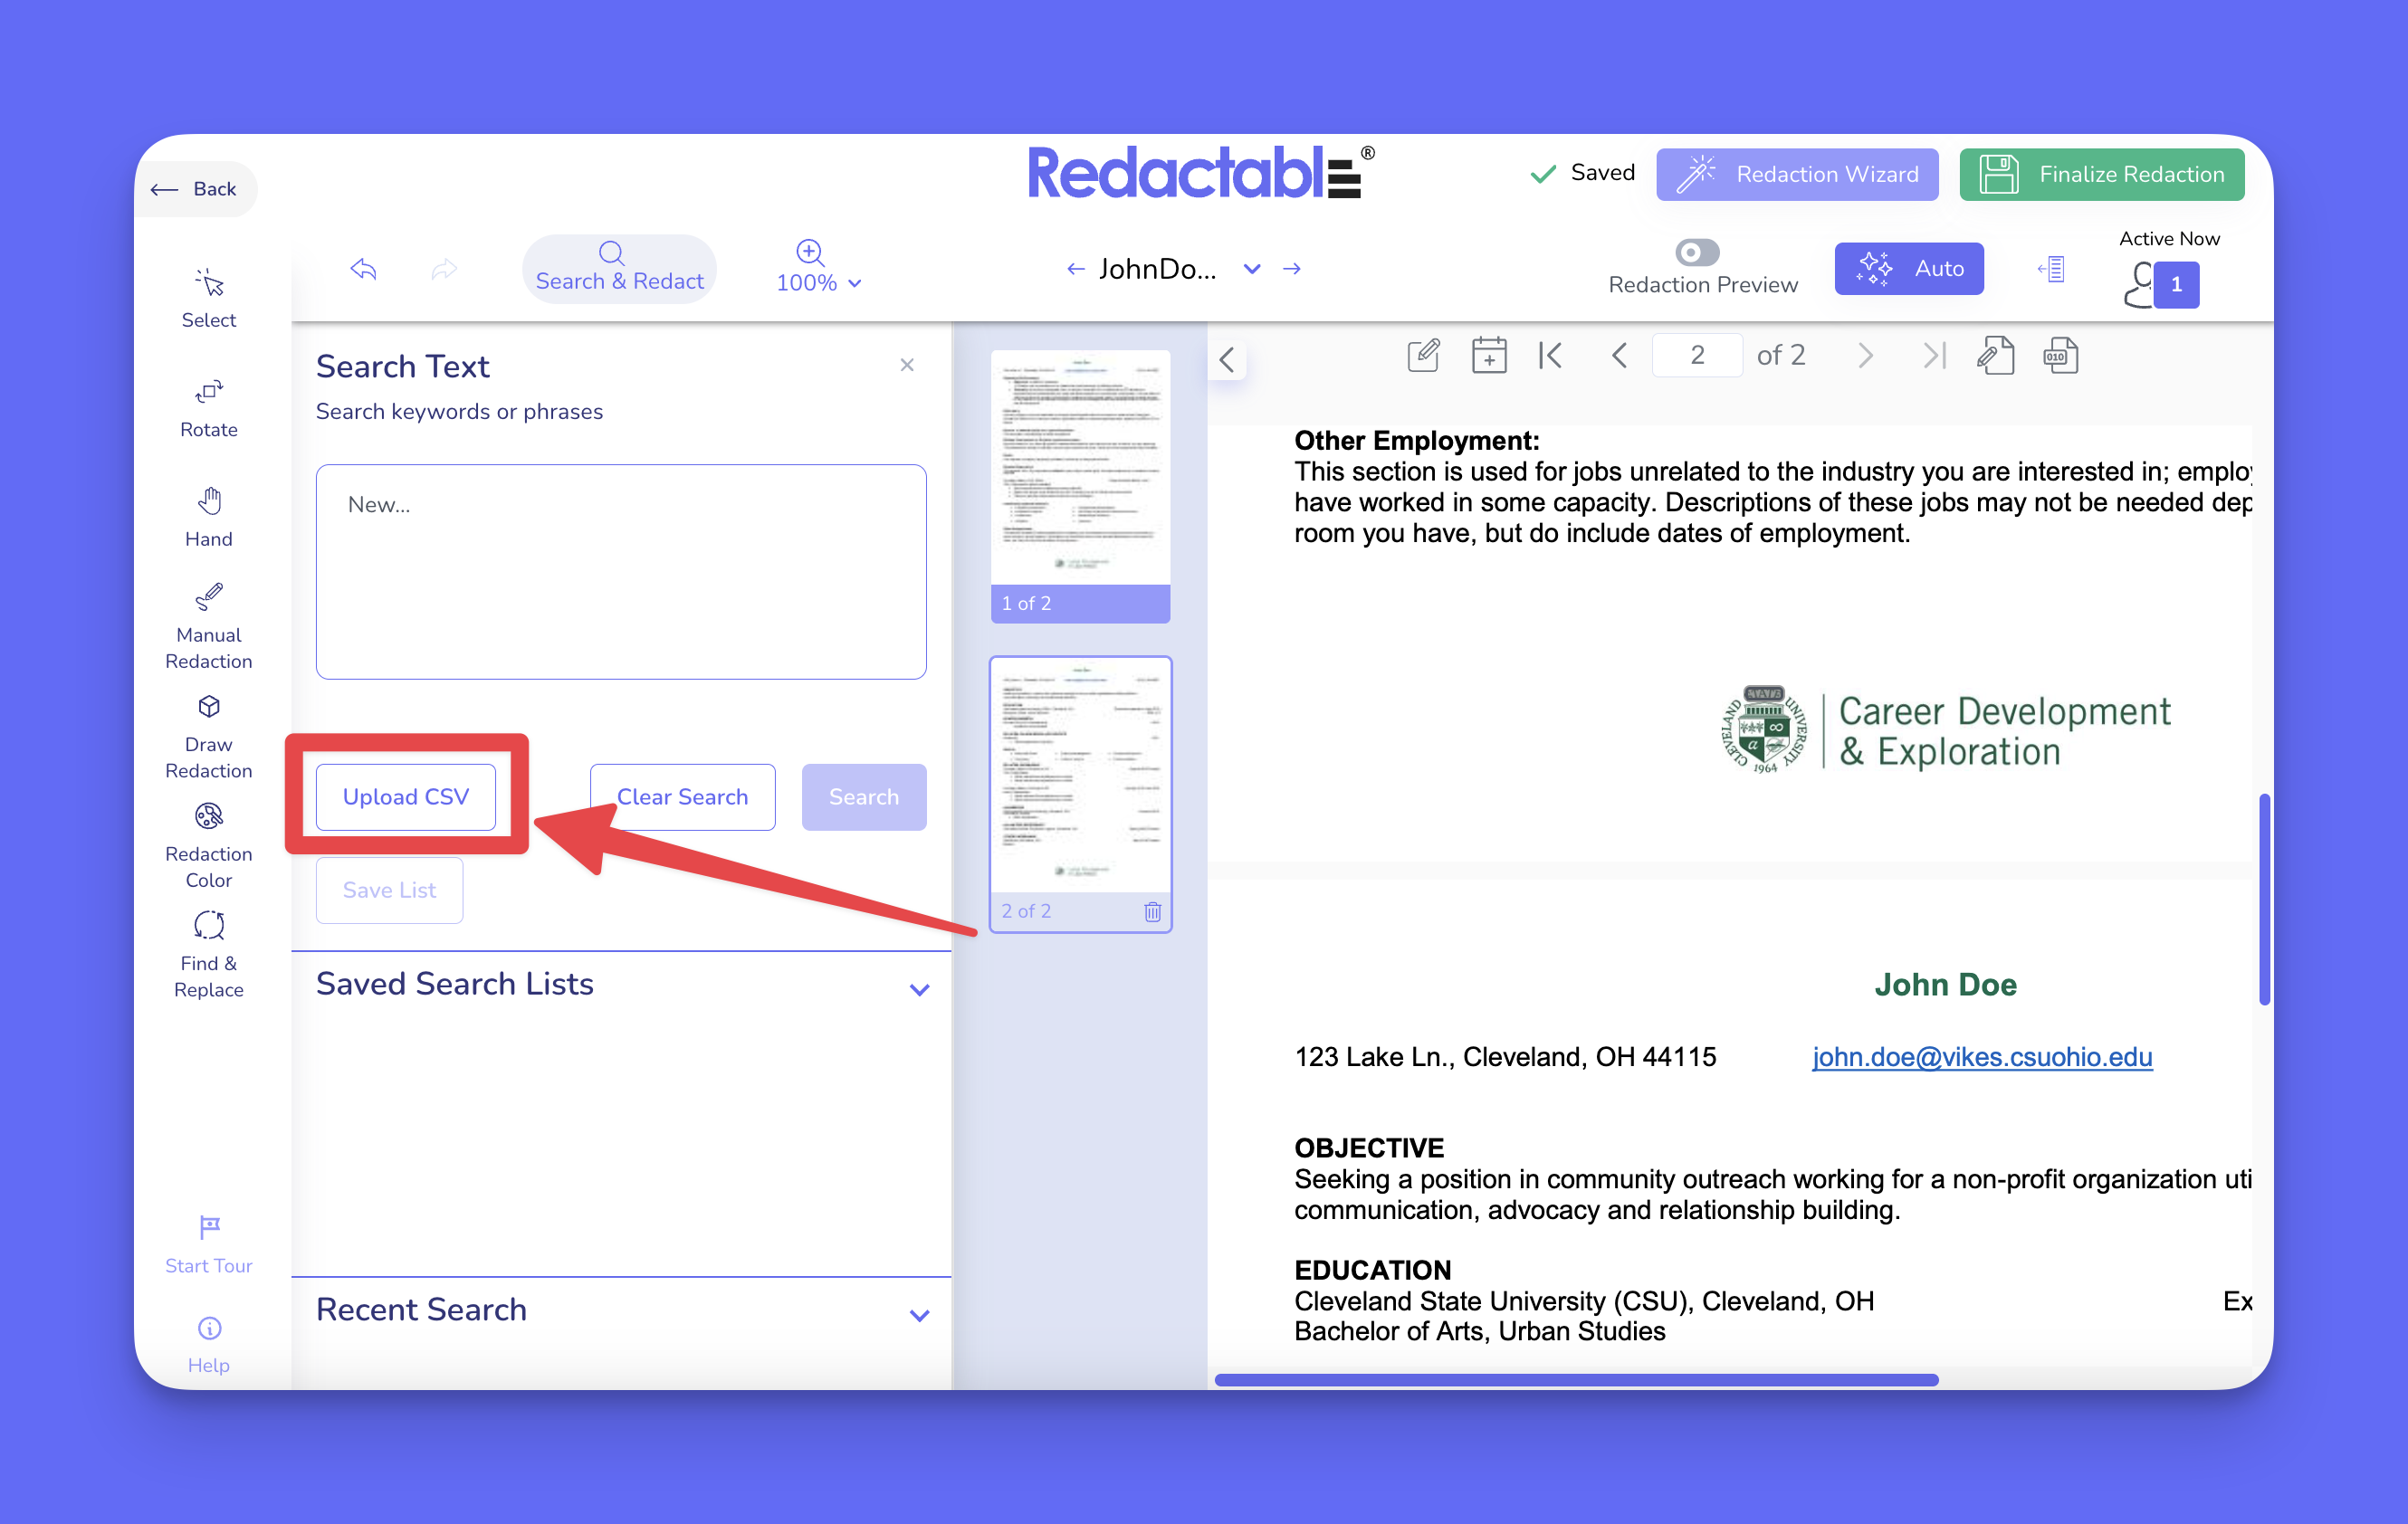
7. Select your CSV file (limit 5,000 terms) and confirm the upload.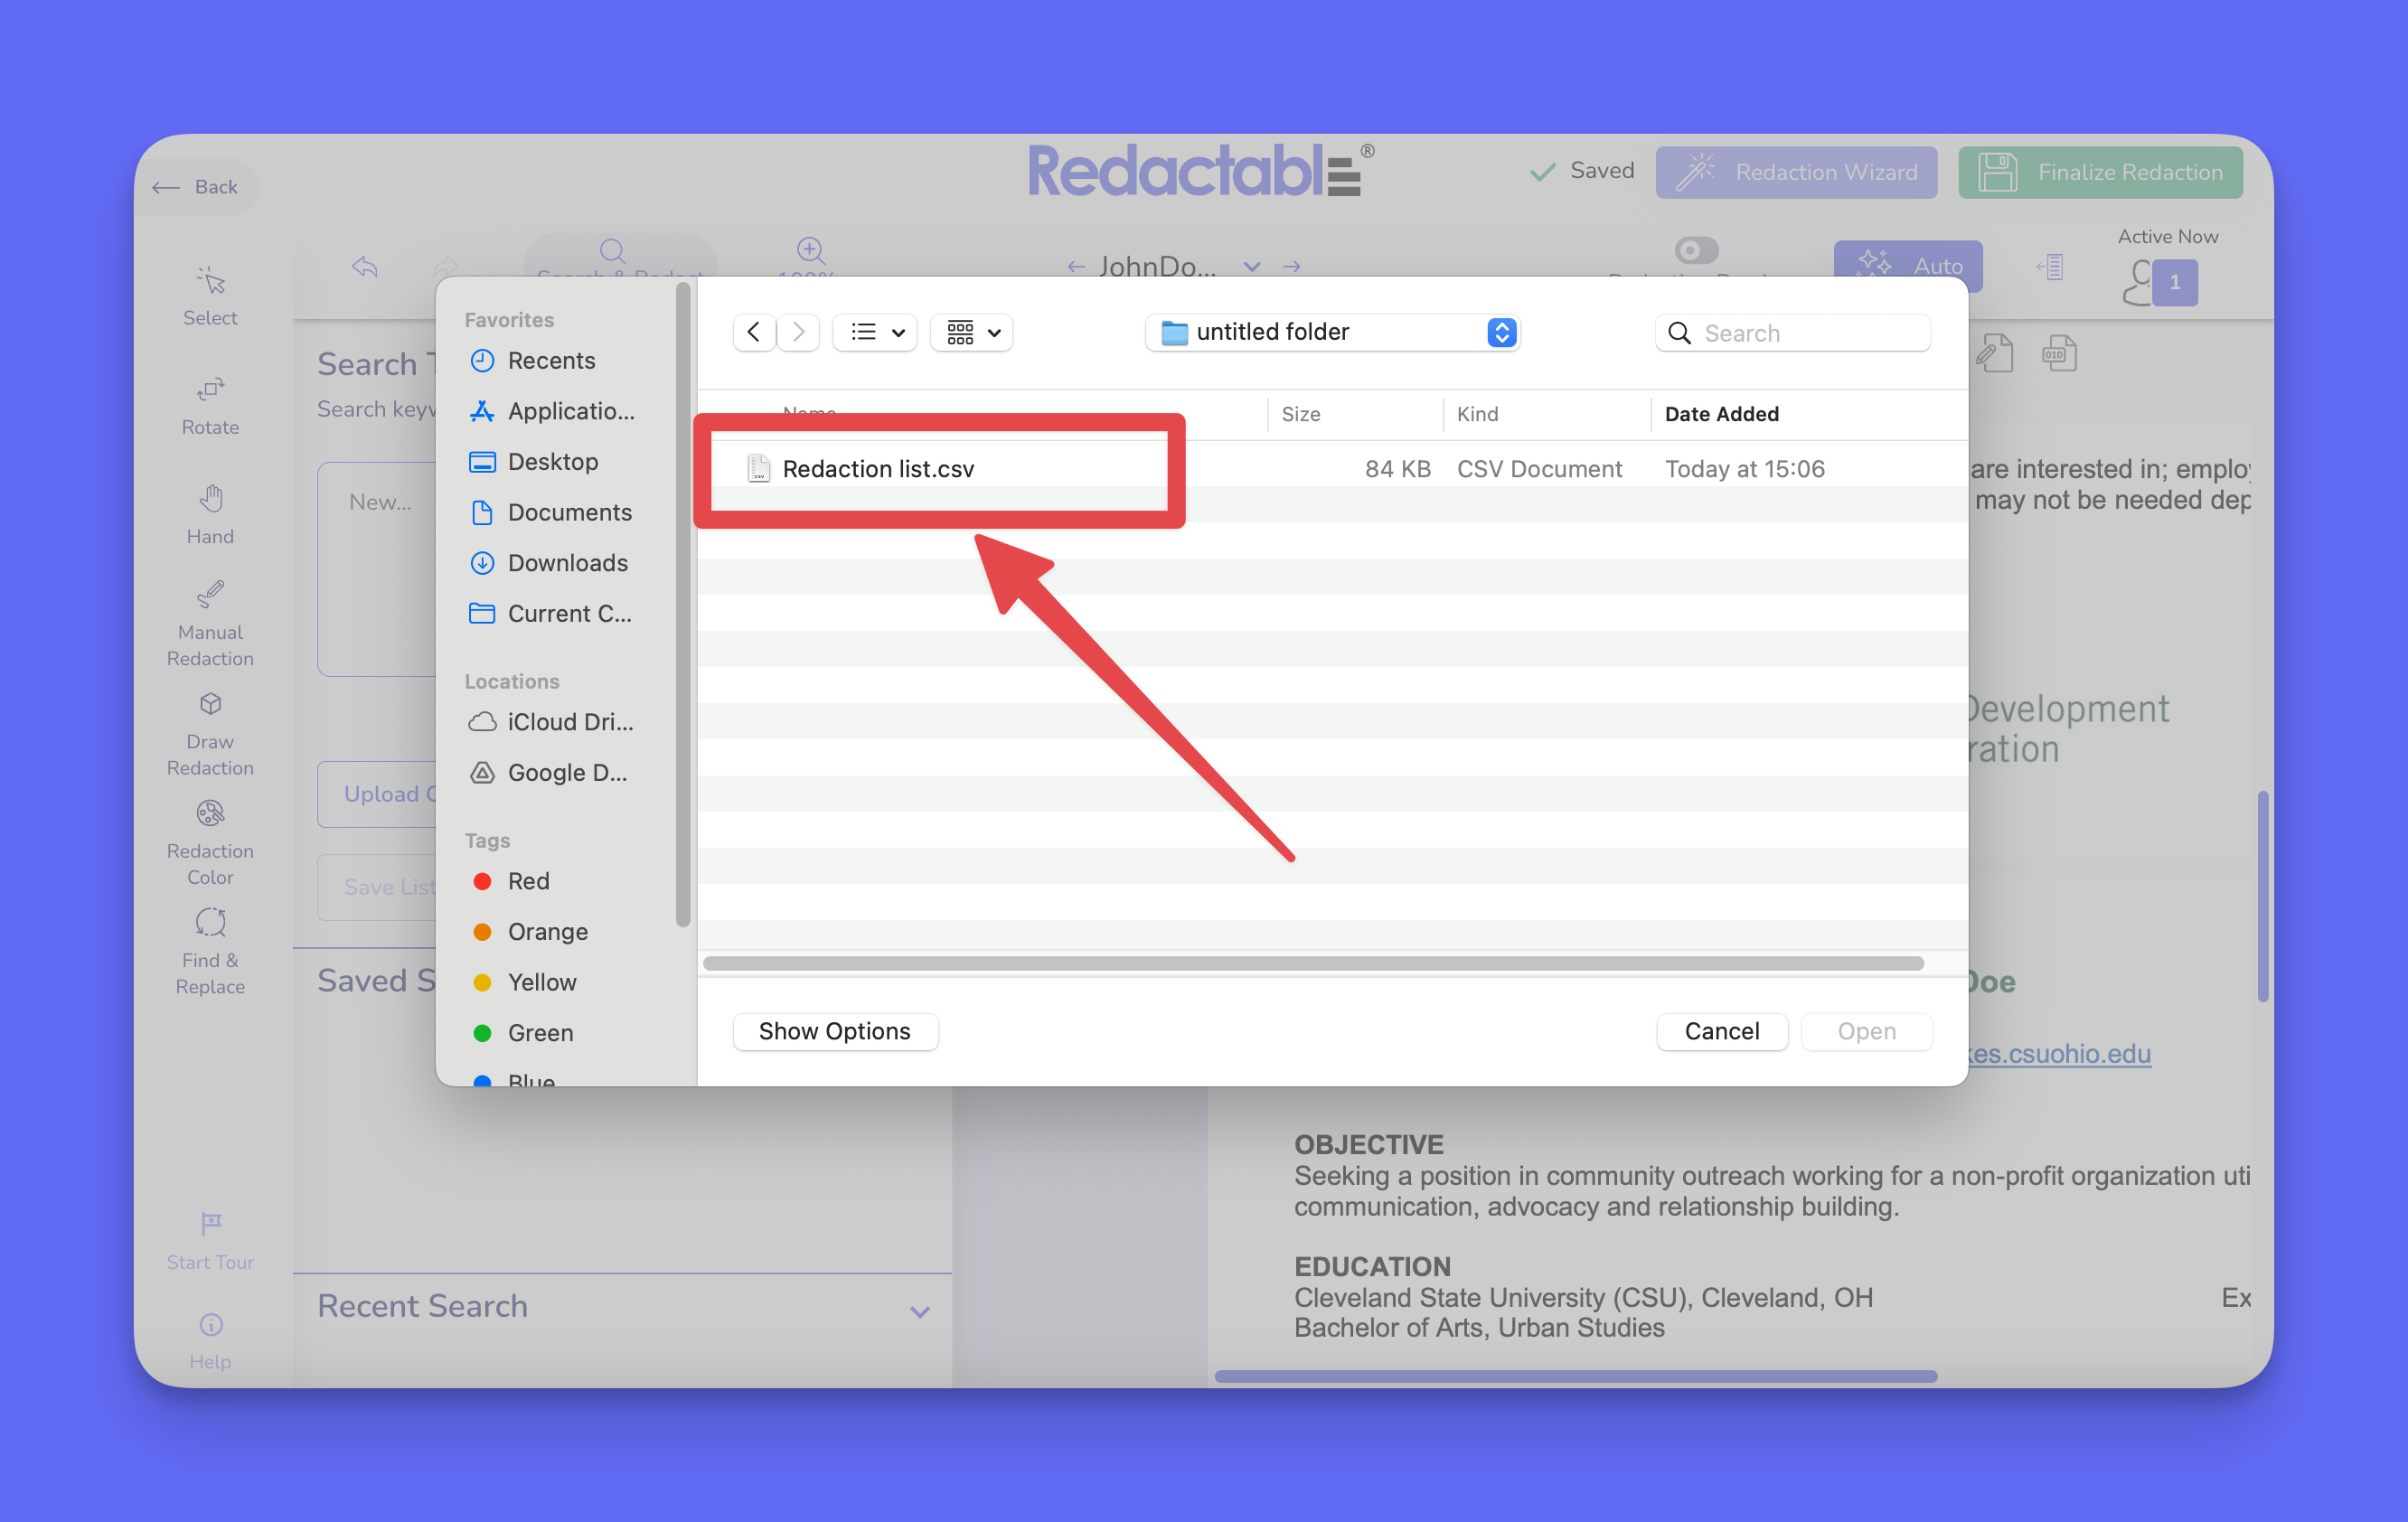
8. After uploading, the terms will be added to your active search list.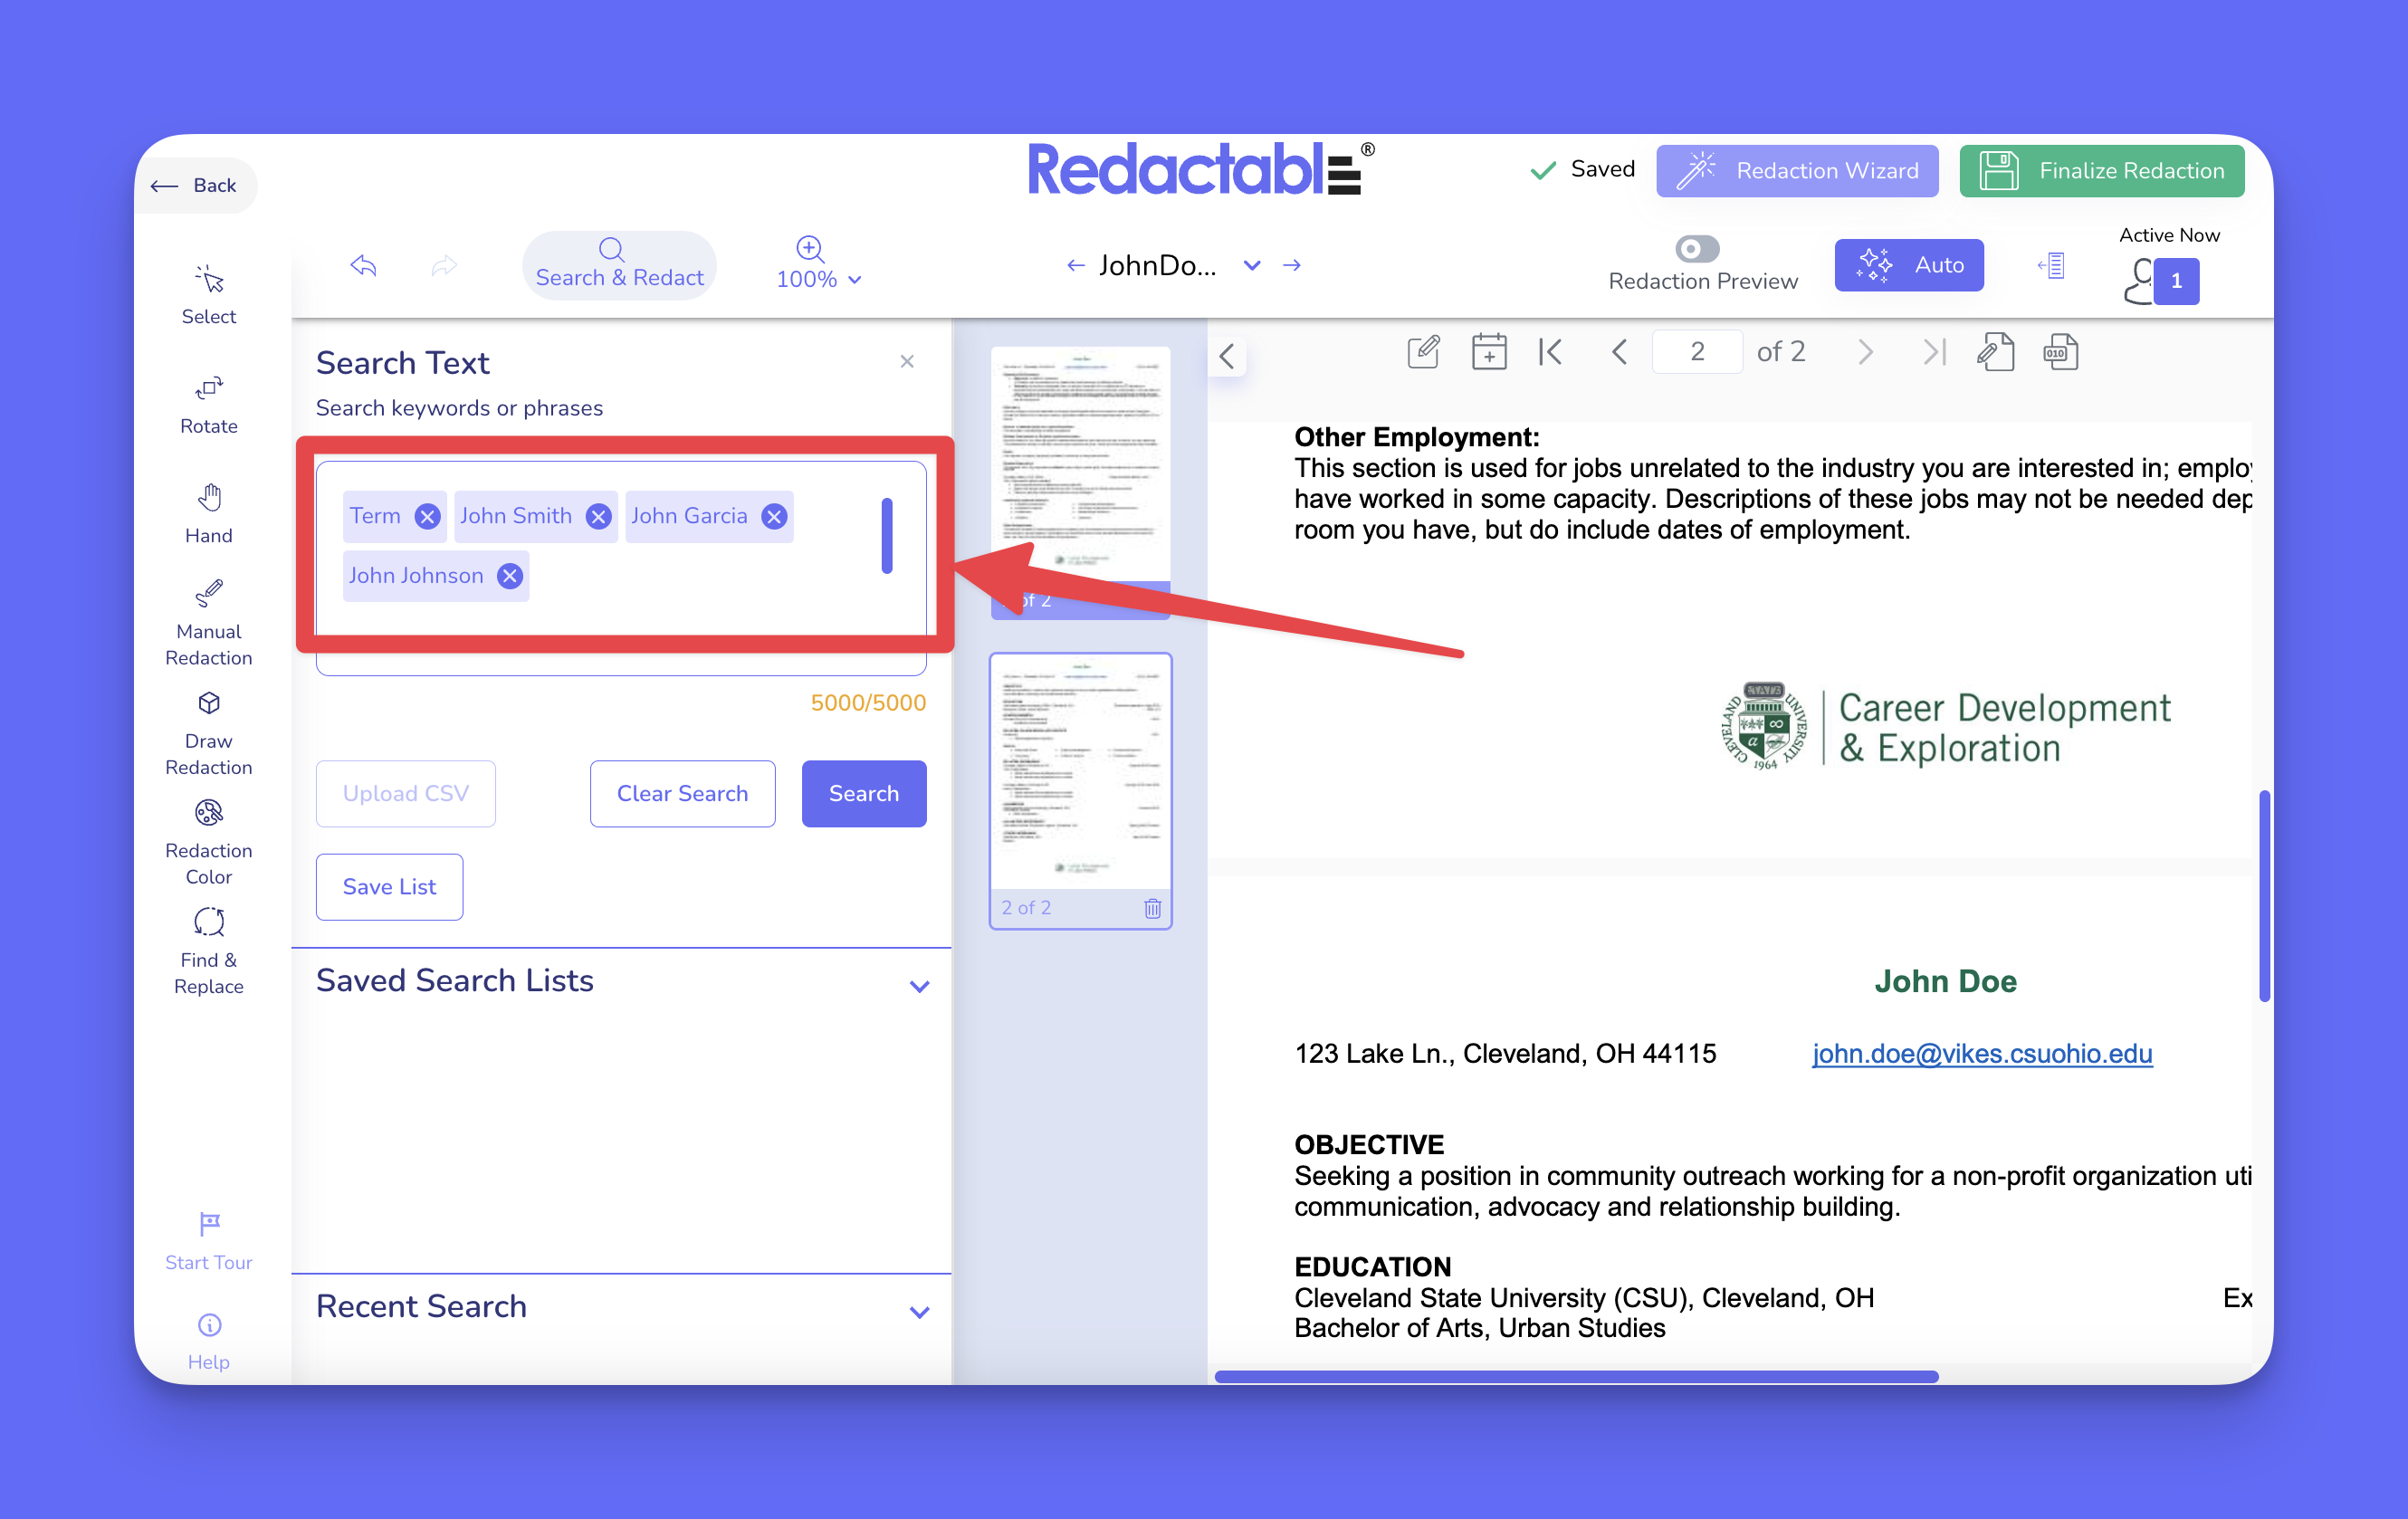
9. To save the list of terms click the “Save List” button.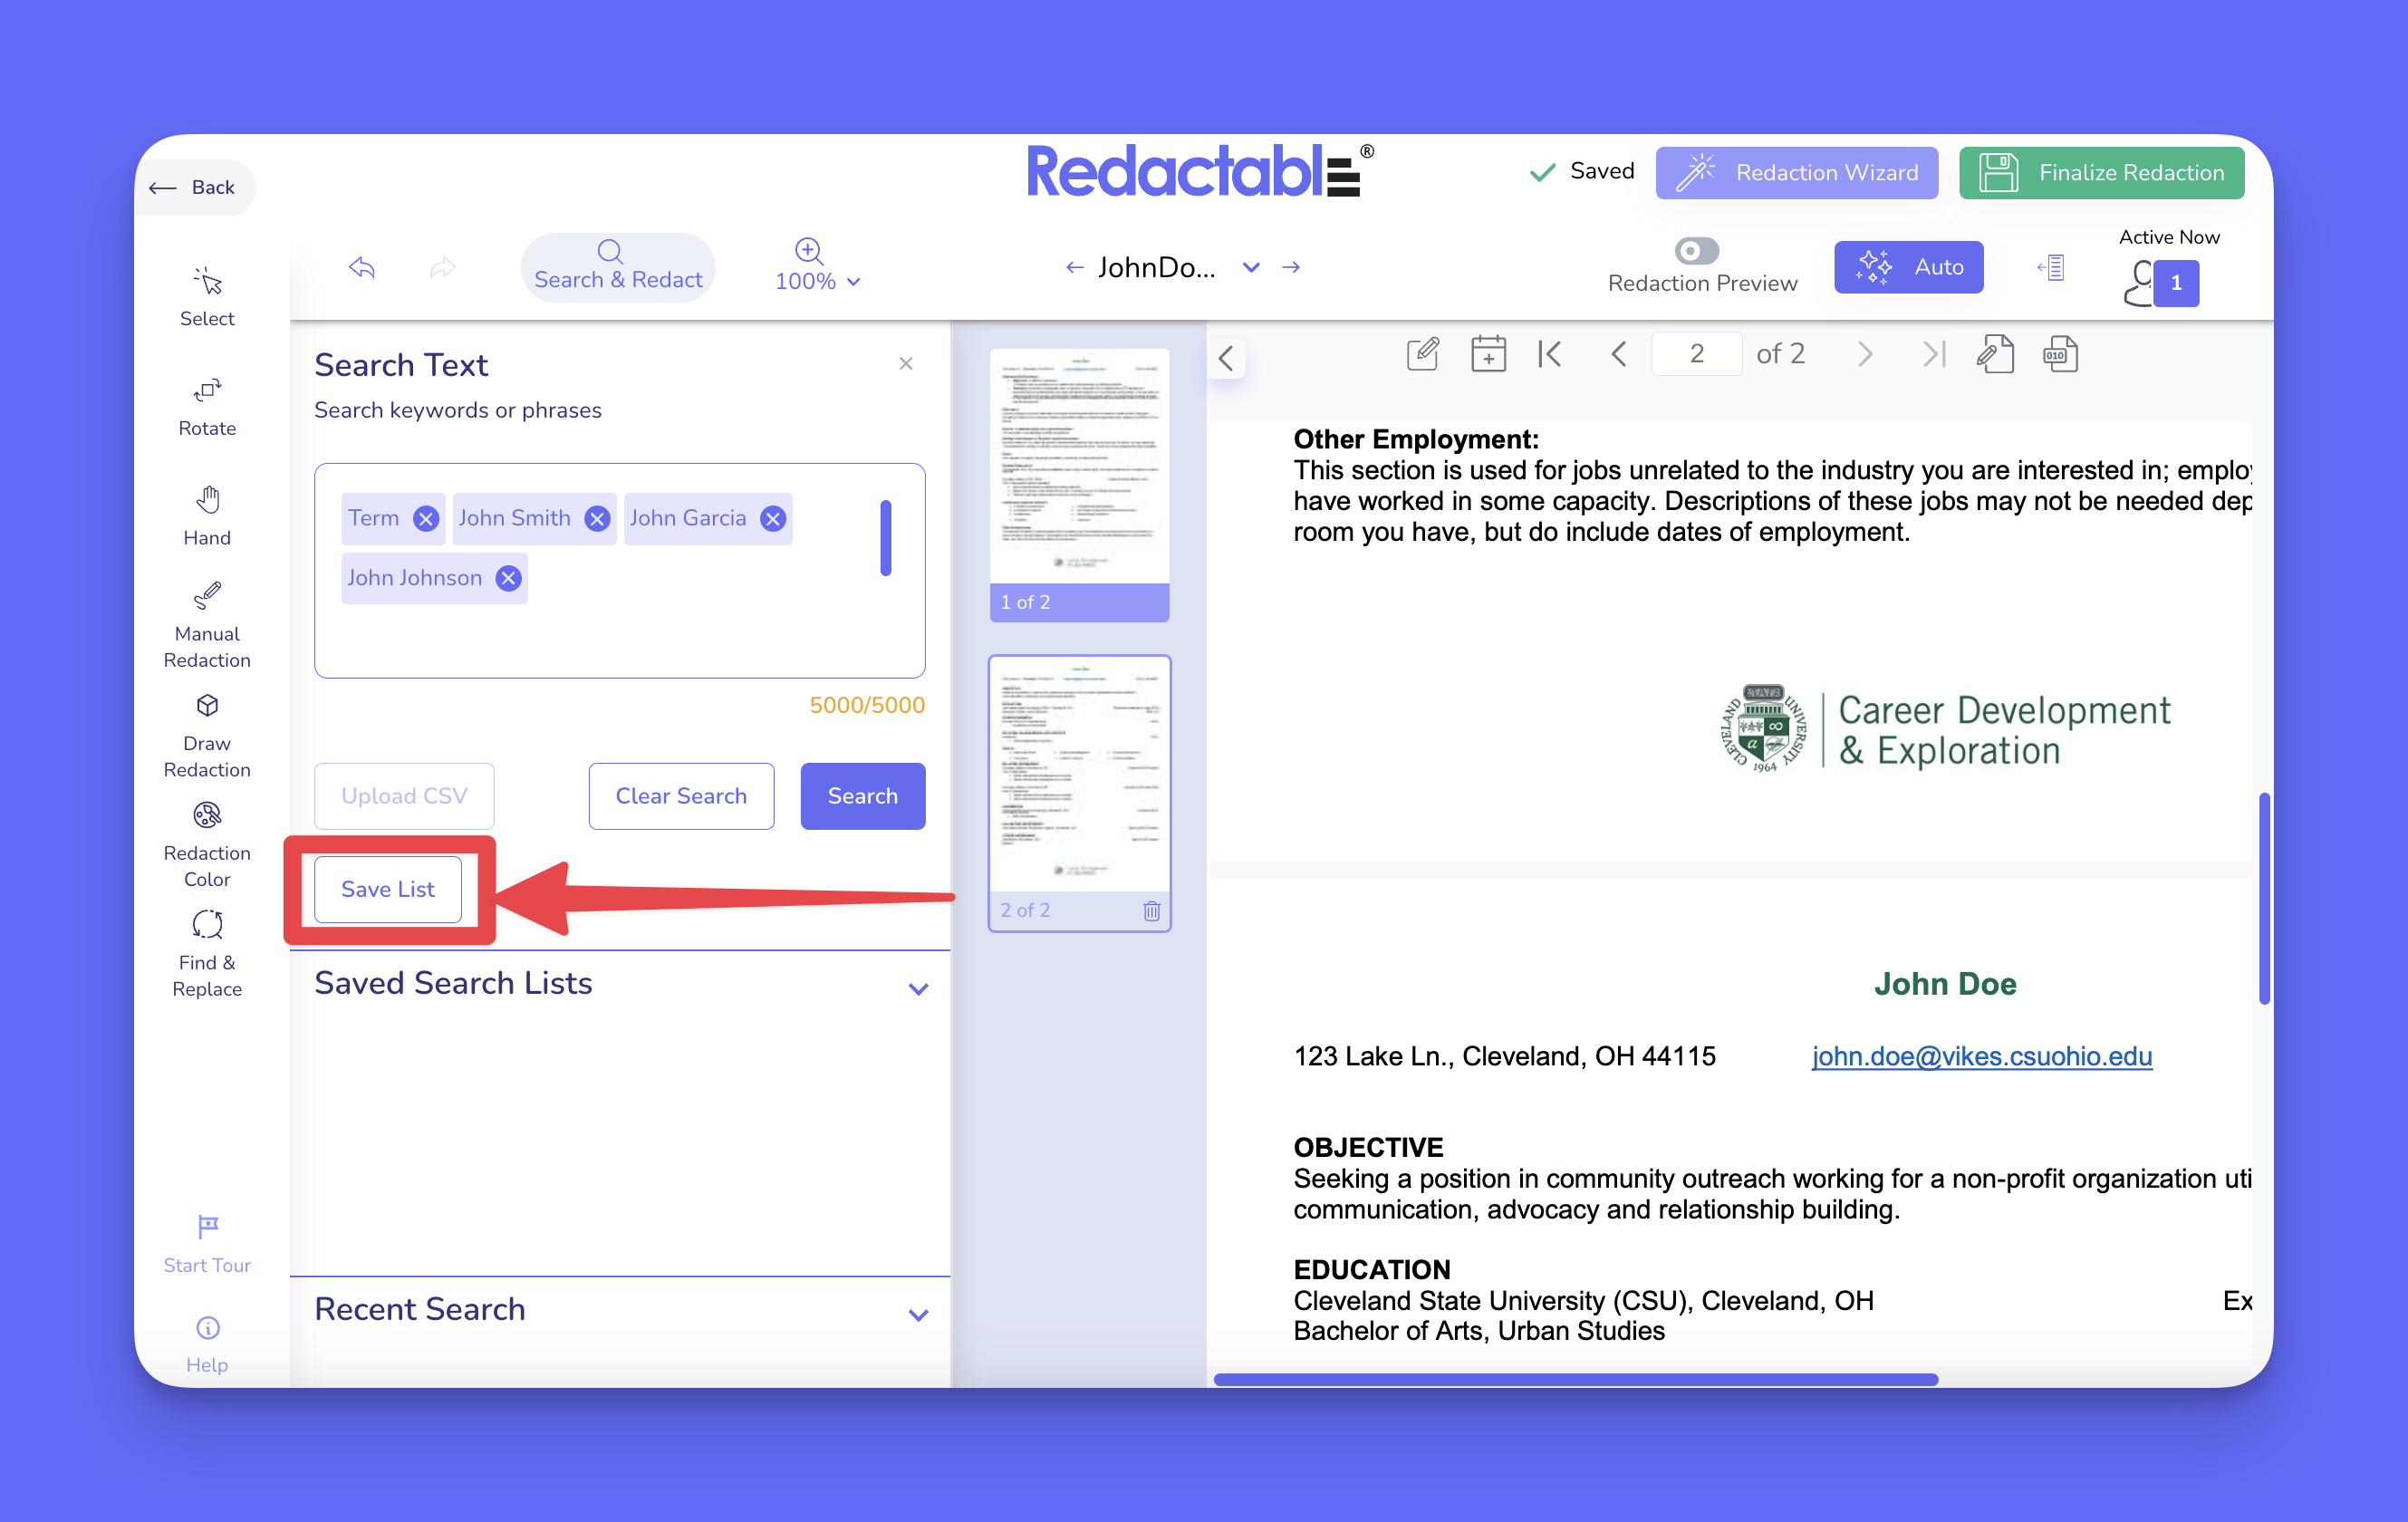
10. Name the list and click Save Search List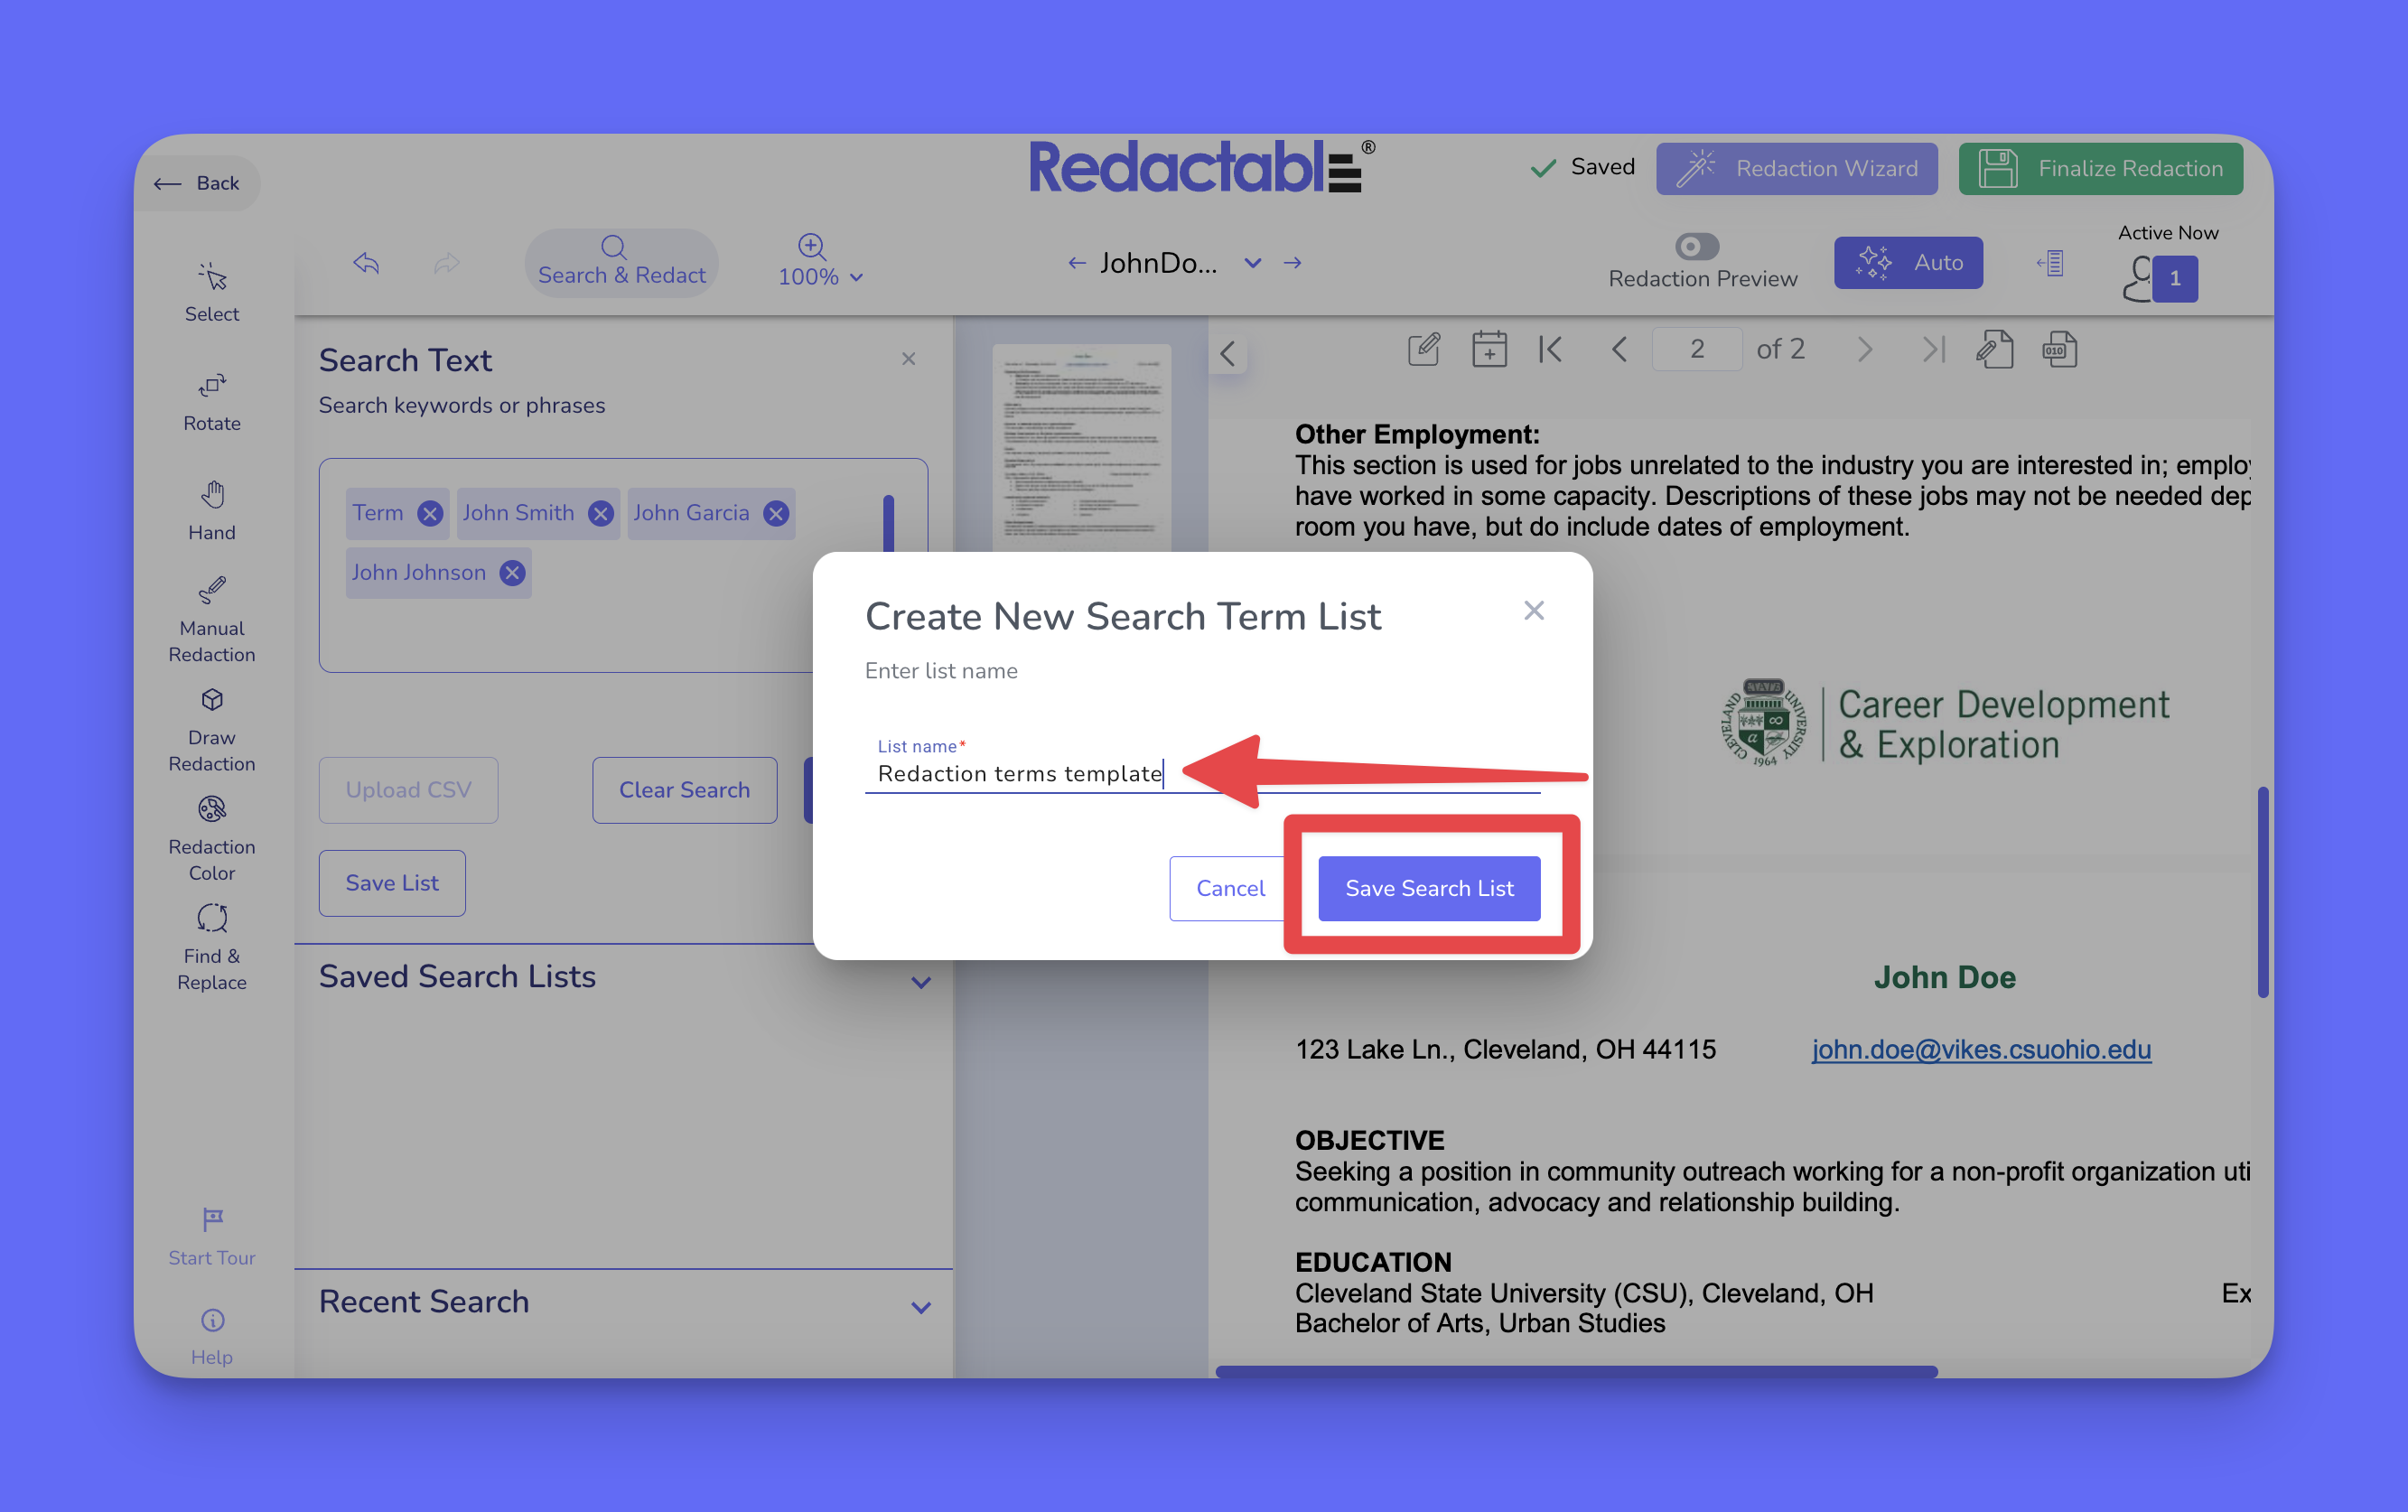
11. Your search list is automatically populated with all uploaded terms, and can be found by clicking on the toggle “ Search Saved Search Lists“.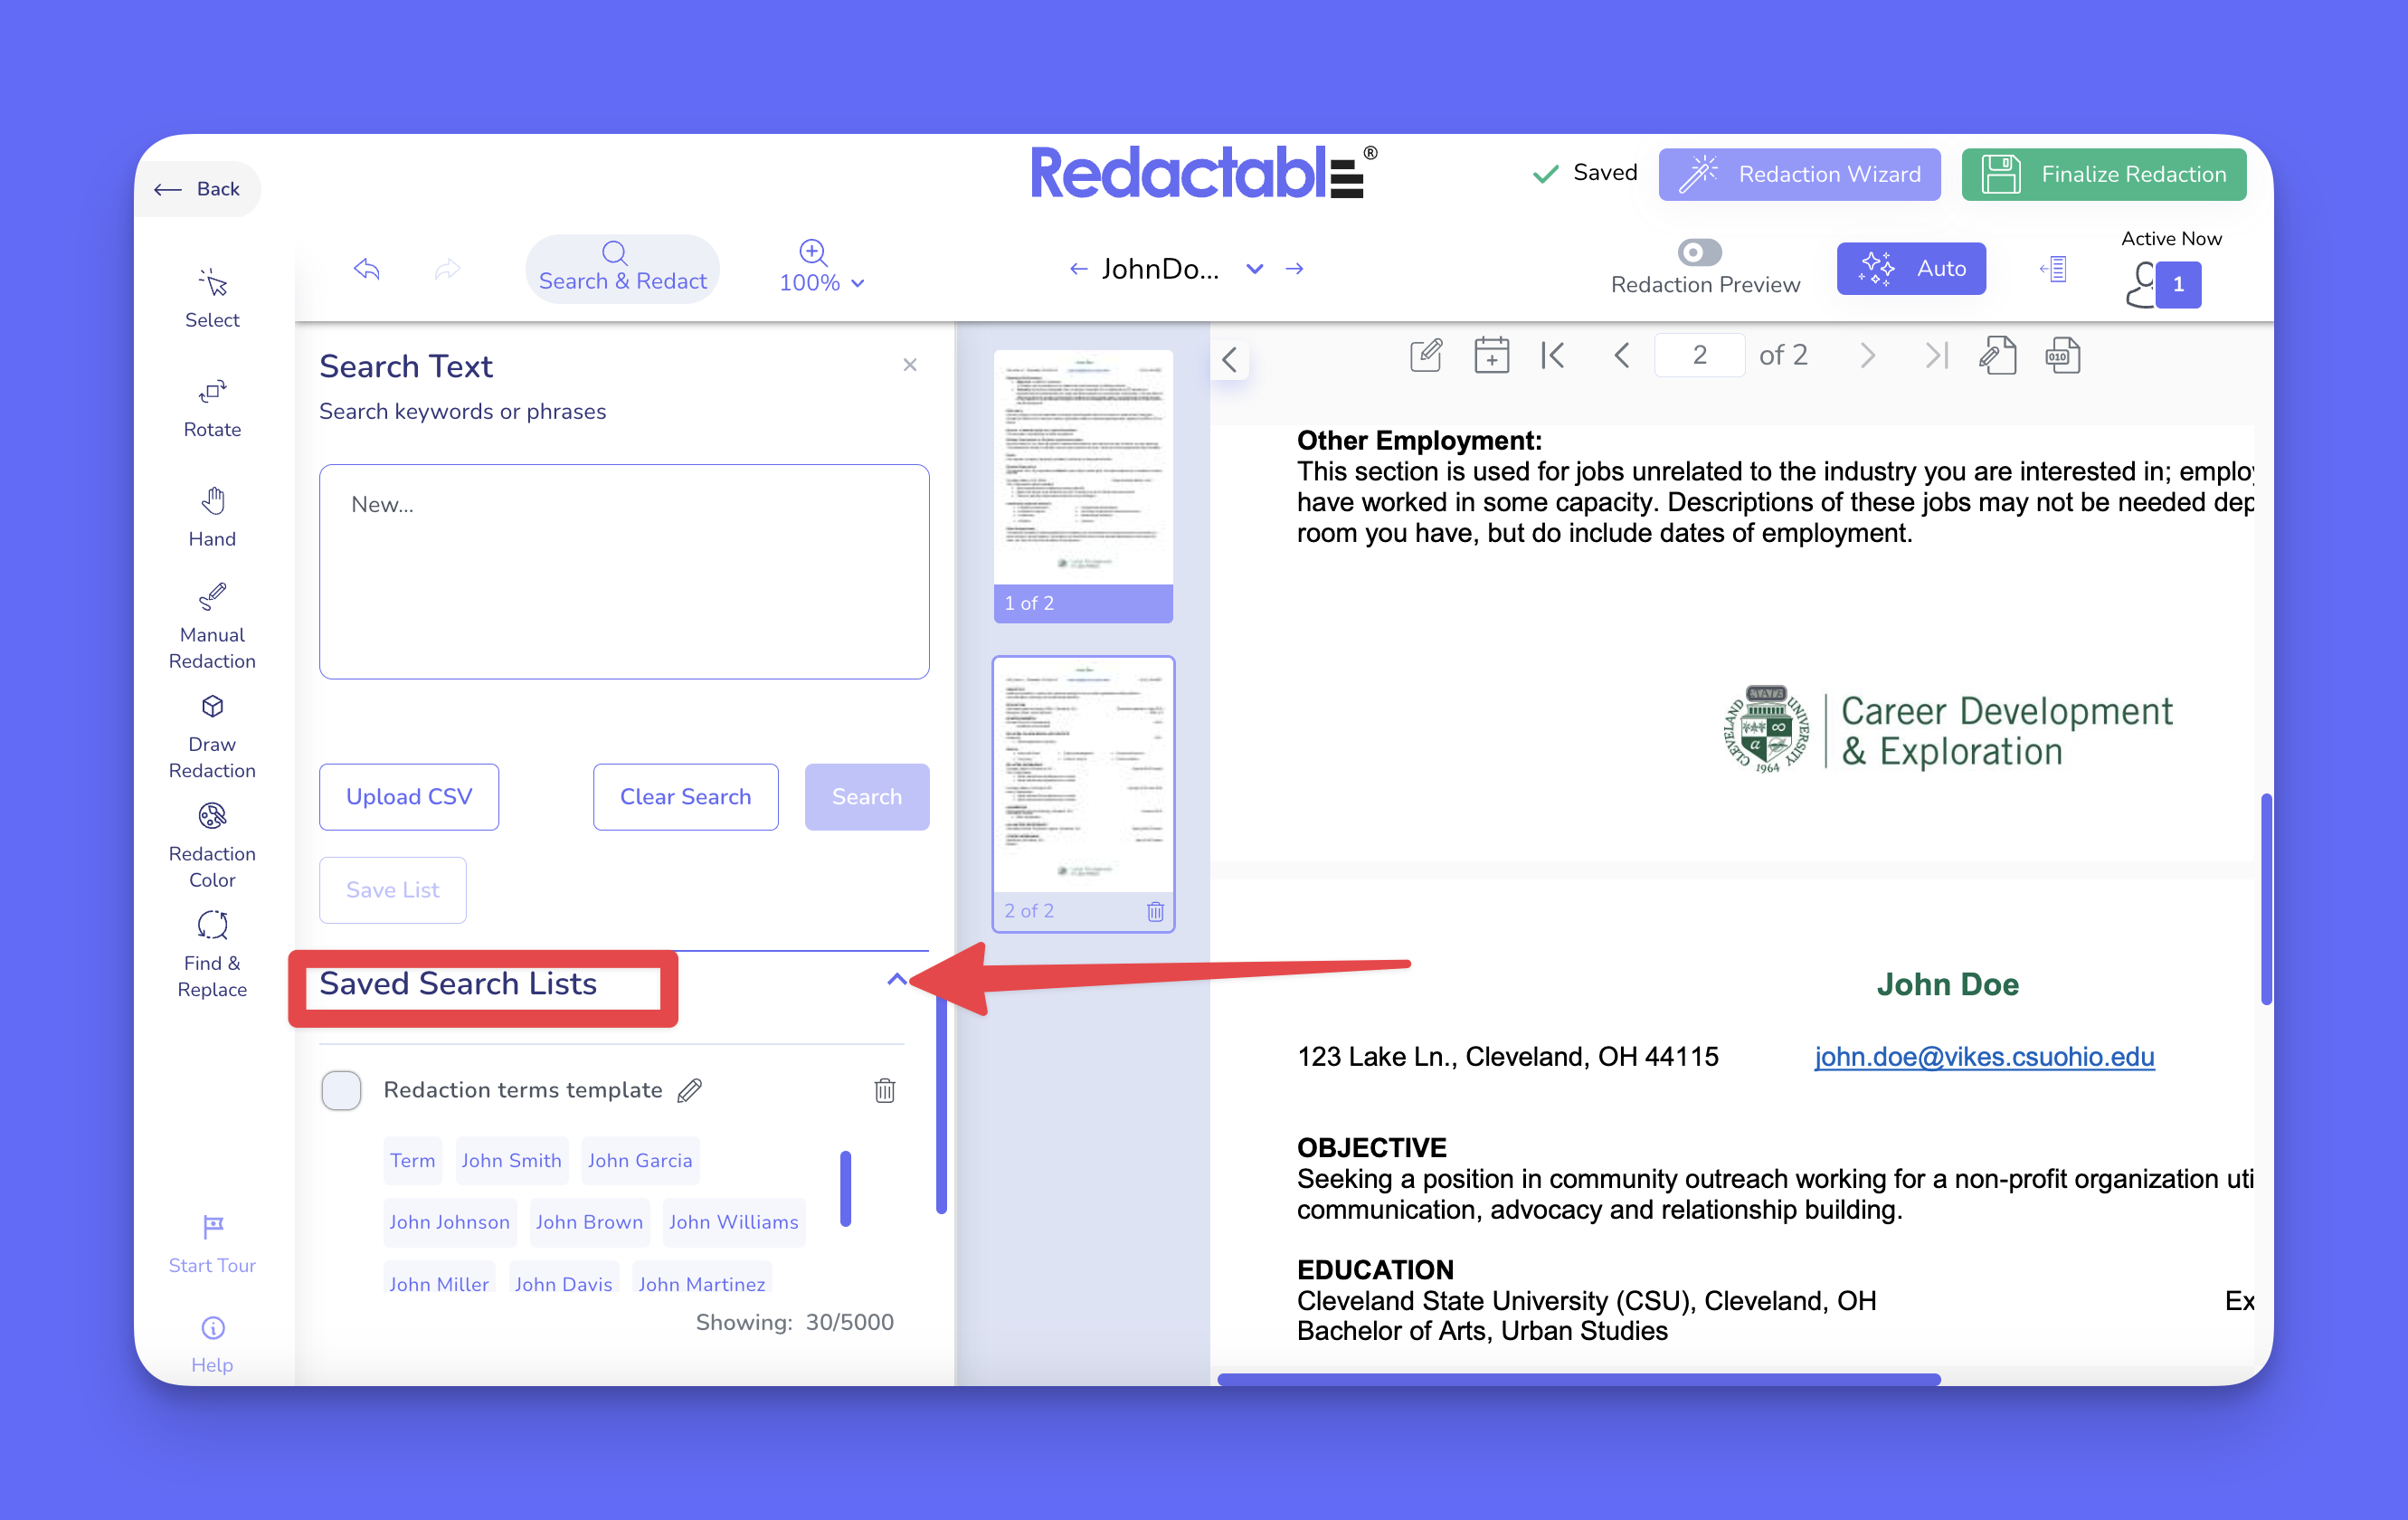
12. To run the redaction using uploaded terms, confirm the imported terms appear correctly, and click on "Apply List”.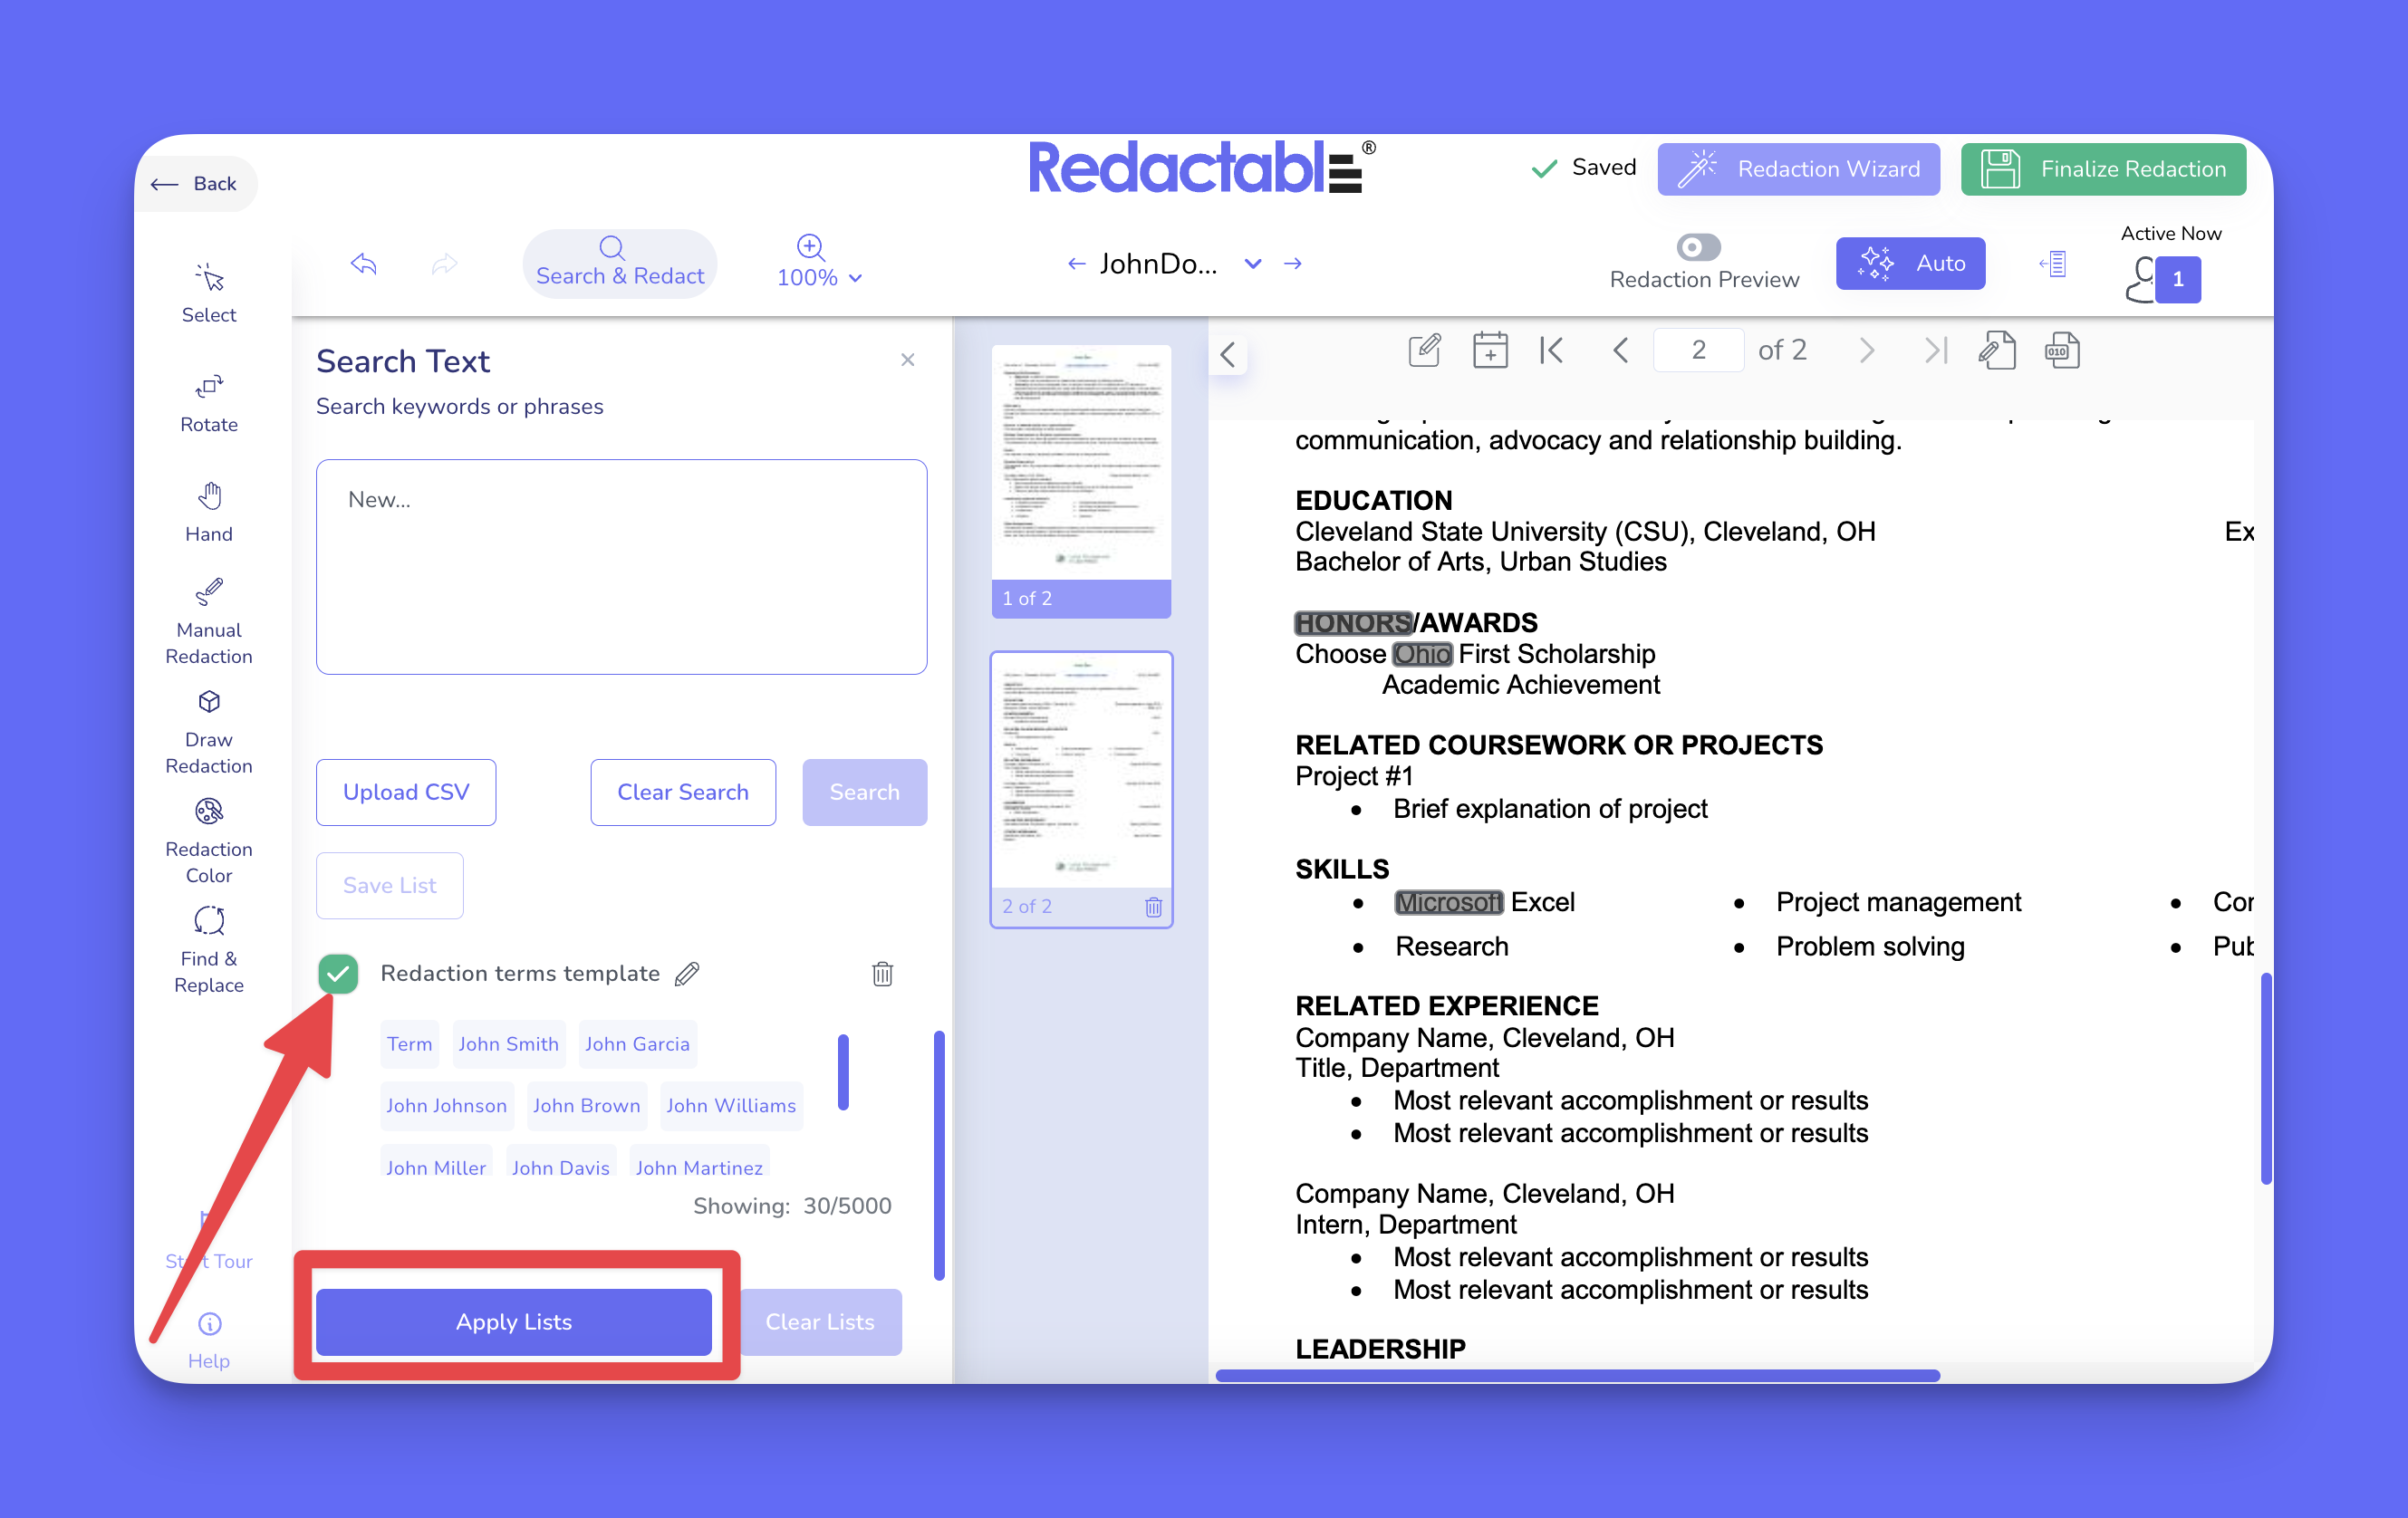
13. Remove entries by clicking on the individual term.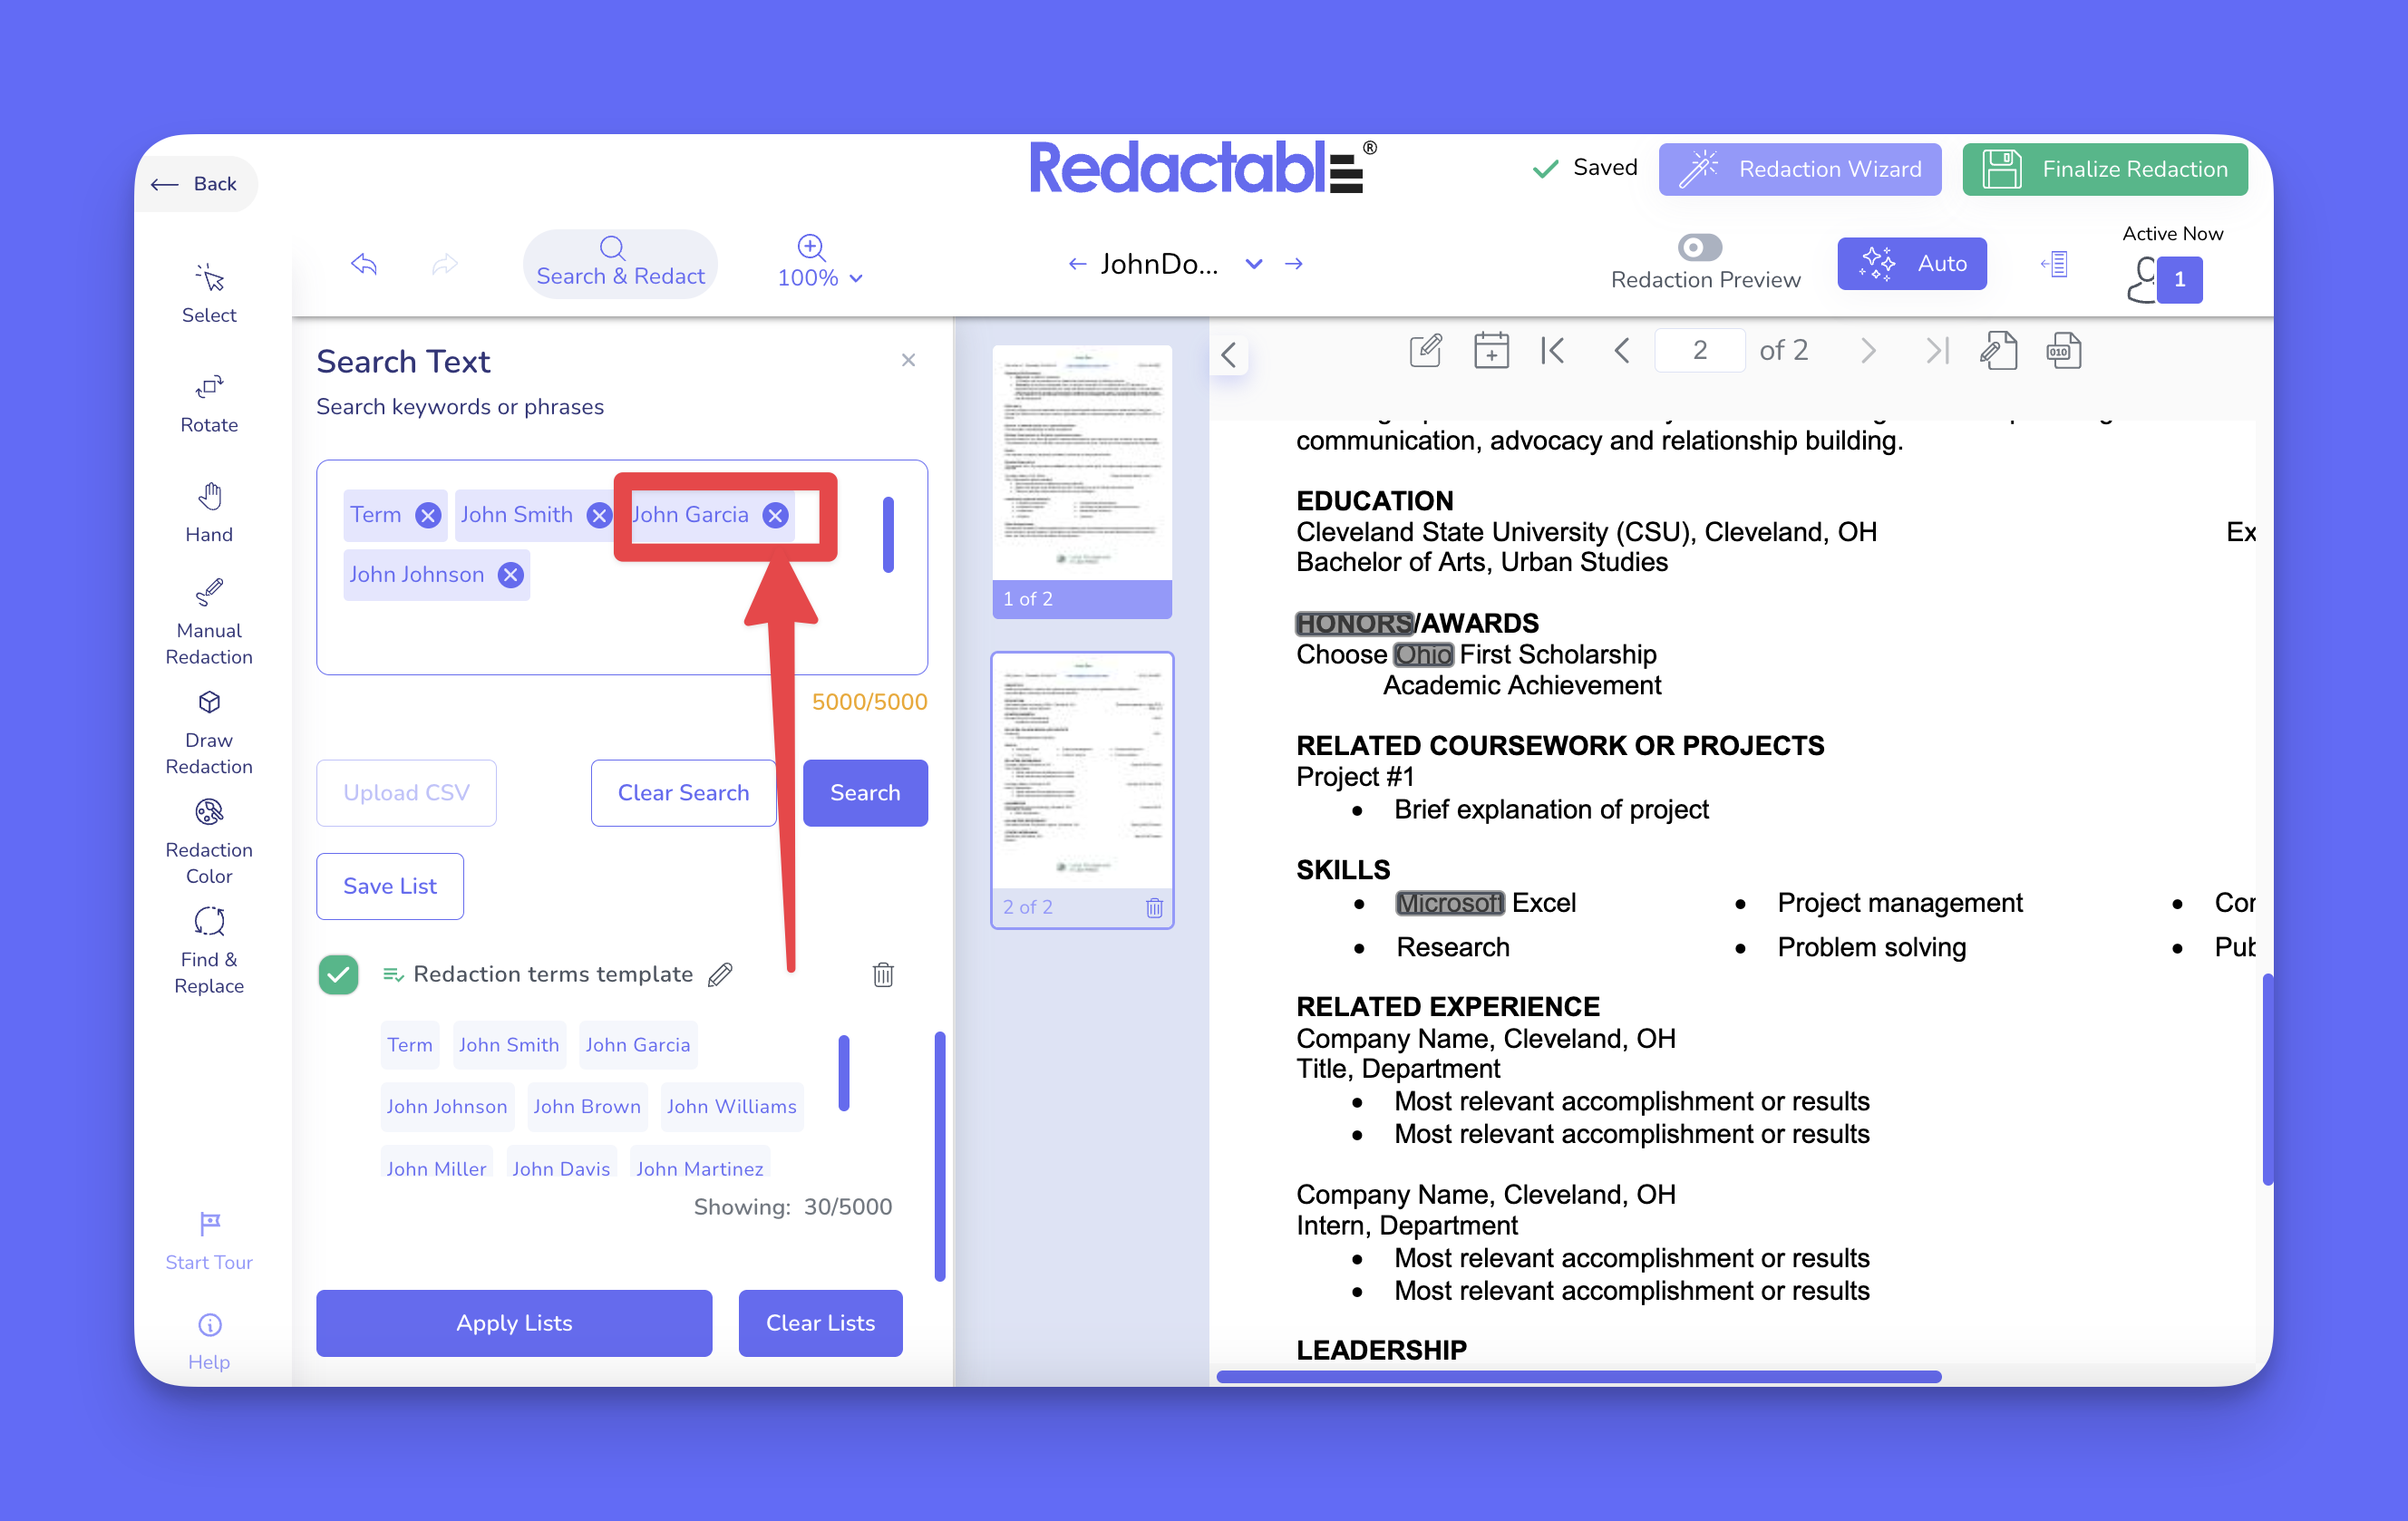
Managing search results
14. Use the checkbox next to a result to select or unselect individual matches.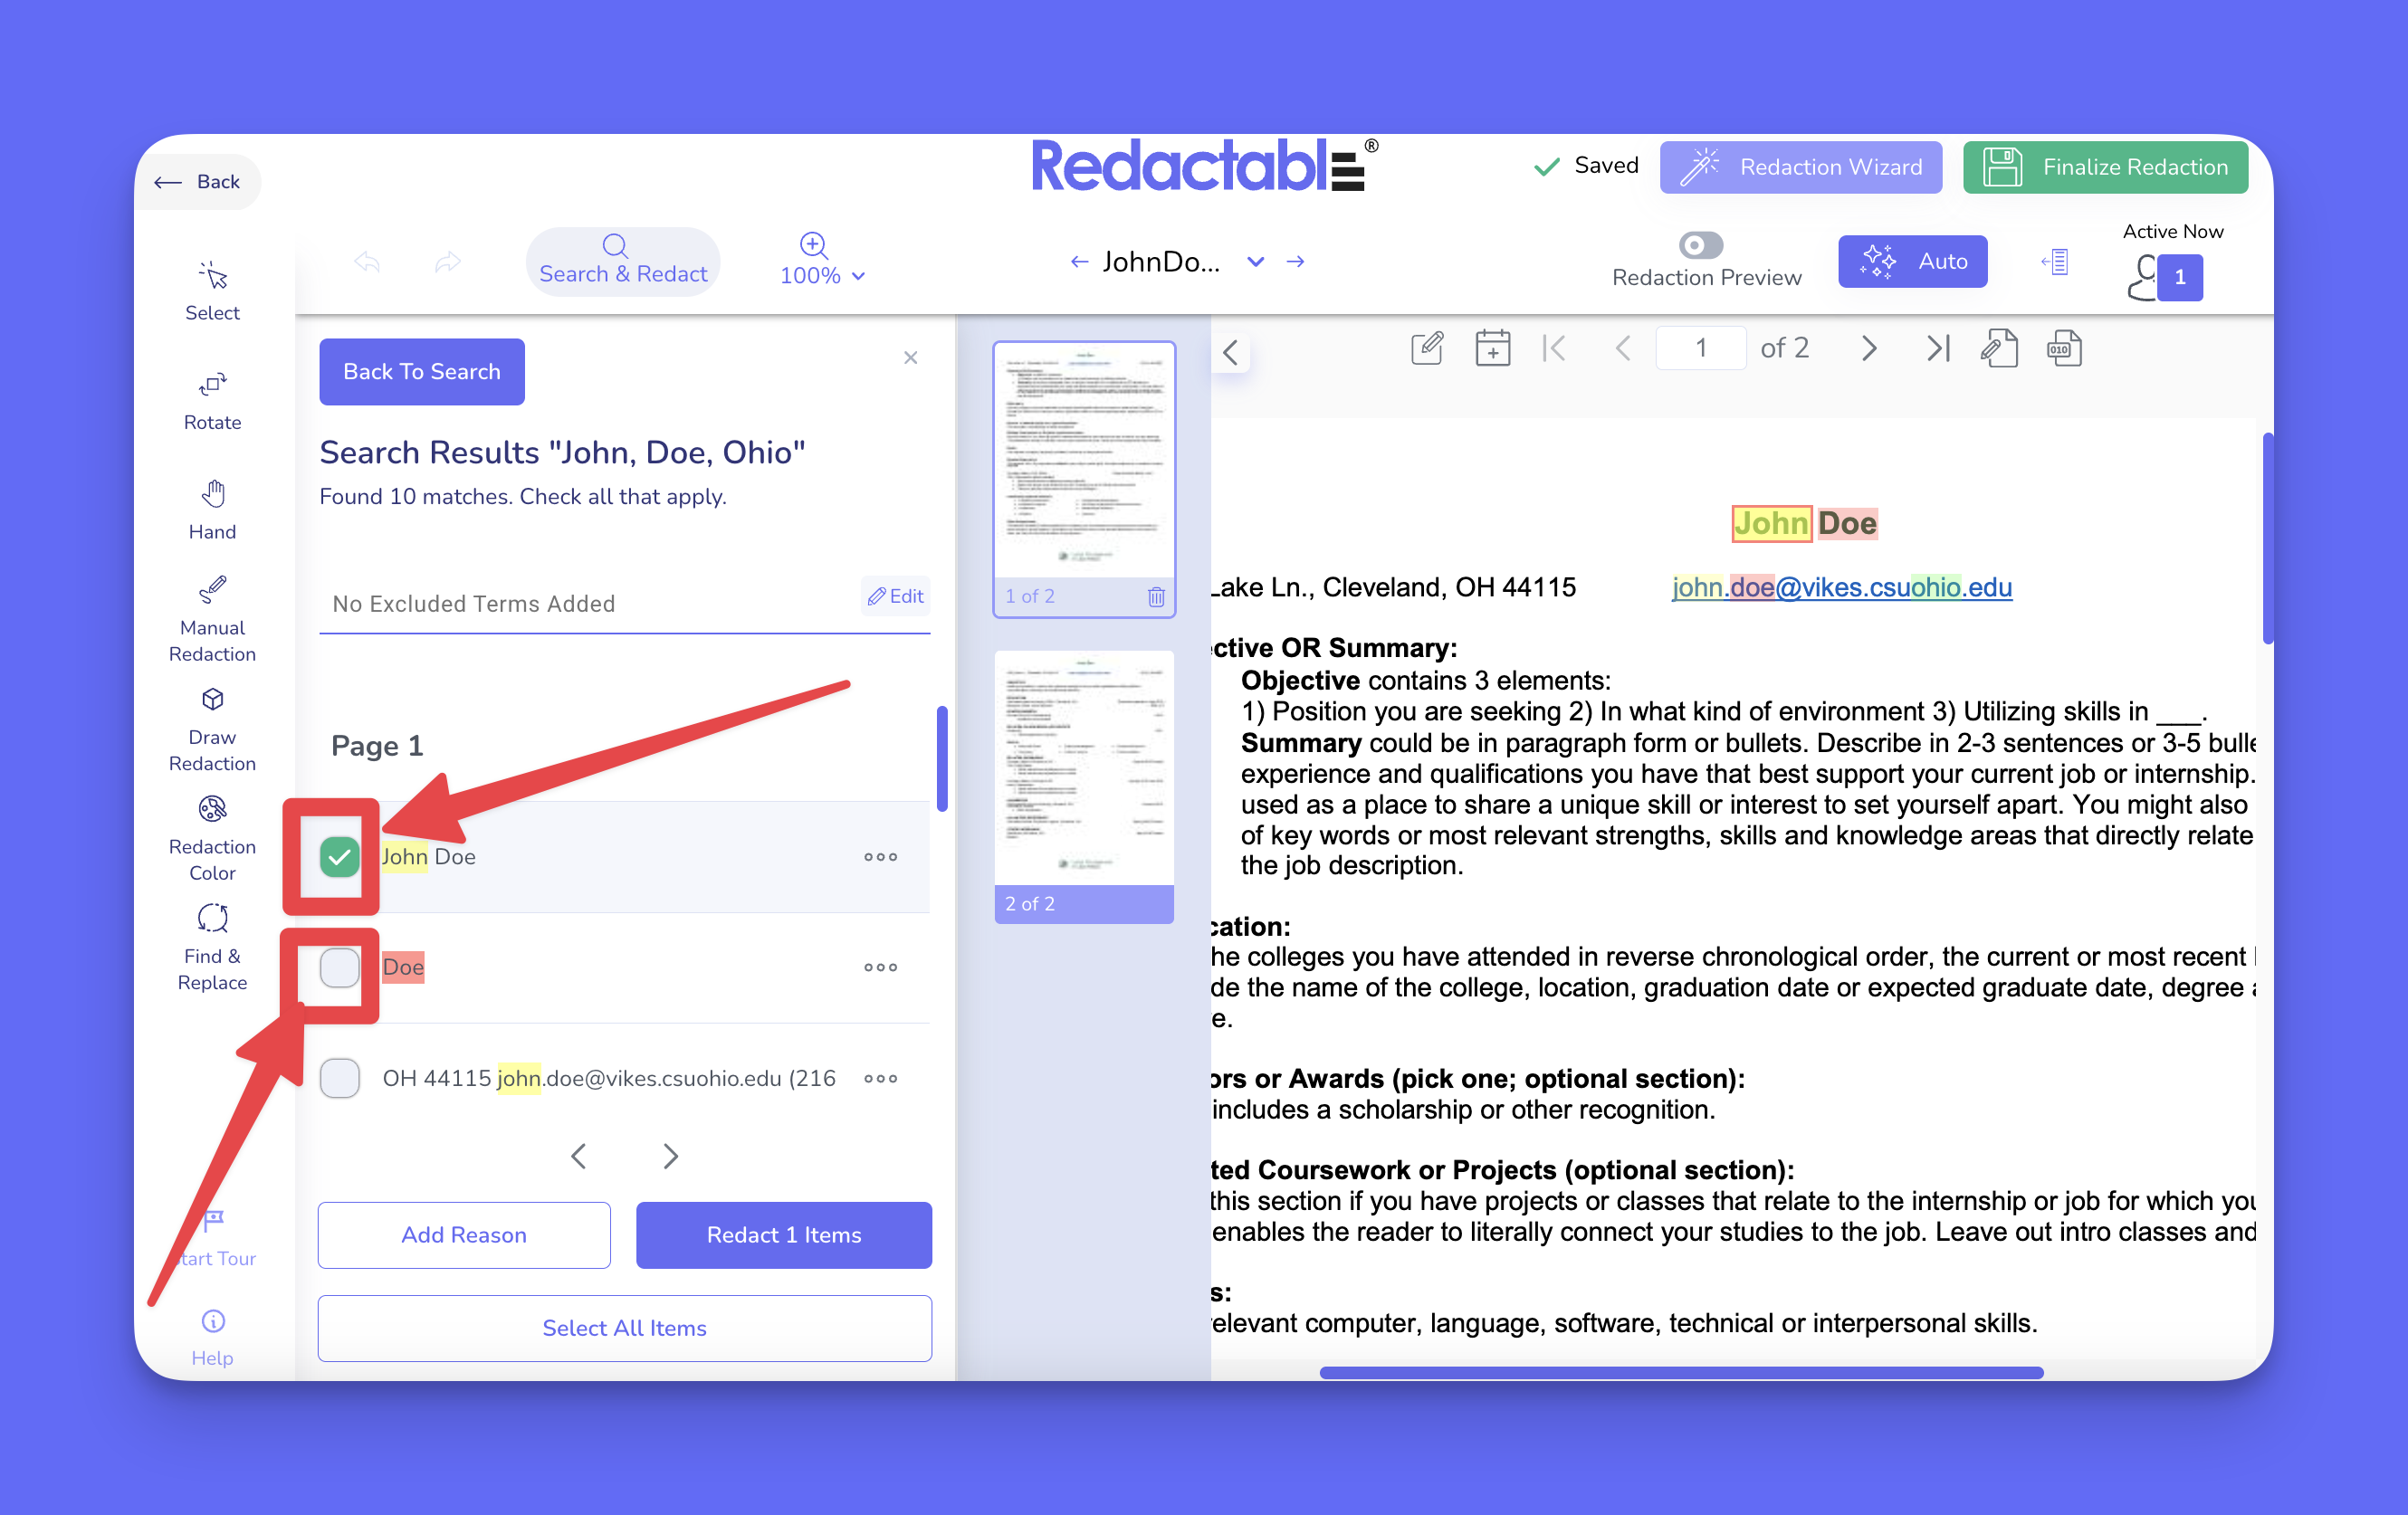
15. To select all results, click "Select All."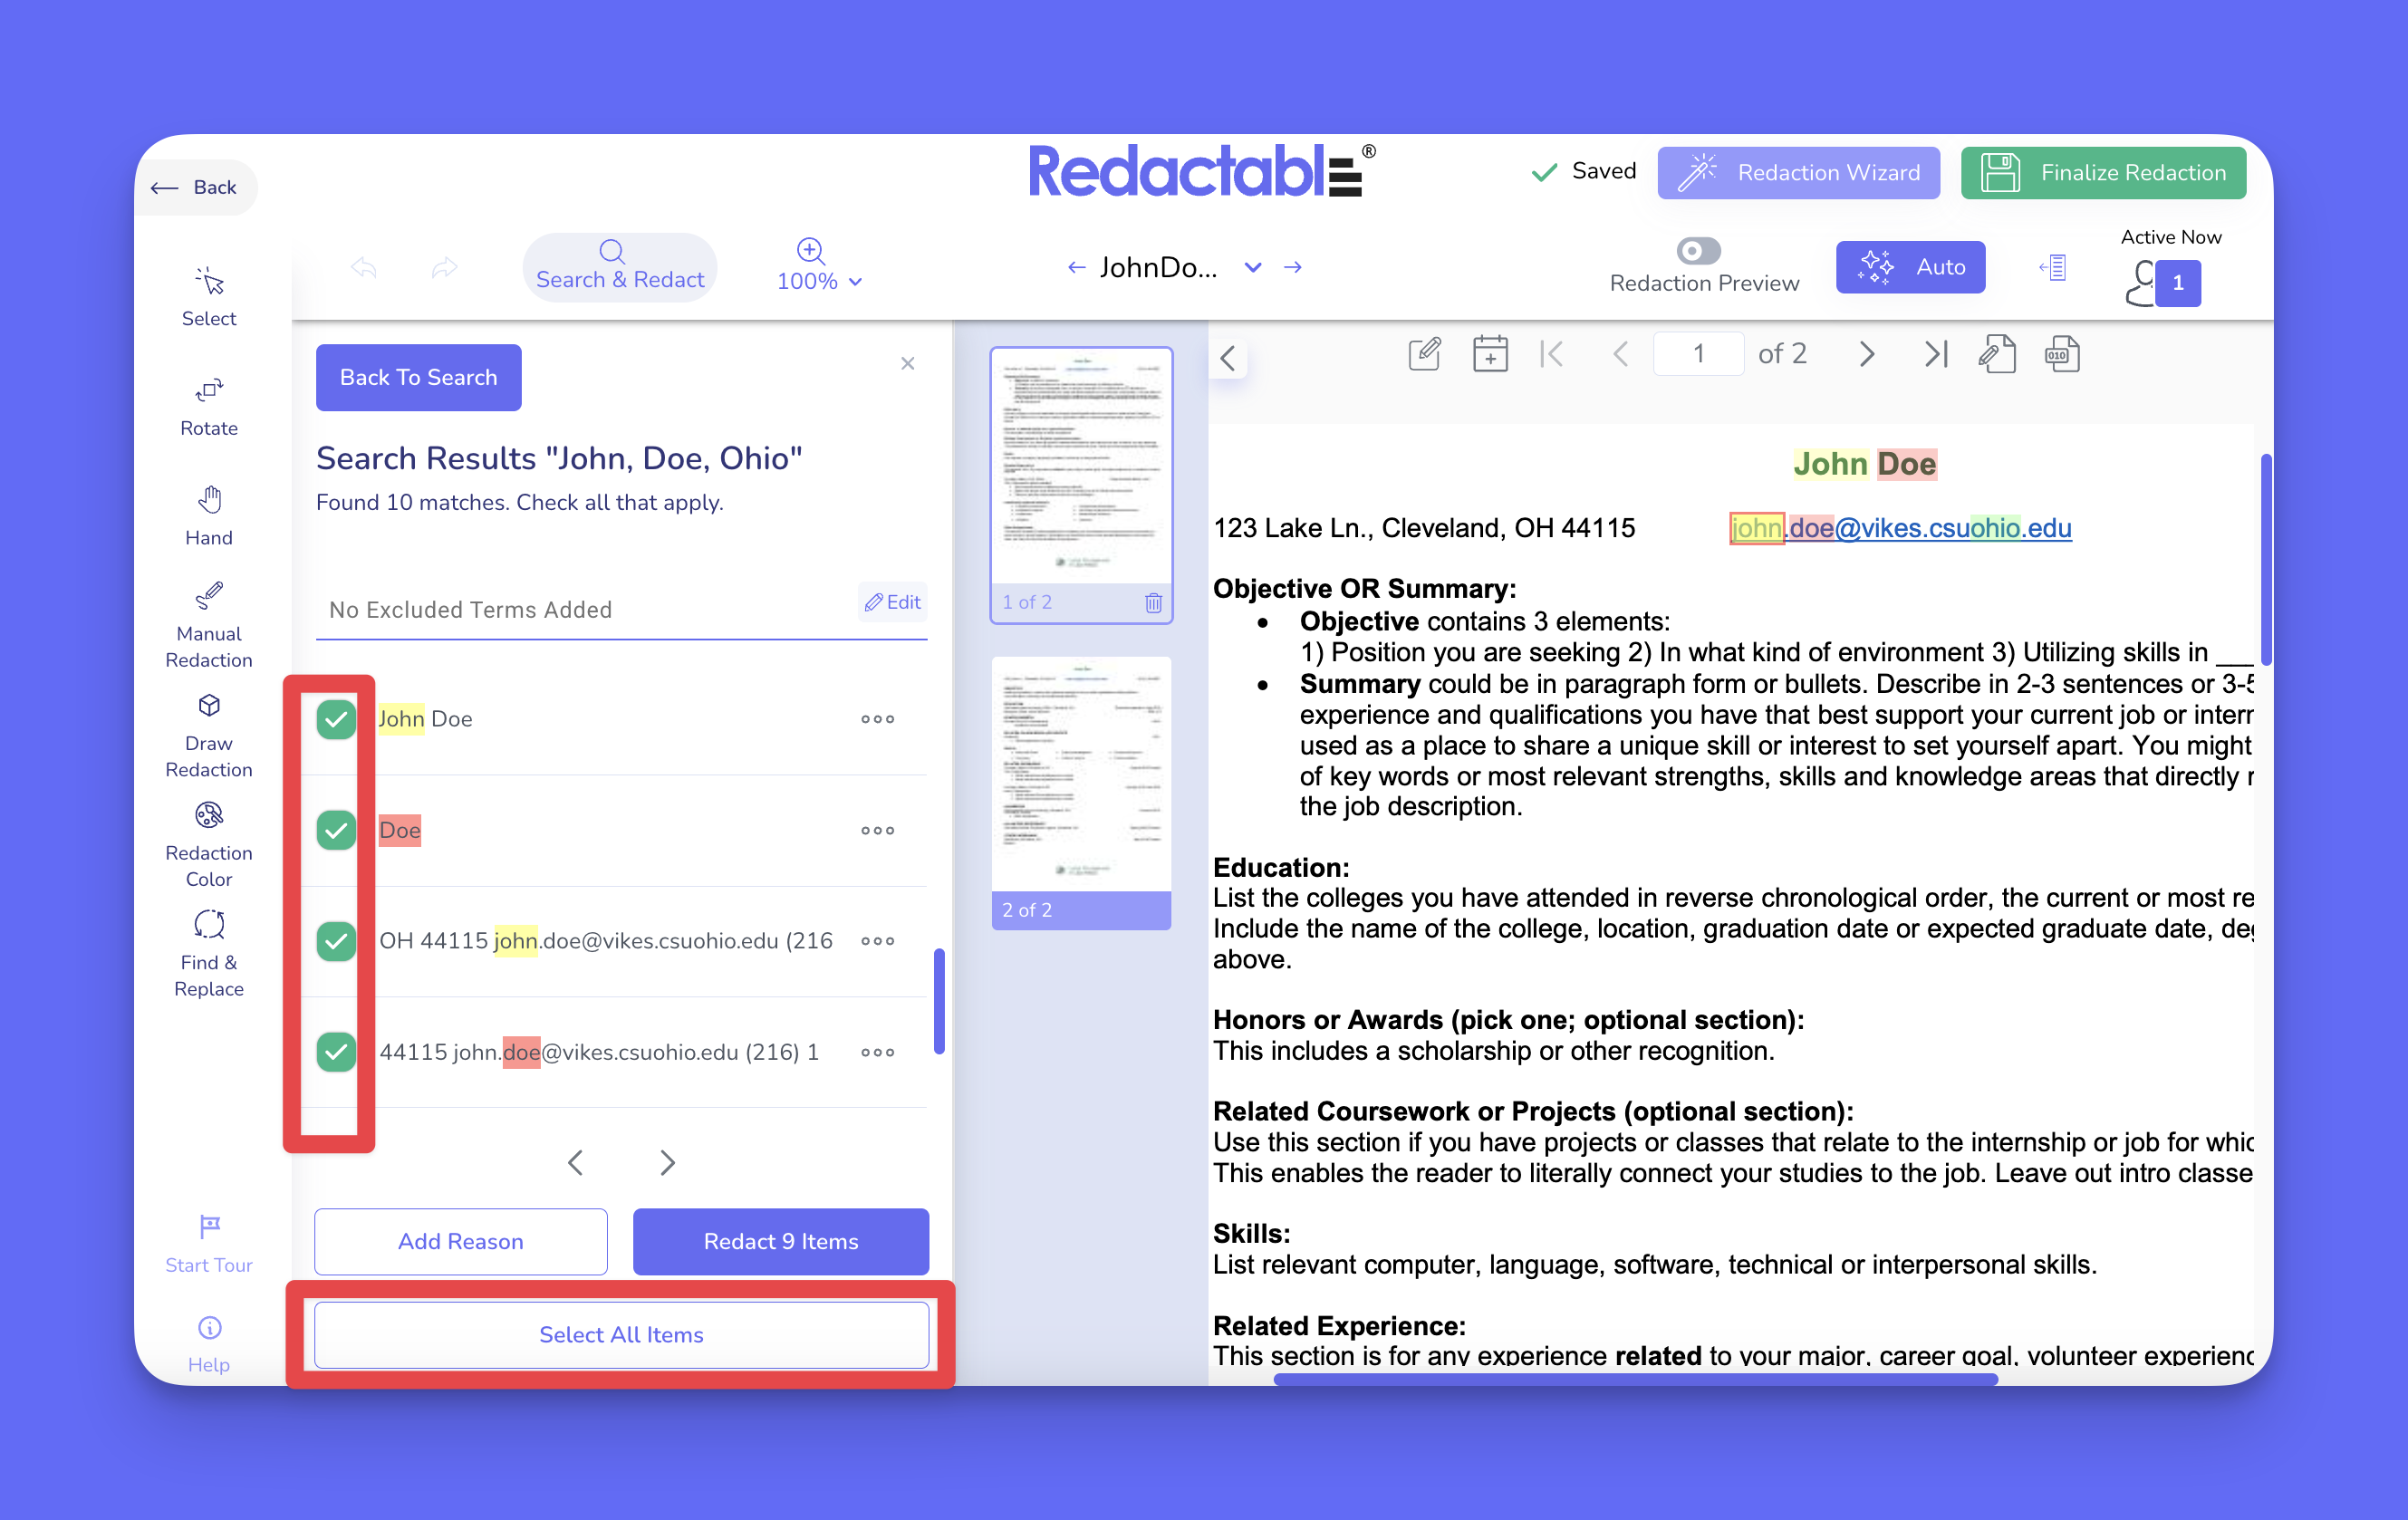
16. To access additional management options, click the three-dot menu next to a search result.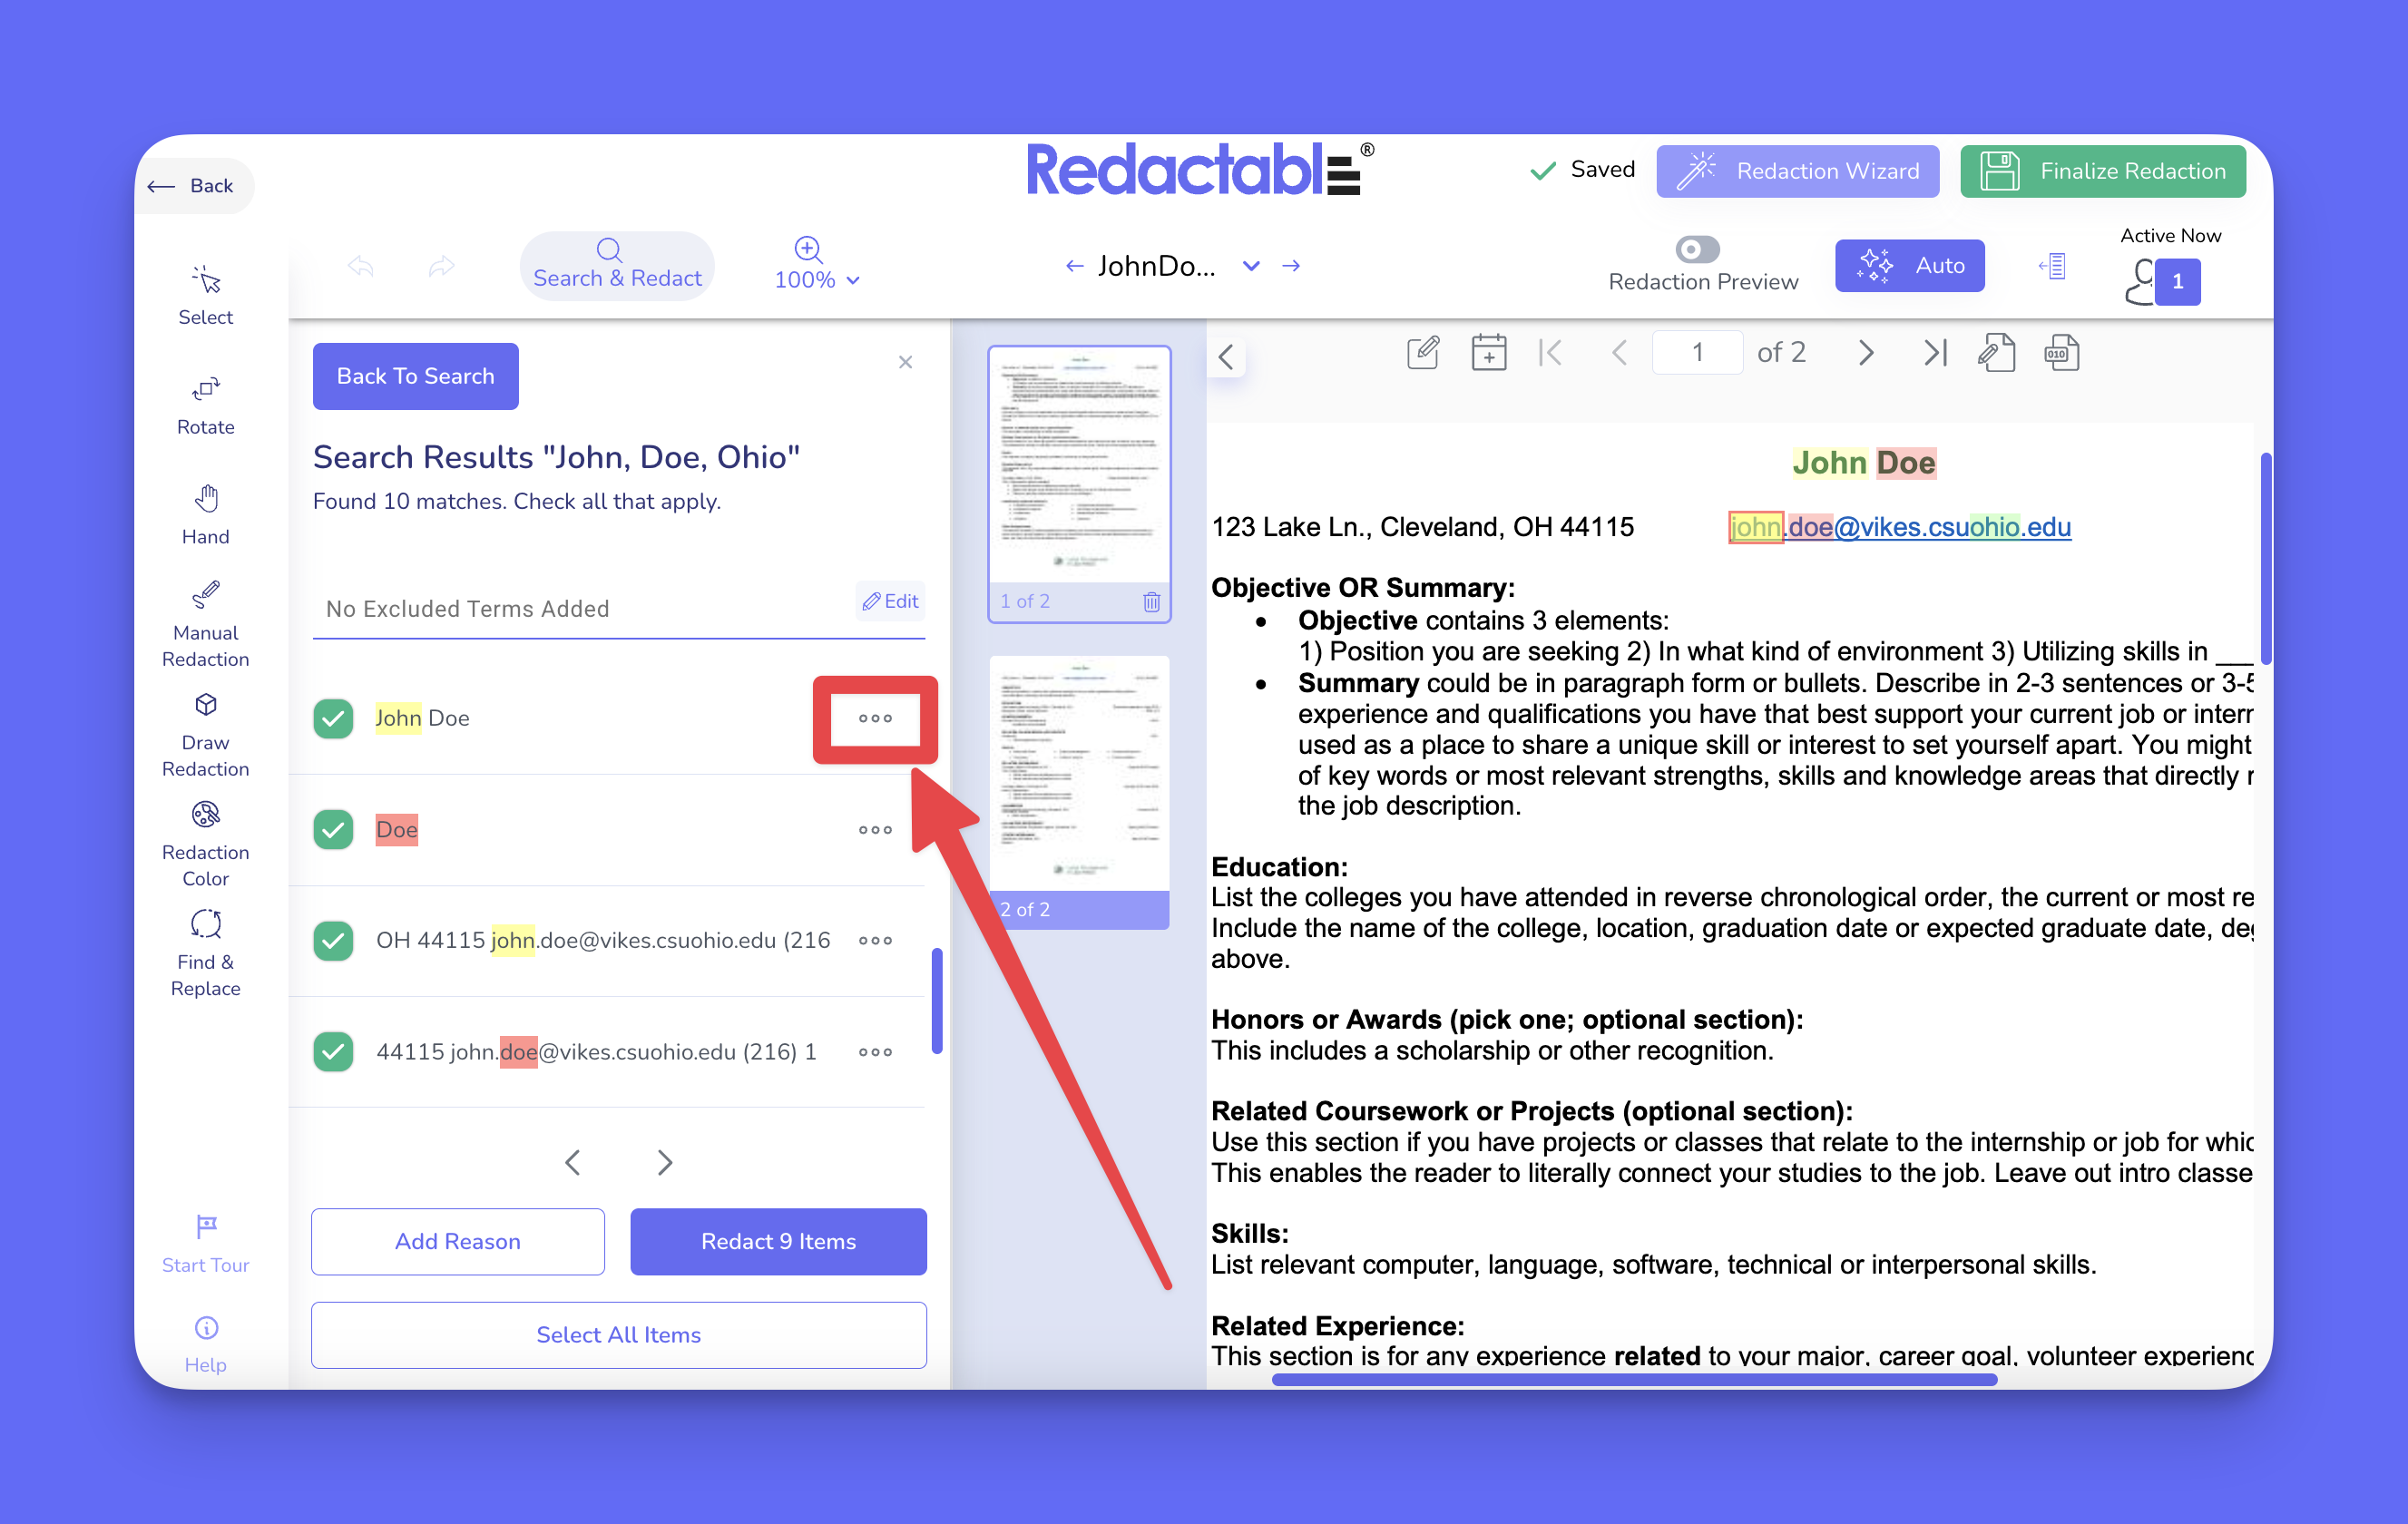
17. The three-dot menu allows users to select or select all instances, remove all instances, or add a redaction reason.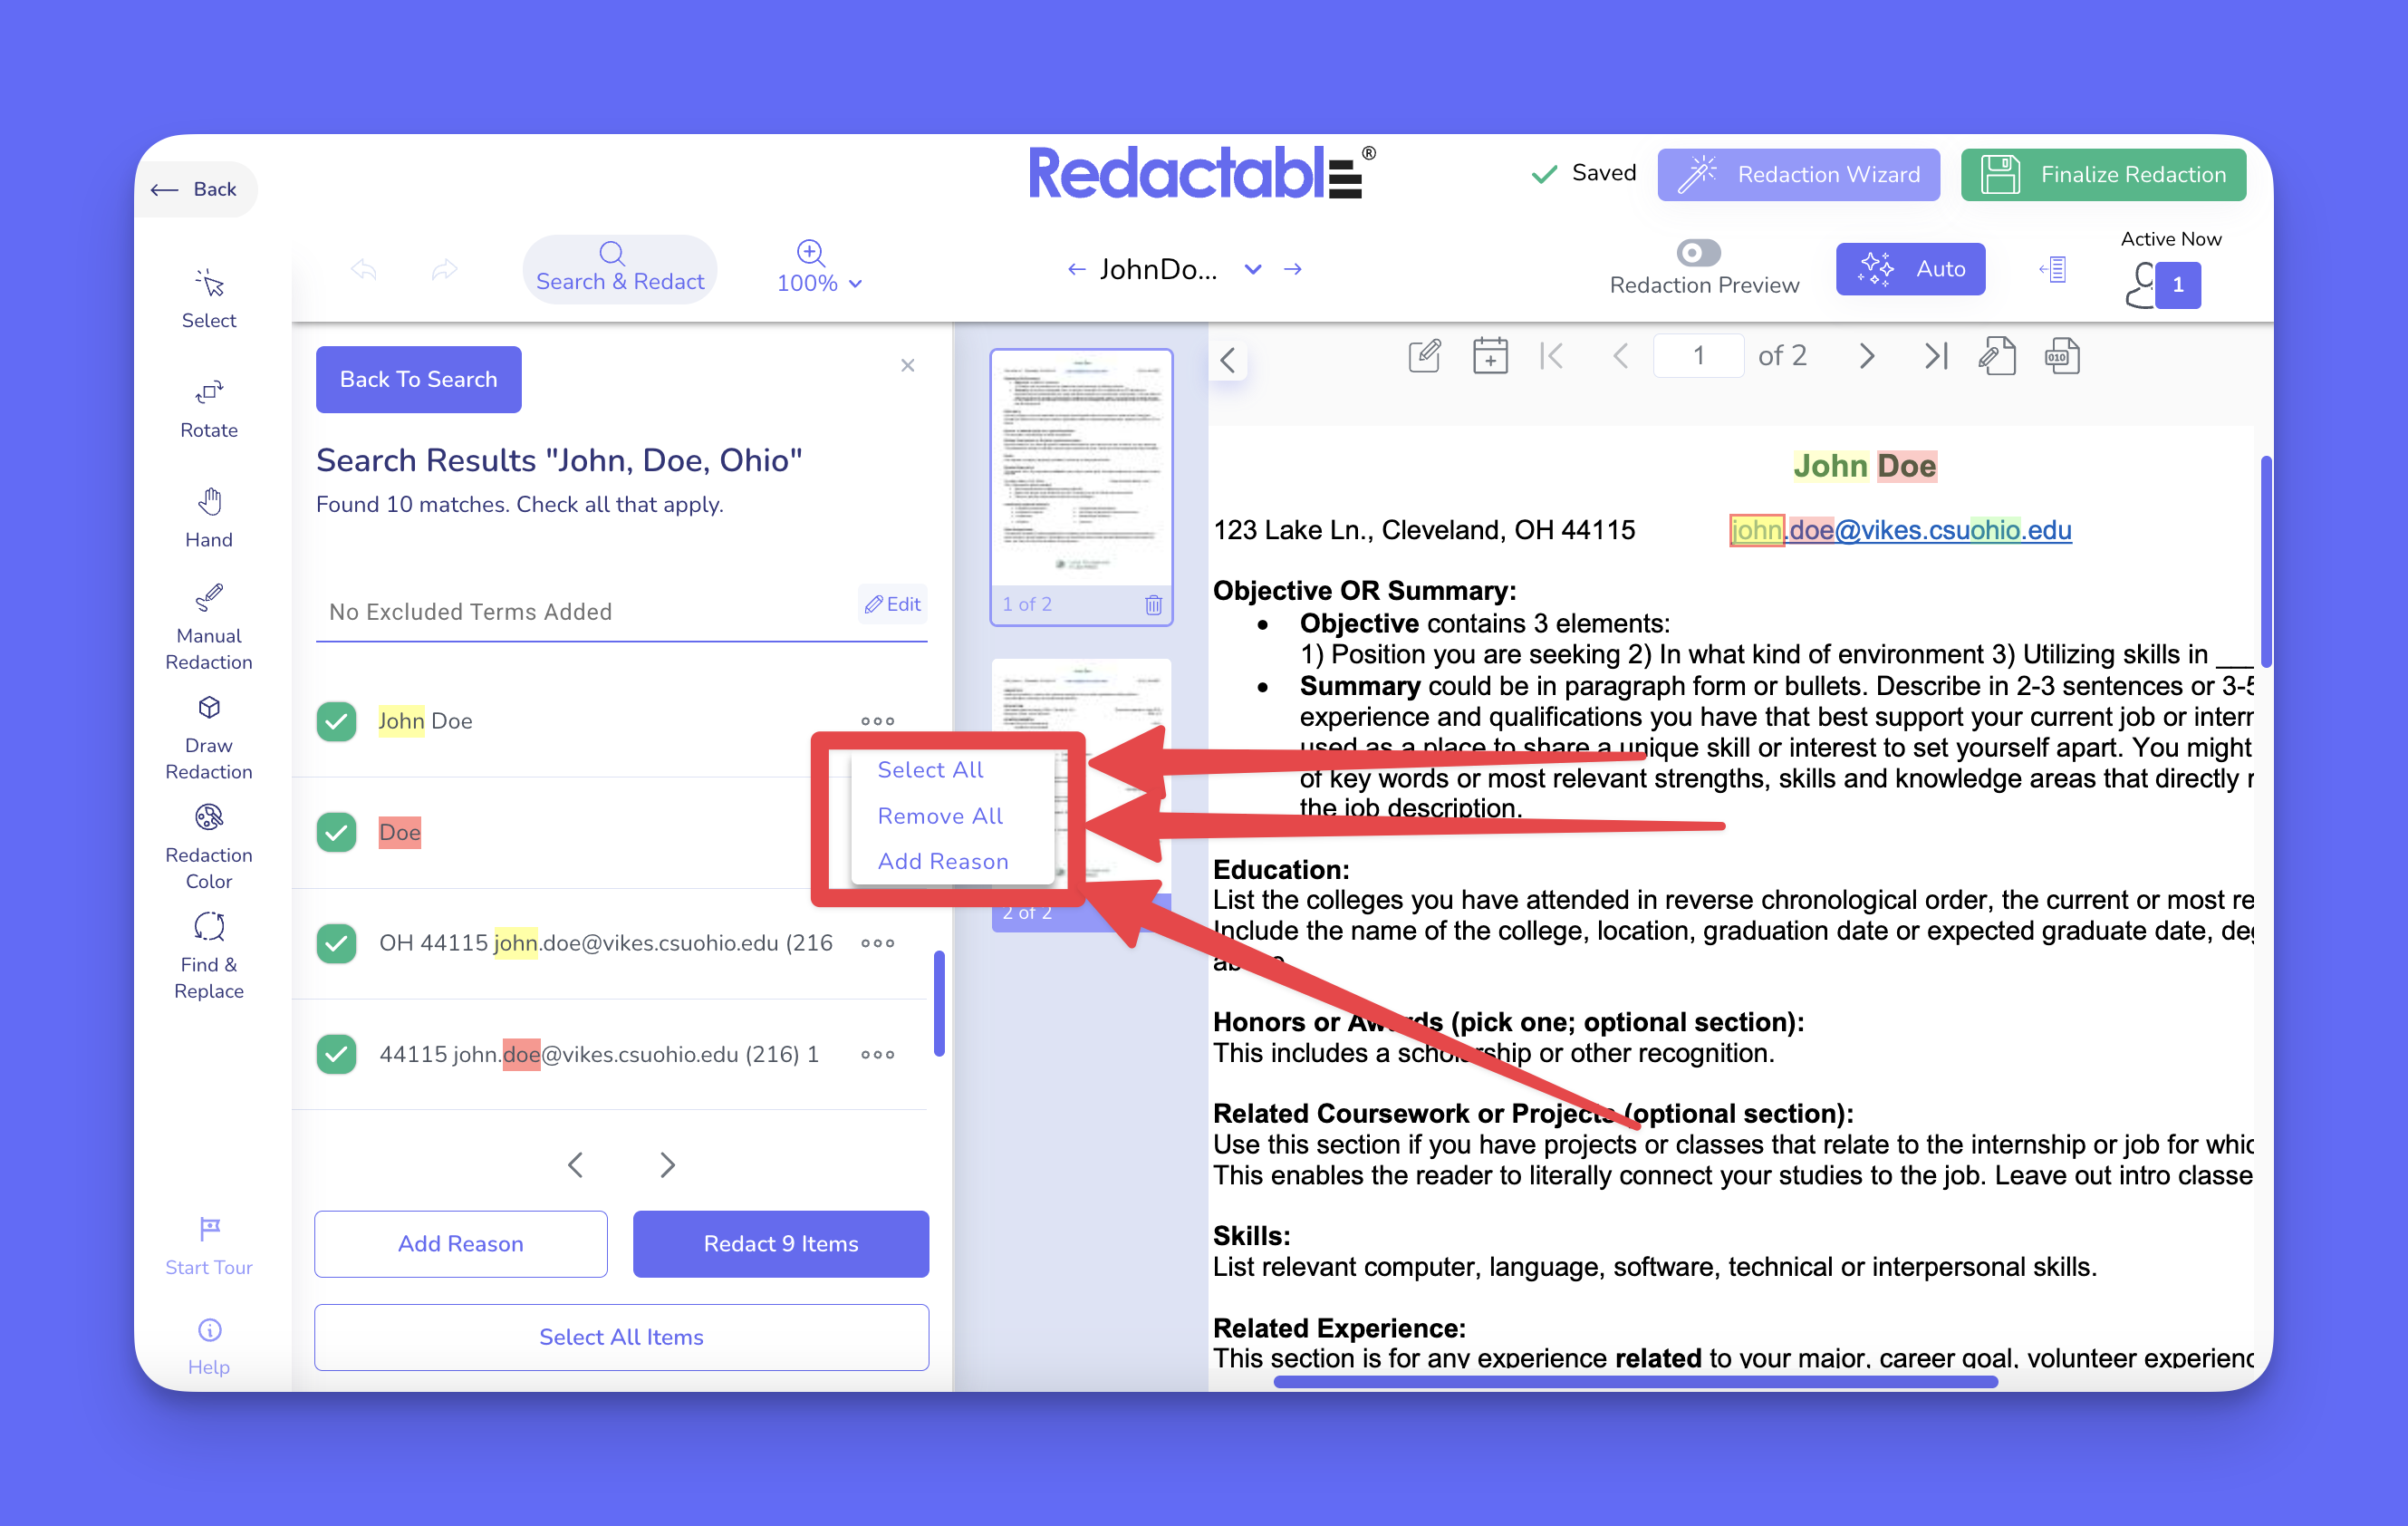
Applying redactions
18. Select individual search results and click "Redact Items" to redact only selected matches.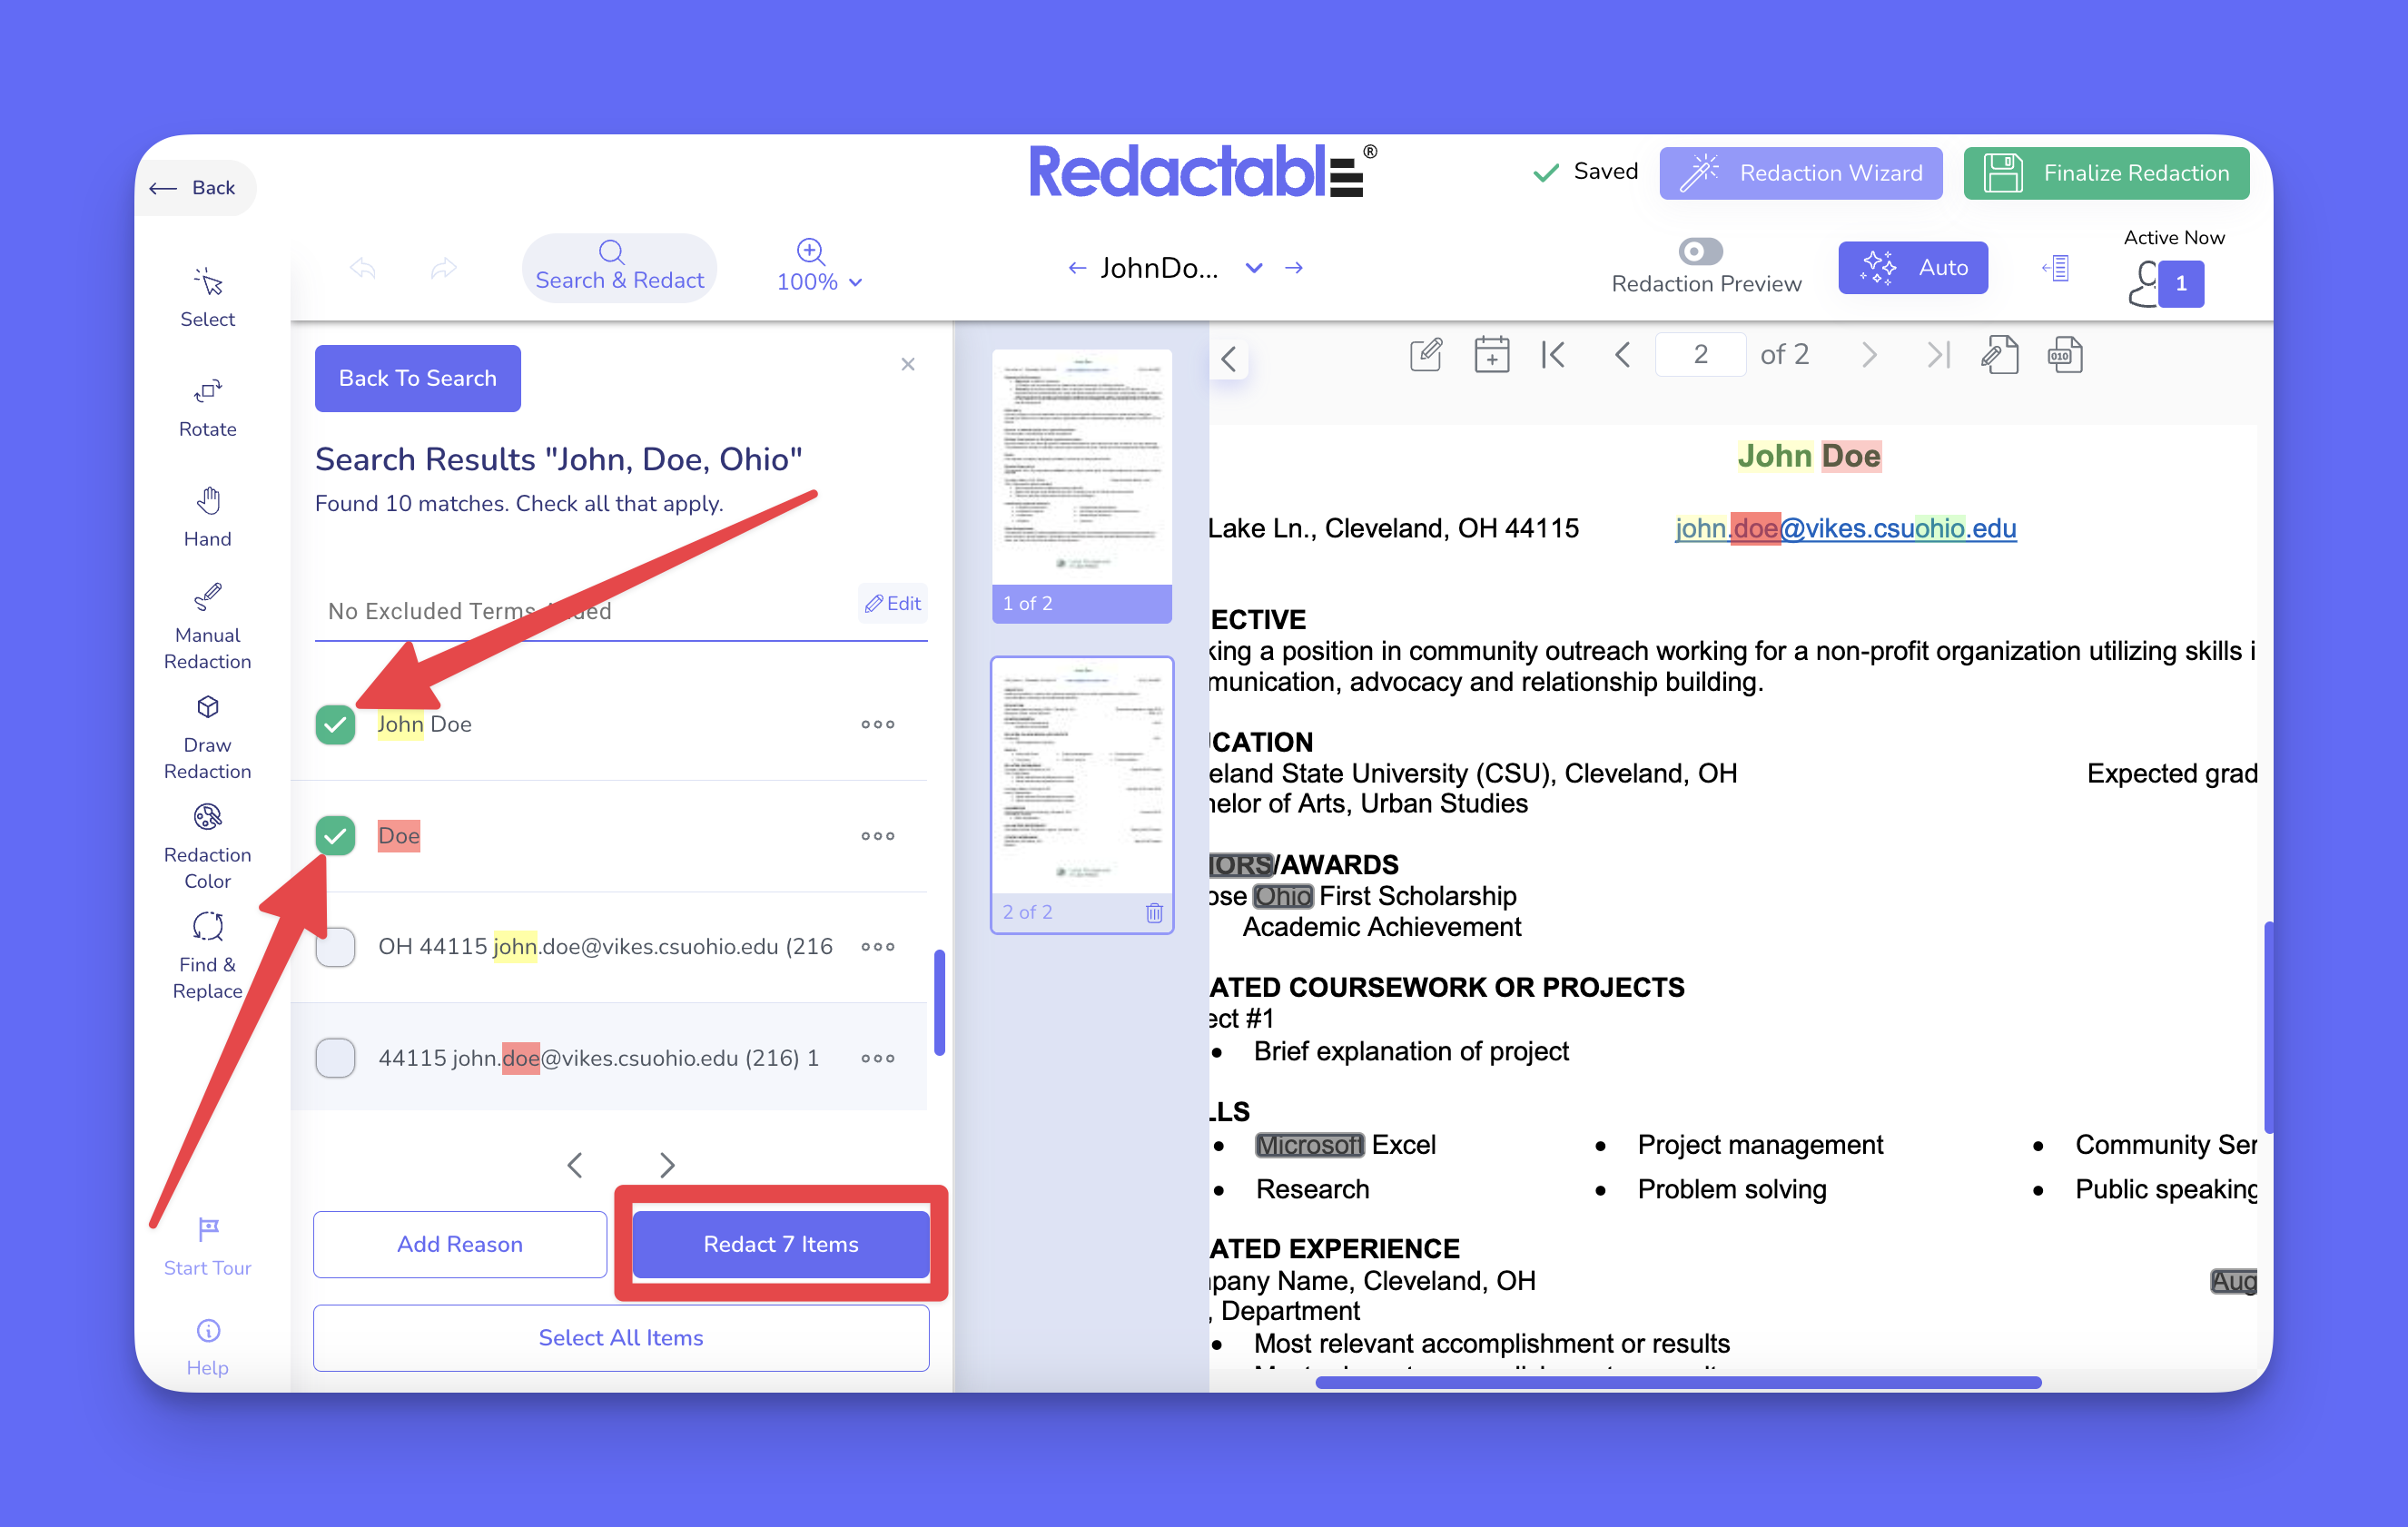
19. To redact all search results at once, select all items and click on "Redact Items."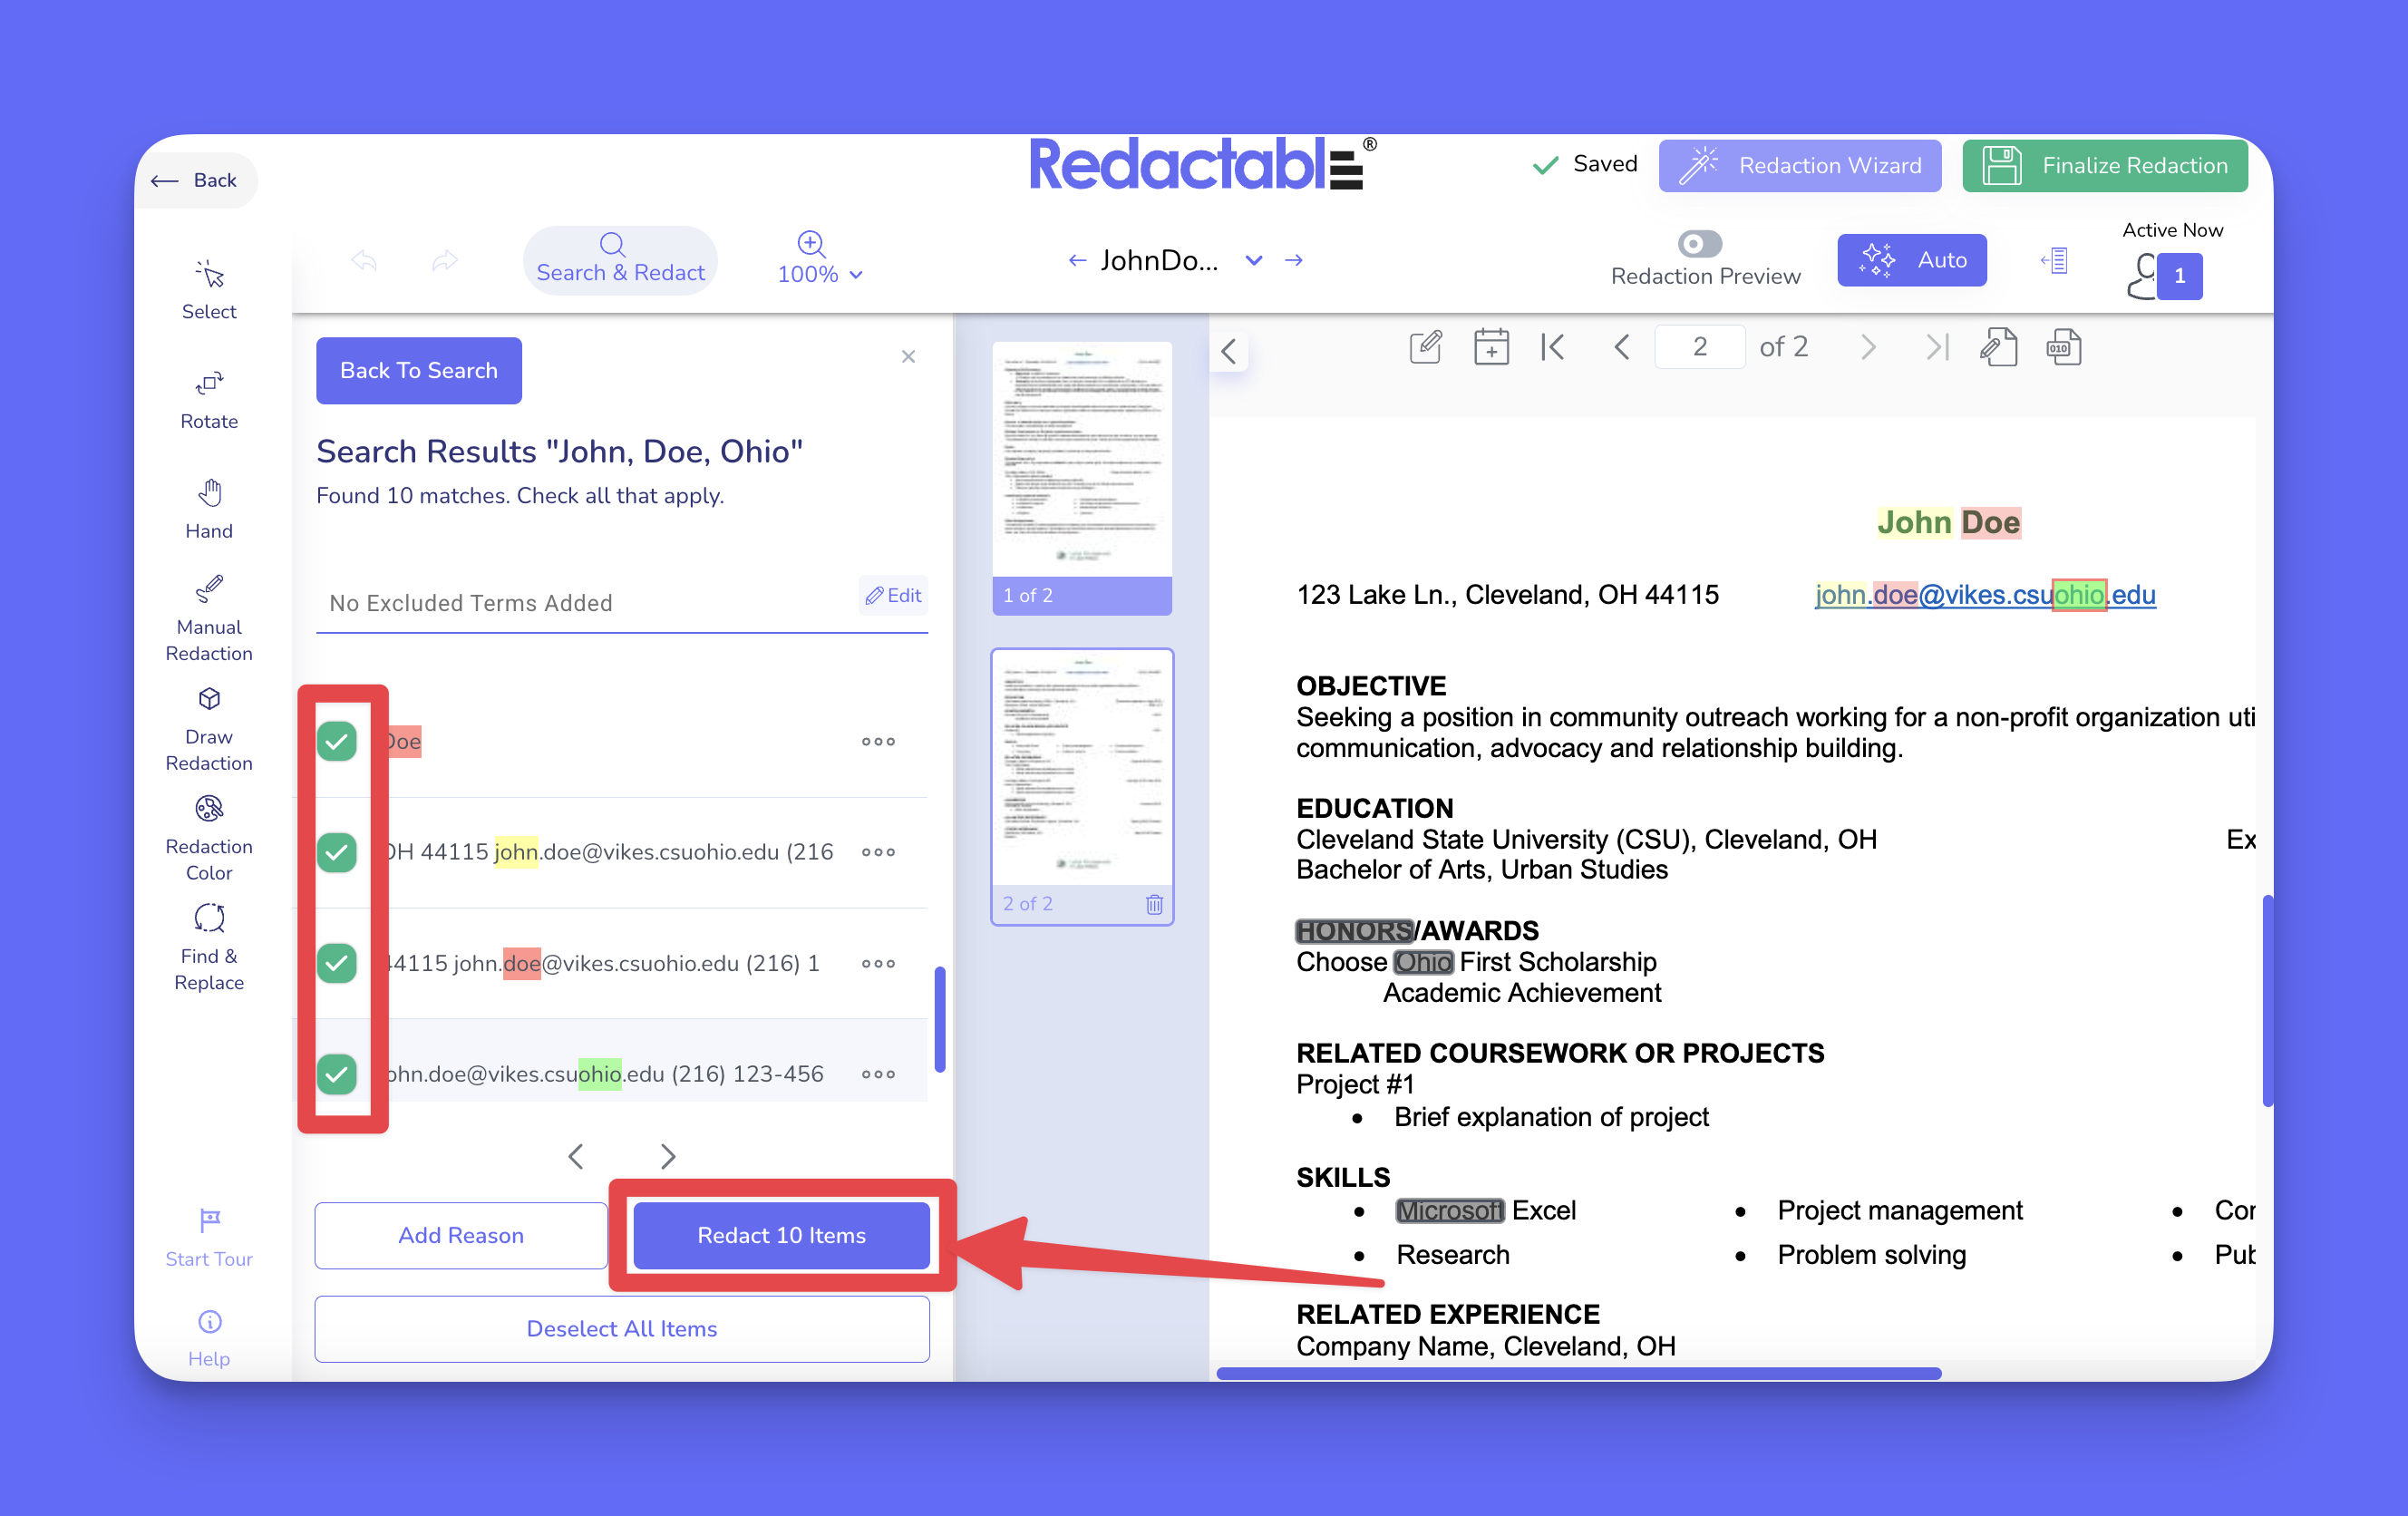
Adding a redaction reason
20. To add a reason to a search result, open the “Add Reason” modal from the three-dot menu.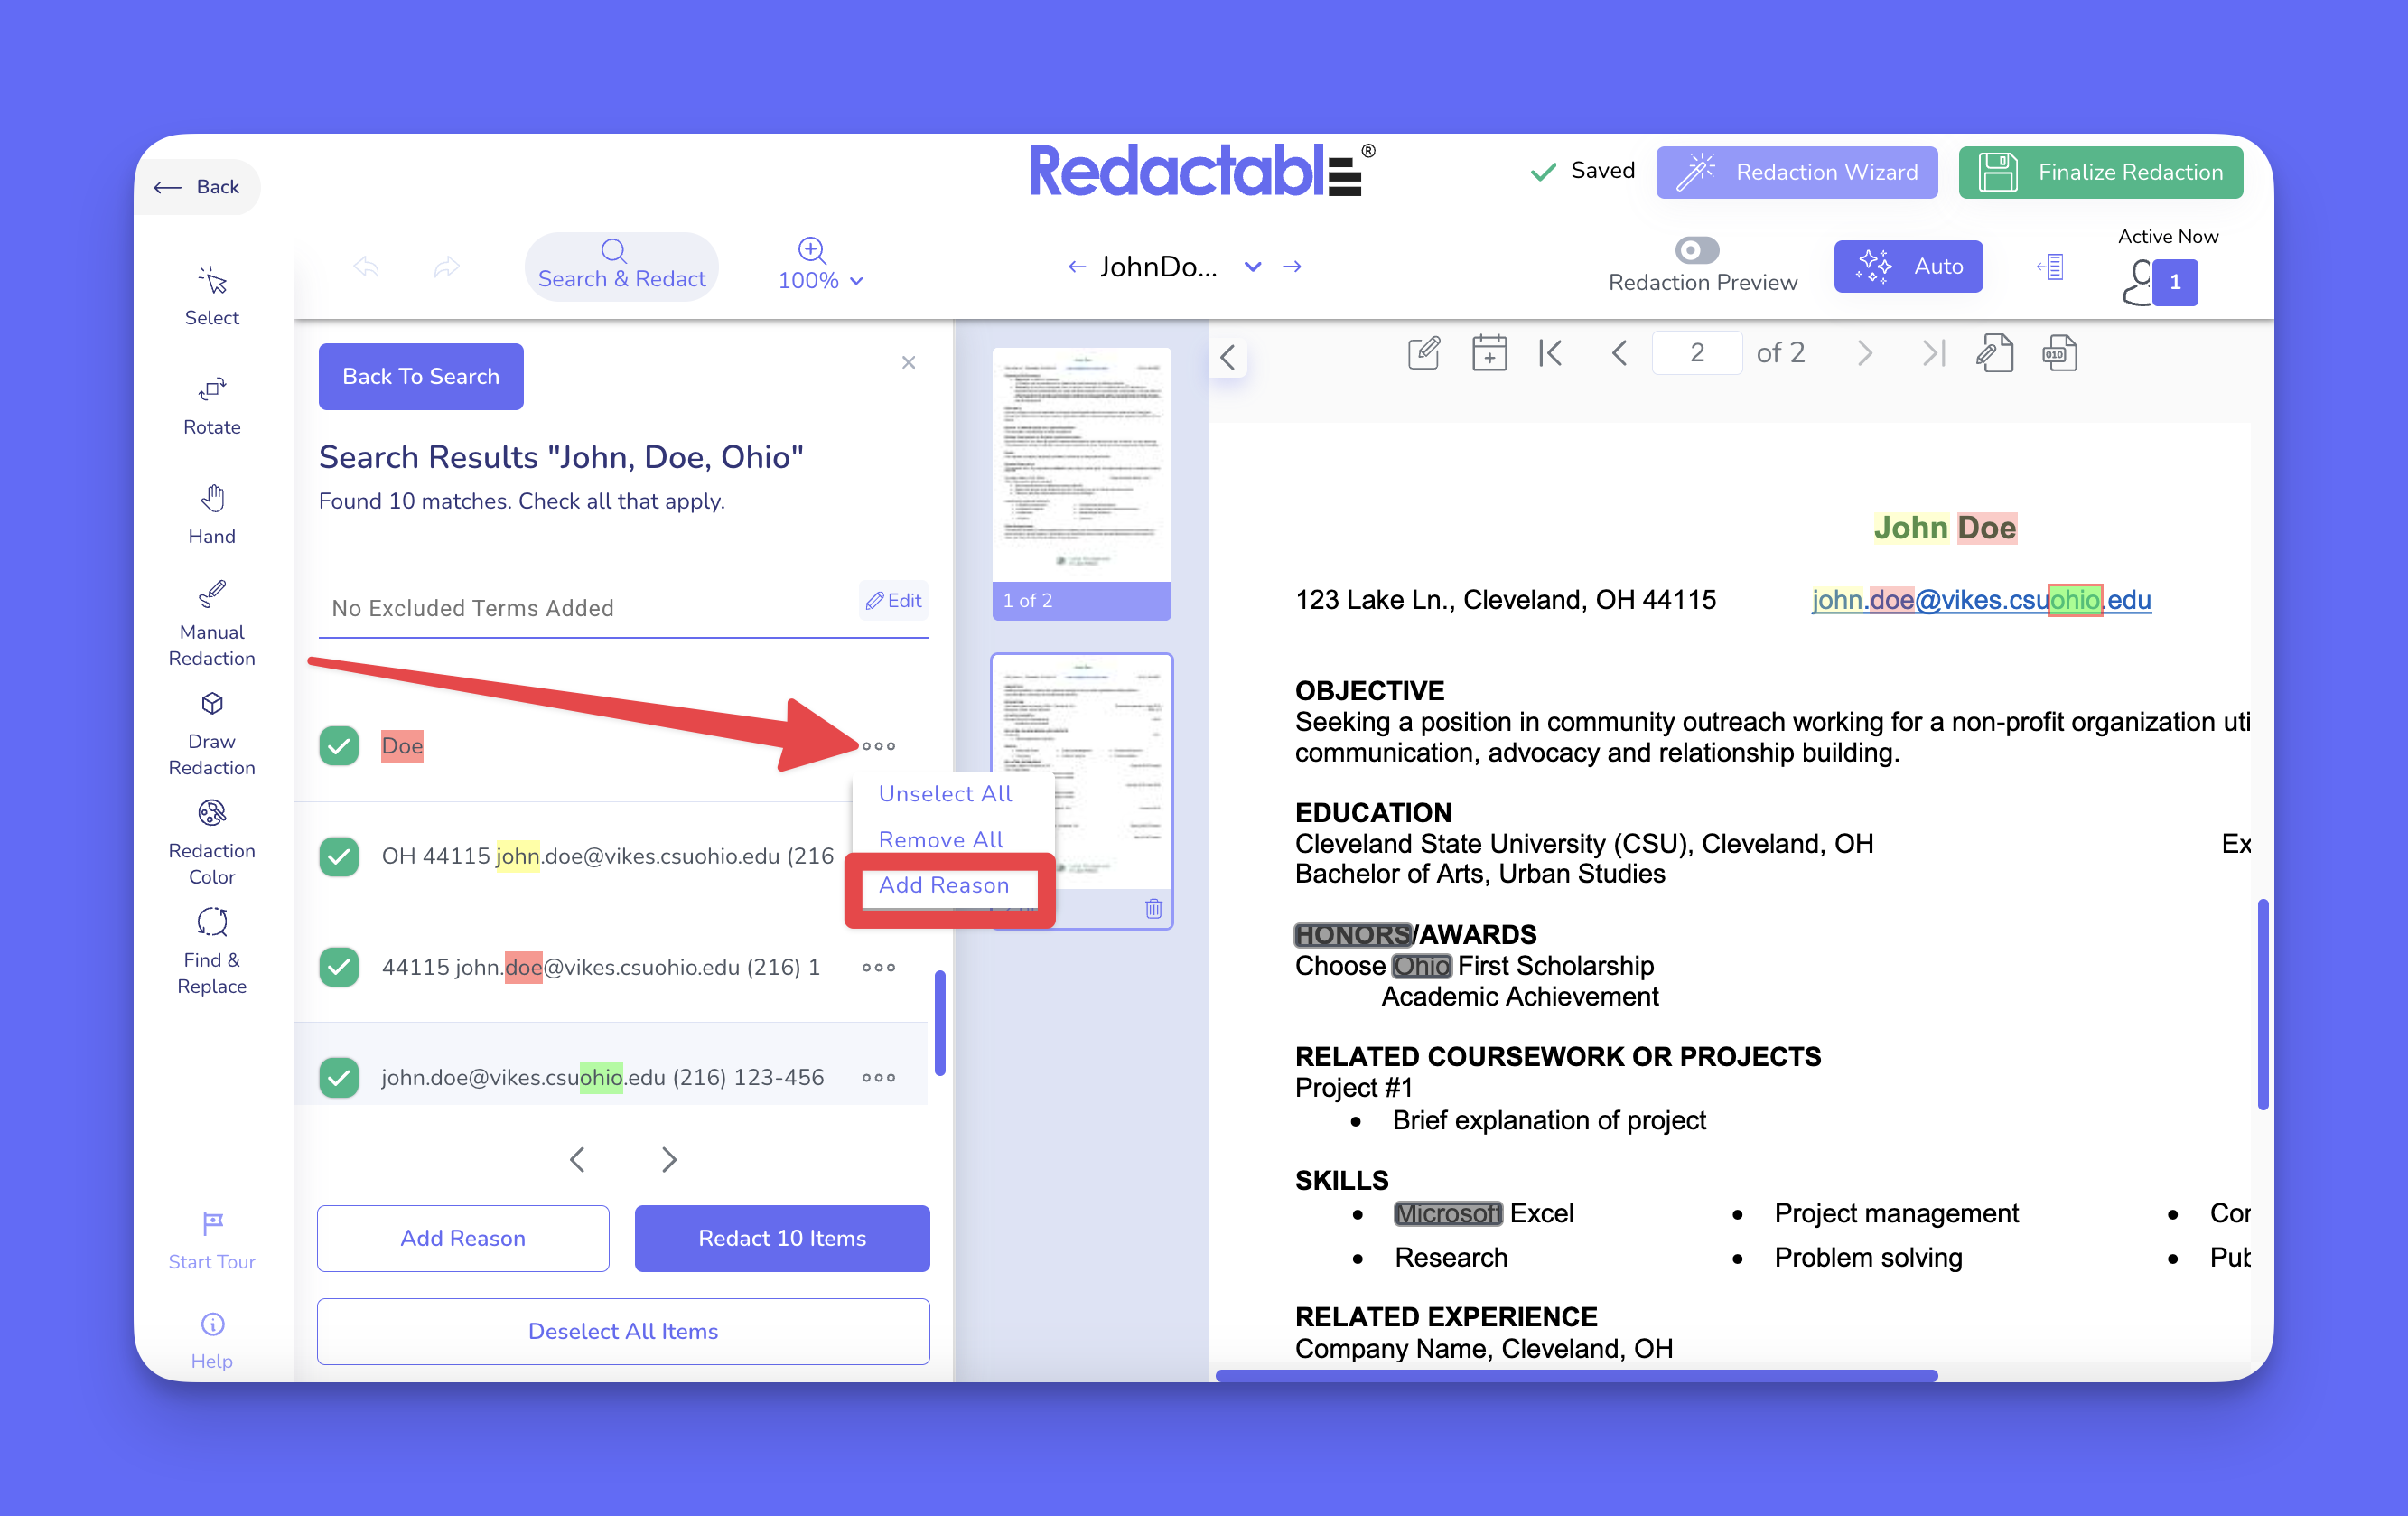
21. A text input field allows users to add new redaction reasons. To add a custom reason, type the text in the input field and click Enter.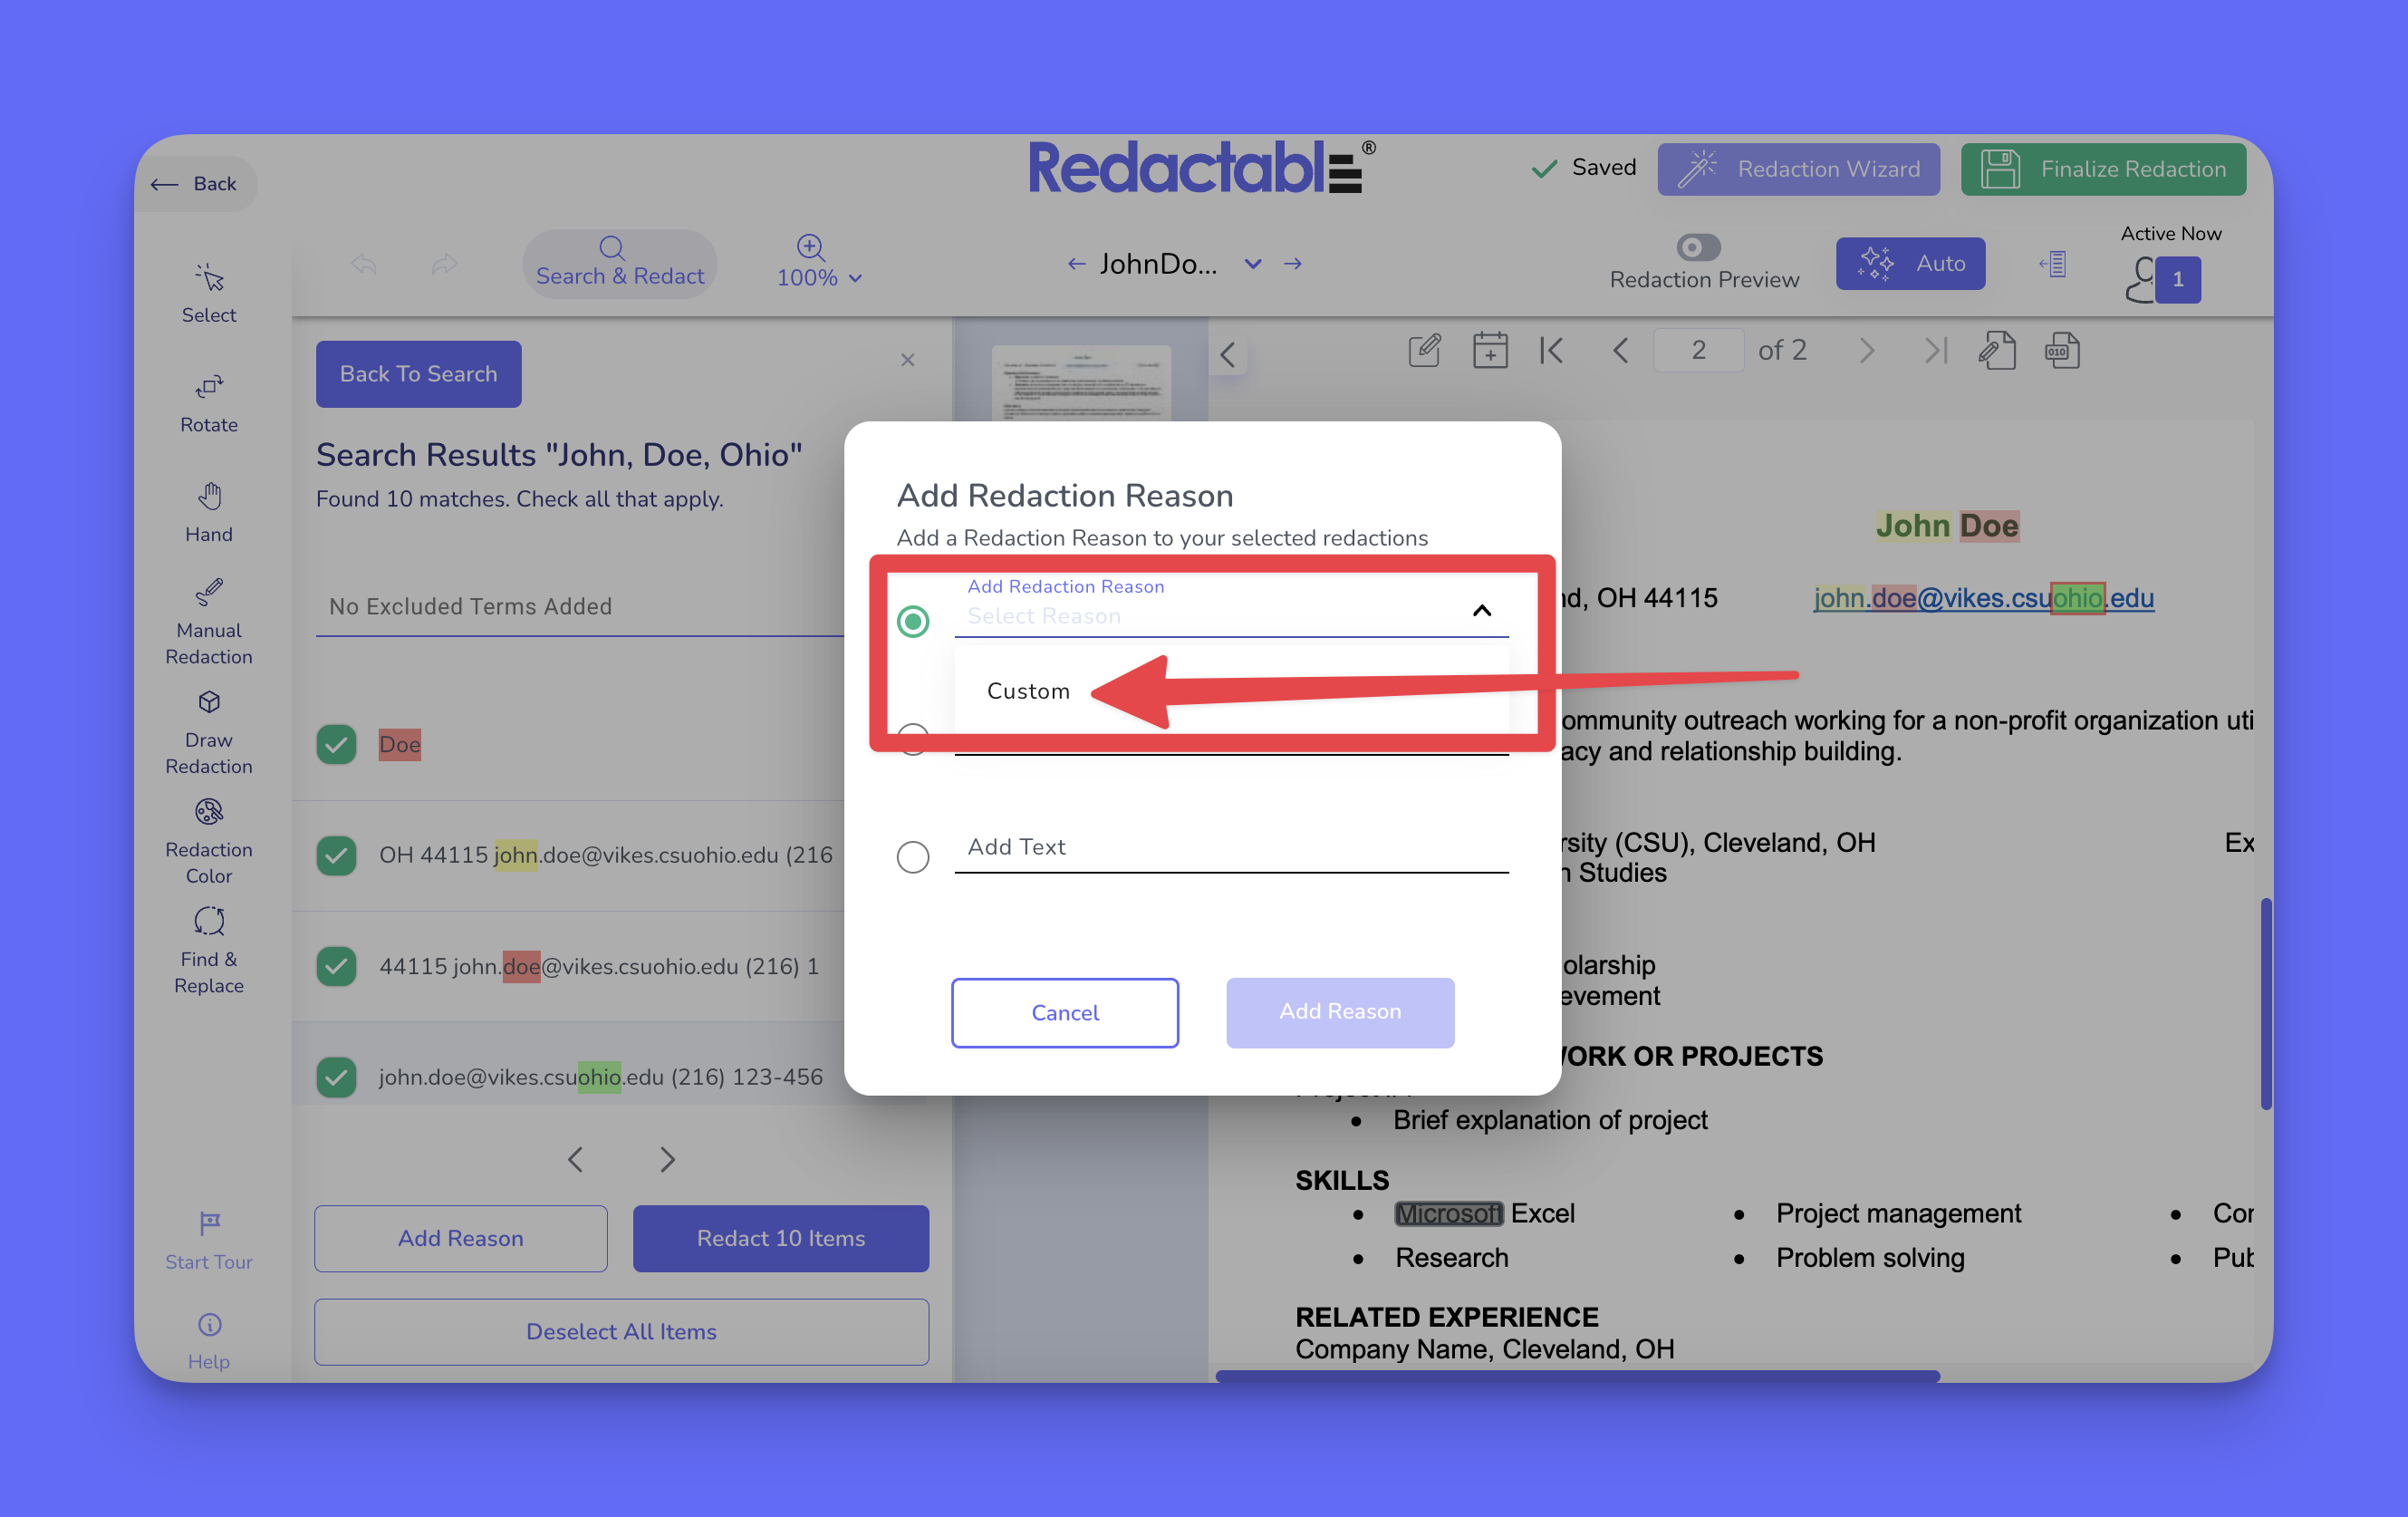
22. To apply the selection, click on the “Add Reason” button.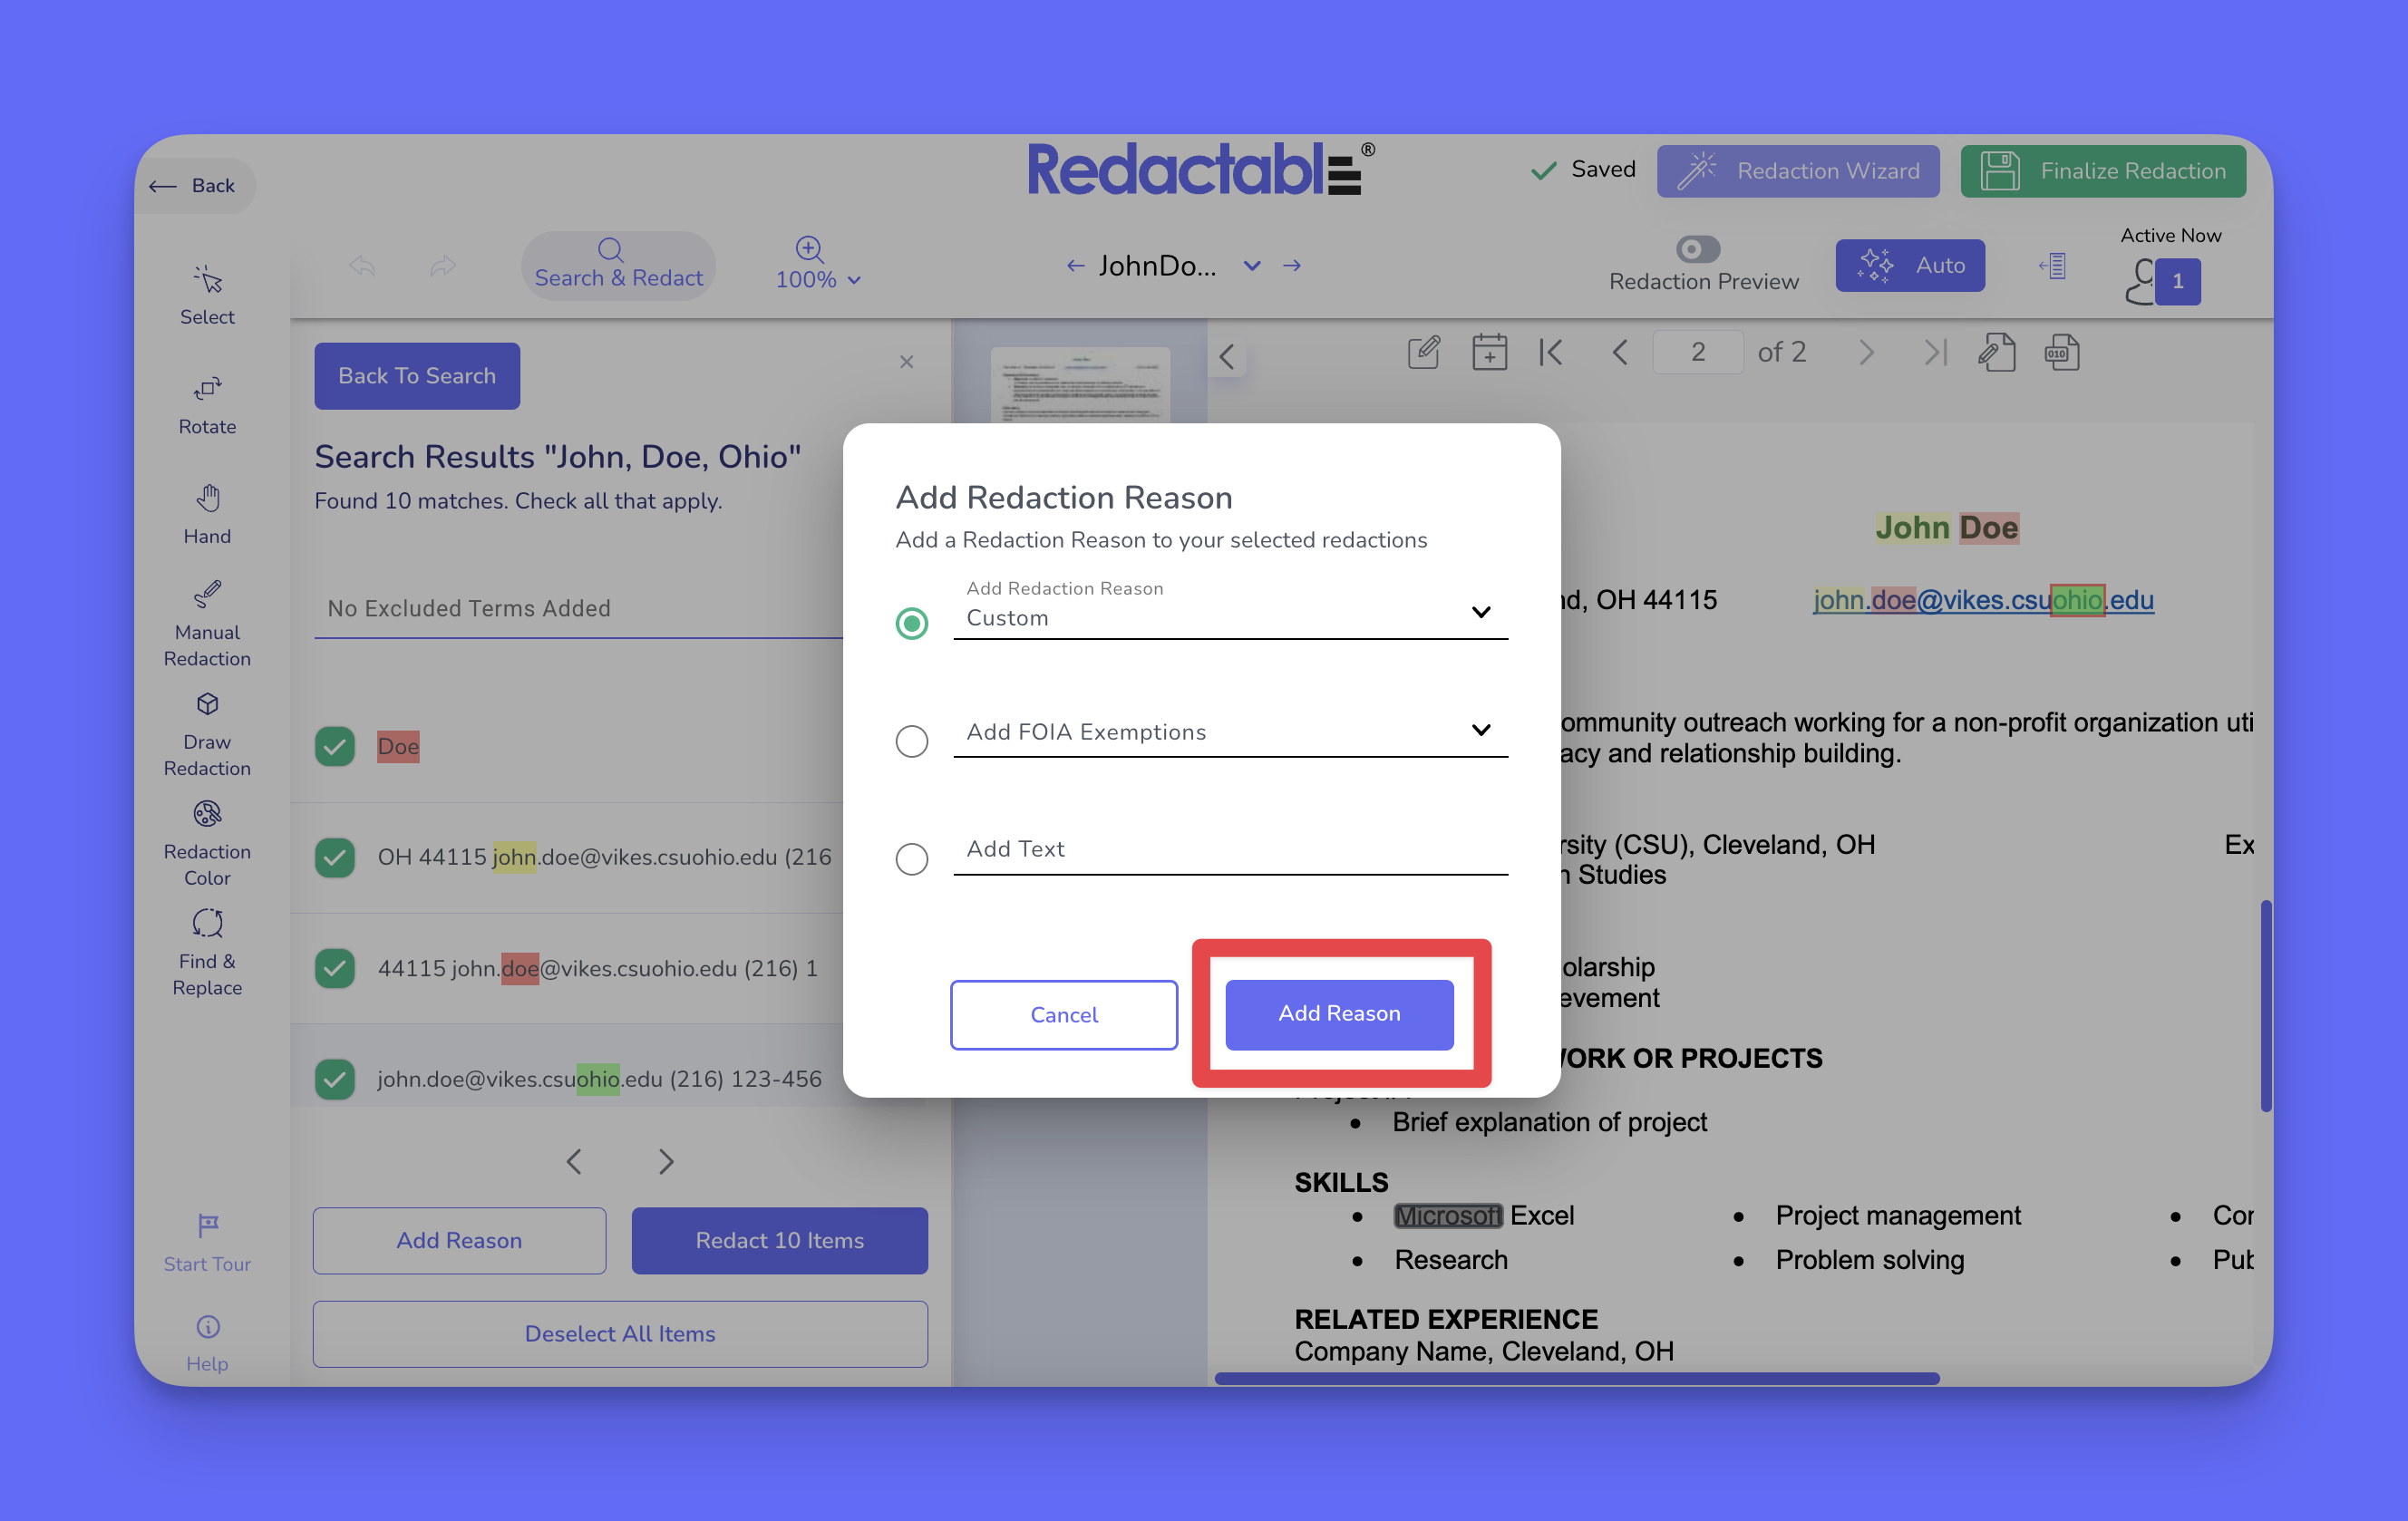
23. The dropdown menu contains predefined redaction reasons. To use a predefined reason, select one from the dropdown list.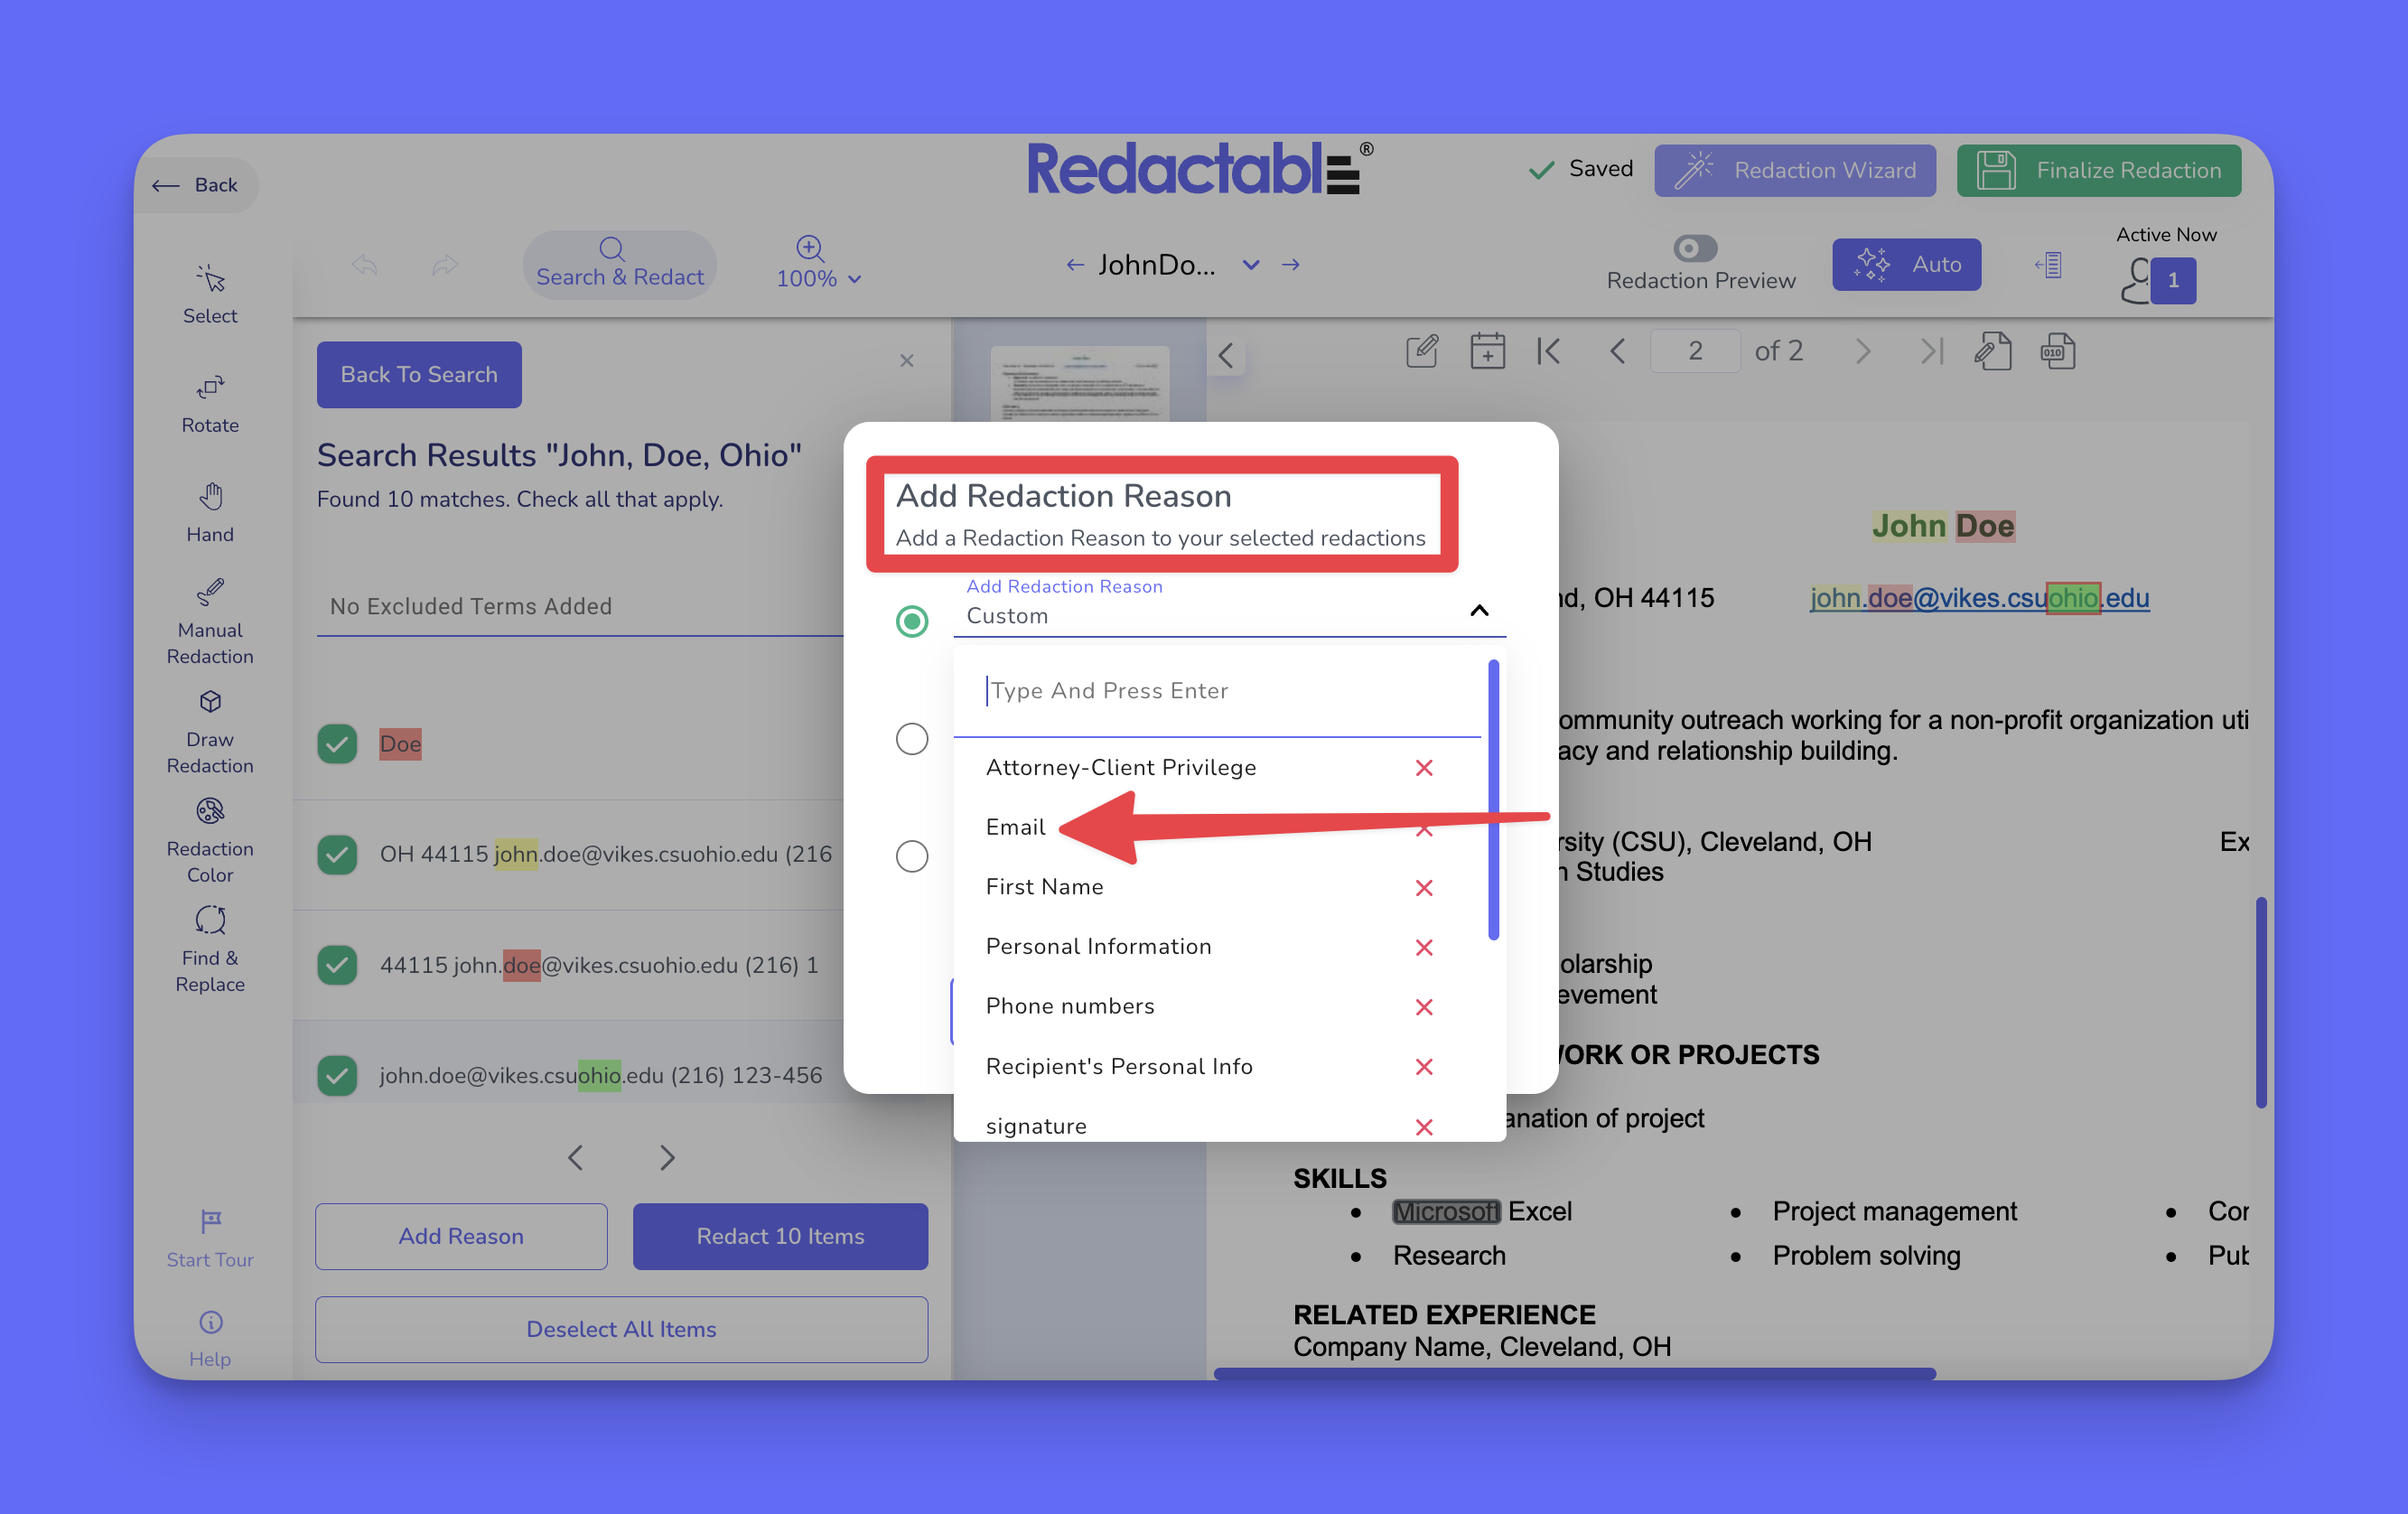
24. To apply the selected redaction reason, click on the “Add Reason” button.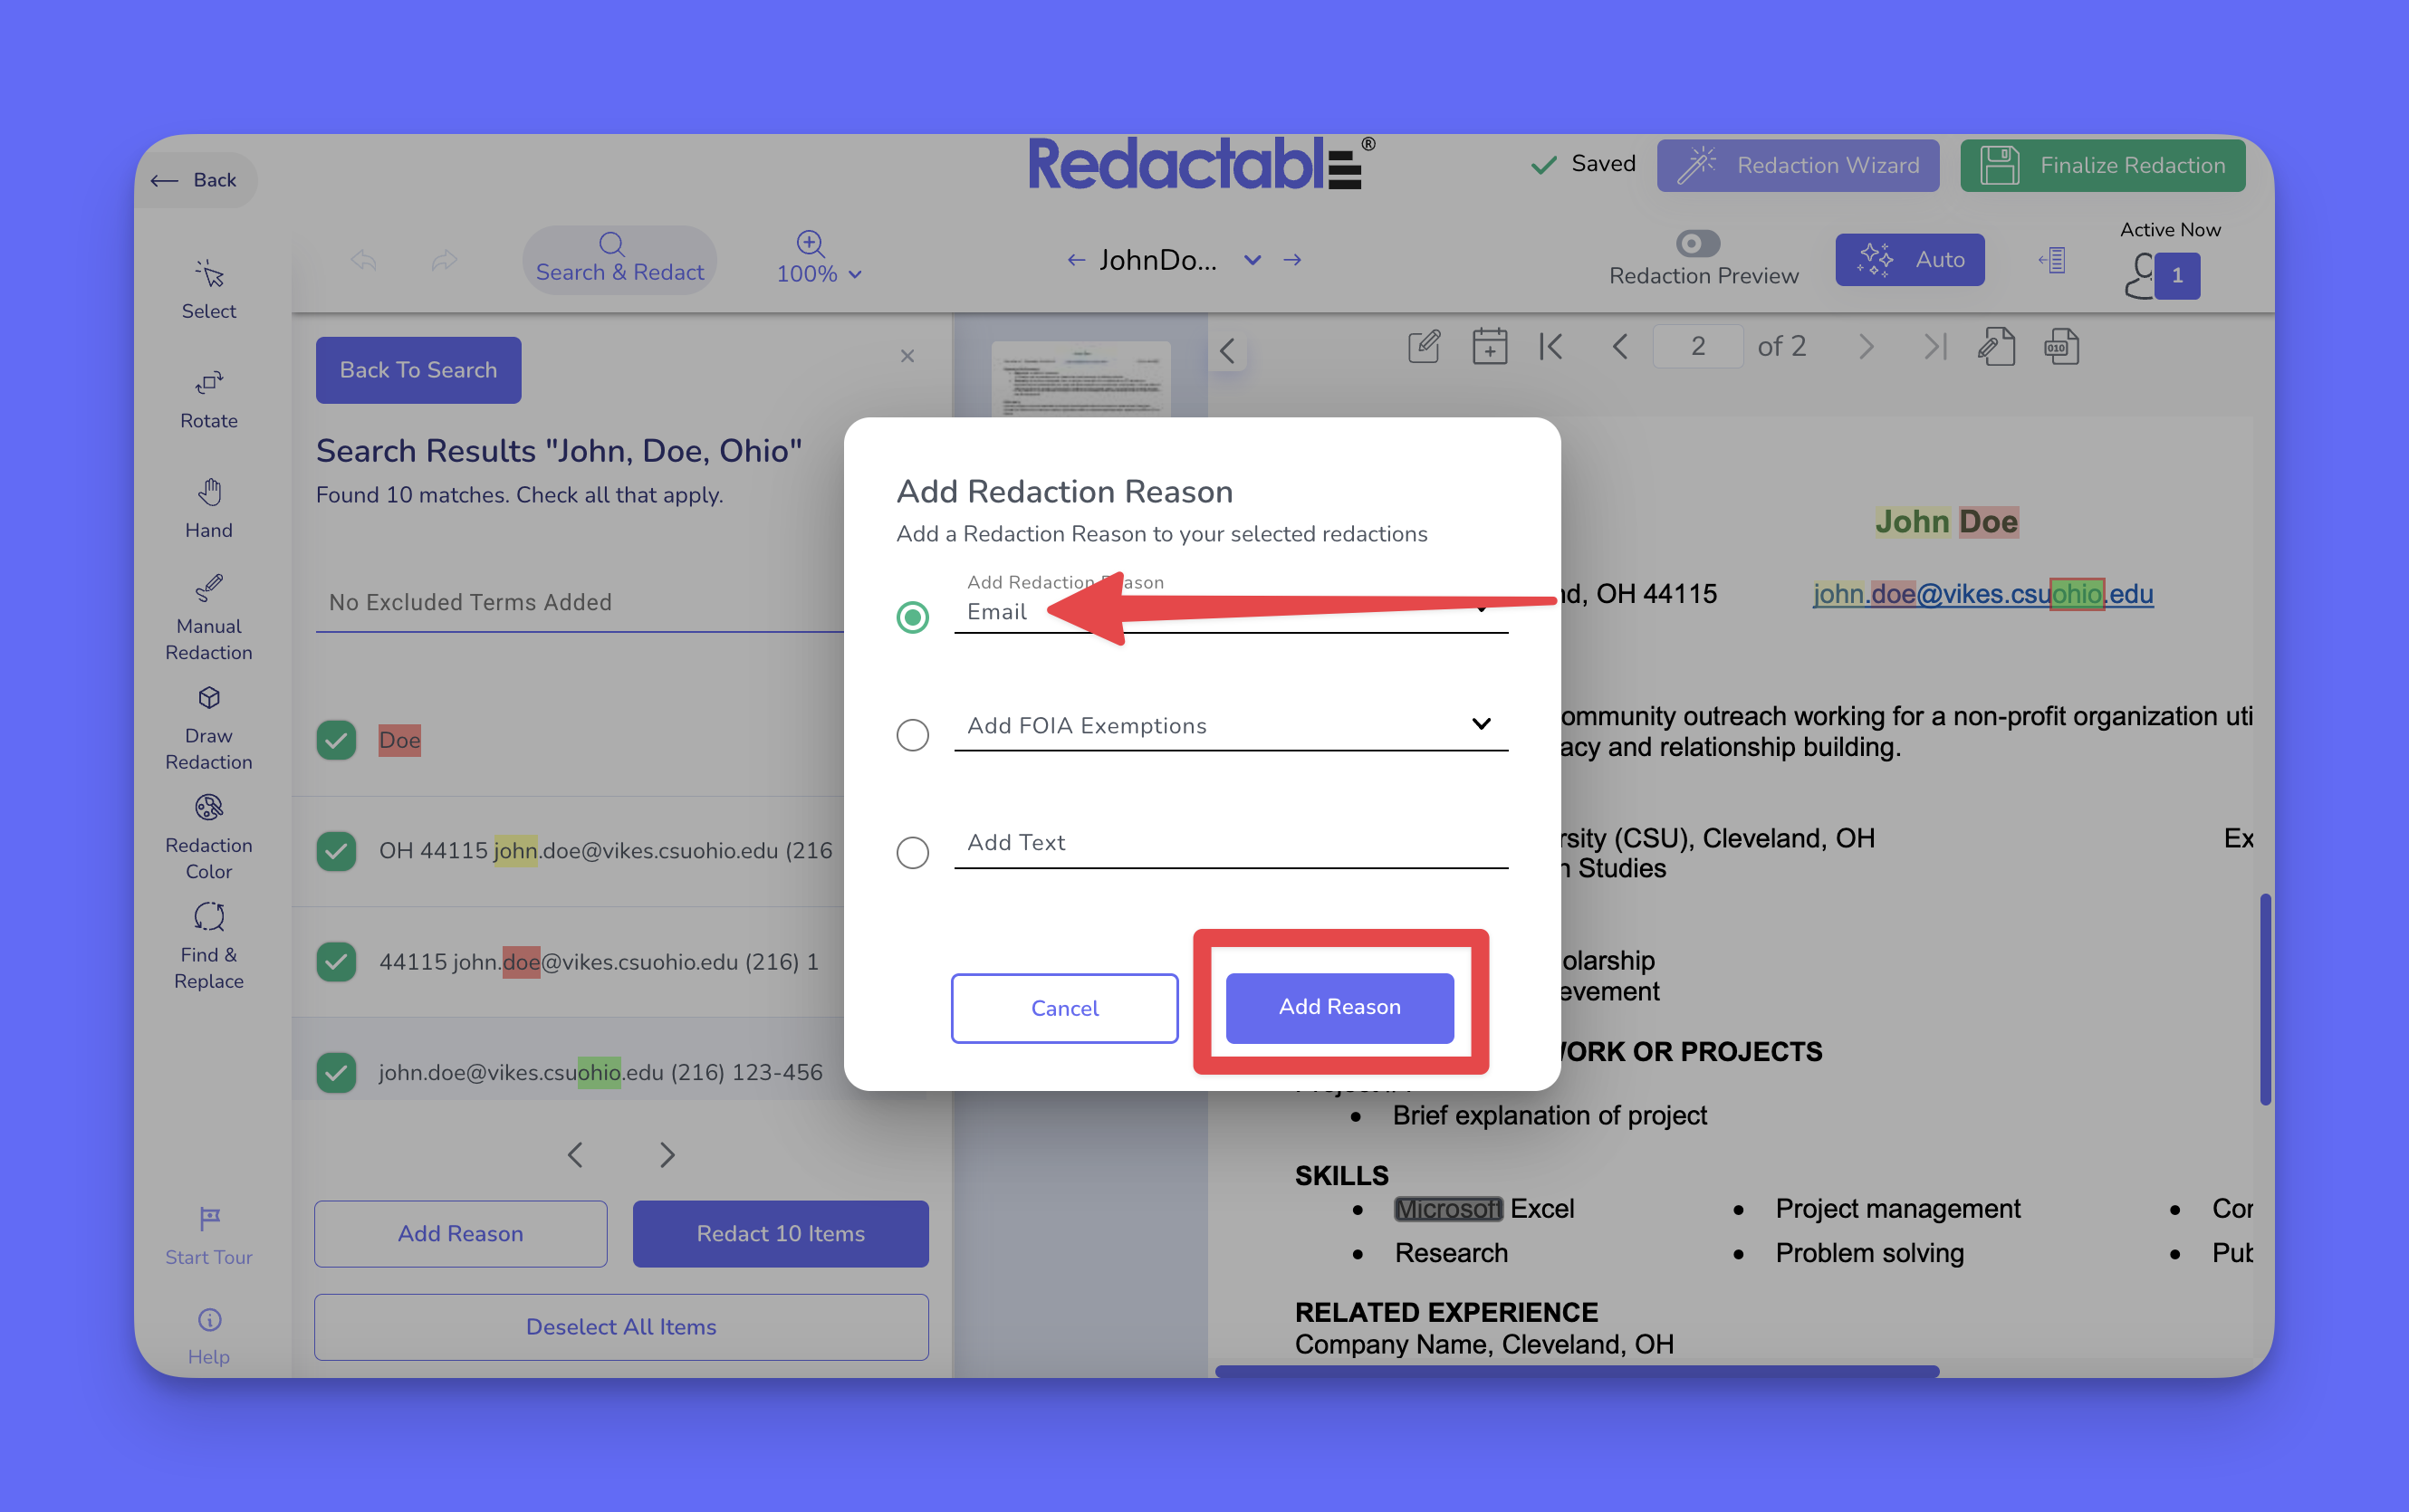
25. To apply a FOIA exemption, search and select a code (e.g., (b)(2), (b)(3)) from the dropdown list.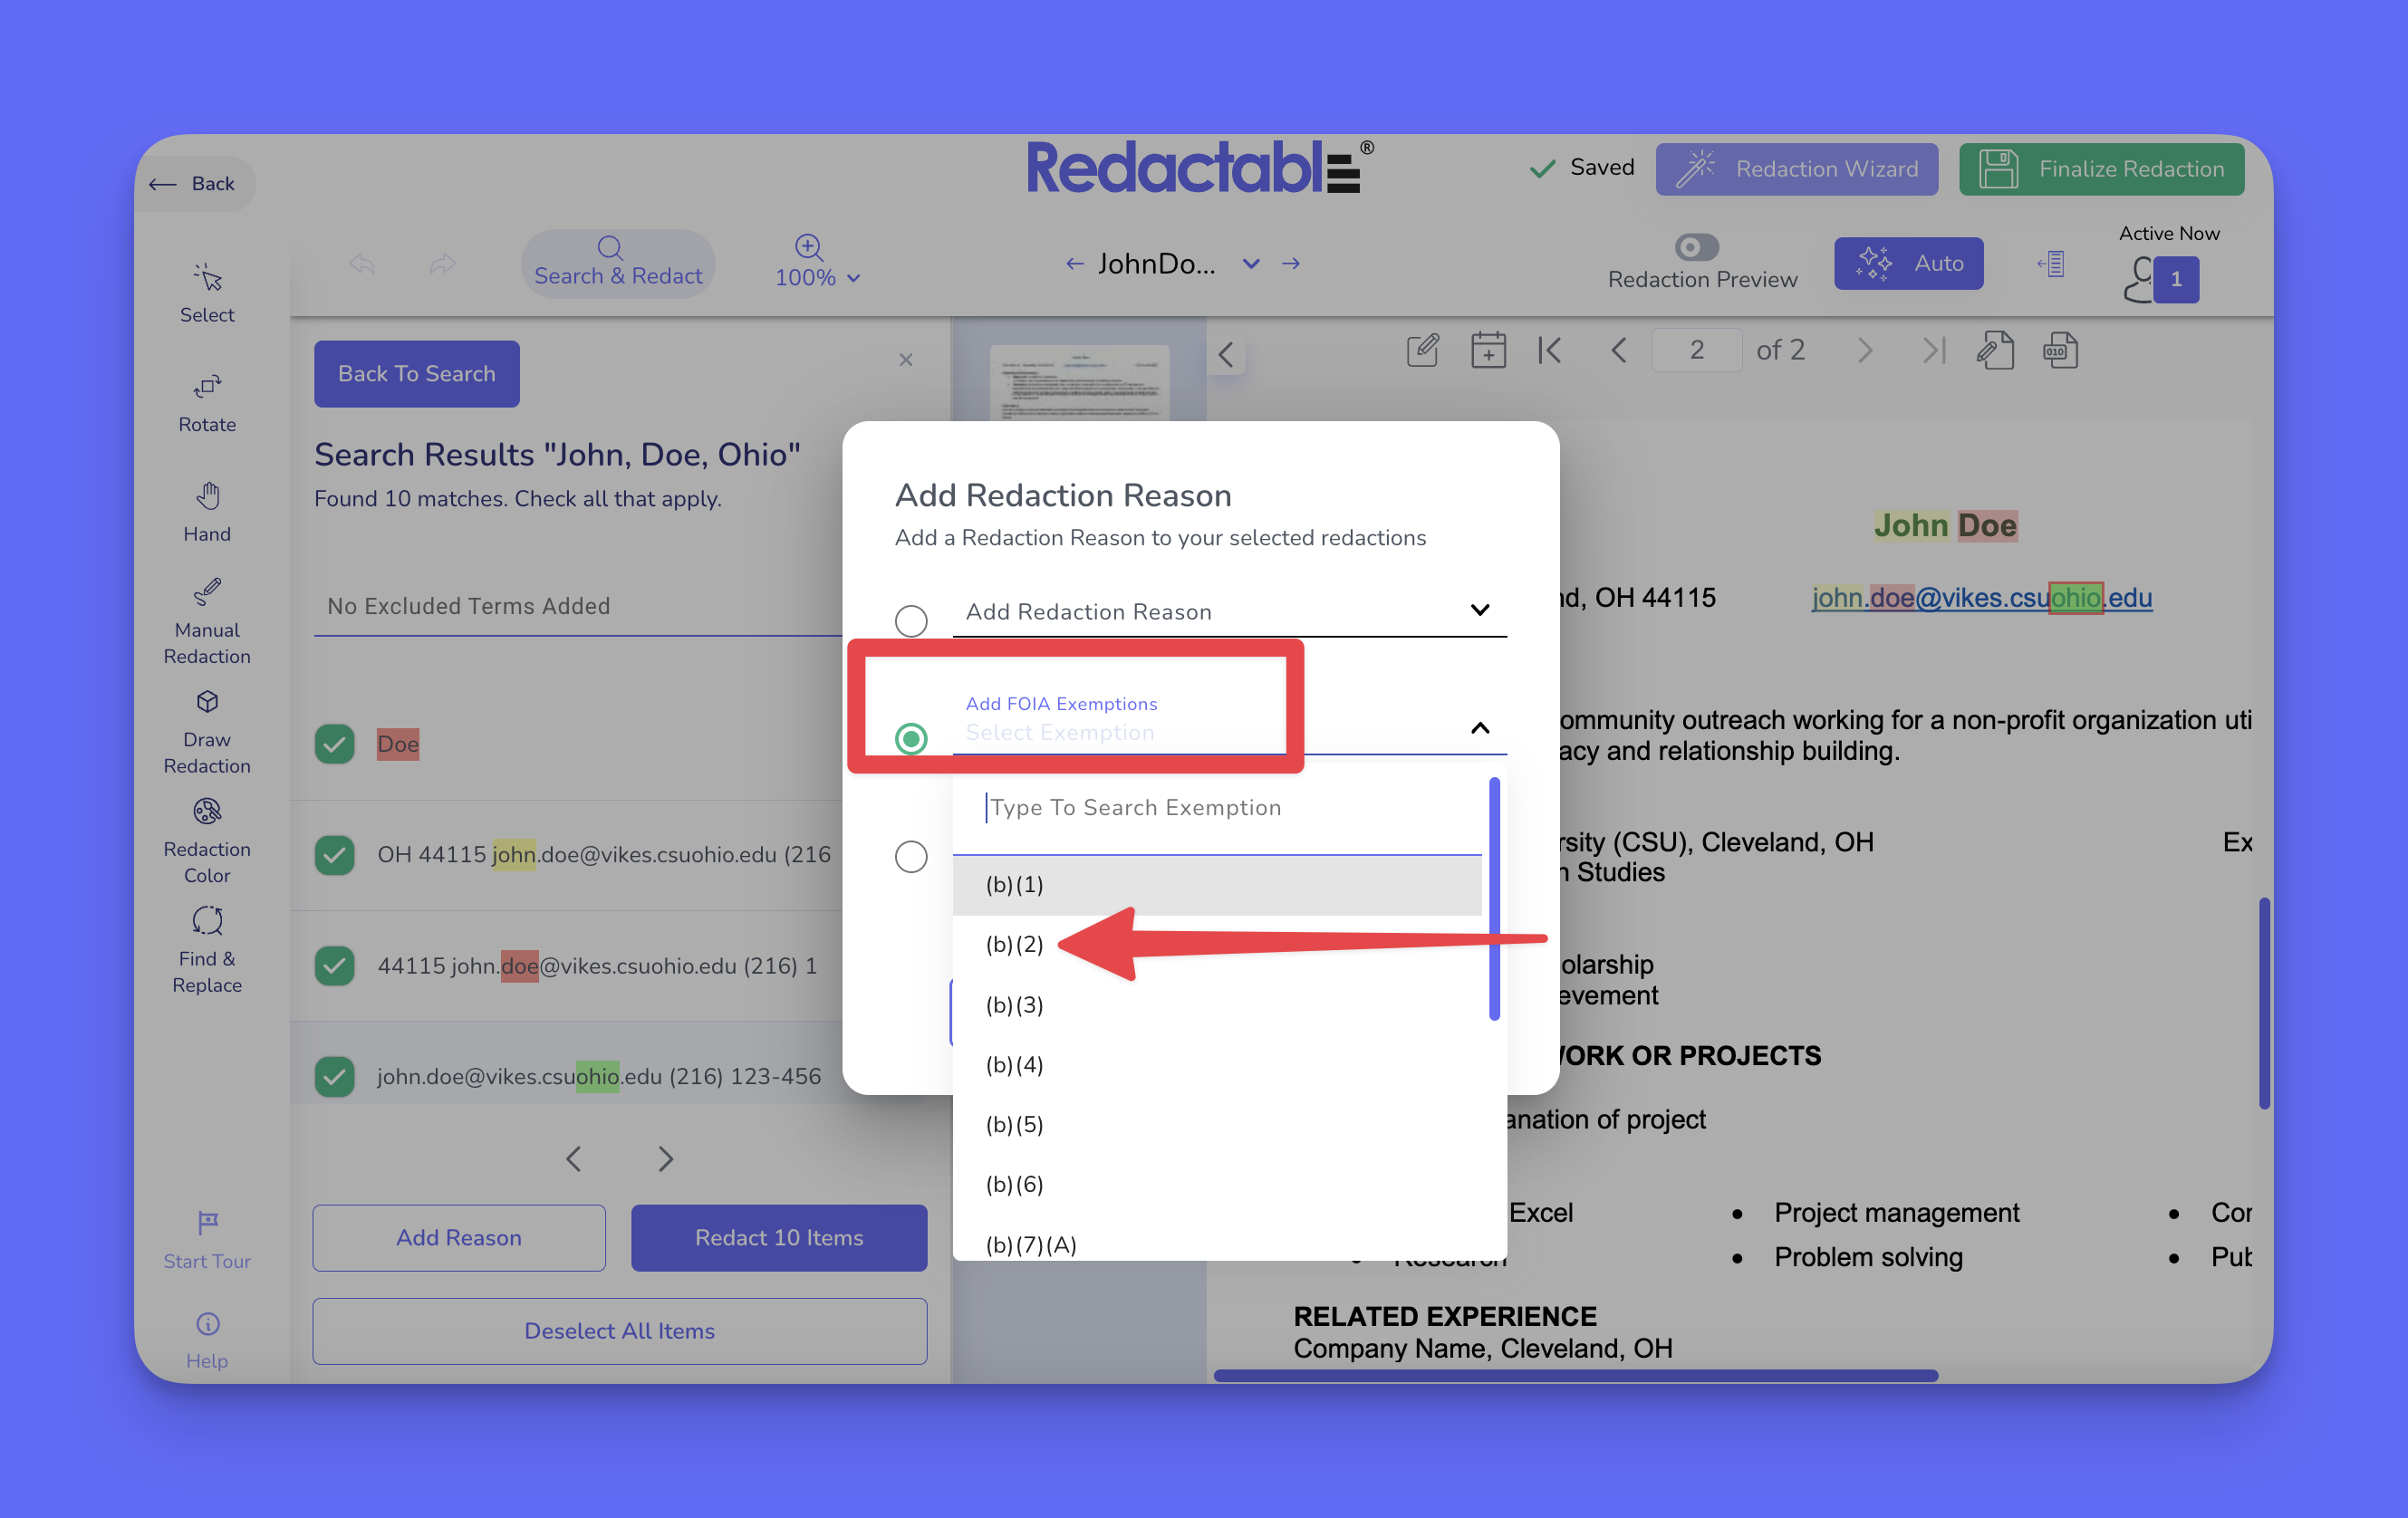
26. To apply the selected FOIA exemption, click on the “Add Reason” button.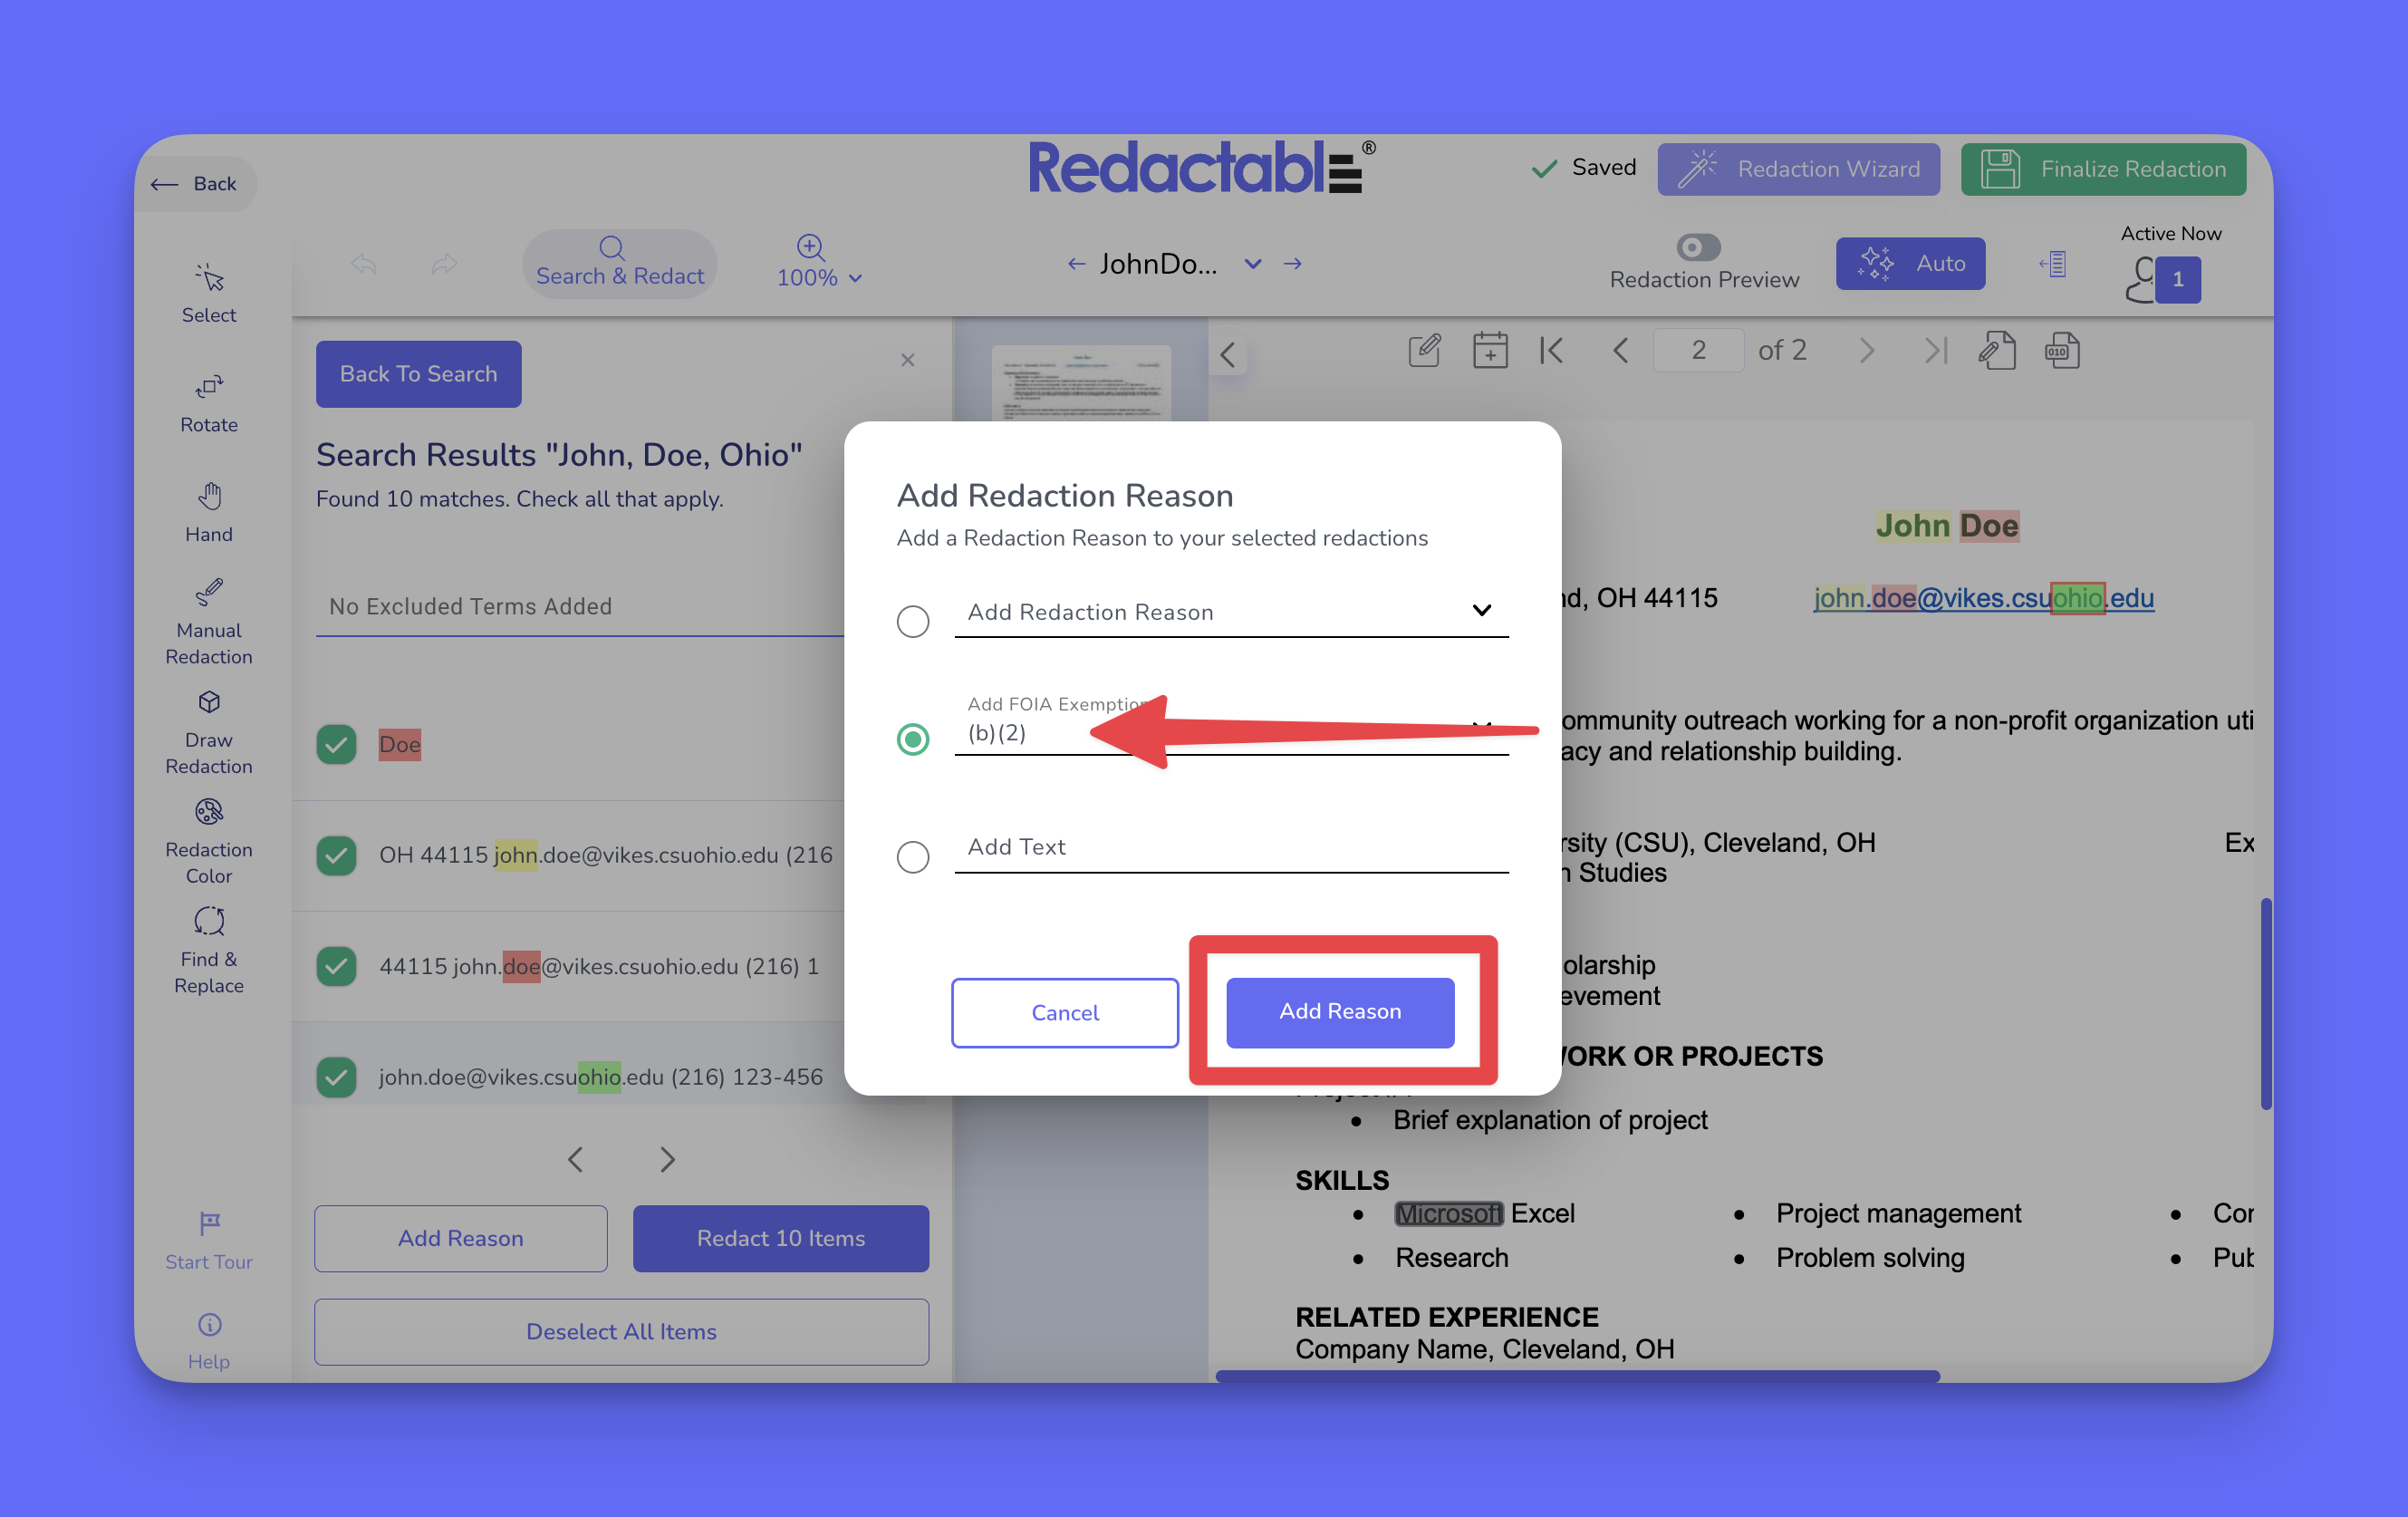
27. The selected reason, exemption, or text will be applied to the chosen redactions.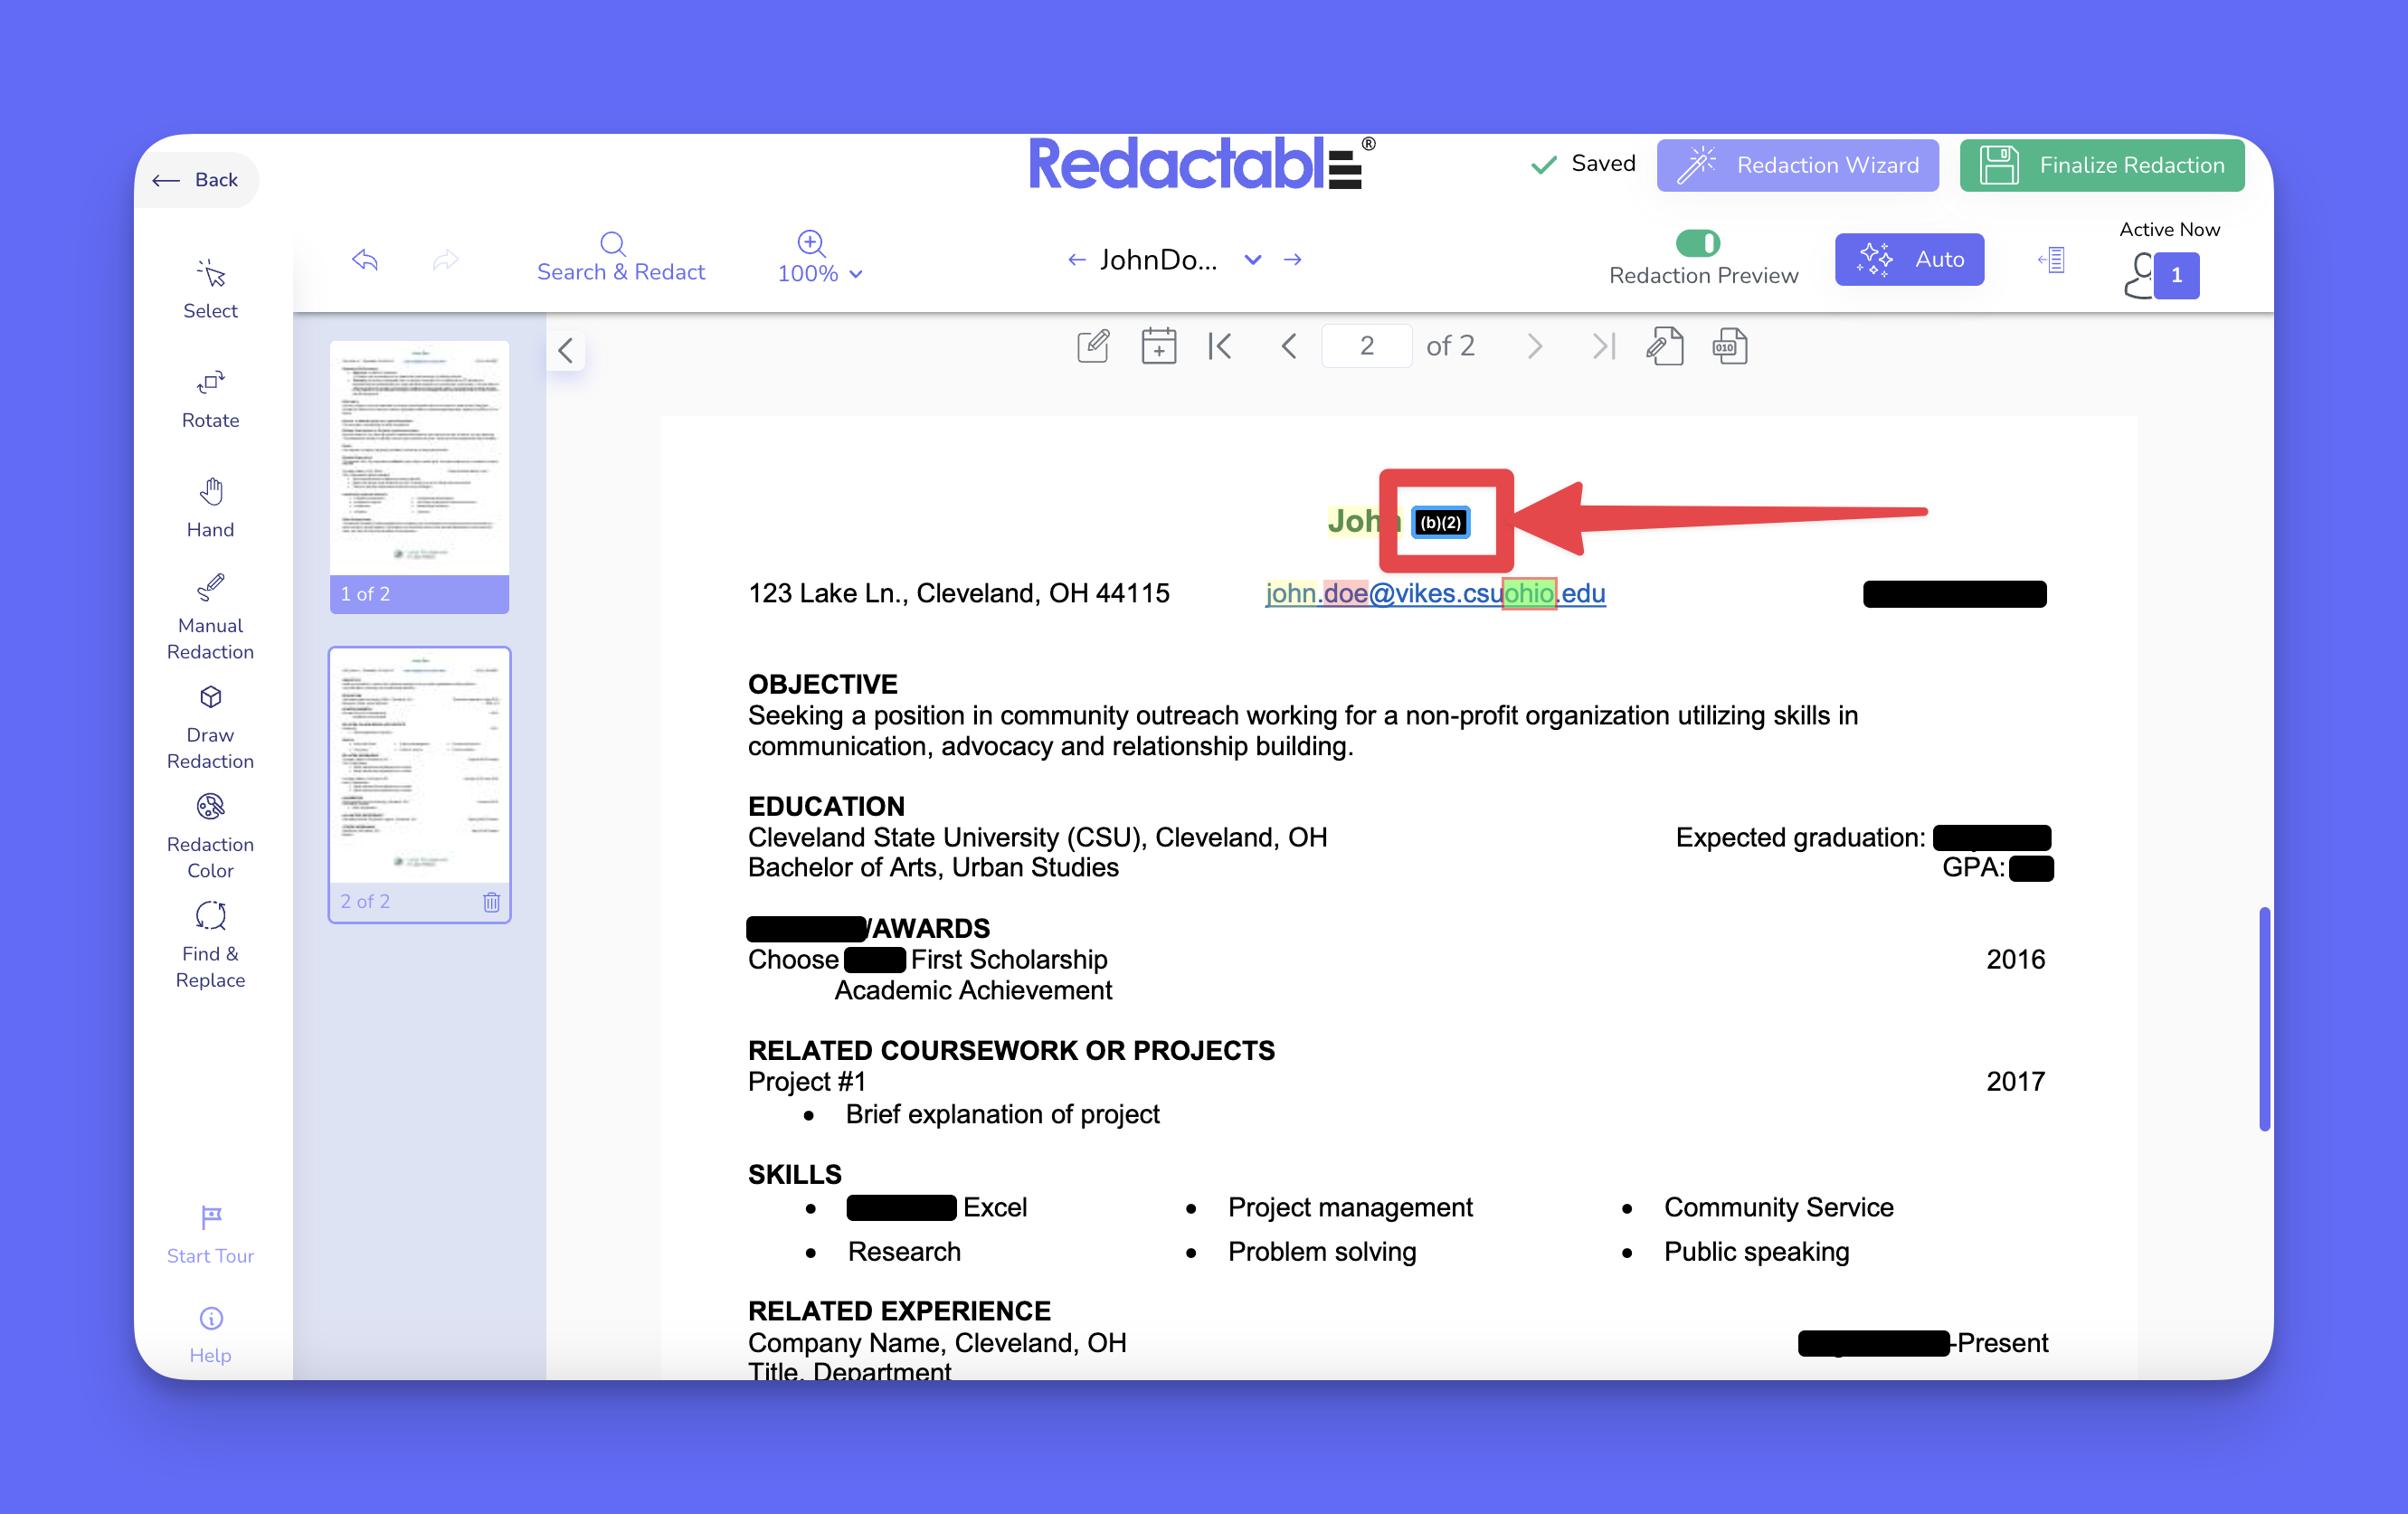
28. Once a reason has been applied, if you click on the chosen redaction, a three-dot menu will appear.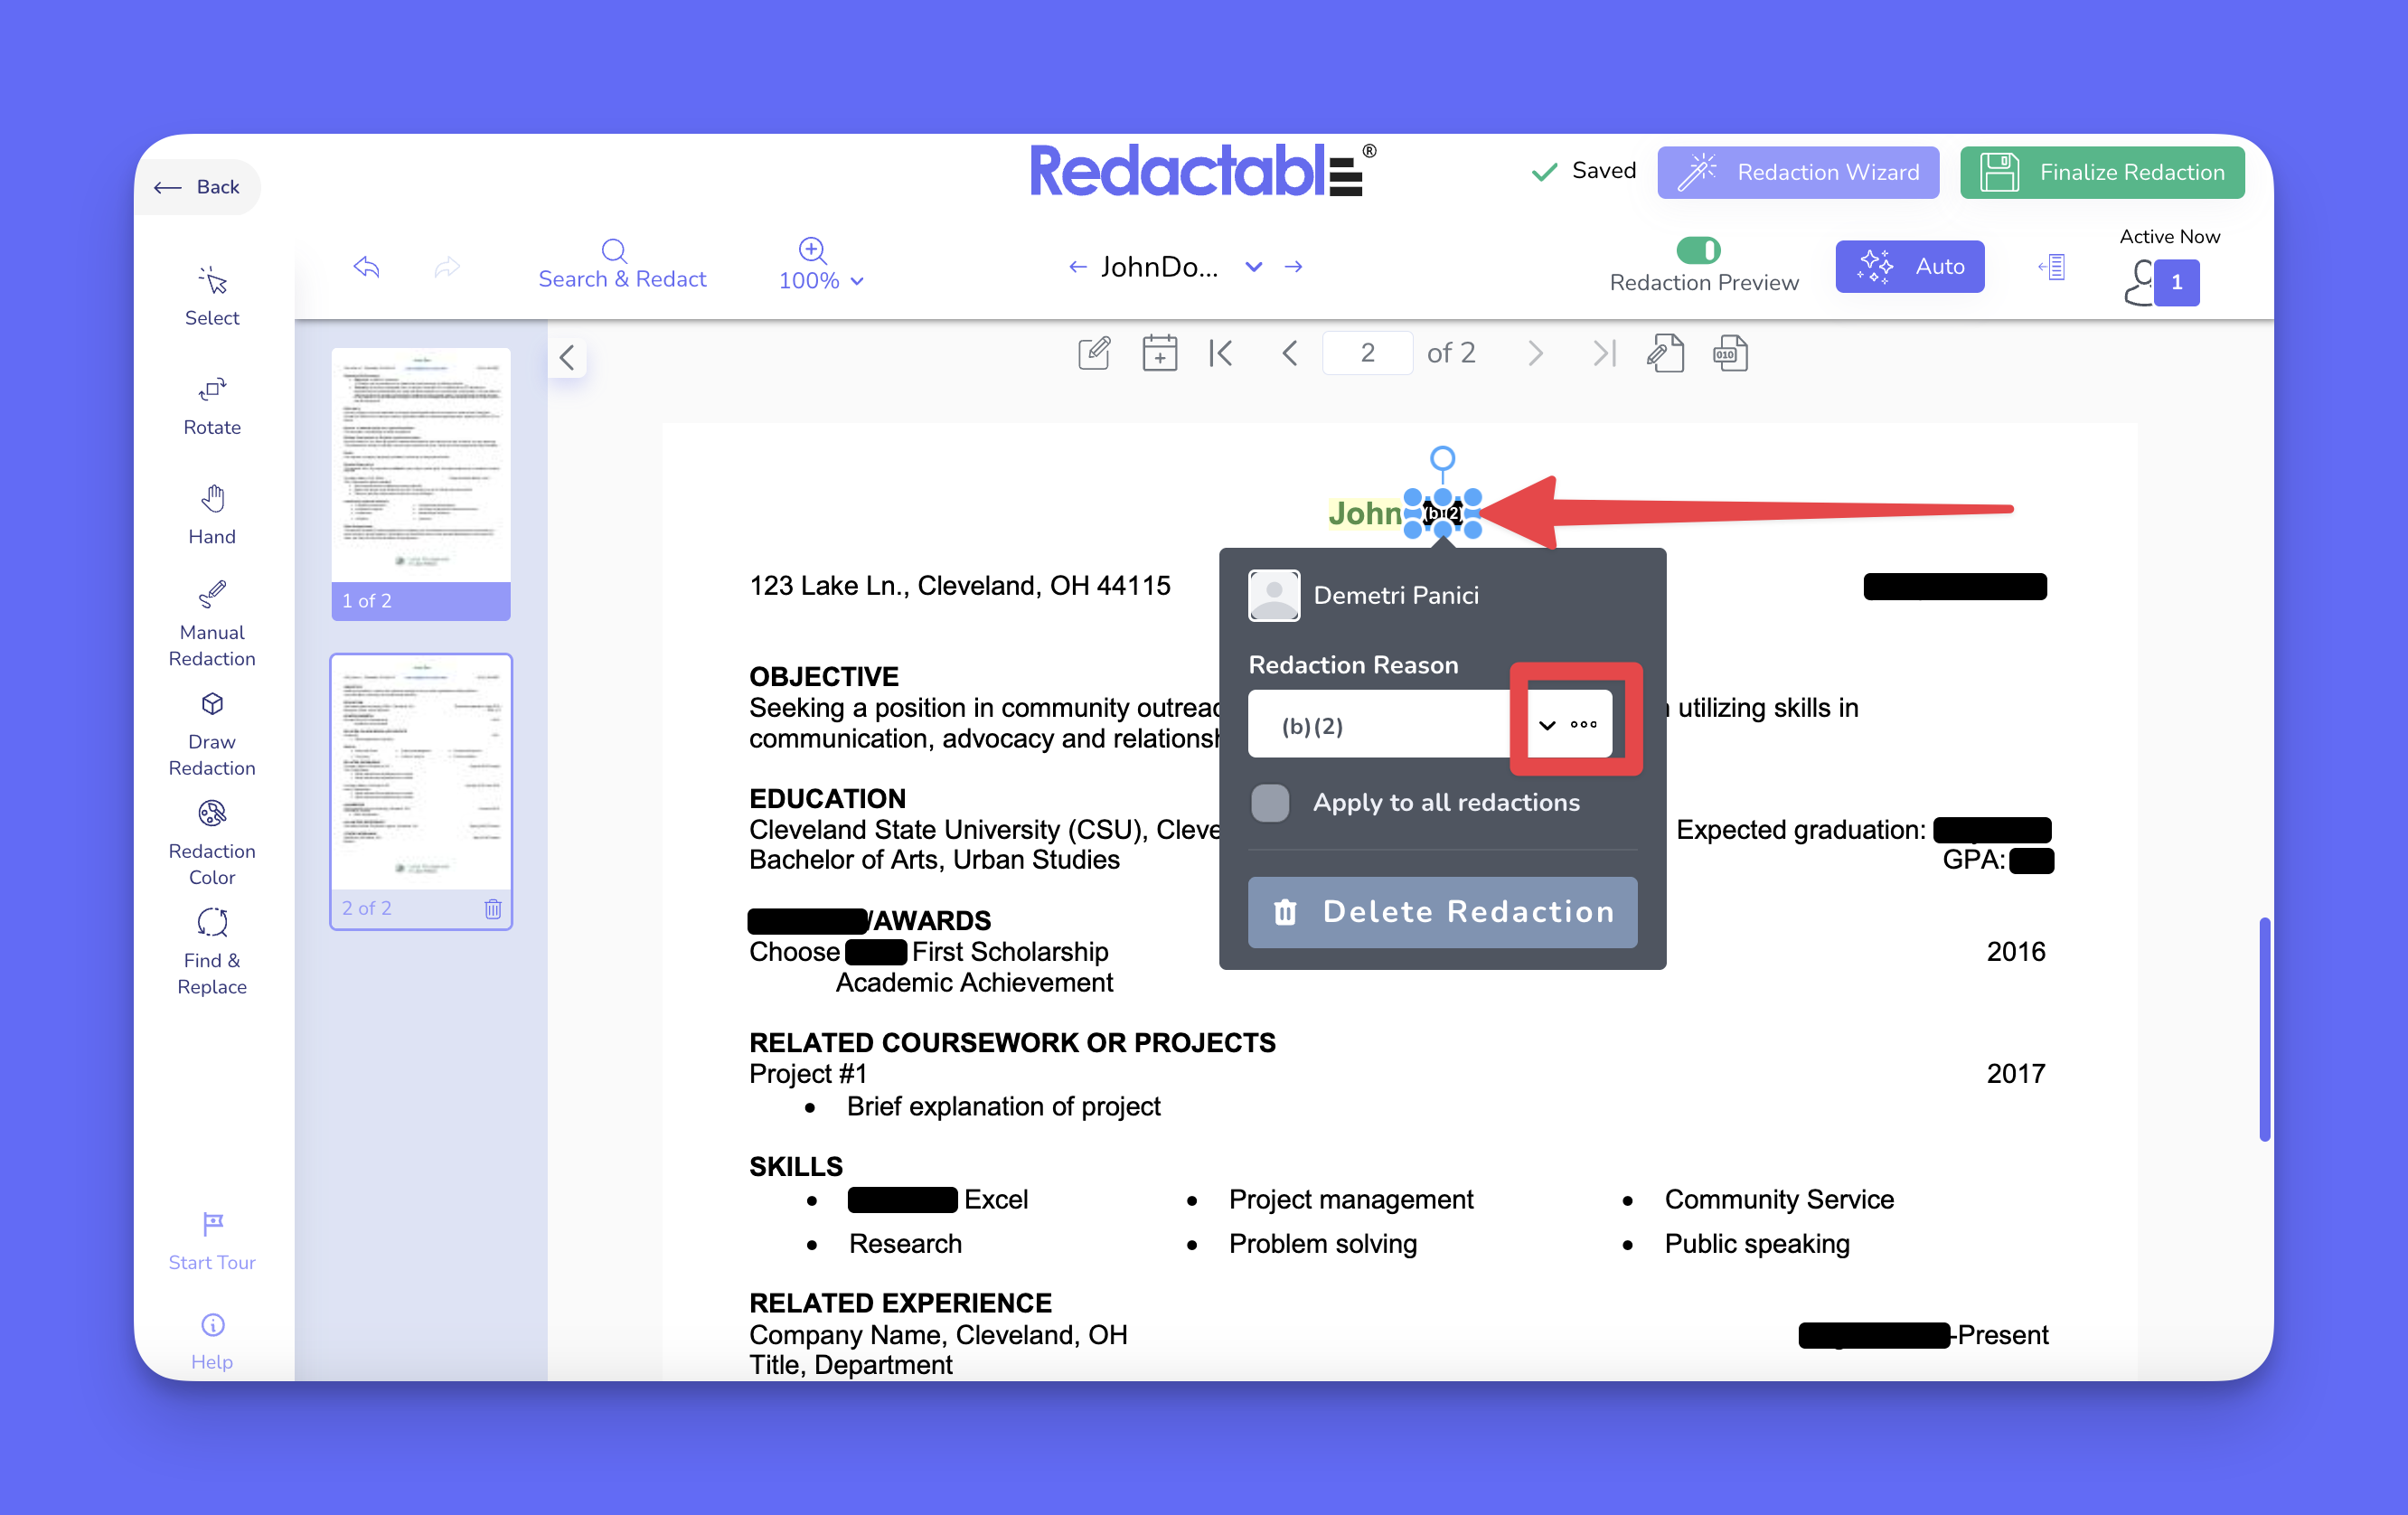
29. The three-dot menu includes the option "Delete This Reason Only" to remove the reason from the selected redaction, and the option "Delete Reason From All" to remove the applied reason across all redactions in the document.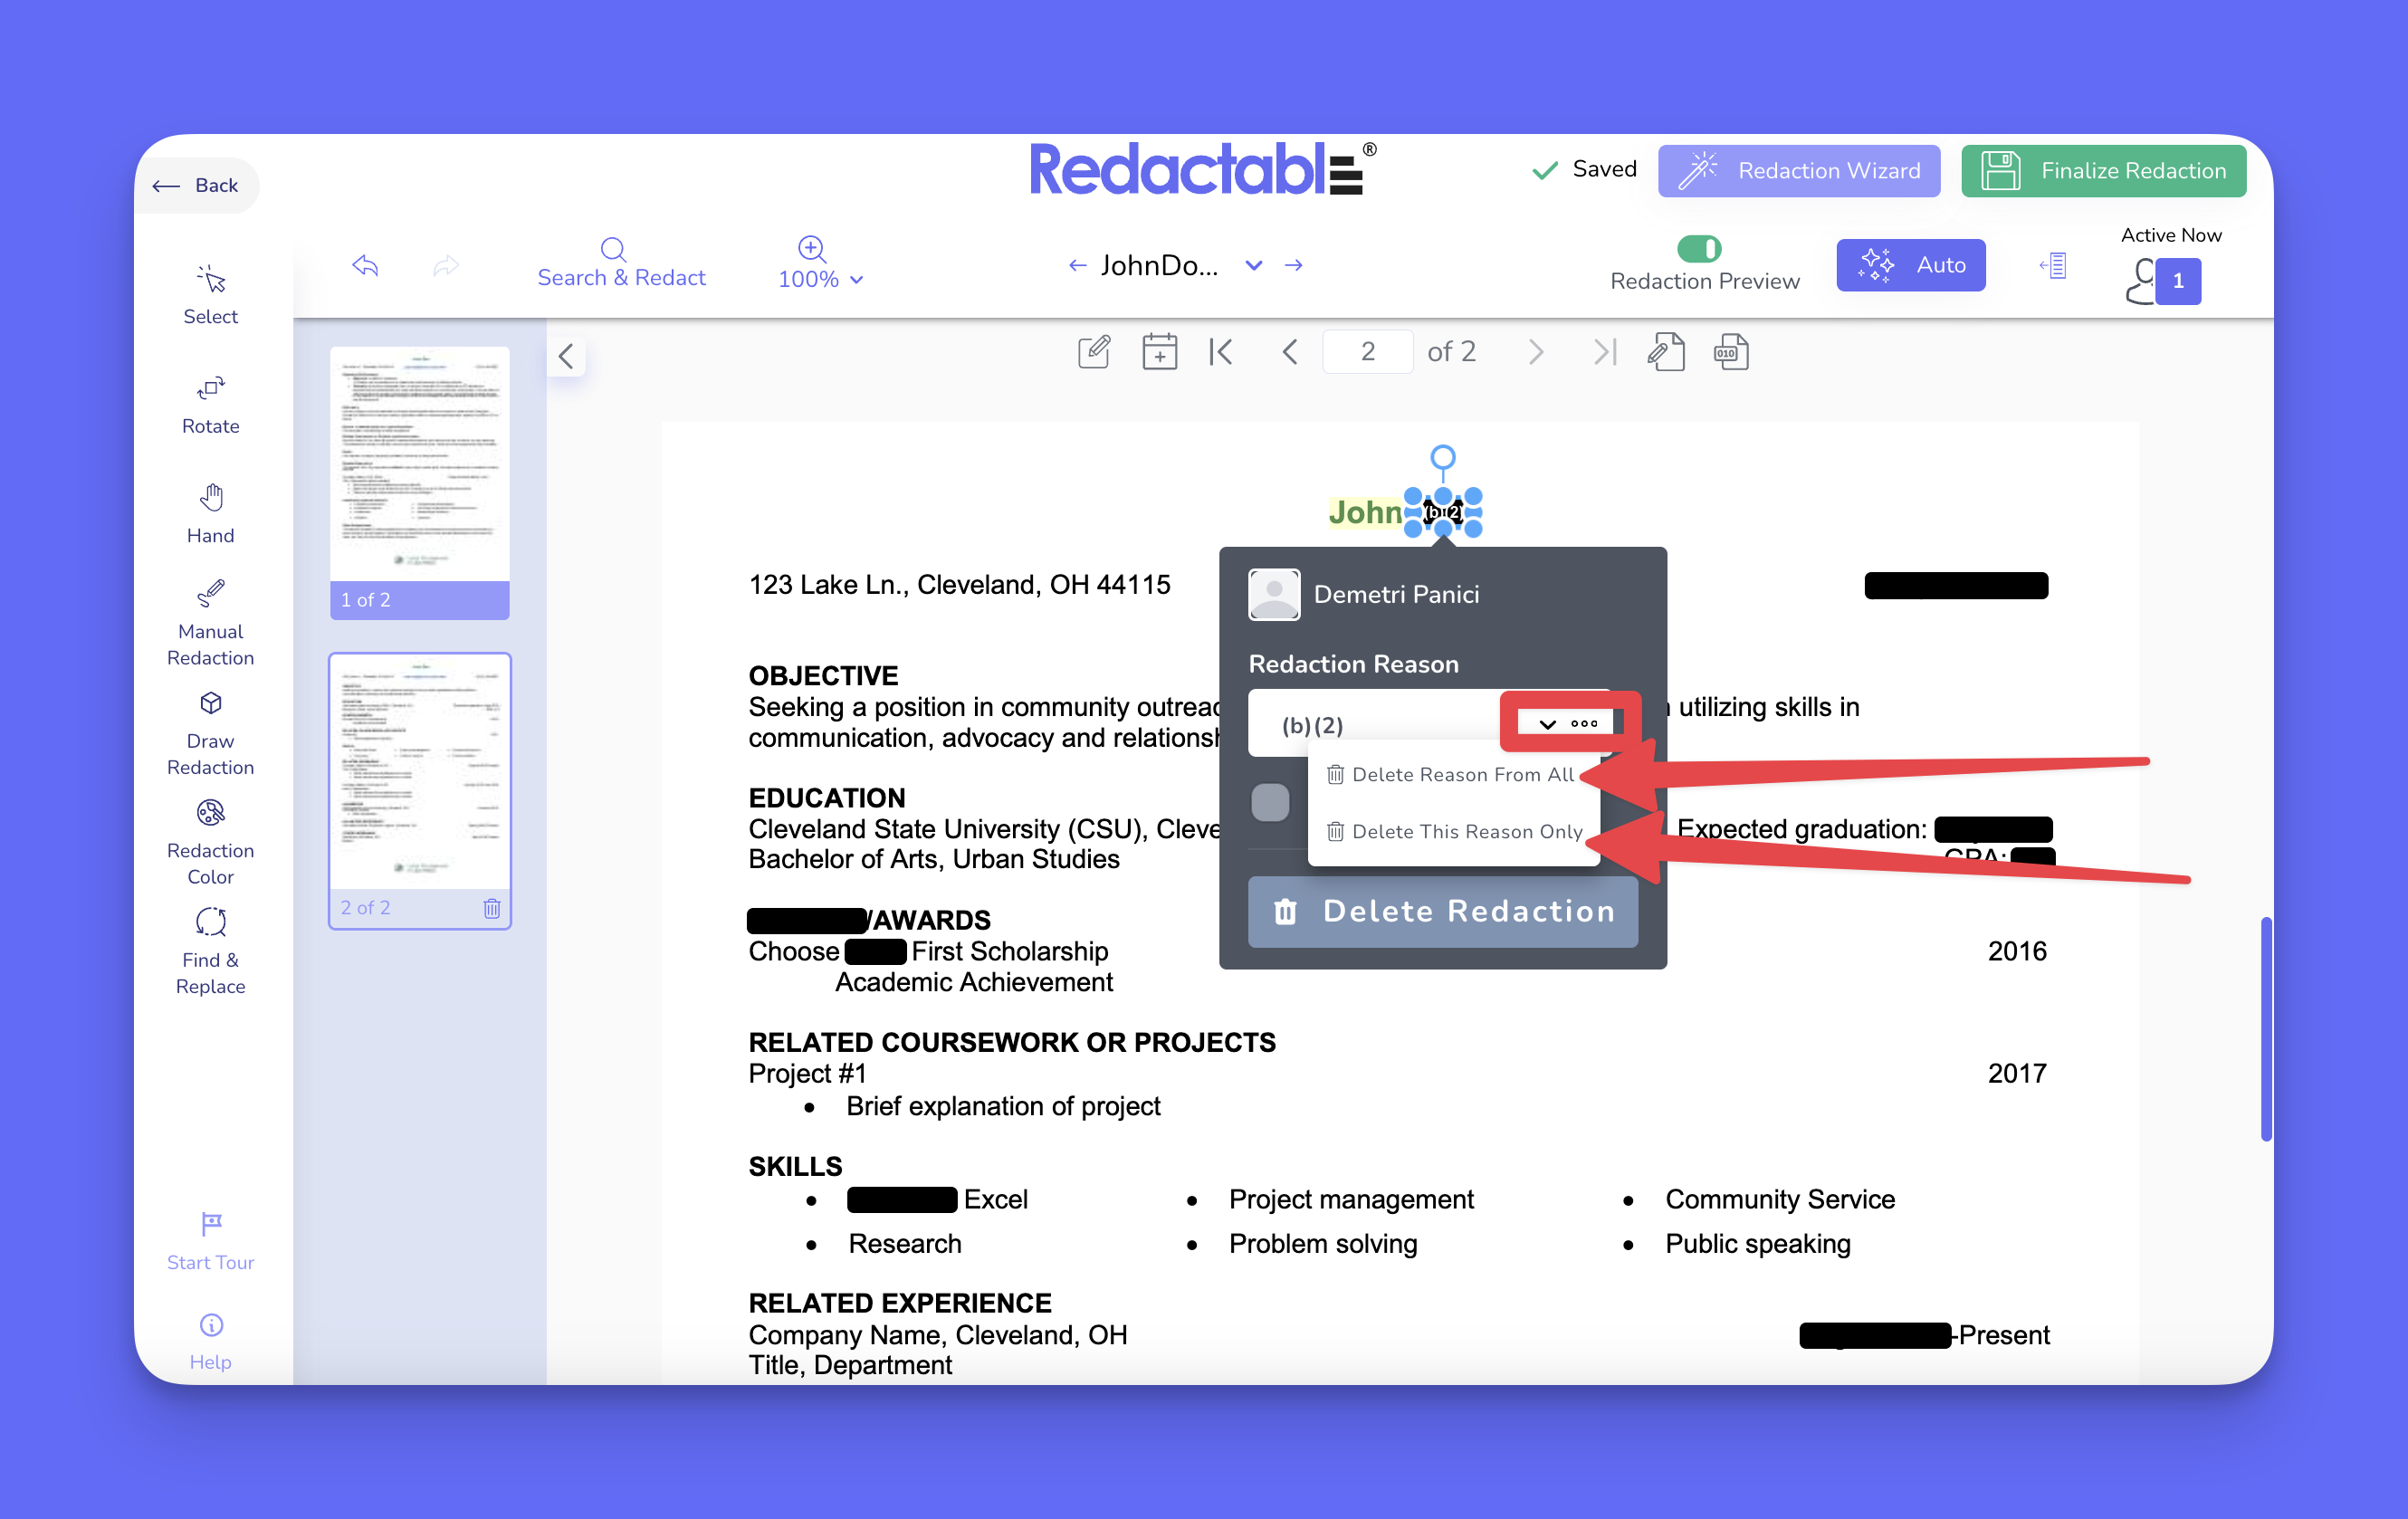
Removing or deleting redactions
30. To remove the item from suggestions, click on a highlighted term and select the “Remove” option. Removed results will not reappear unless Auto Redaction is rerun or refreshed.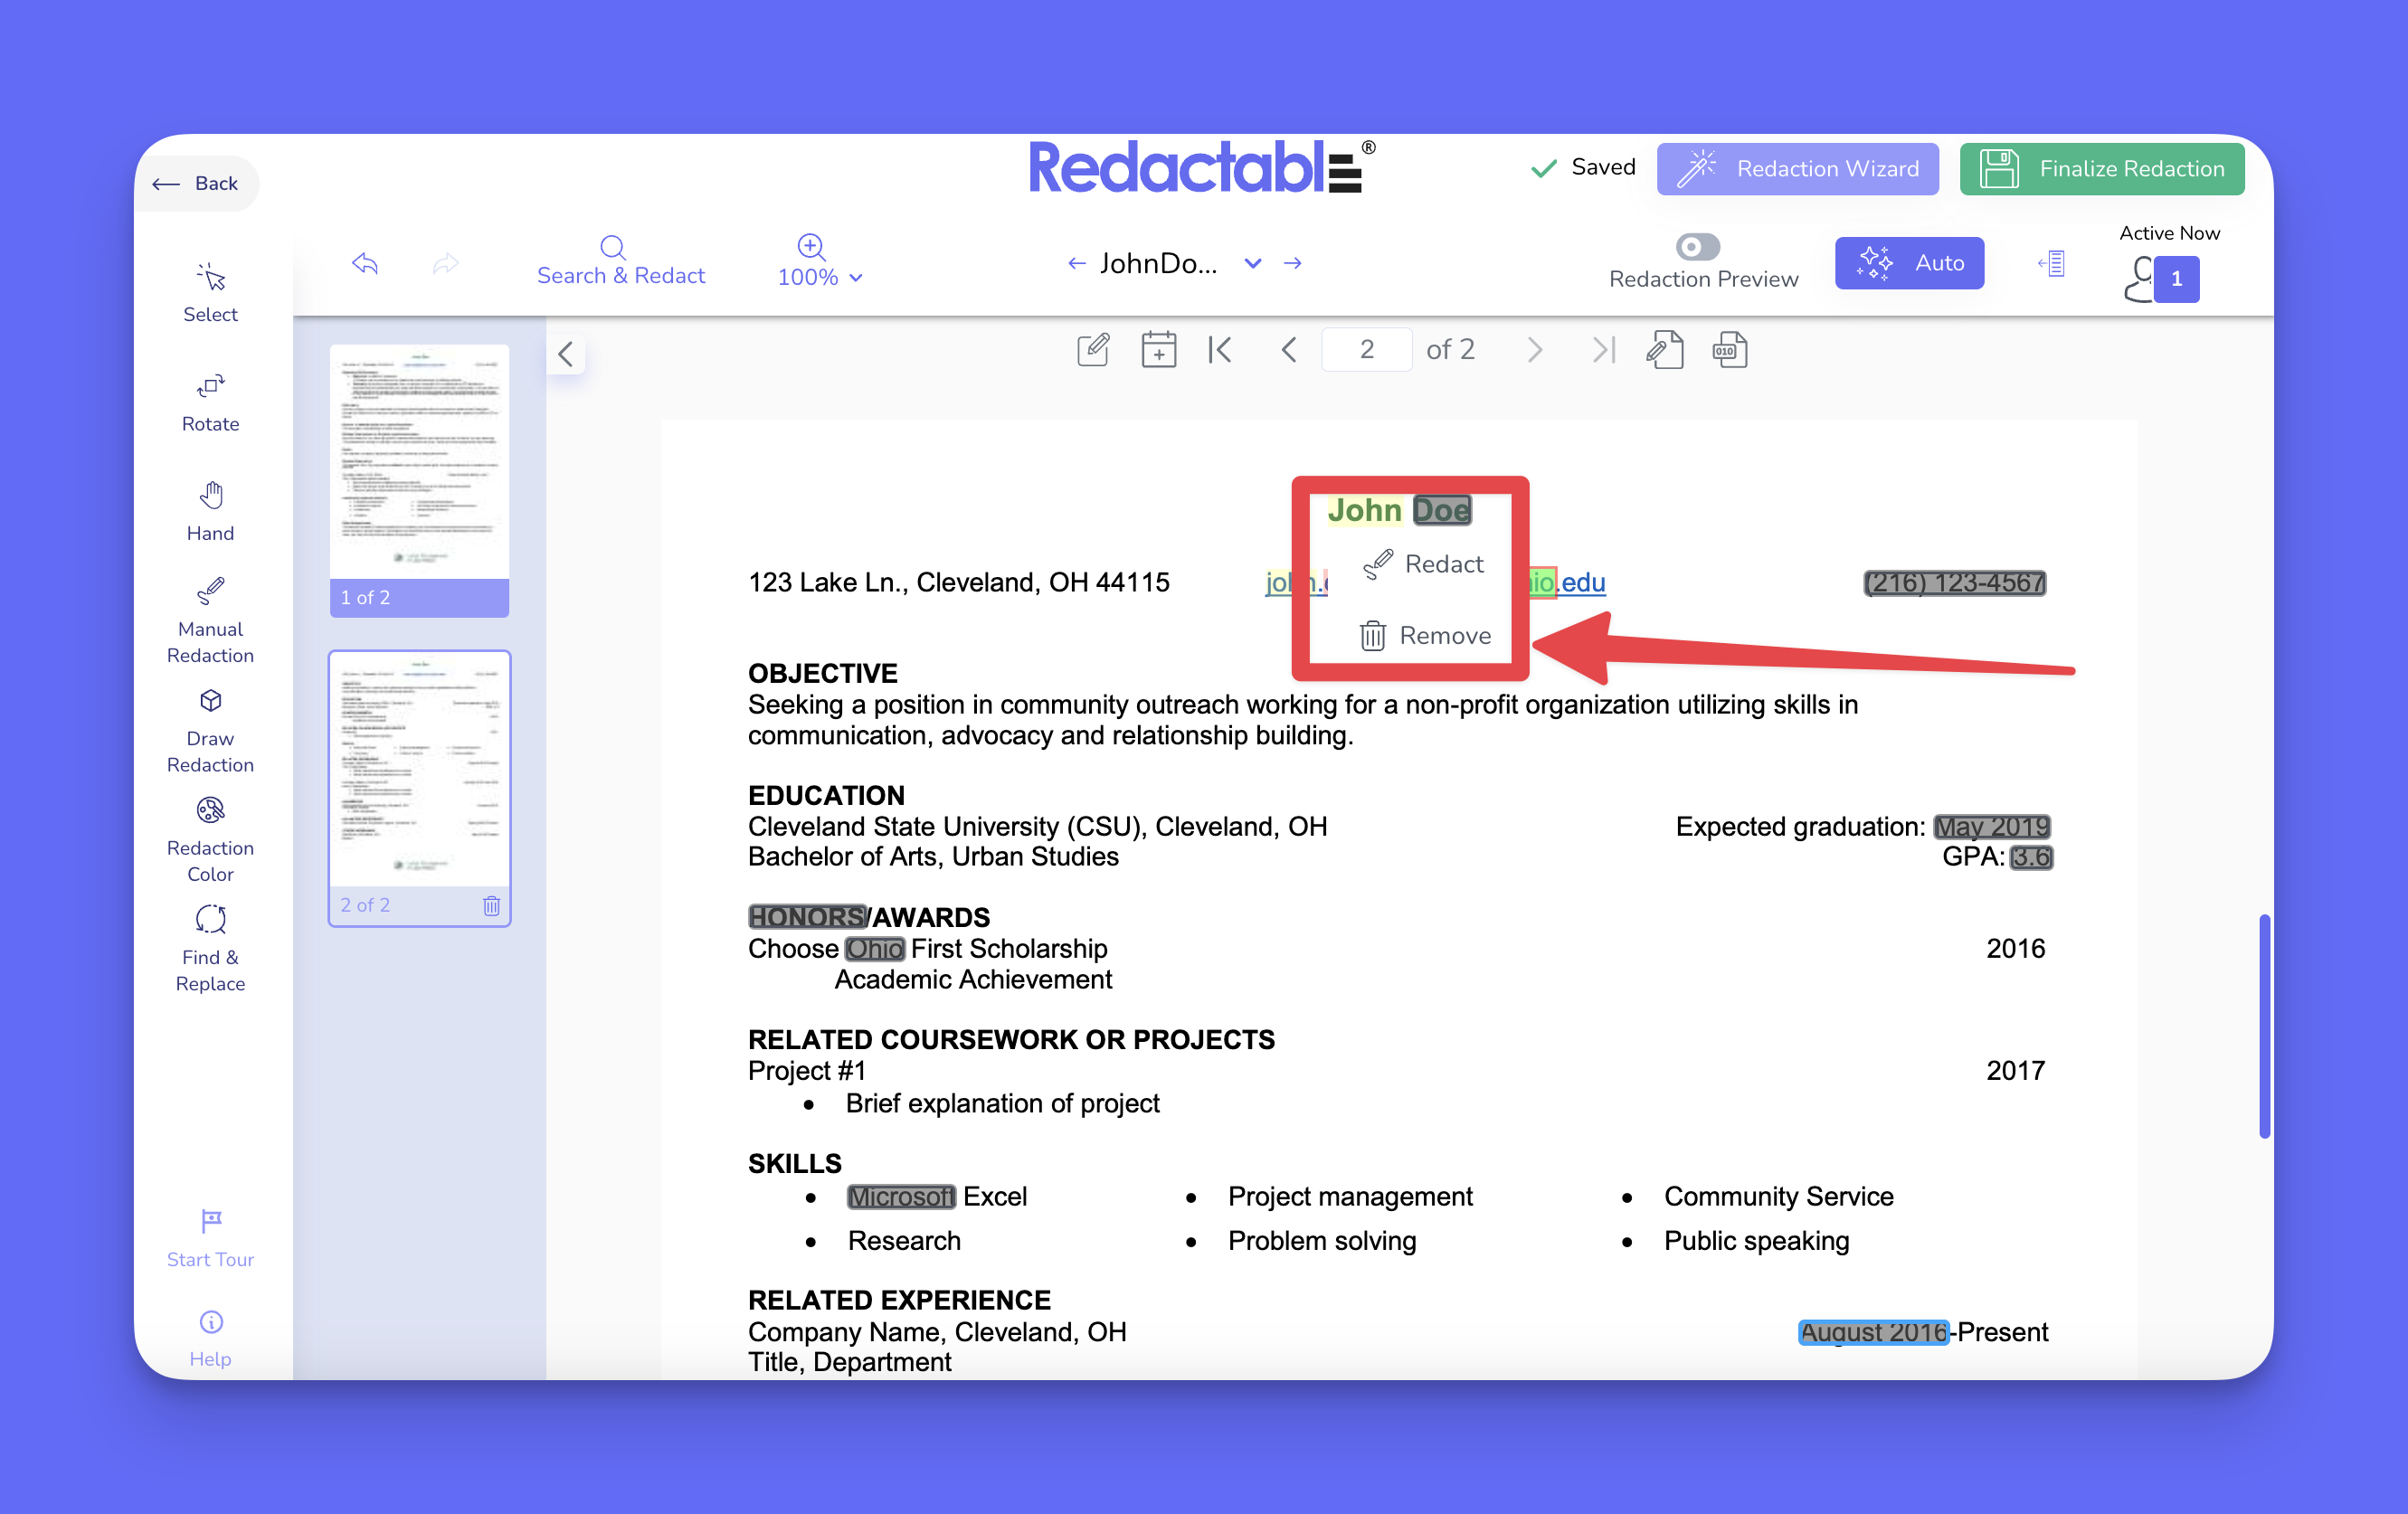
31. To delete a redaction, click on the highlighted redaction in the document and select the “Delete Redaction” option.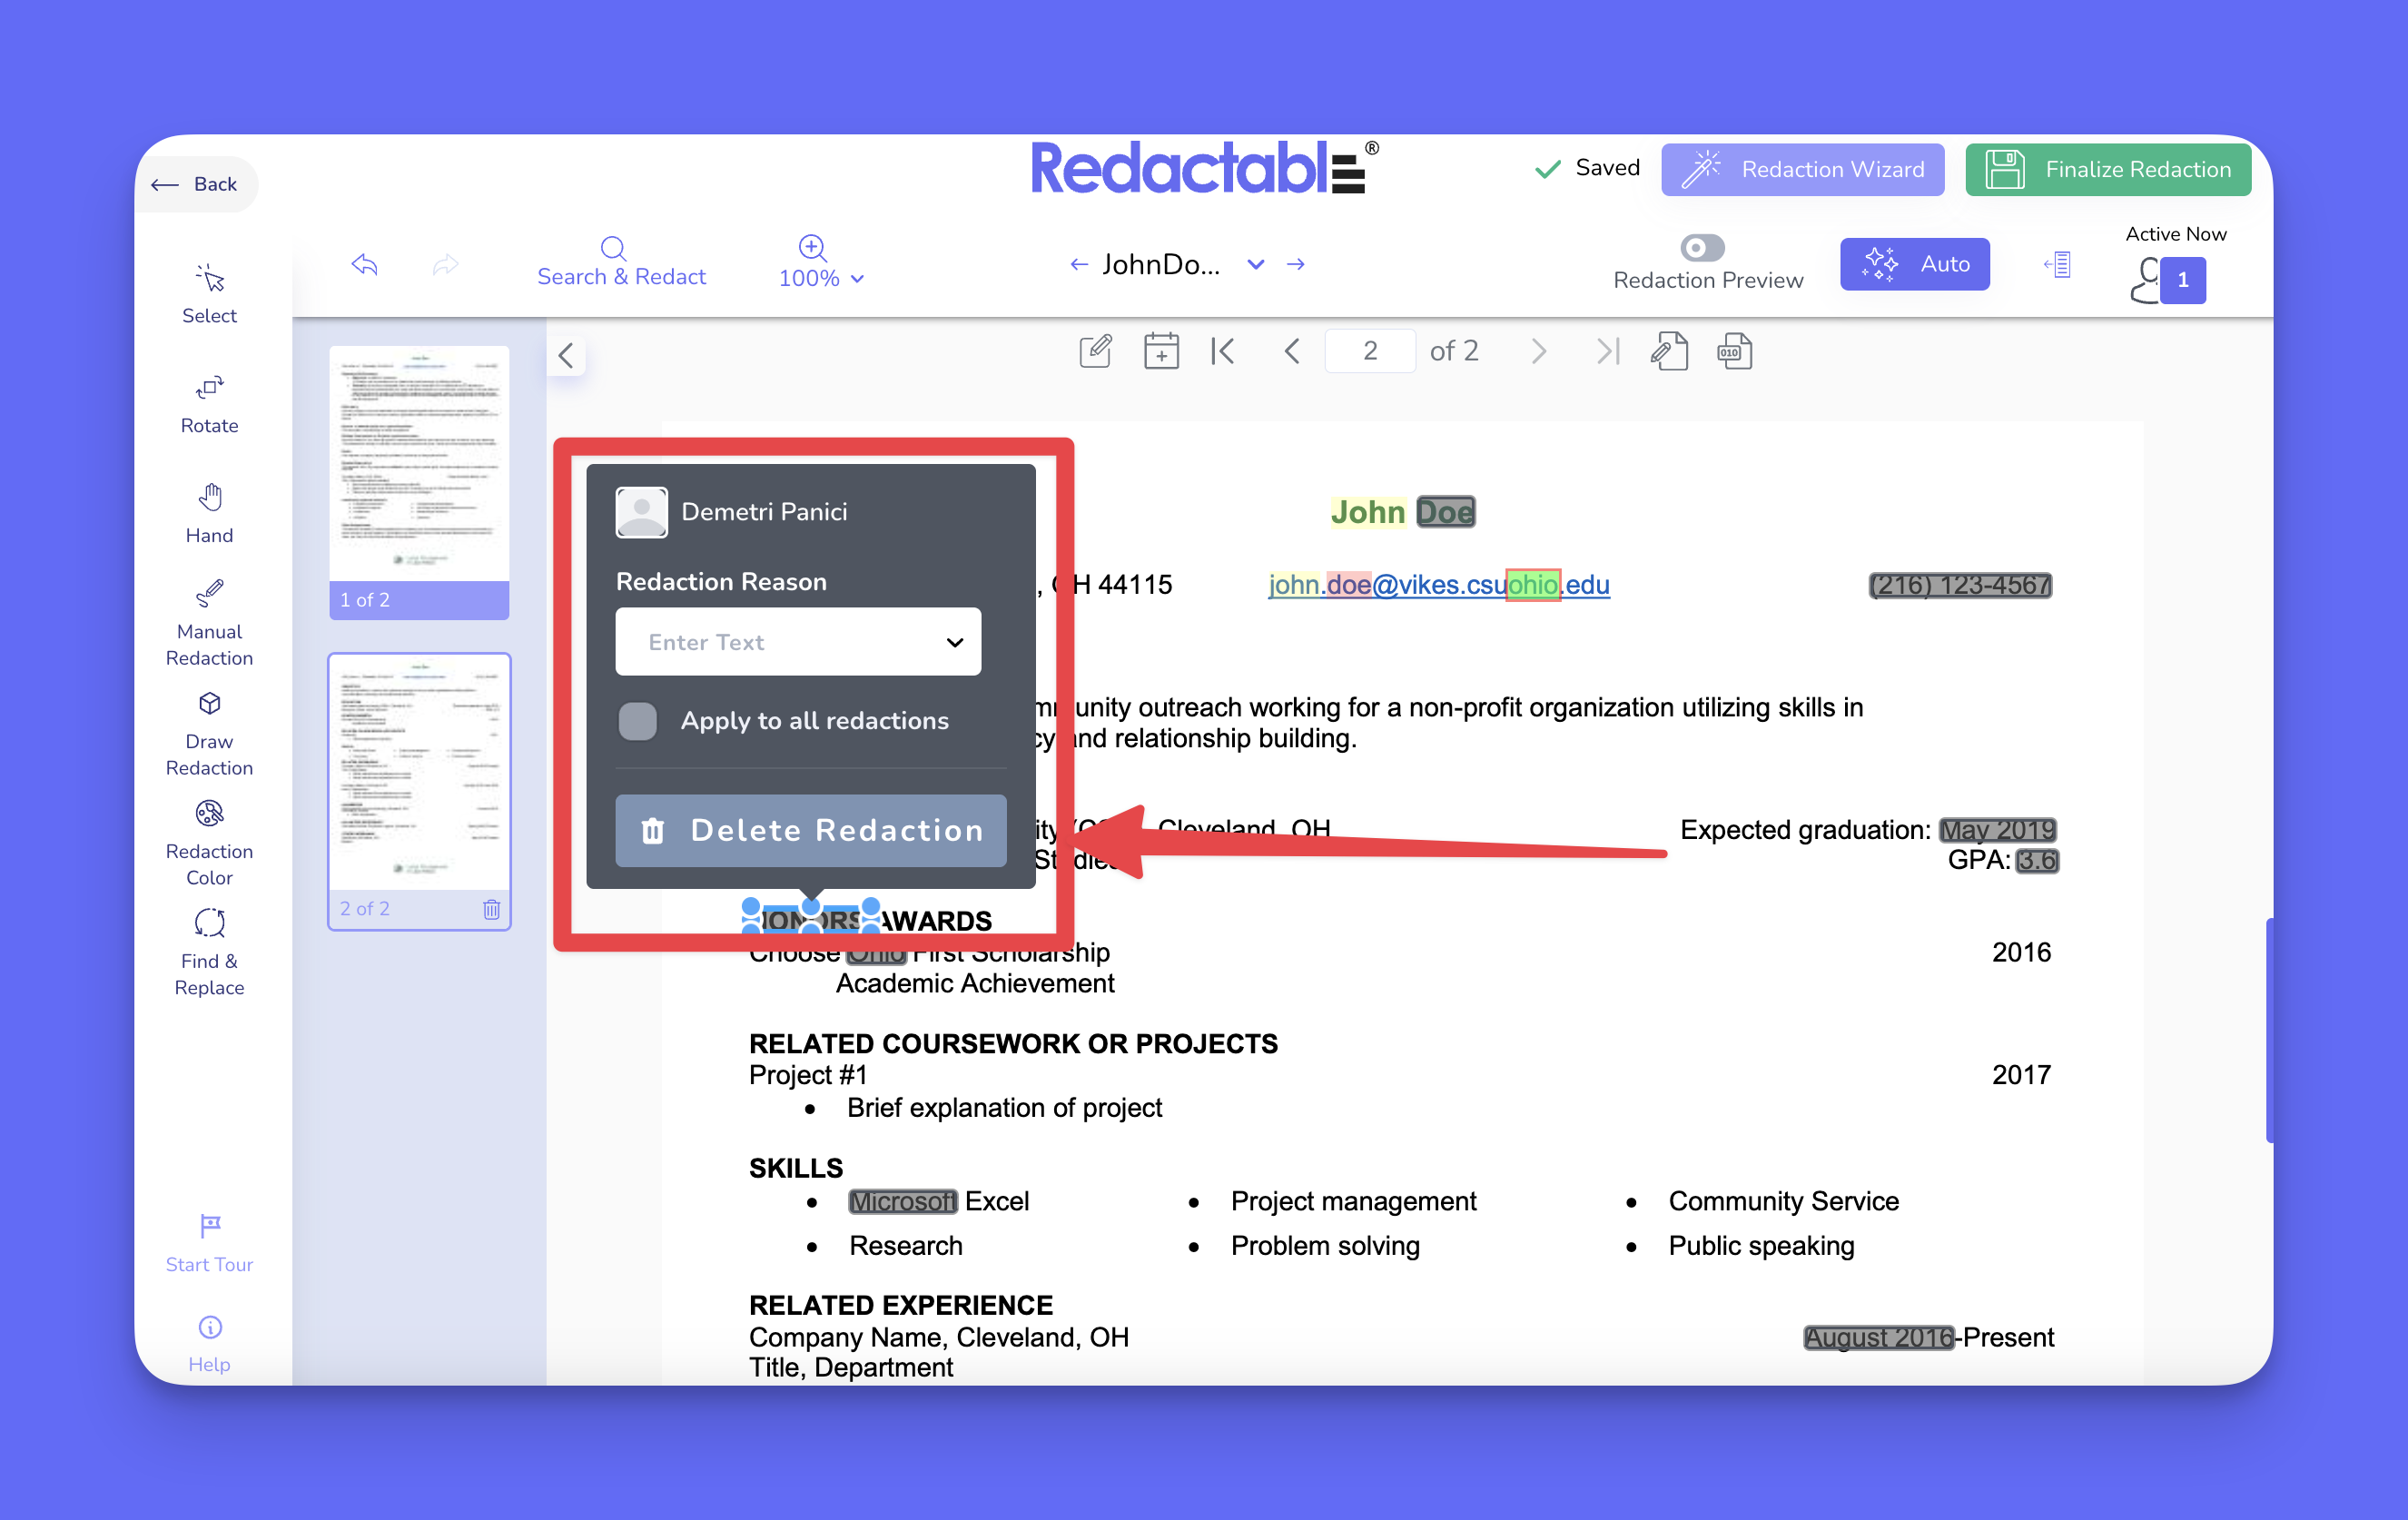
Finalizing your document
32. To complete the redaction process, review all applied redactions, and click on “Finalize Redaction” to permanently apply changes.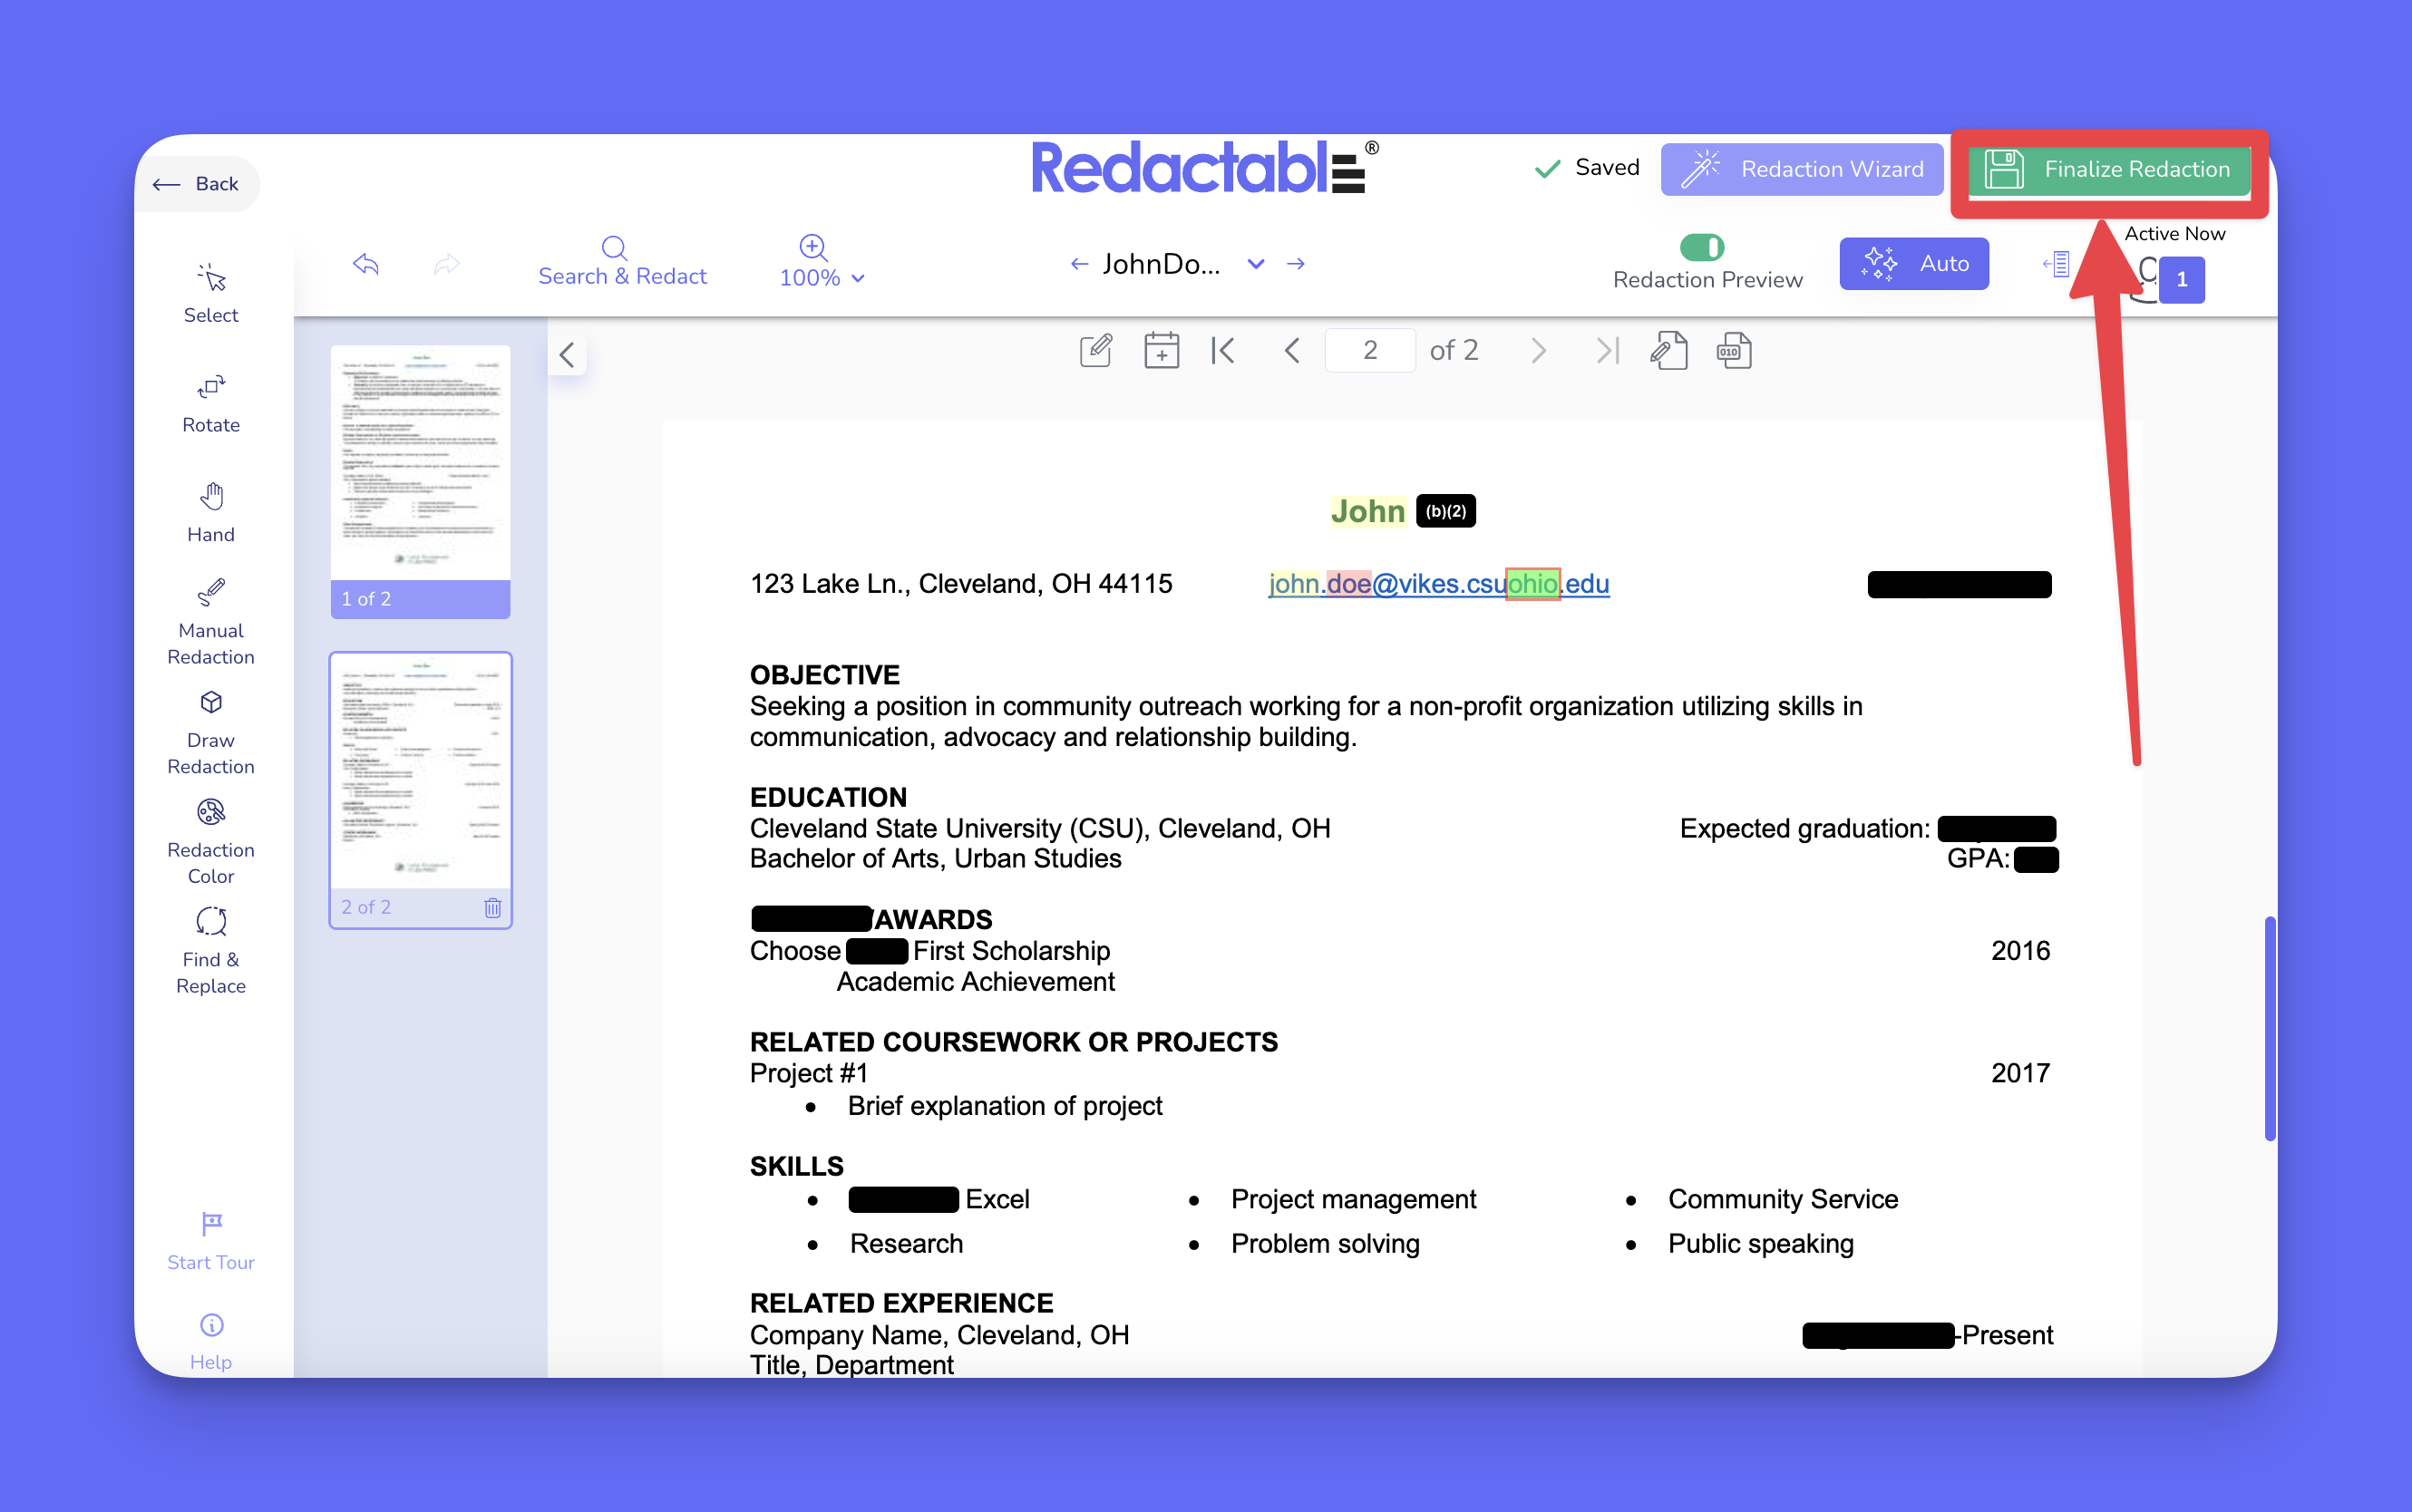
If you have additional questions or need help, please contact us at support@redactable.com.
Tip: For detailed instructions on how to use the Redaction Wizard, click here.
Was this article helpful?
That’s Great!
Thank you for your feedback
Sorry! We couldn't be helpful
Thank you for your feedback
Feedback sent
We appreciate your effort and will try to fix the article