Manual Redactions
The Manual Redaction feature allows users to directly highlight and redact specific text within a document. This gives you a fast, precise way to secure sensitive information when you want full control over exactly what gets hidden. It is ideal for handling documents that require selective text redactions like names, addresses, account numbers, and legal or financial details that require direct review before applying a redaction.
The feature is integrated directly into the document editor and supports quick adjustments or removal of redactions when needed.
Why It Matters
The Manual Redaction feature is designed to simplify selective text-based redaction workflows by using:
- Precise text selection: Directly highlight and redact specific text within the document.
- Flexible access points: Access the feature from both the Redaction Wizard and the editor toolbar.
- Controlled redaction workflows: Apply redactions only to the exact text selected by the user.
- Simplified document review: Redact sensitive content directly within the document without switching tools.
- Editable redactions: Remove or adjust redactions at any point before finalizing the document.
Using the Manual Redaction feature
Accessing the tool
1. From your Redactable dashboard, open your document.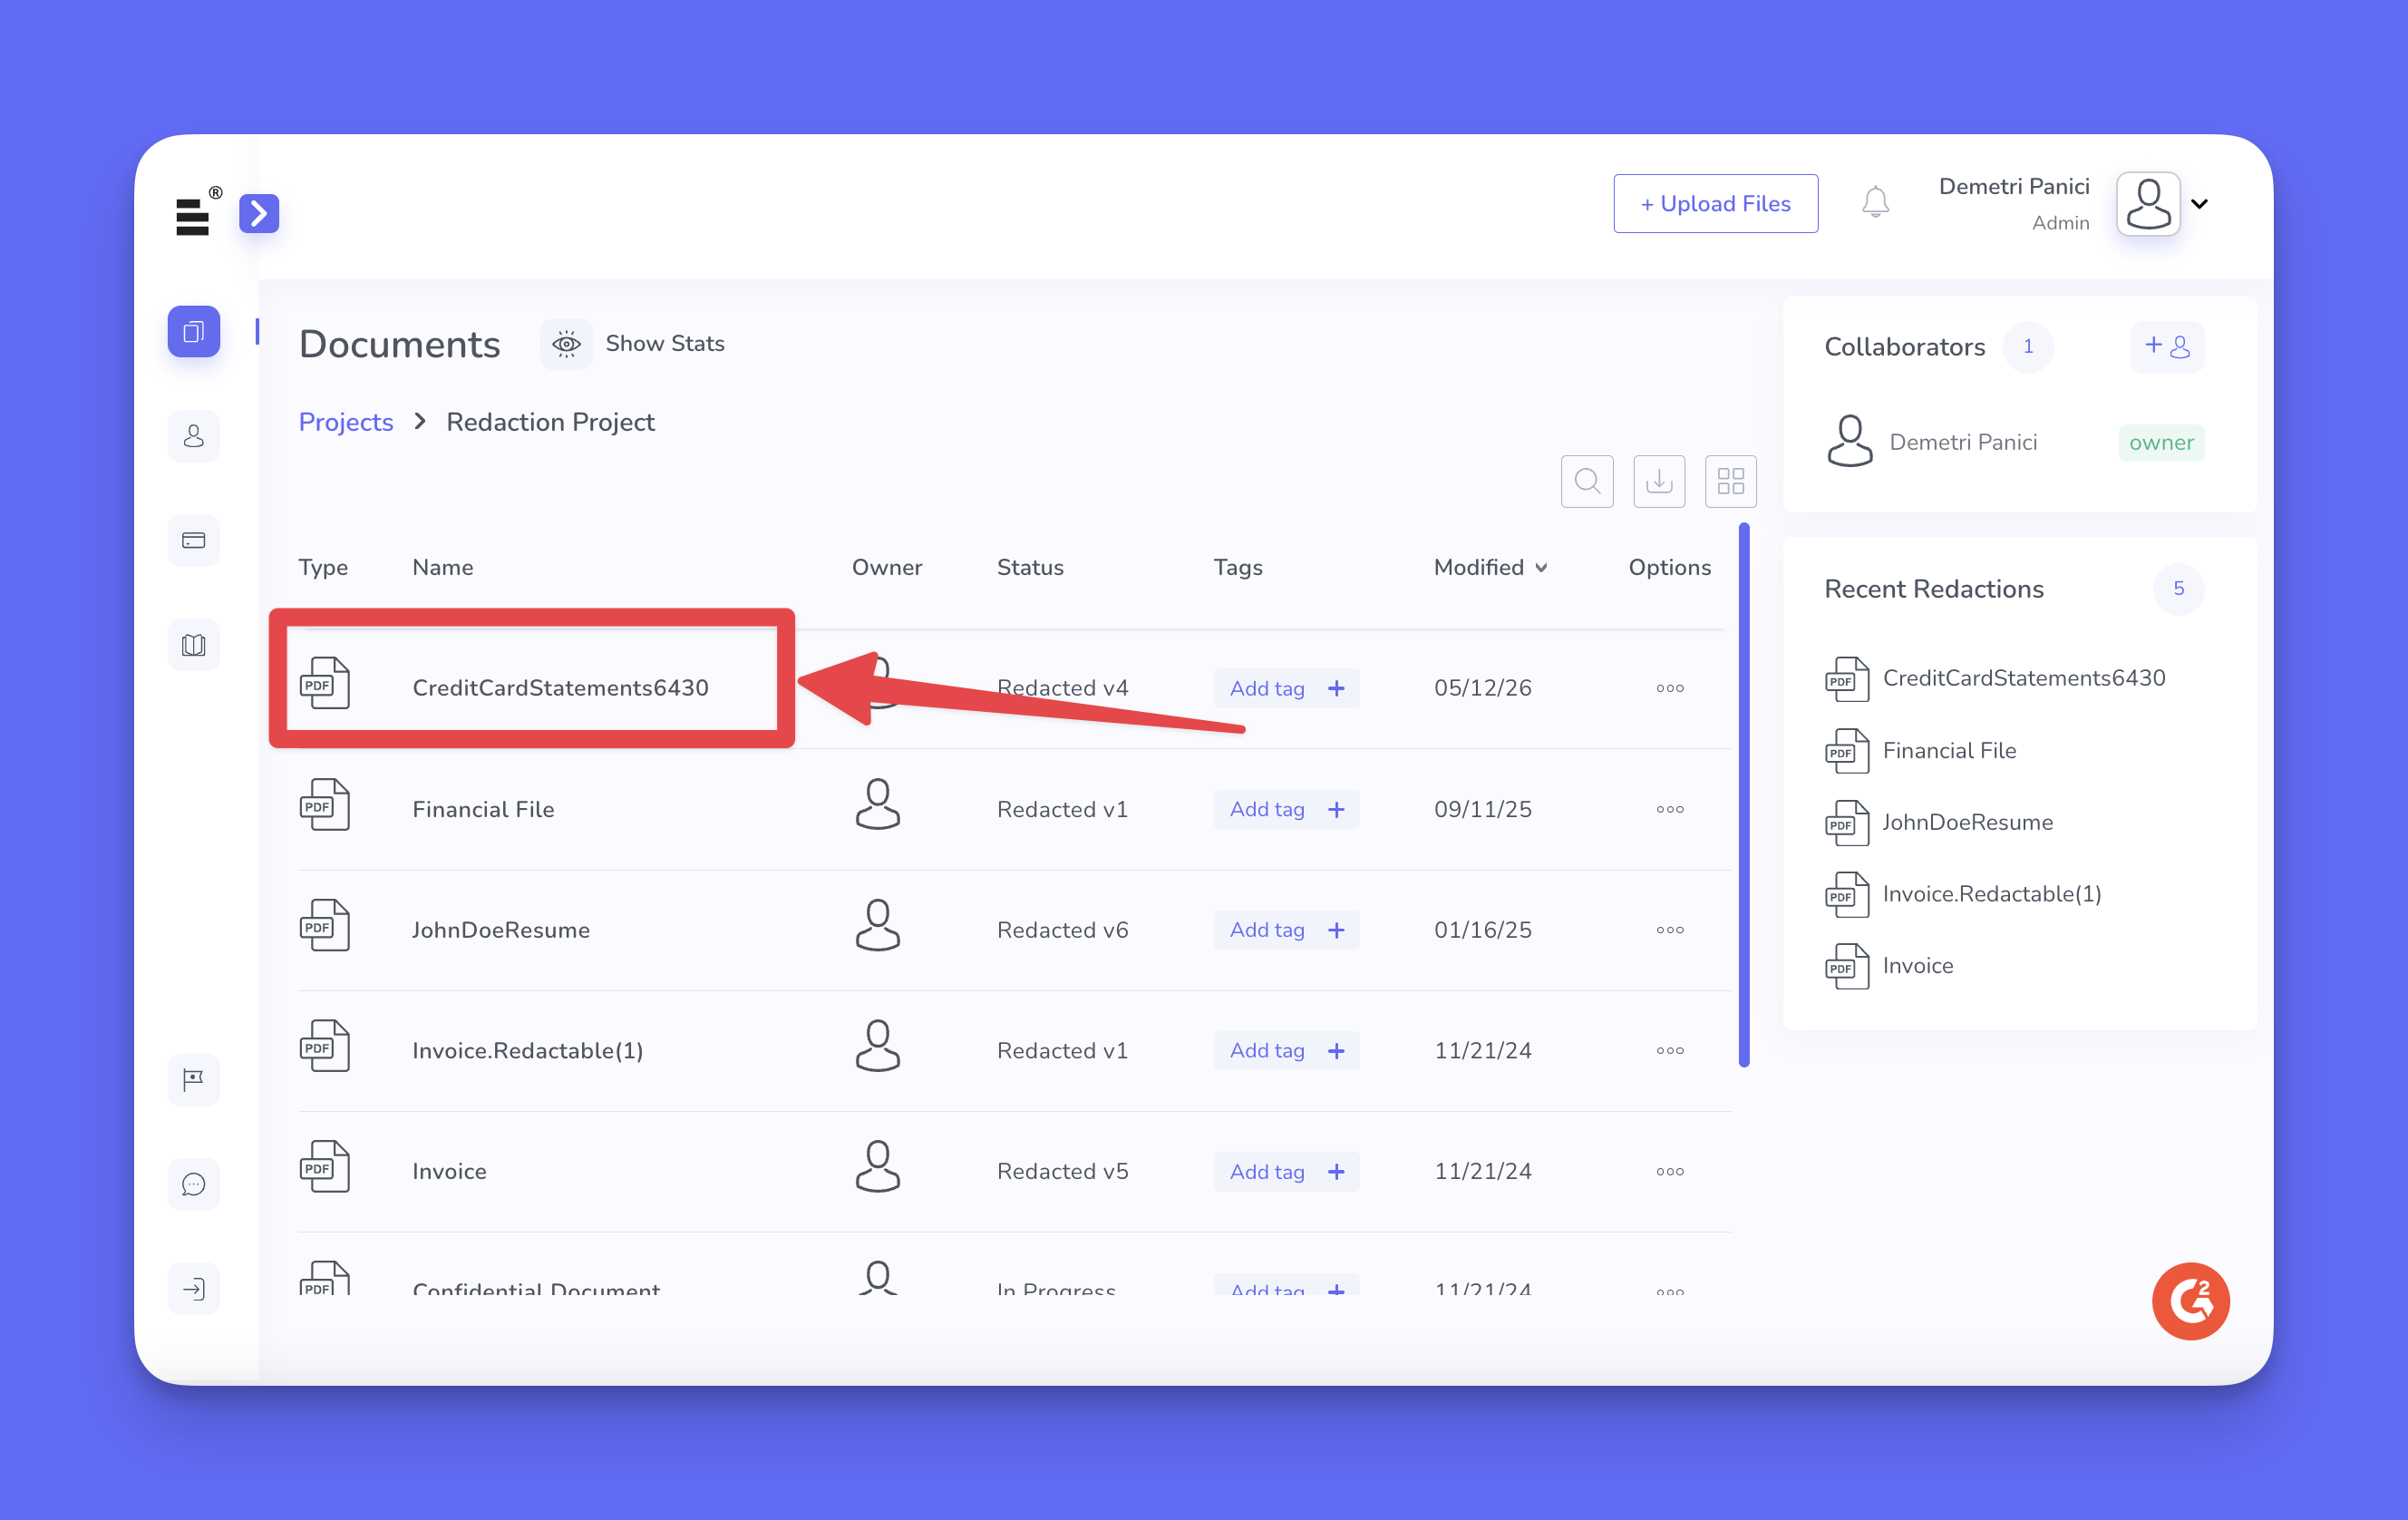
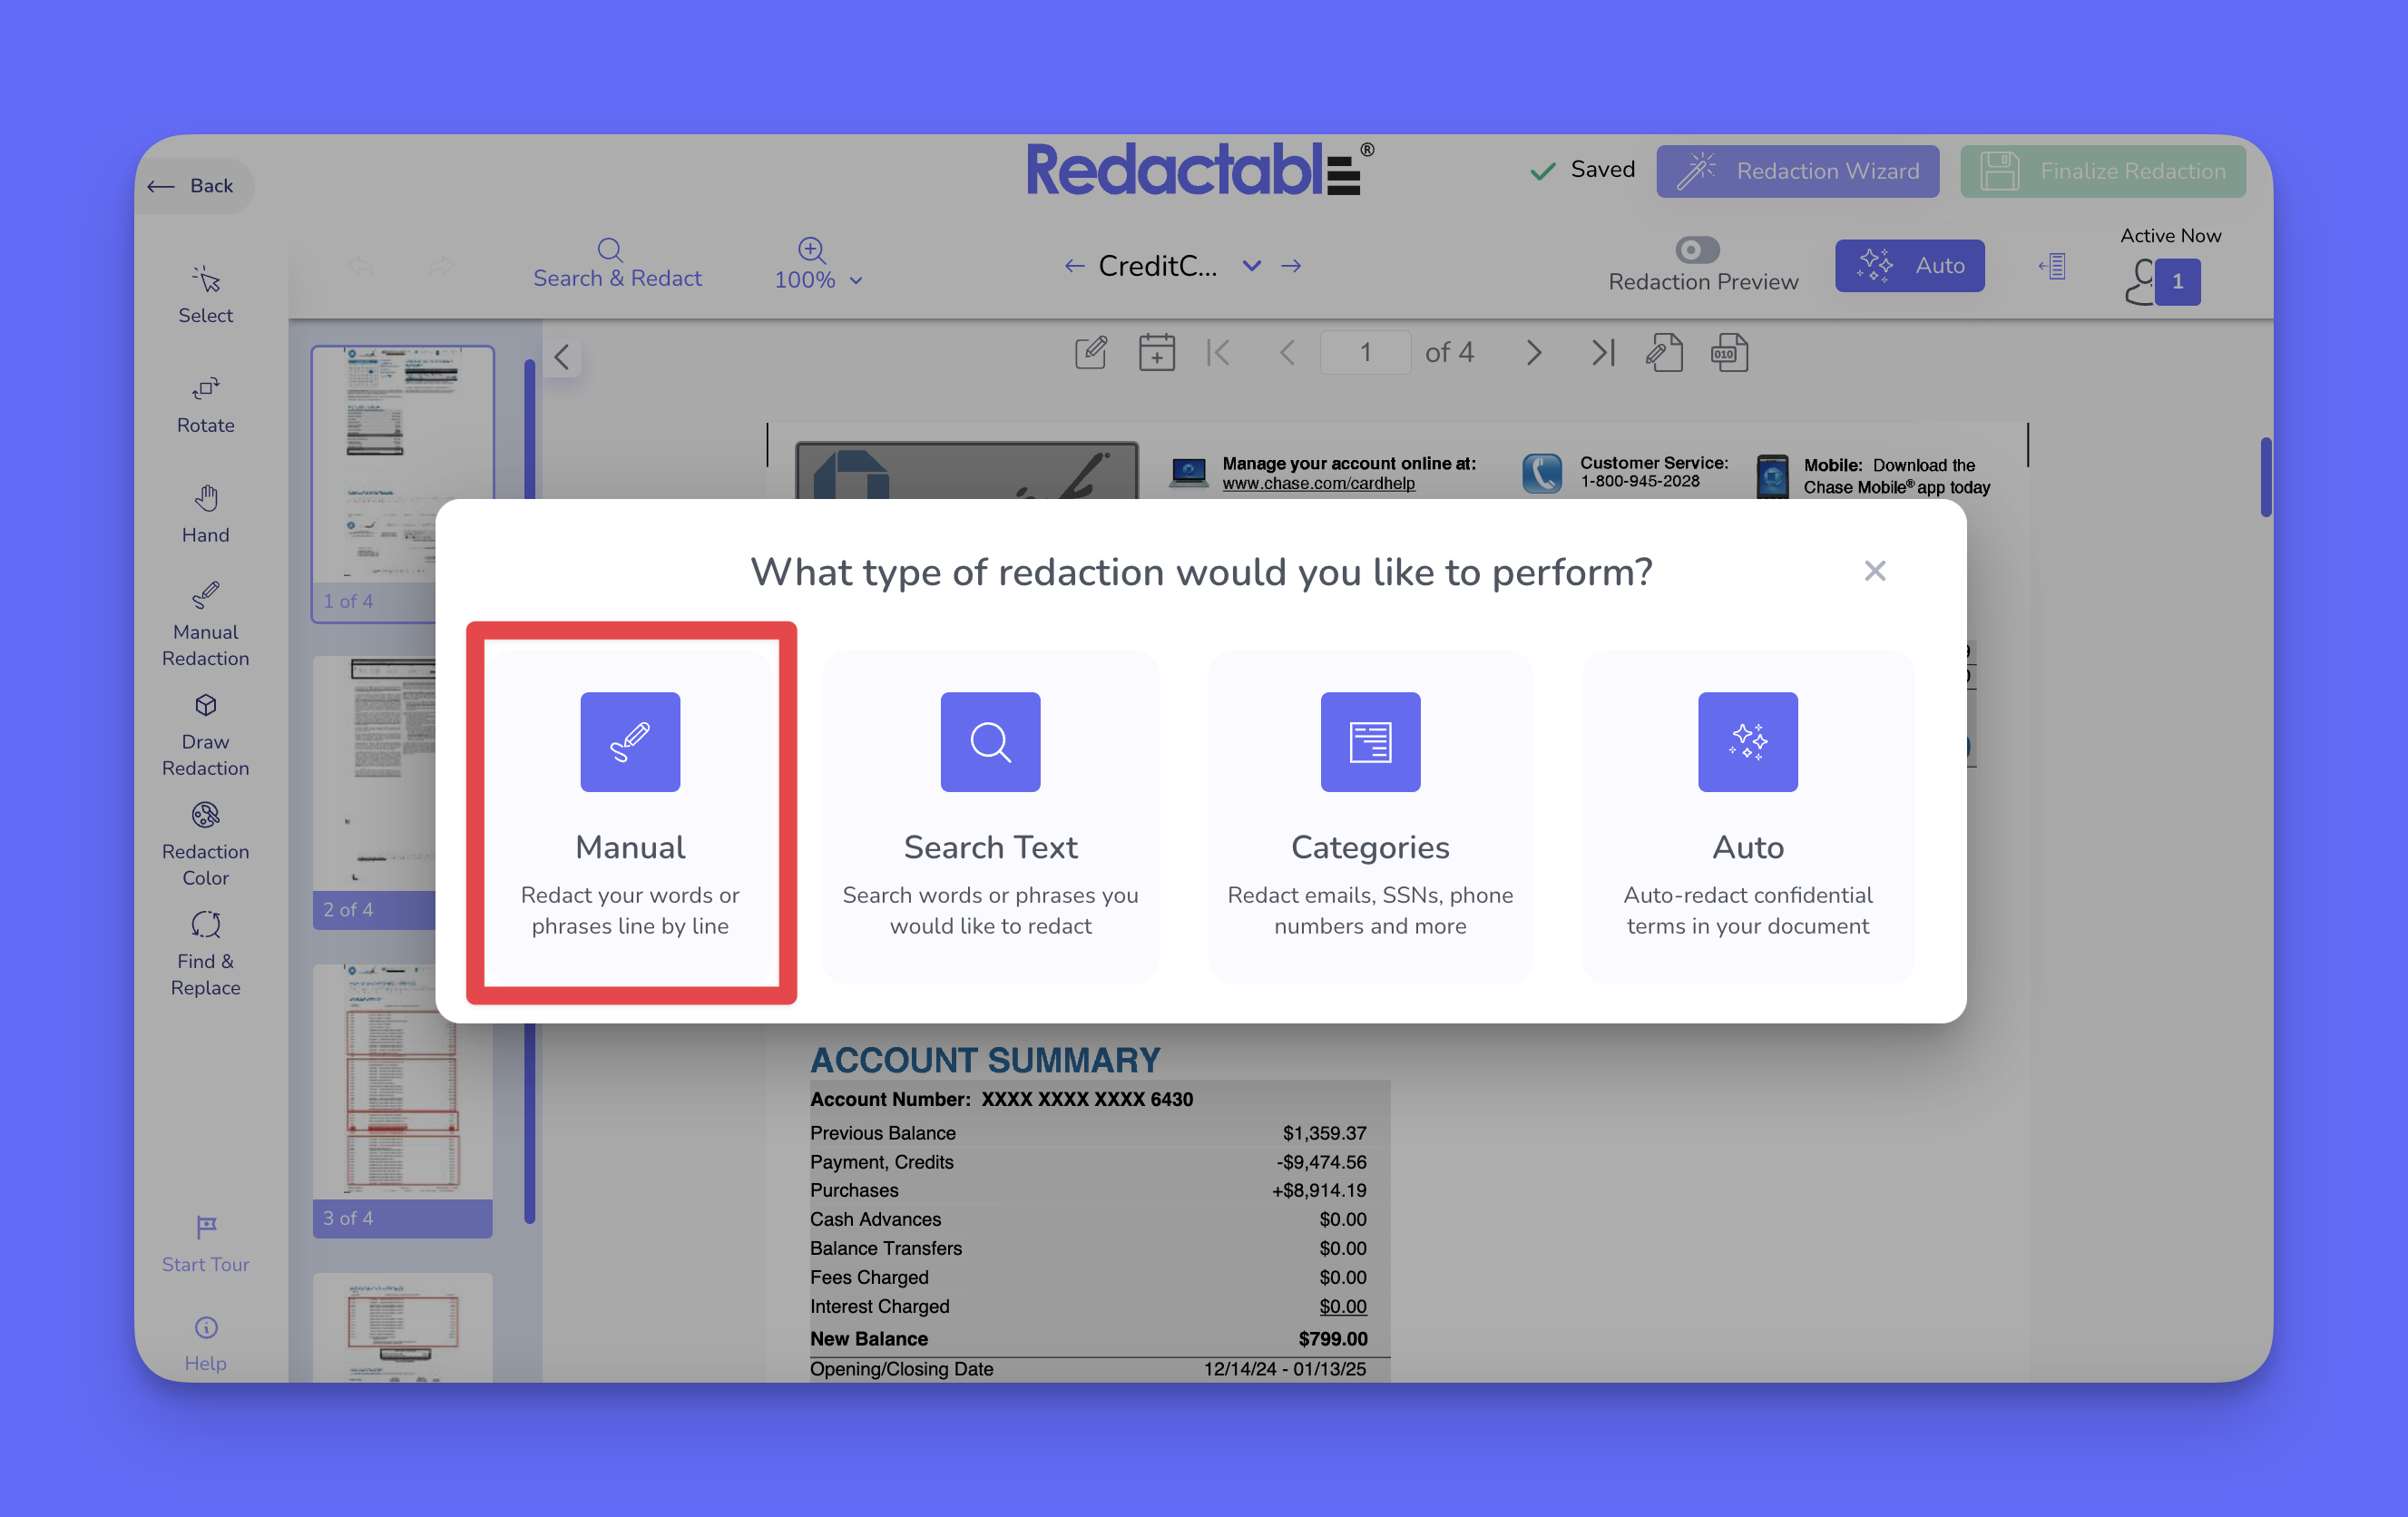
2. The “Redaction Wizard” appears automatically when the document opens. From the “Redaction Wizard” select the “Manual” option.
3. You can also select the “Manual Redaction” button (the pencil icon) from the left-side navigation panel.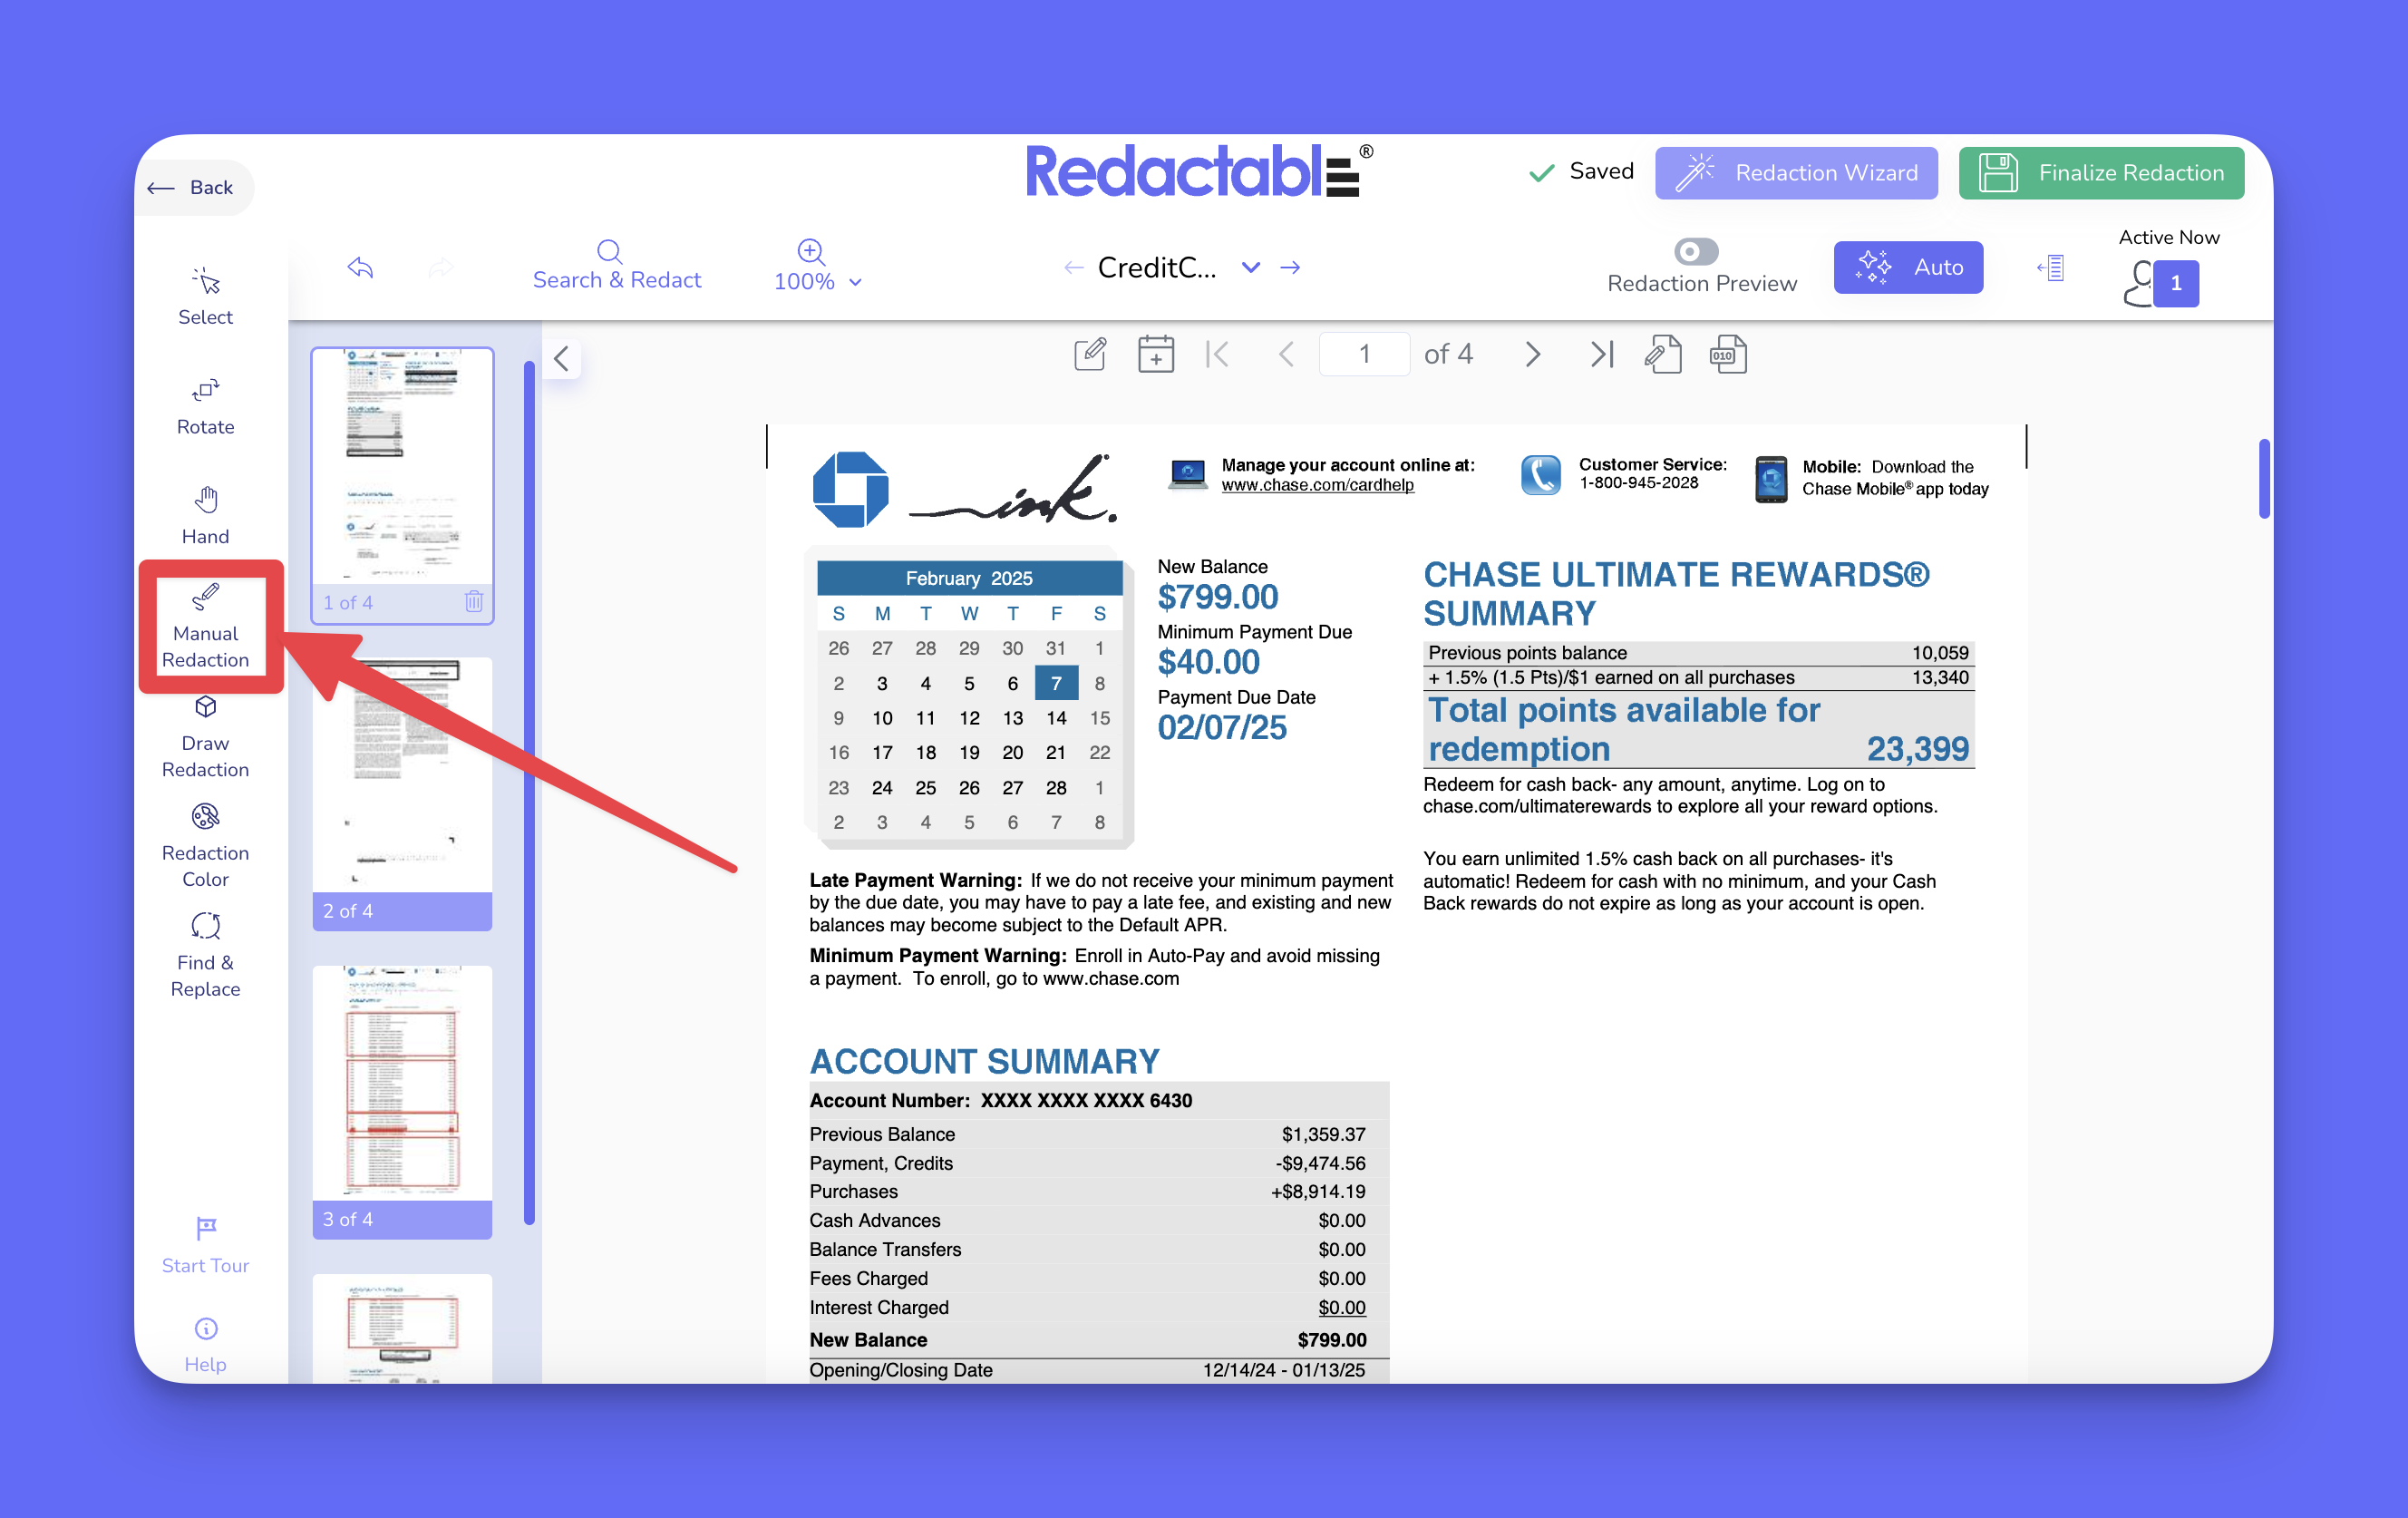
4. Once the Manual Redaction tool is selected, it will appear highlighted at the top of the document editor, indicating that manual redaction is enabled.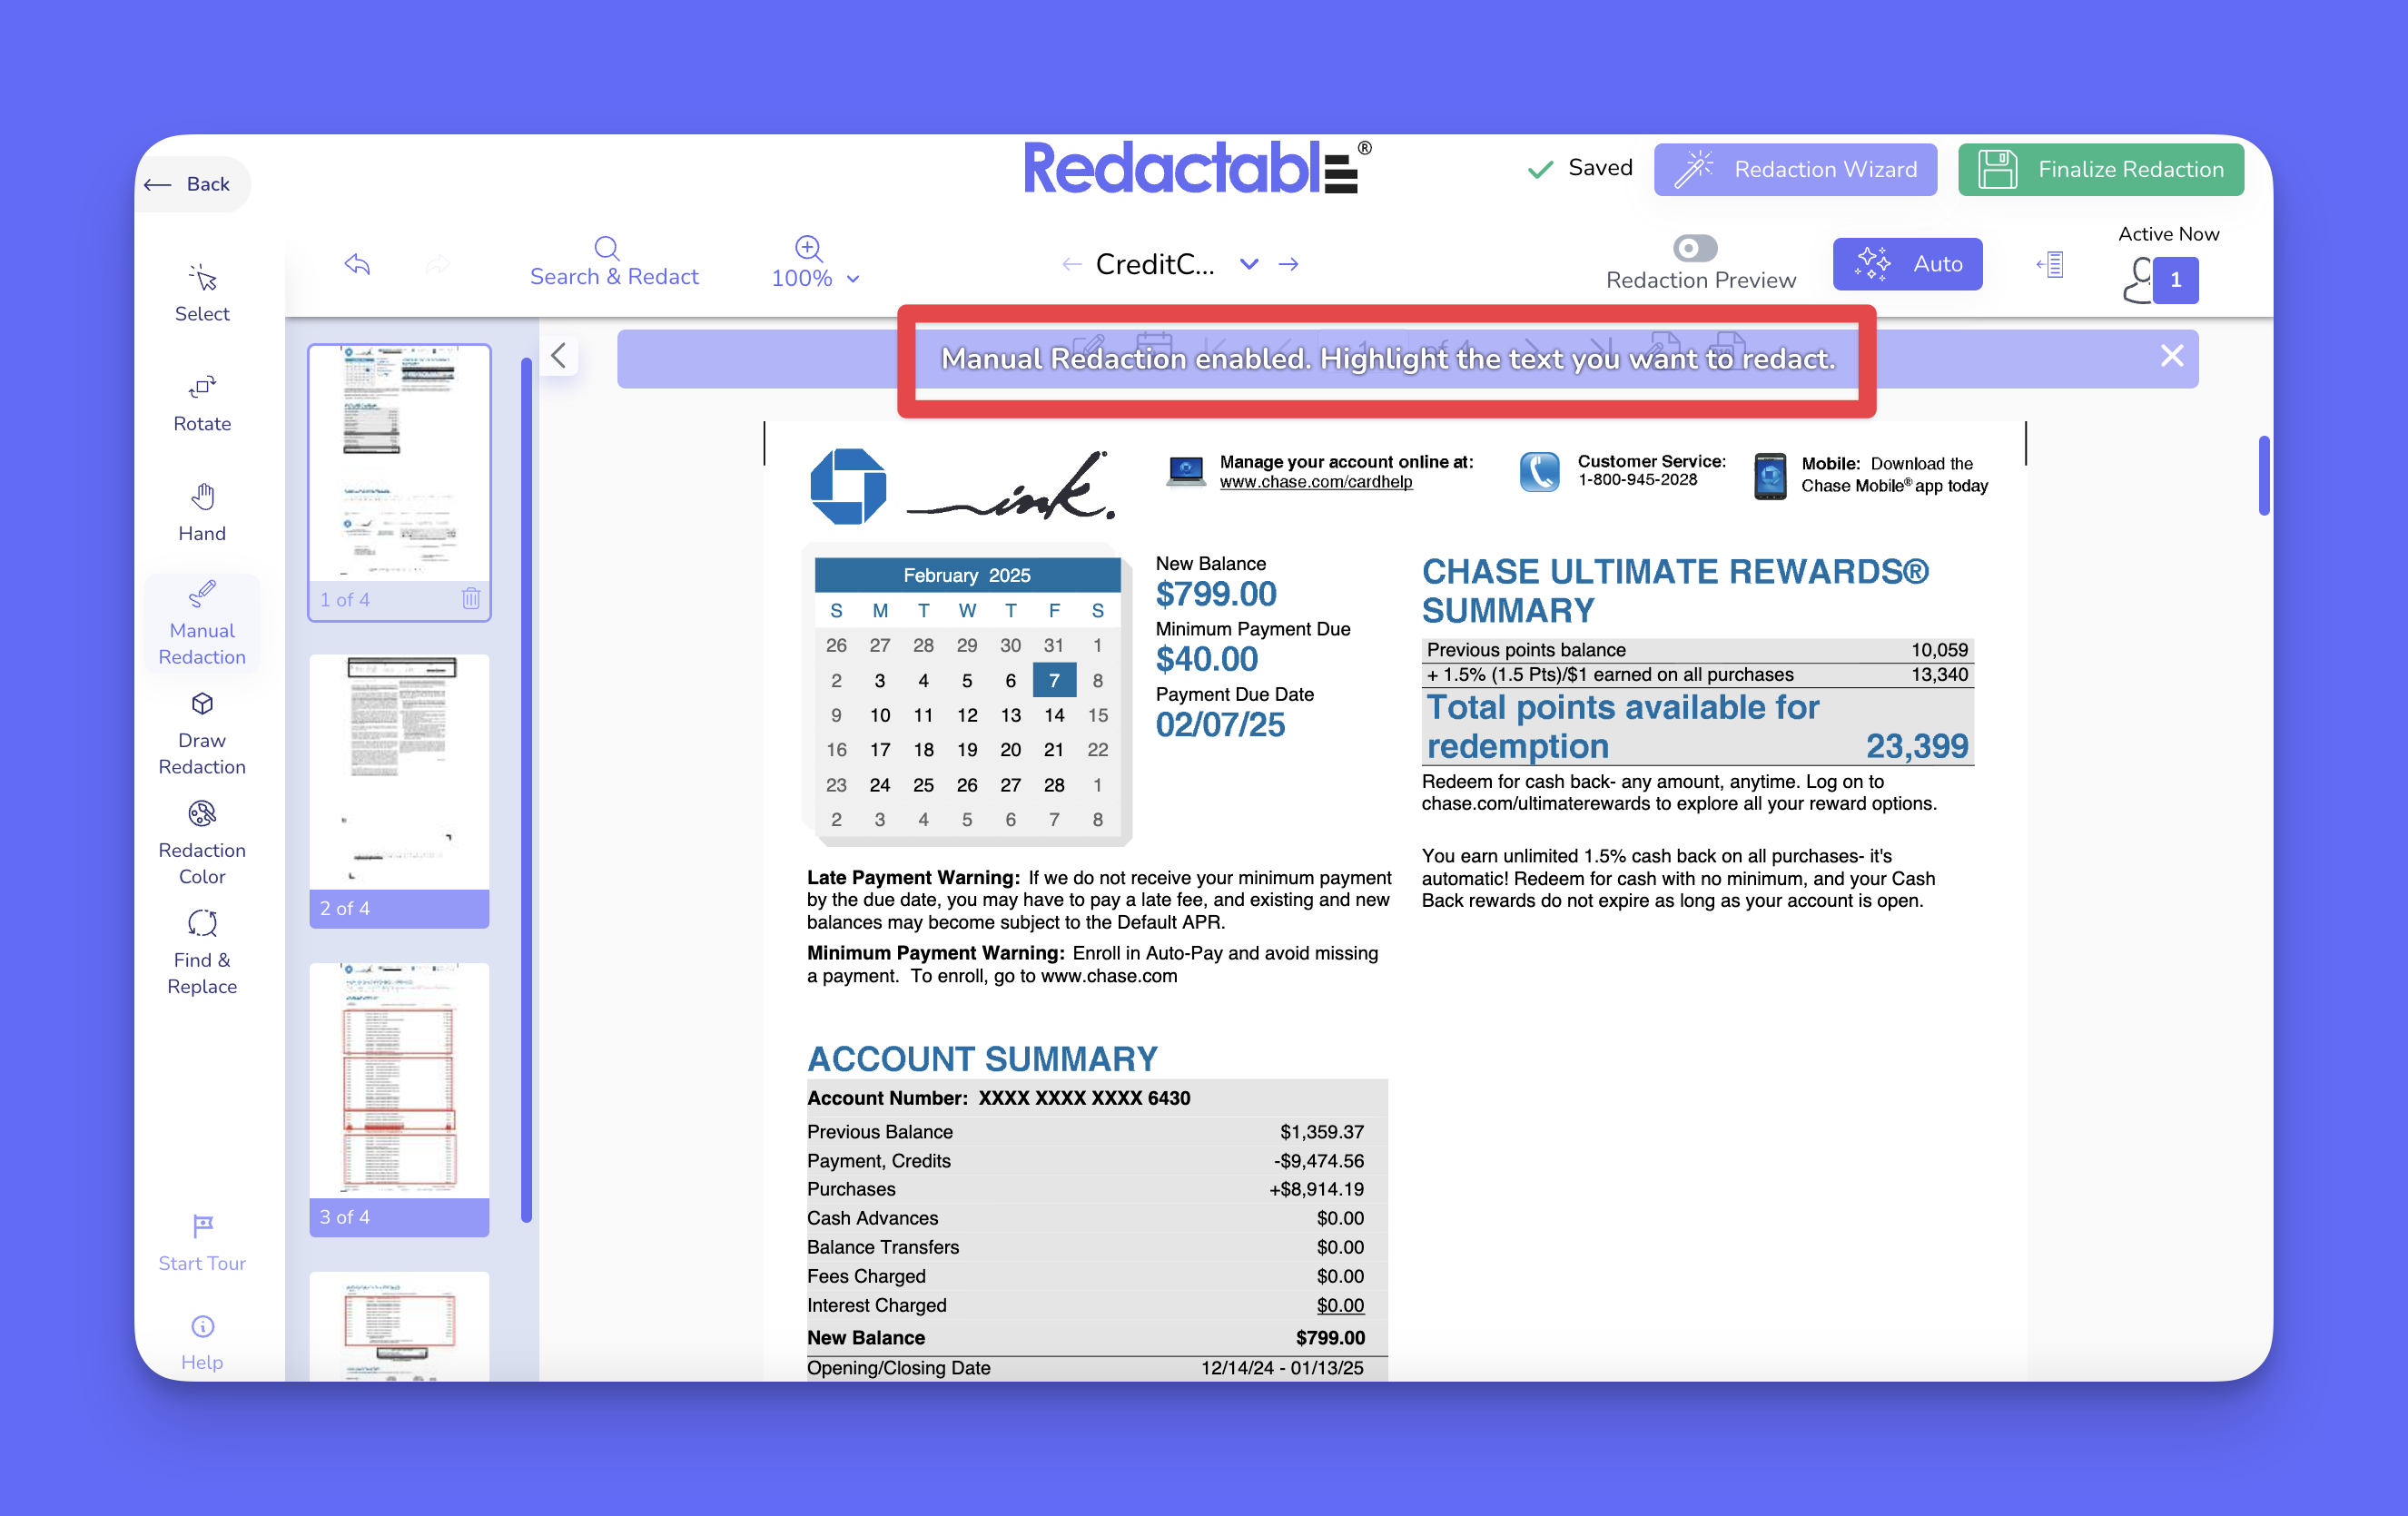
Using Manual Redaction
5. Click and drag your cursor to highlight the text you want to redact. The selected text will automatically be marked for redaction.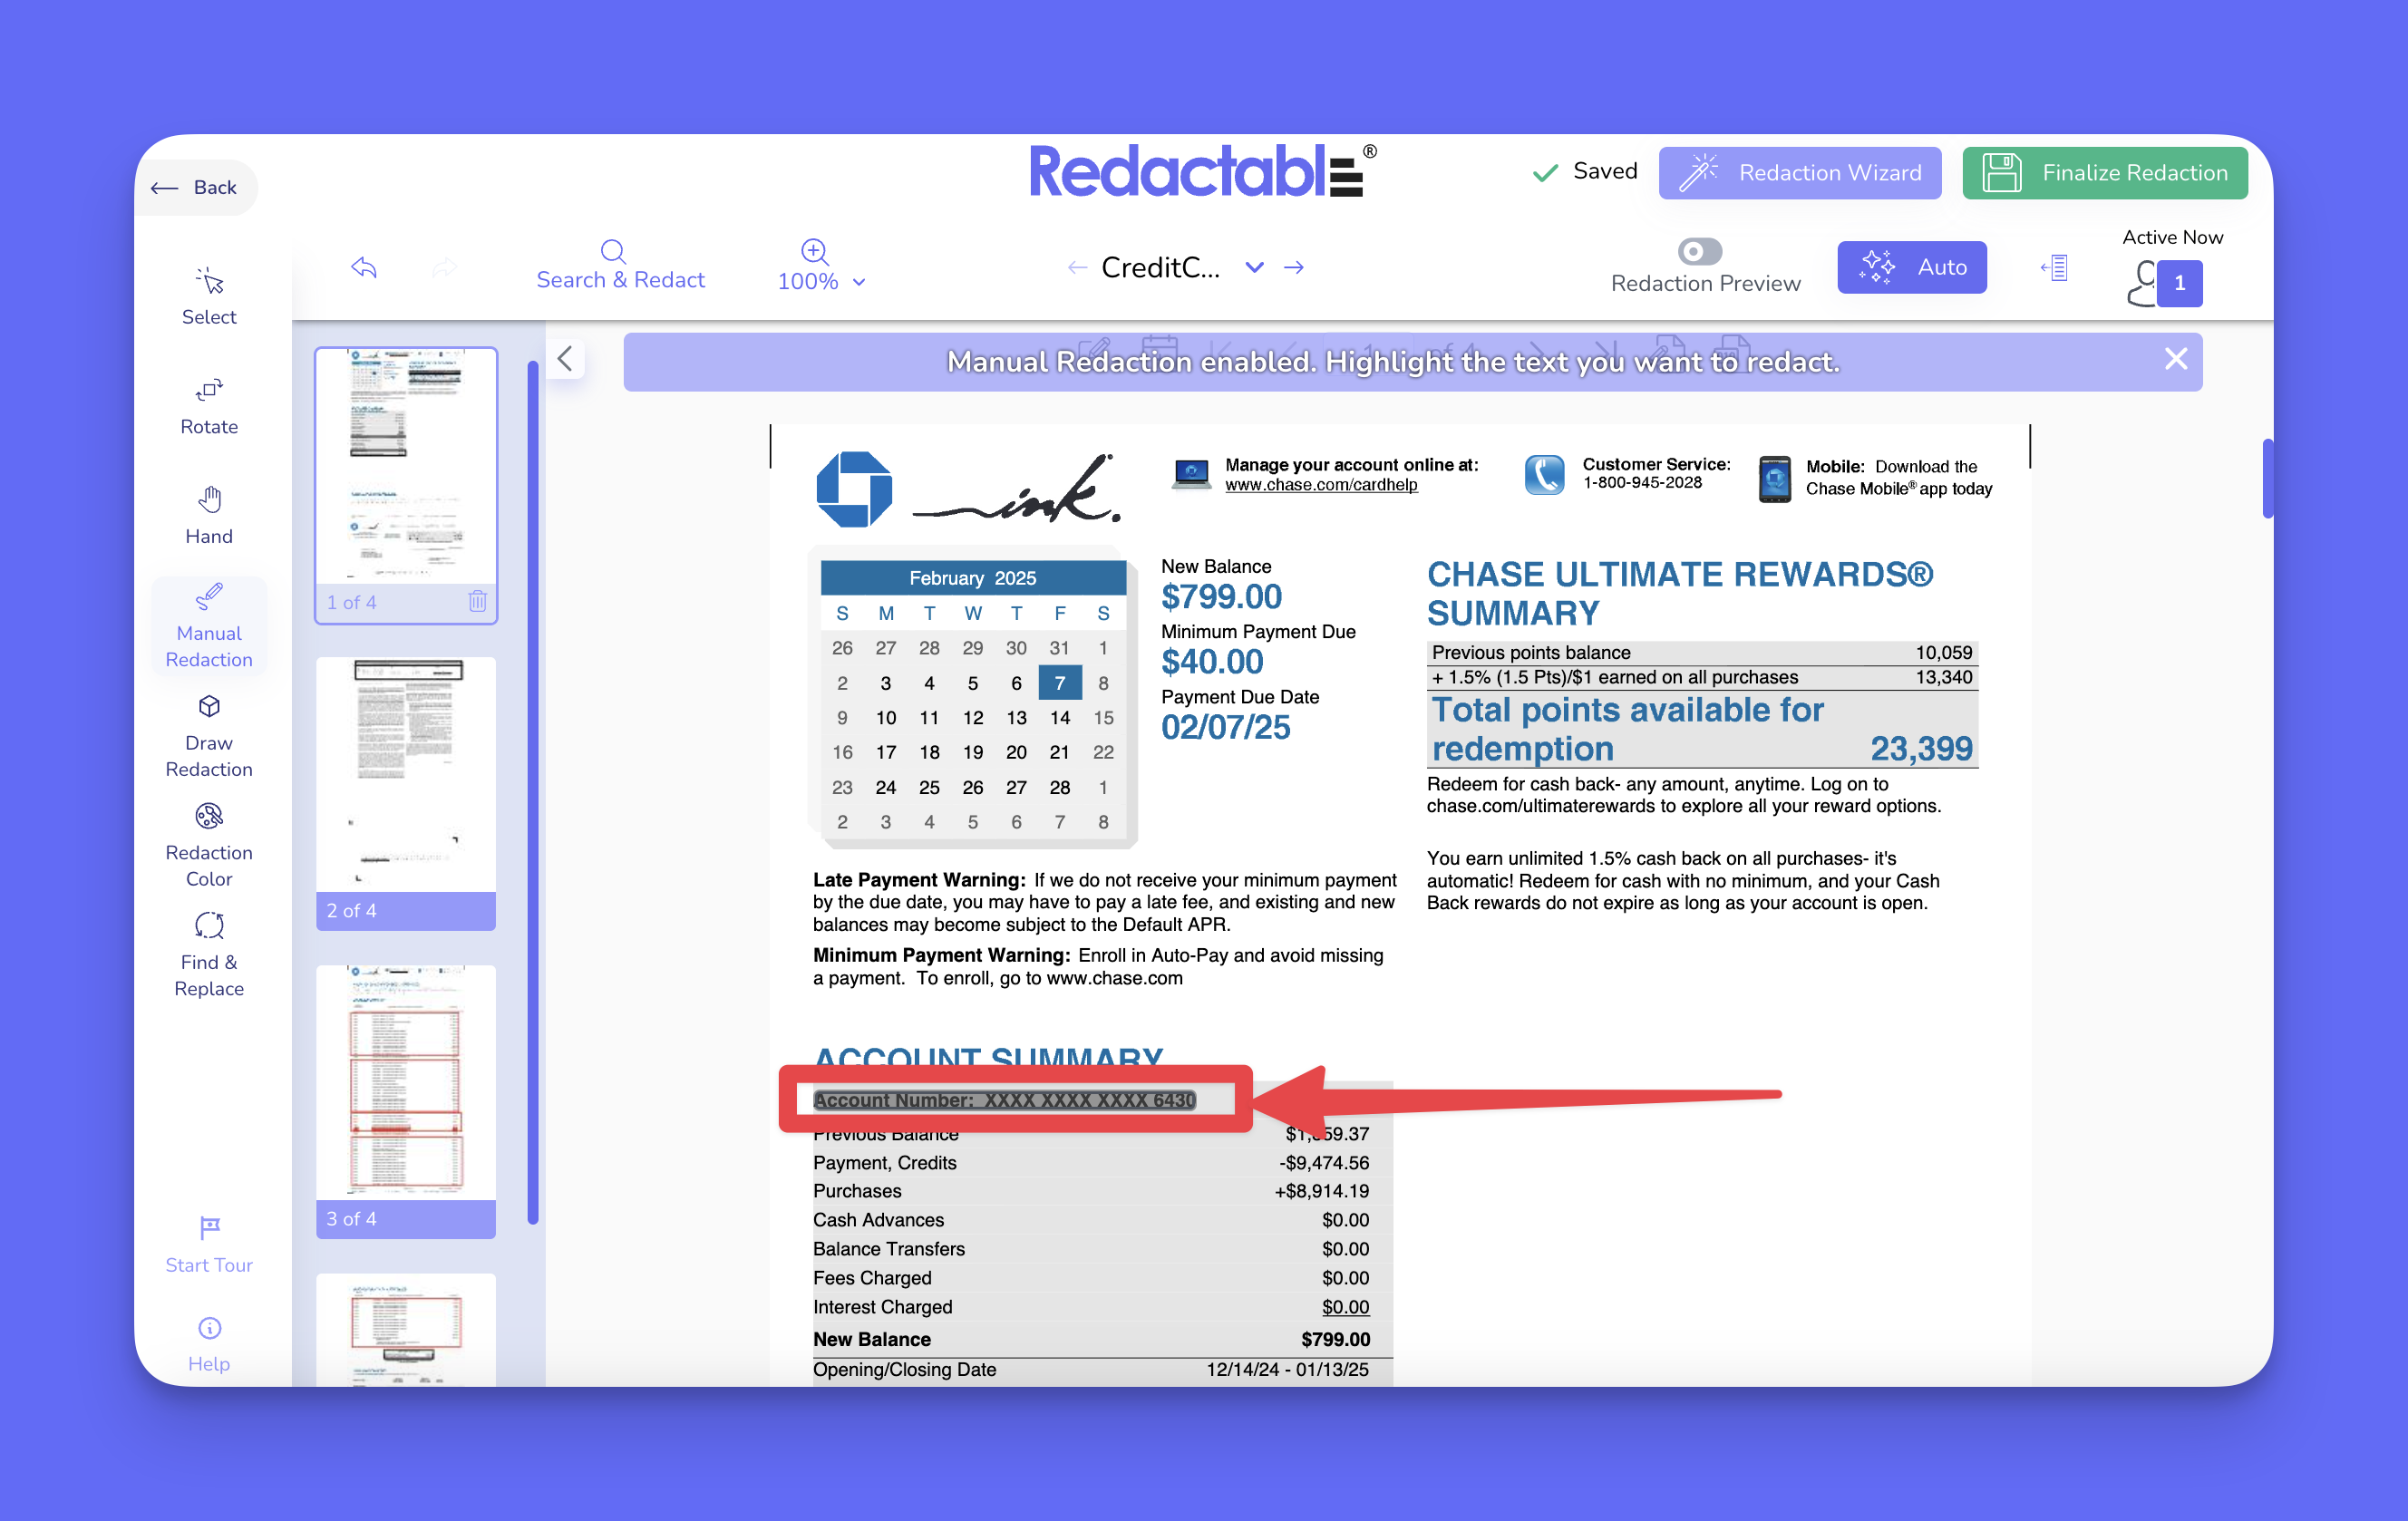
Adding a redaction reason
6. To add a reason to a manual redaction, click on the redaction and open the "Add Reason" modal.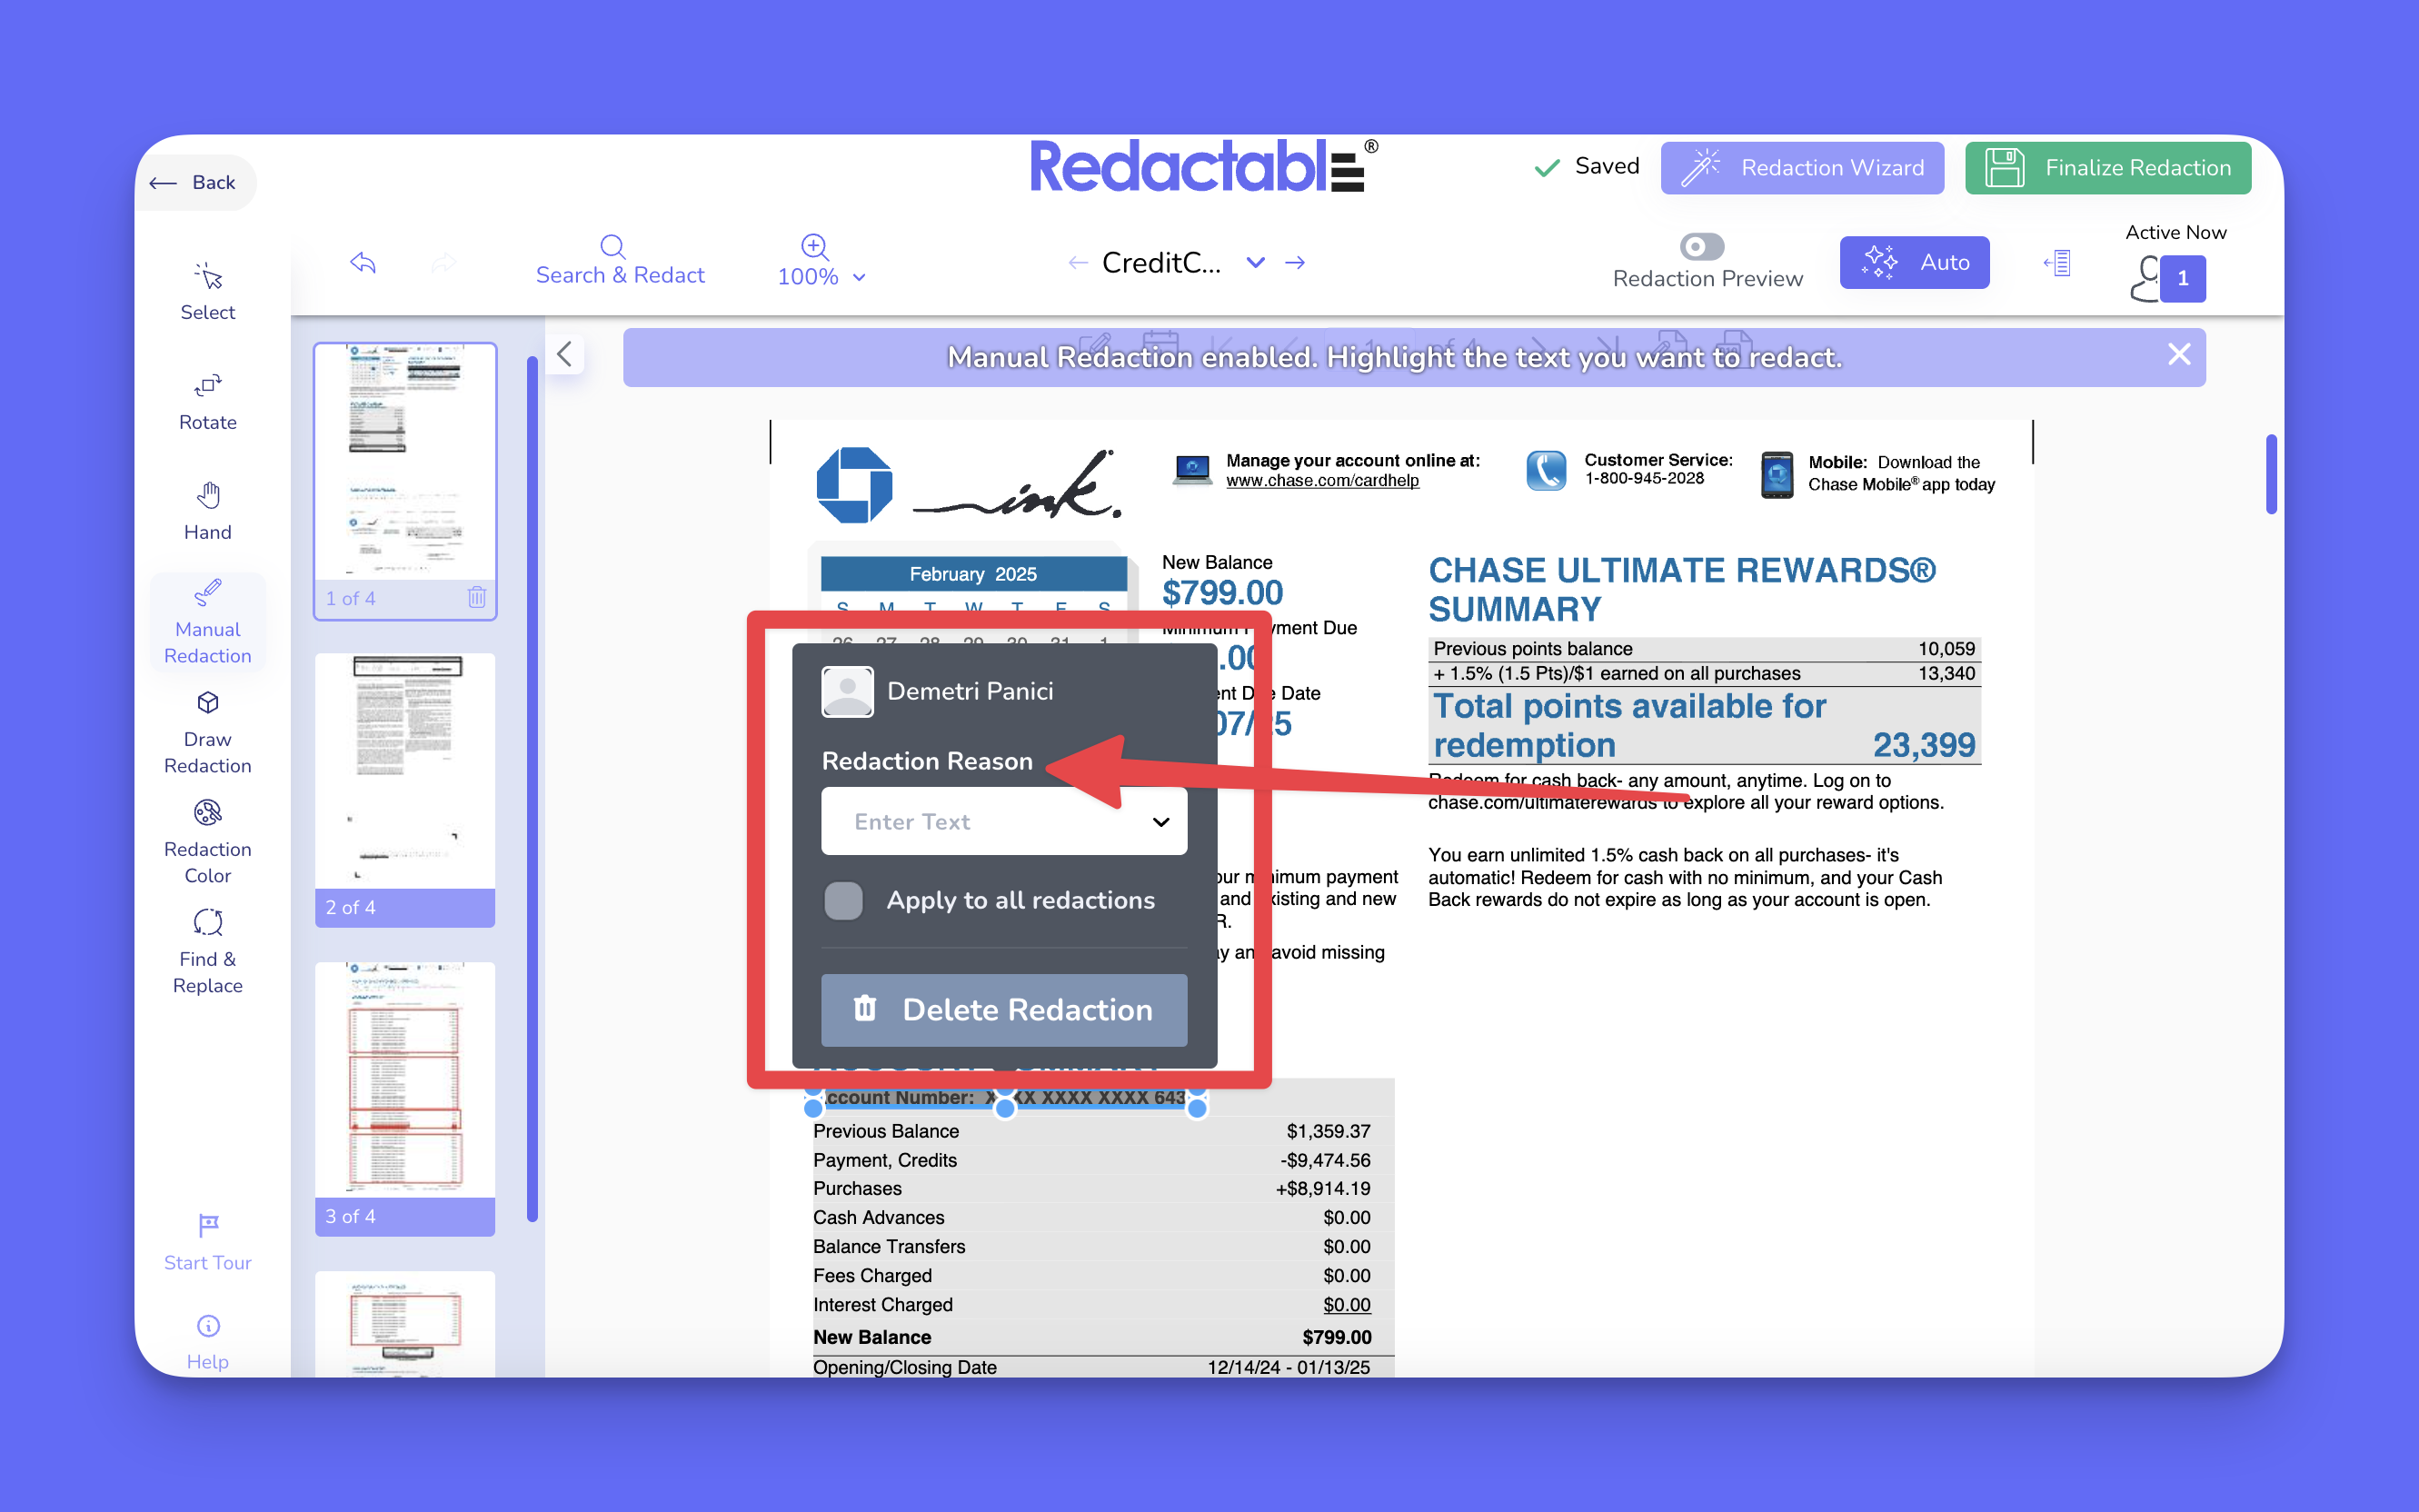
7. The dropdown menu contains predefined redaction reasons. To use a predefined reason, select one from the dropdown list, and click “Enter”.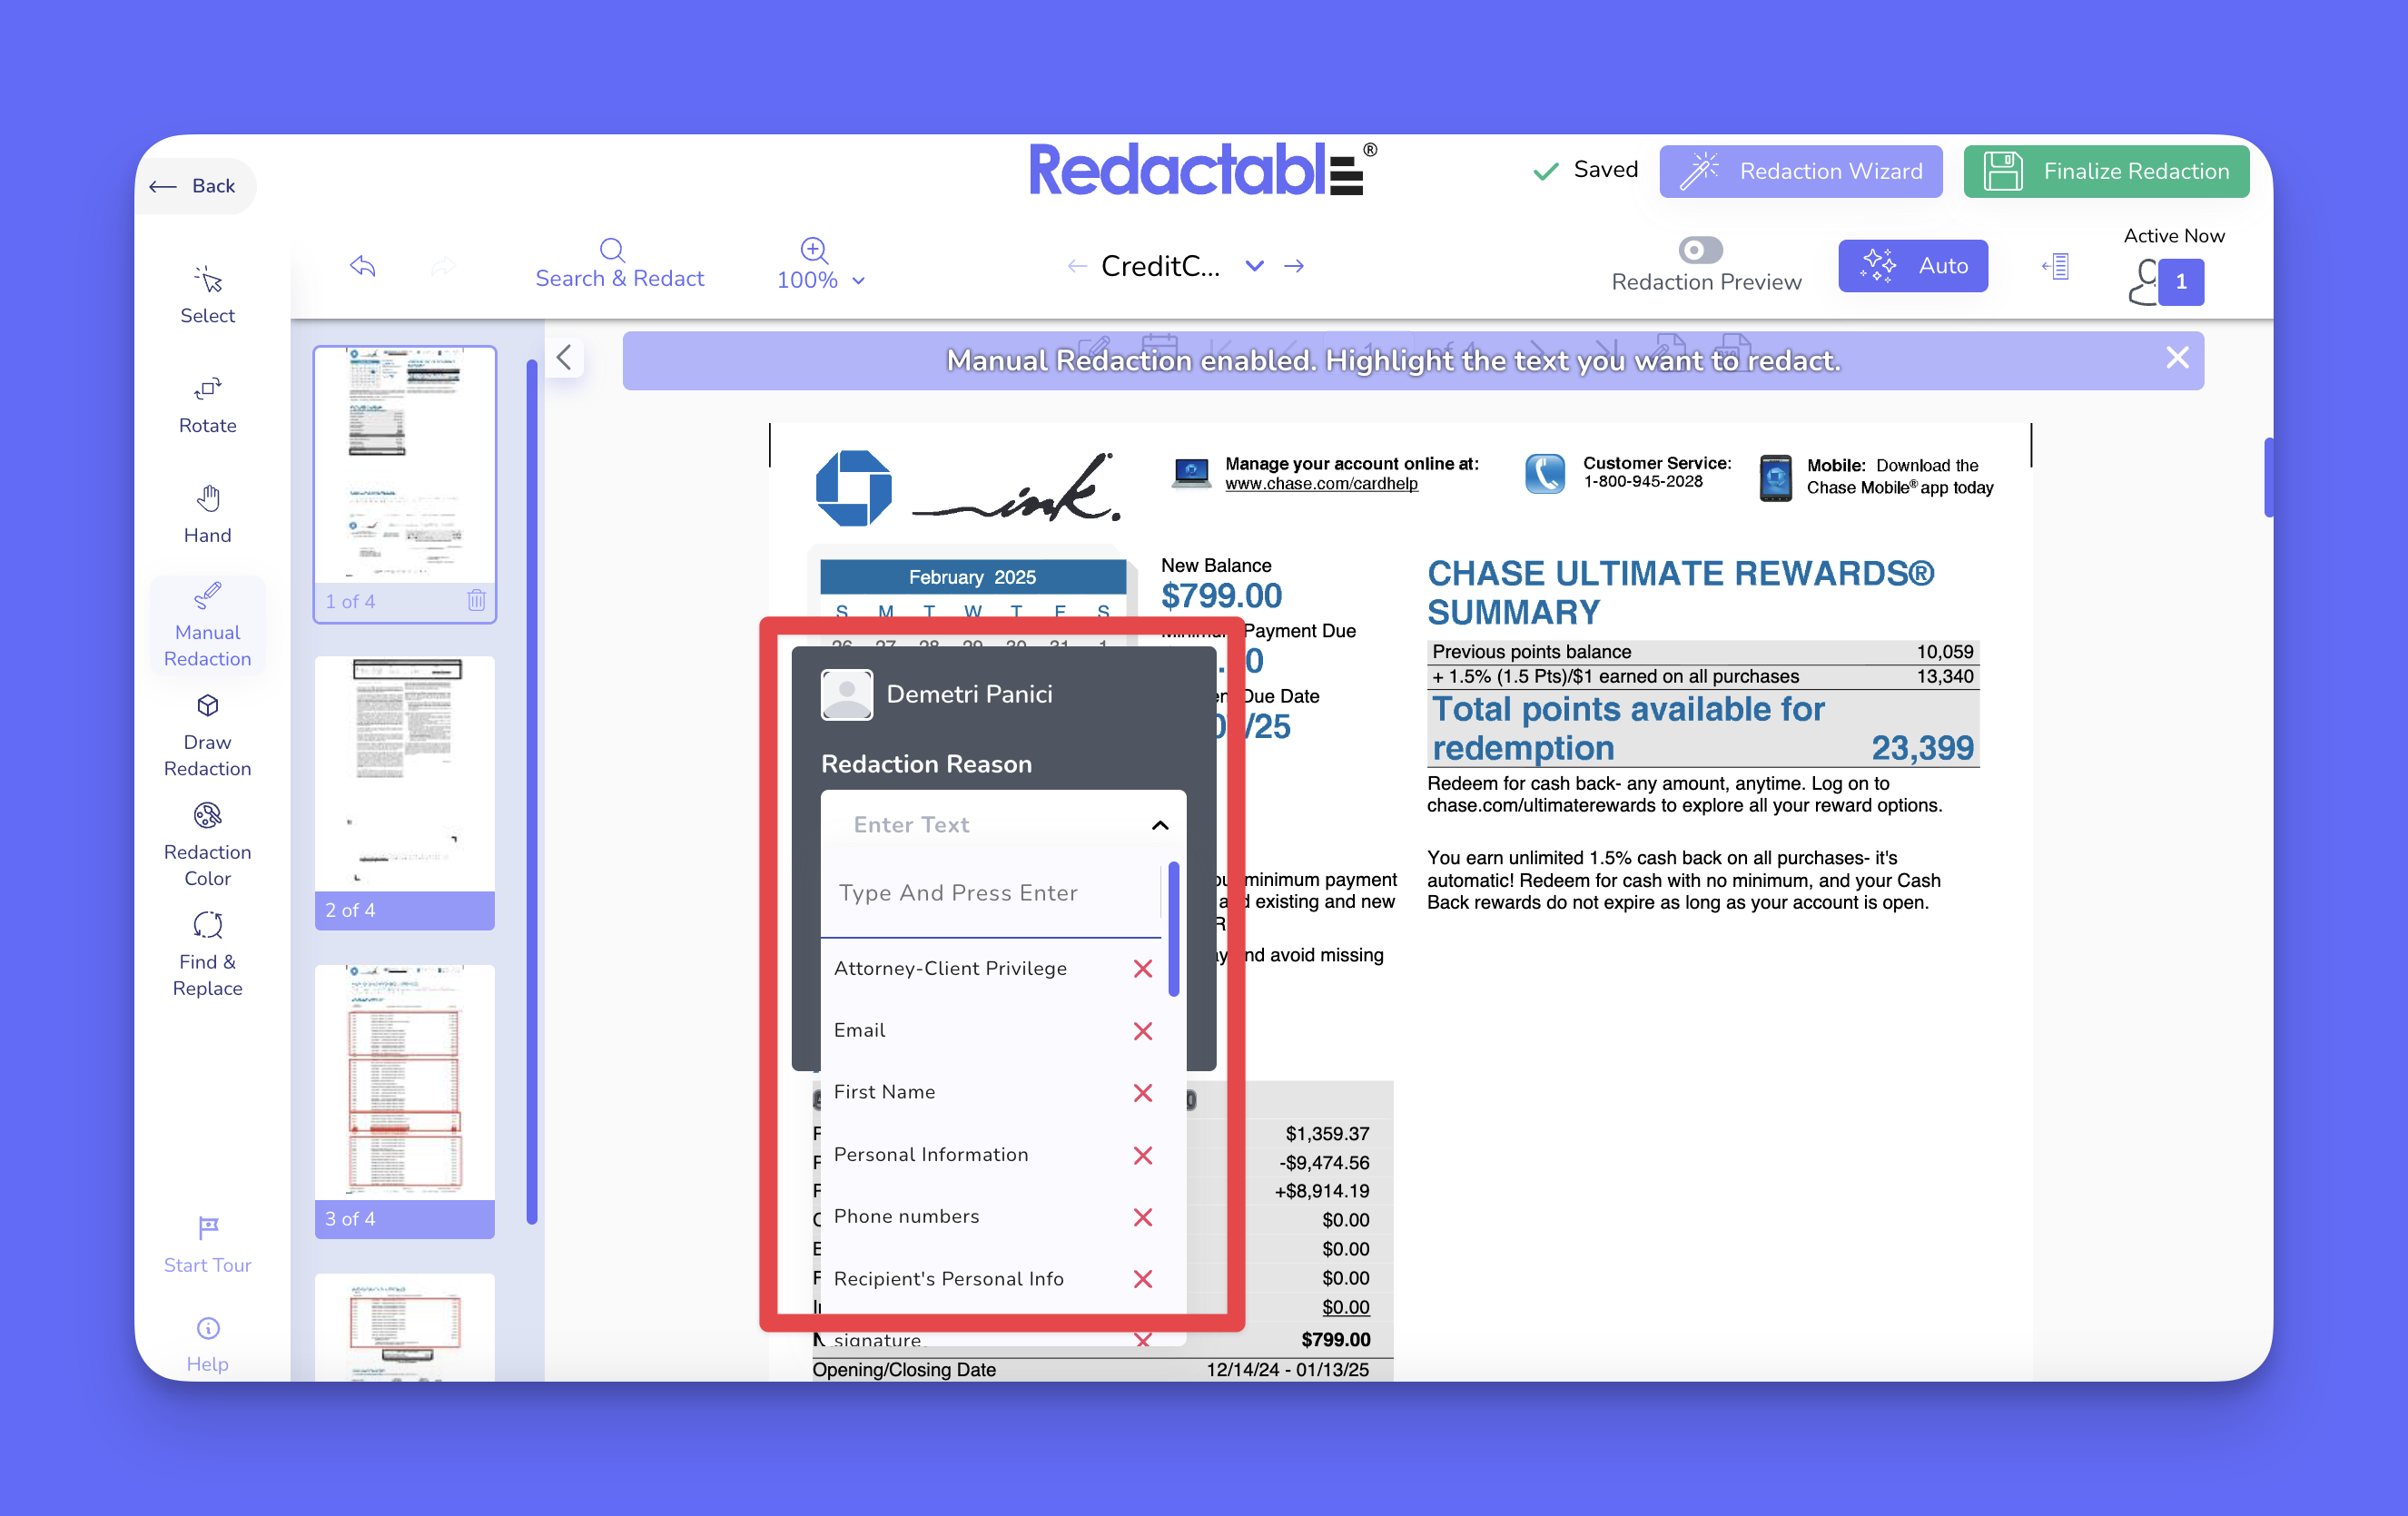
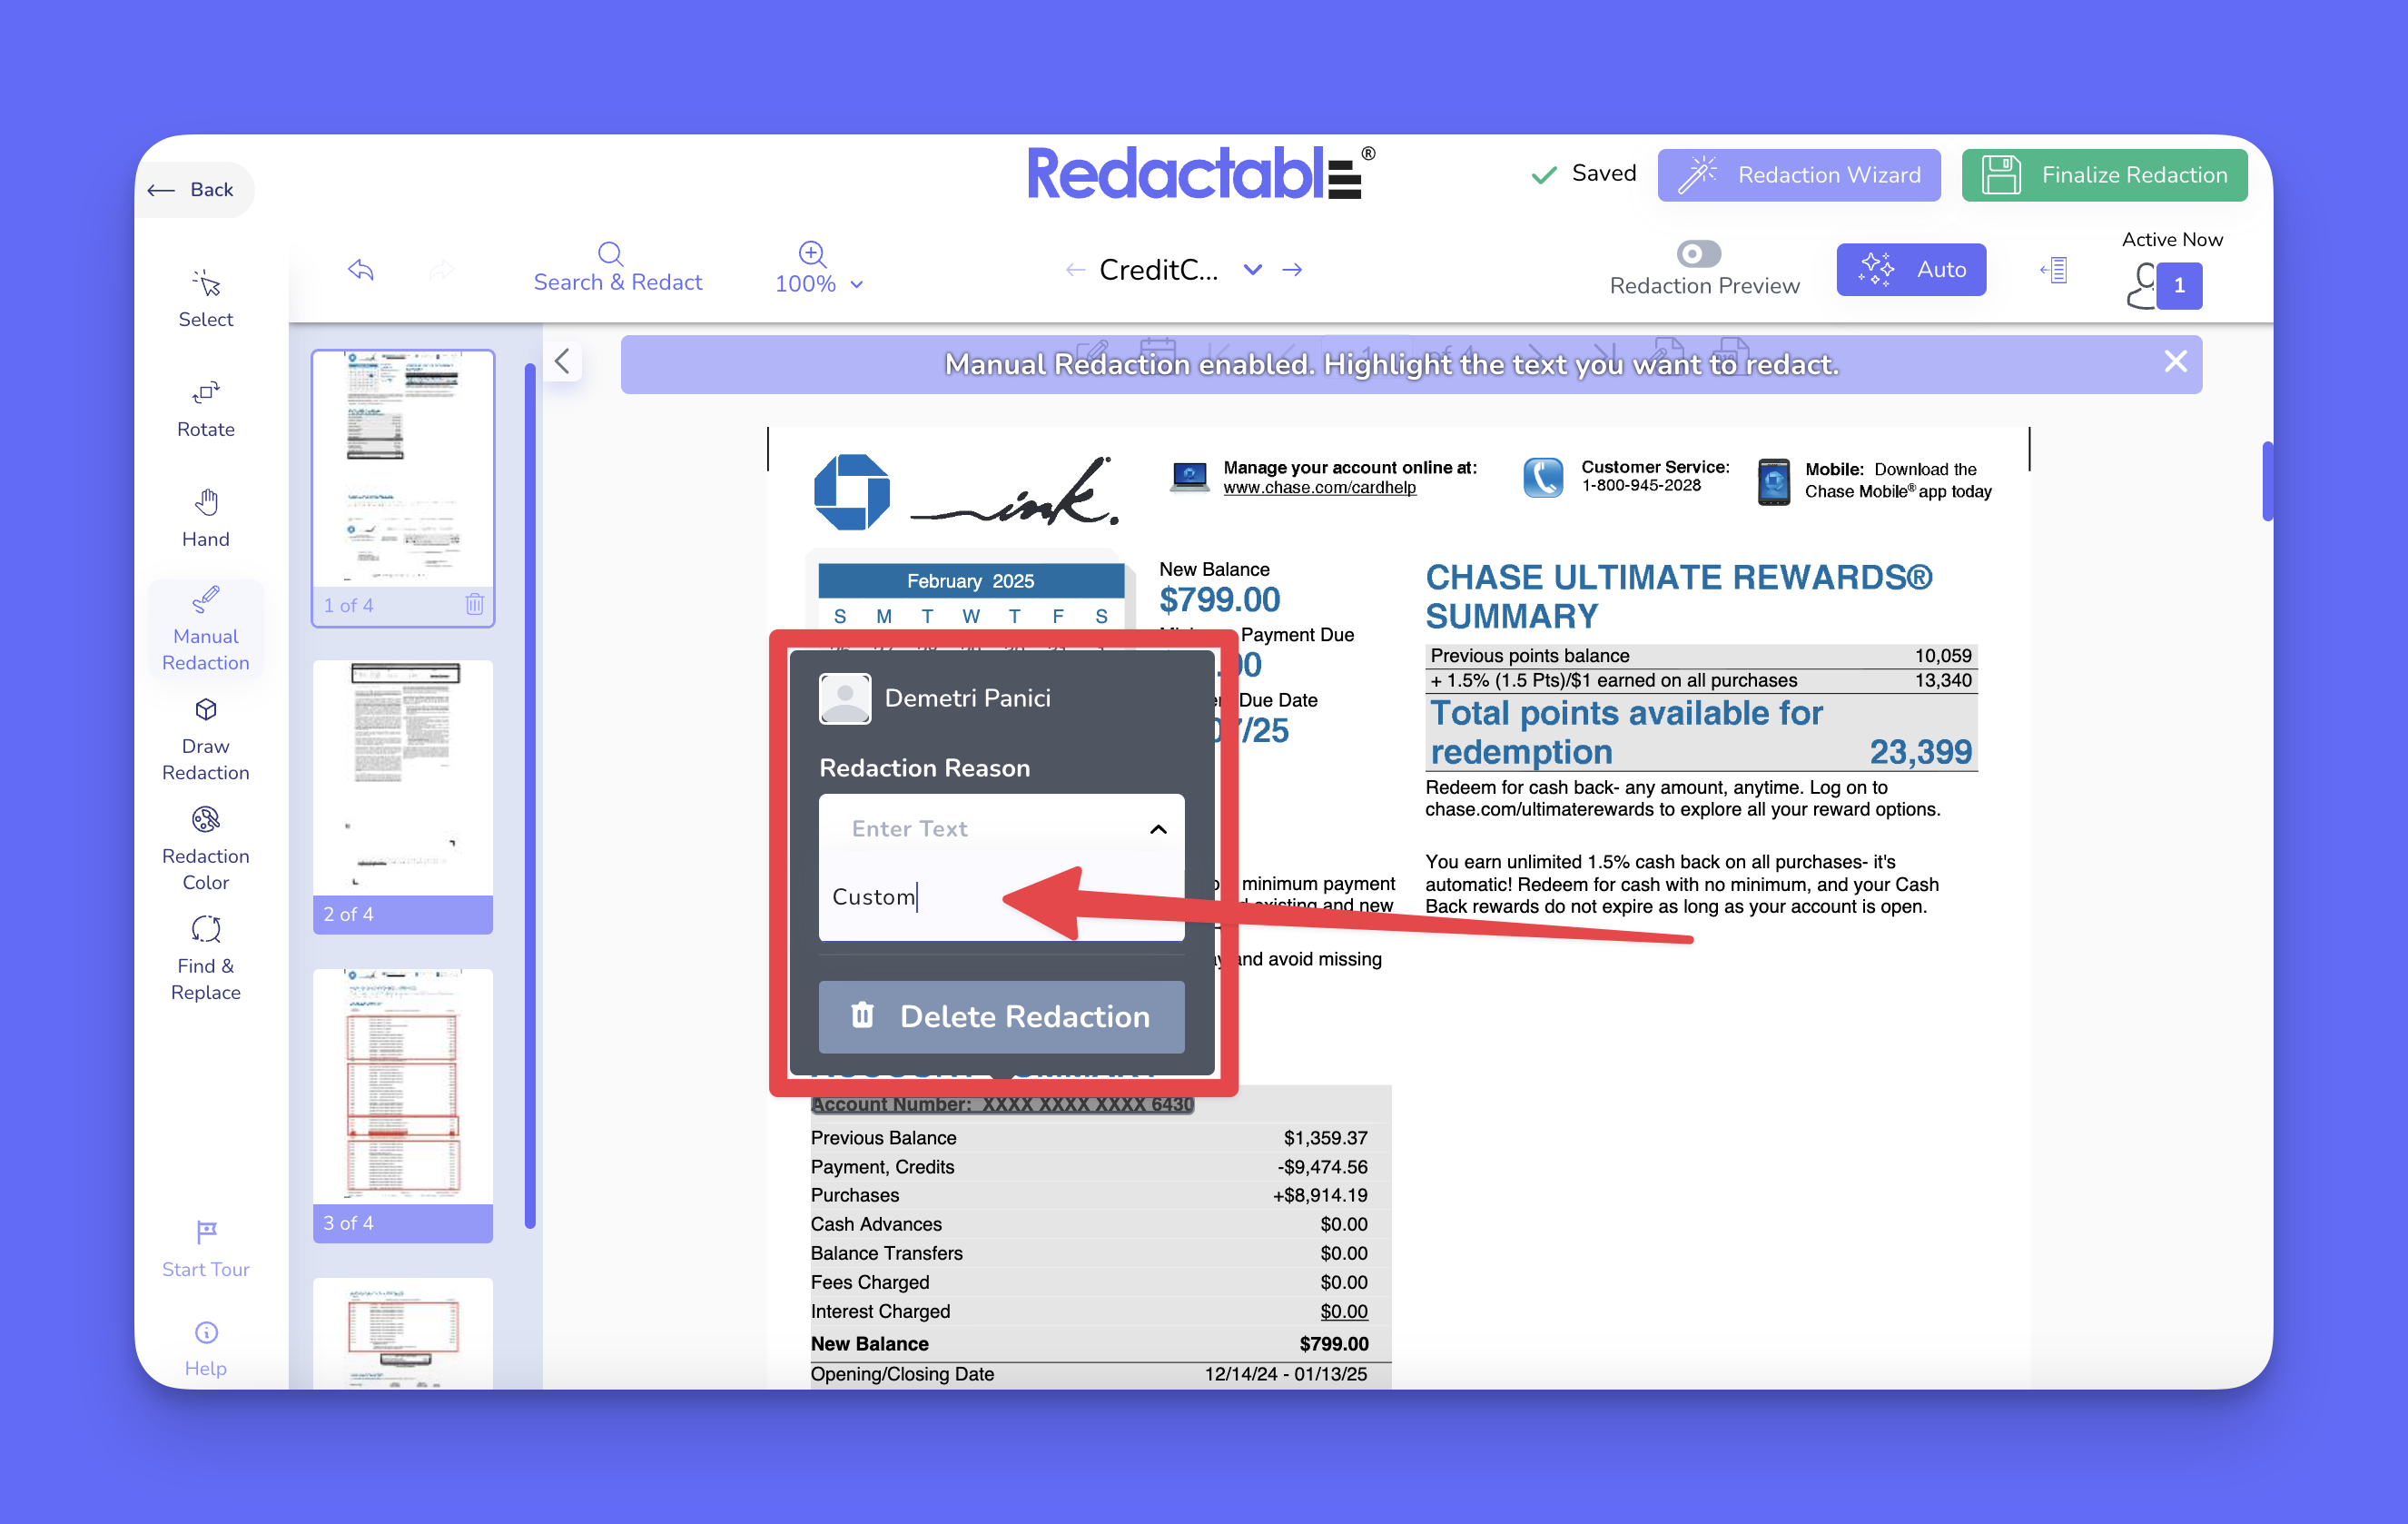
8. A text input field allows users to add new redaction reasons. To add a custom reason, type the text in the input field and click Enter.
9. To add a predefined reason, select one from the dropdown list. The selected reason, exemption, or text will be applied to the chosen redaction.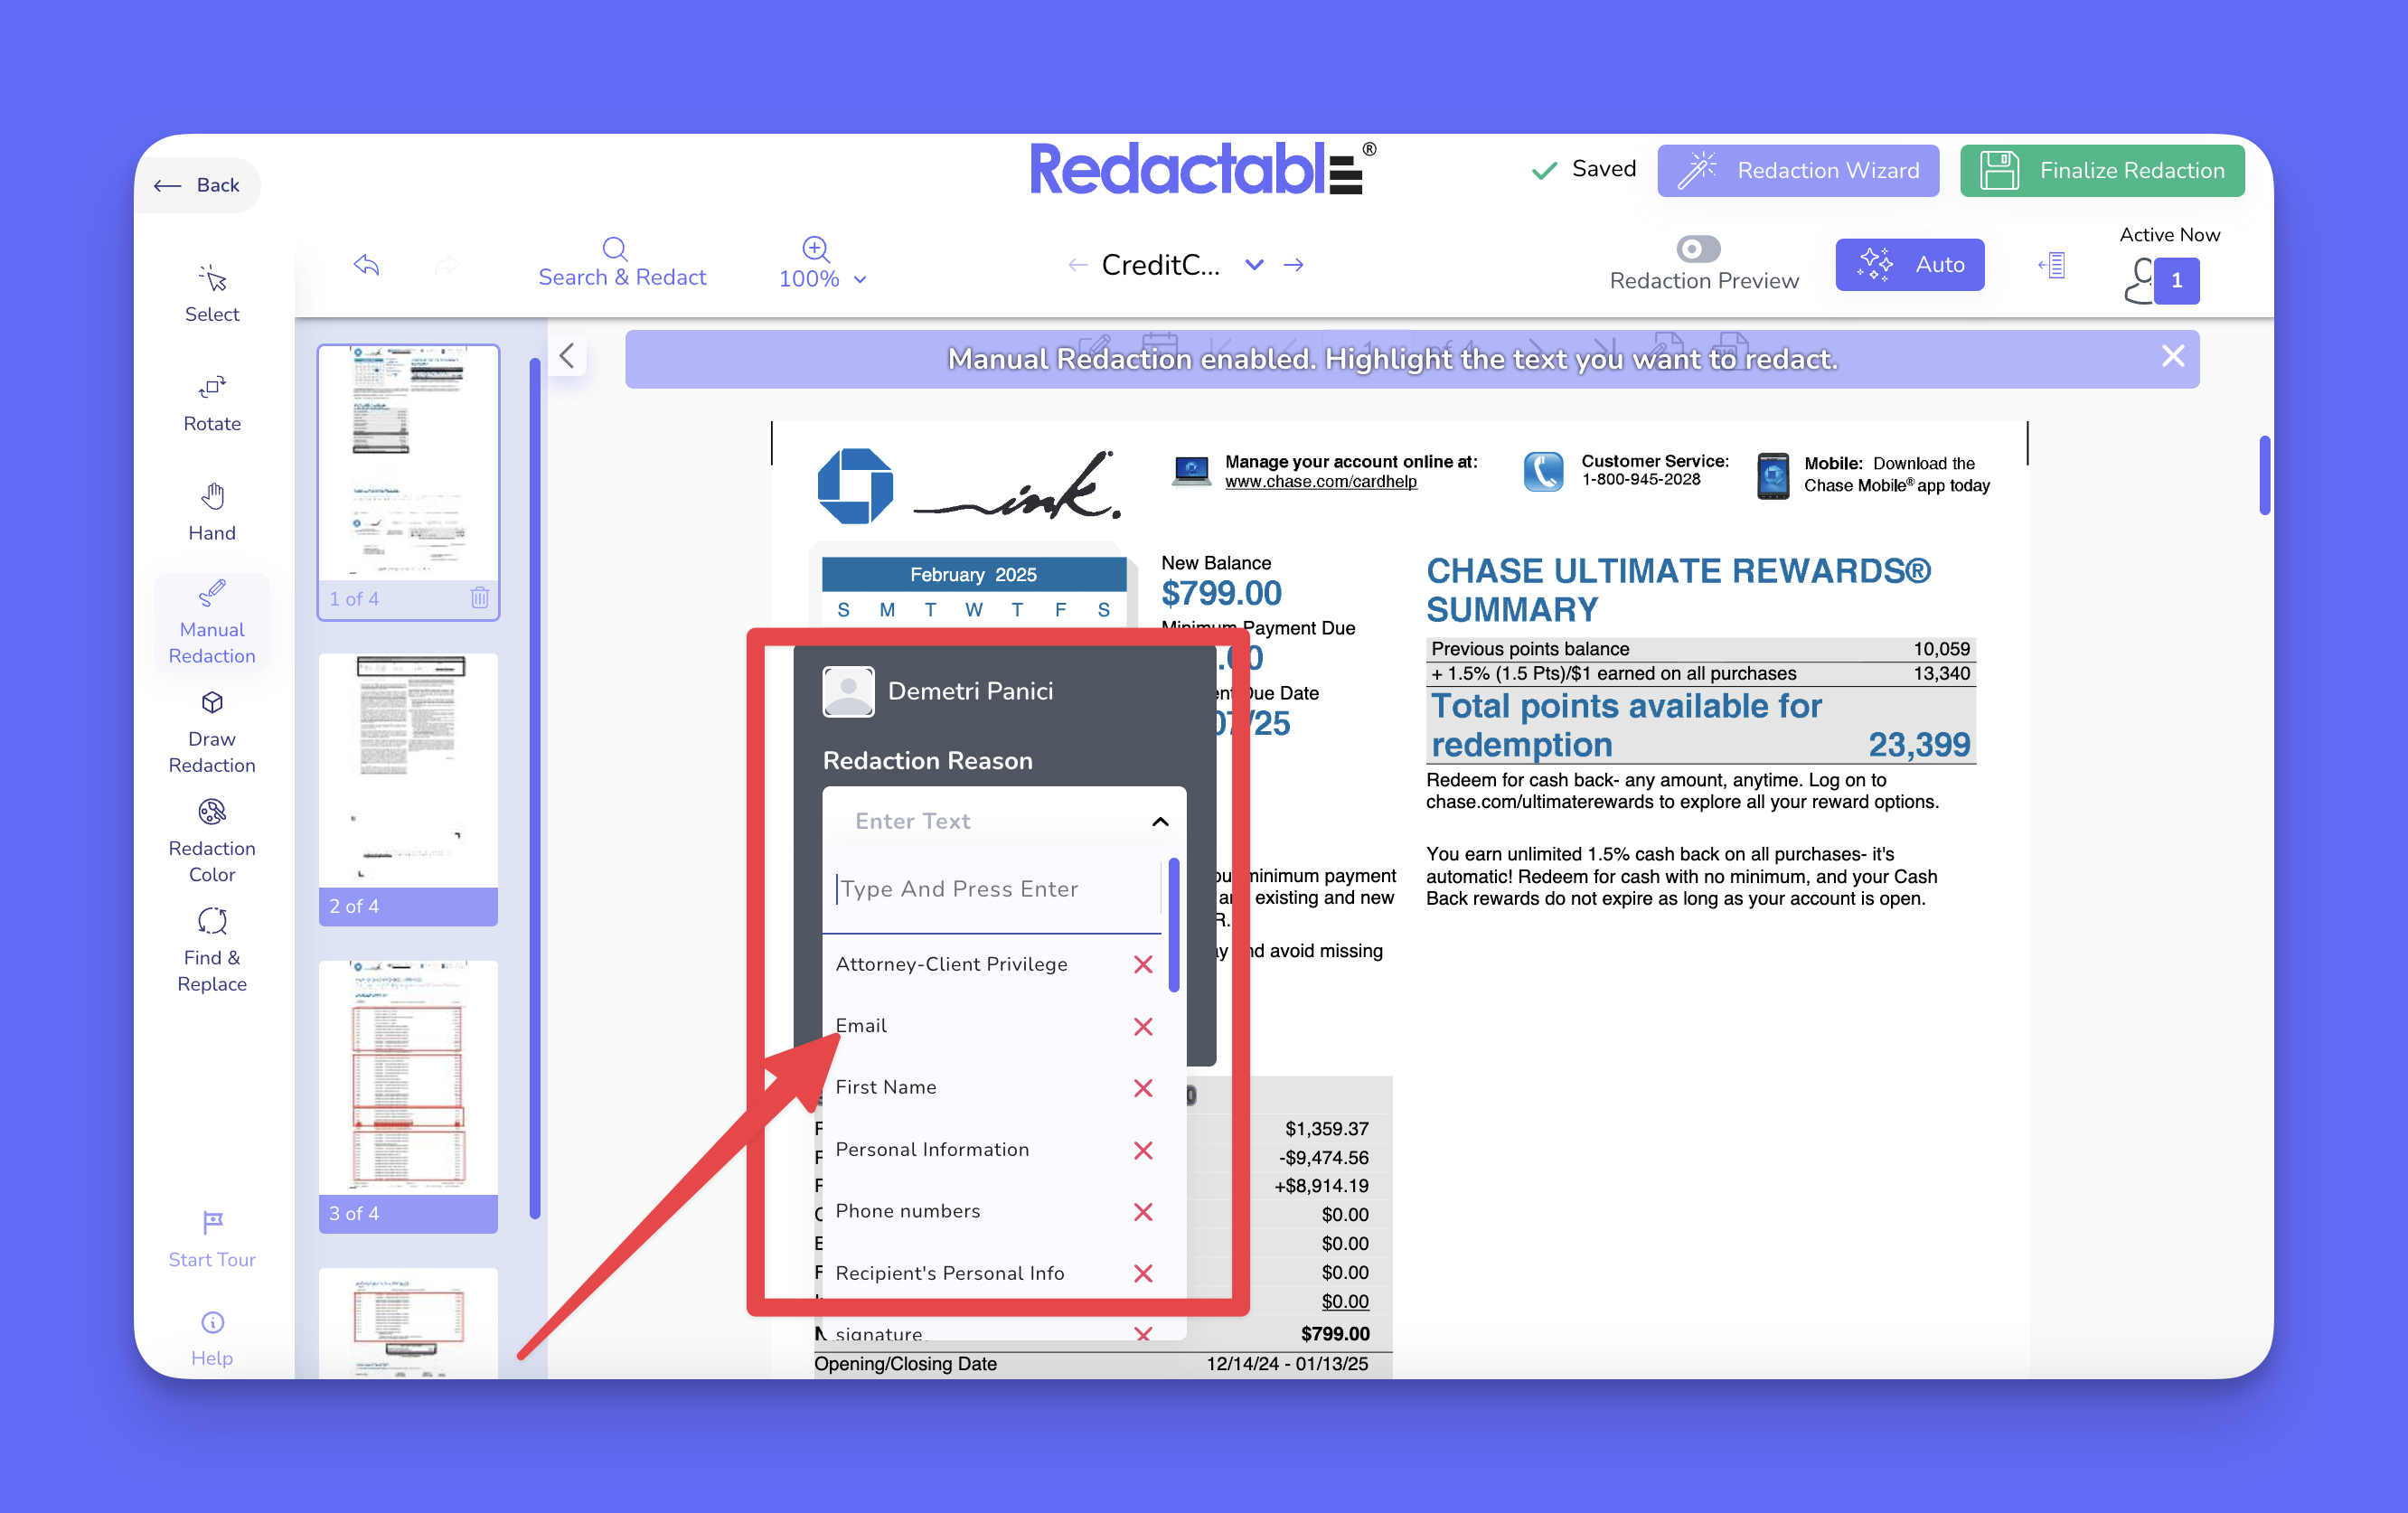
10. To apply the selected reason across all redactions in the document, select the “Apply to All Redactions” option.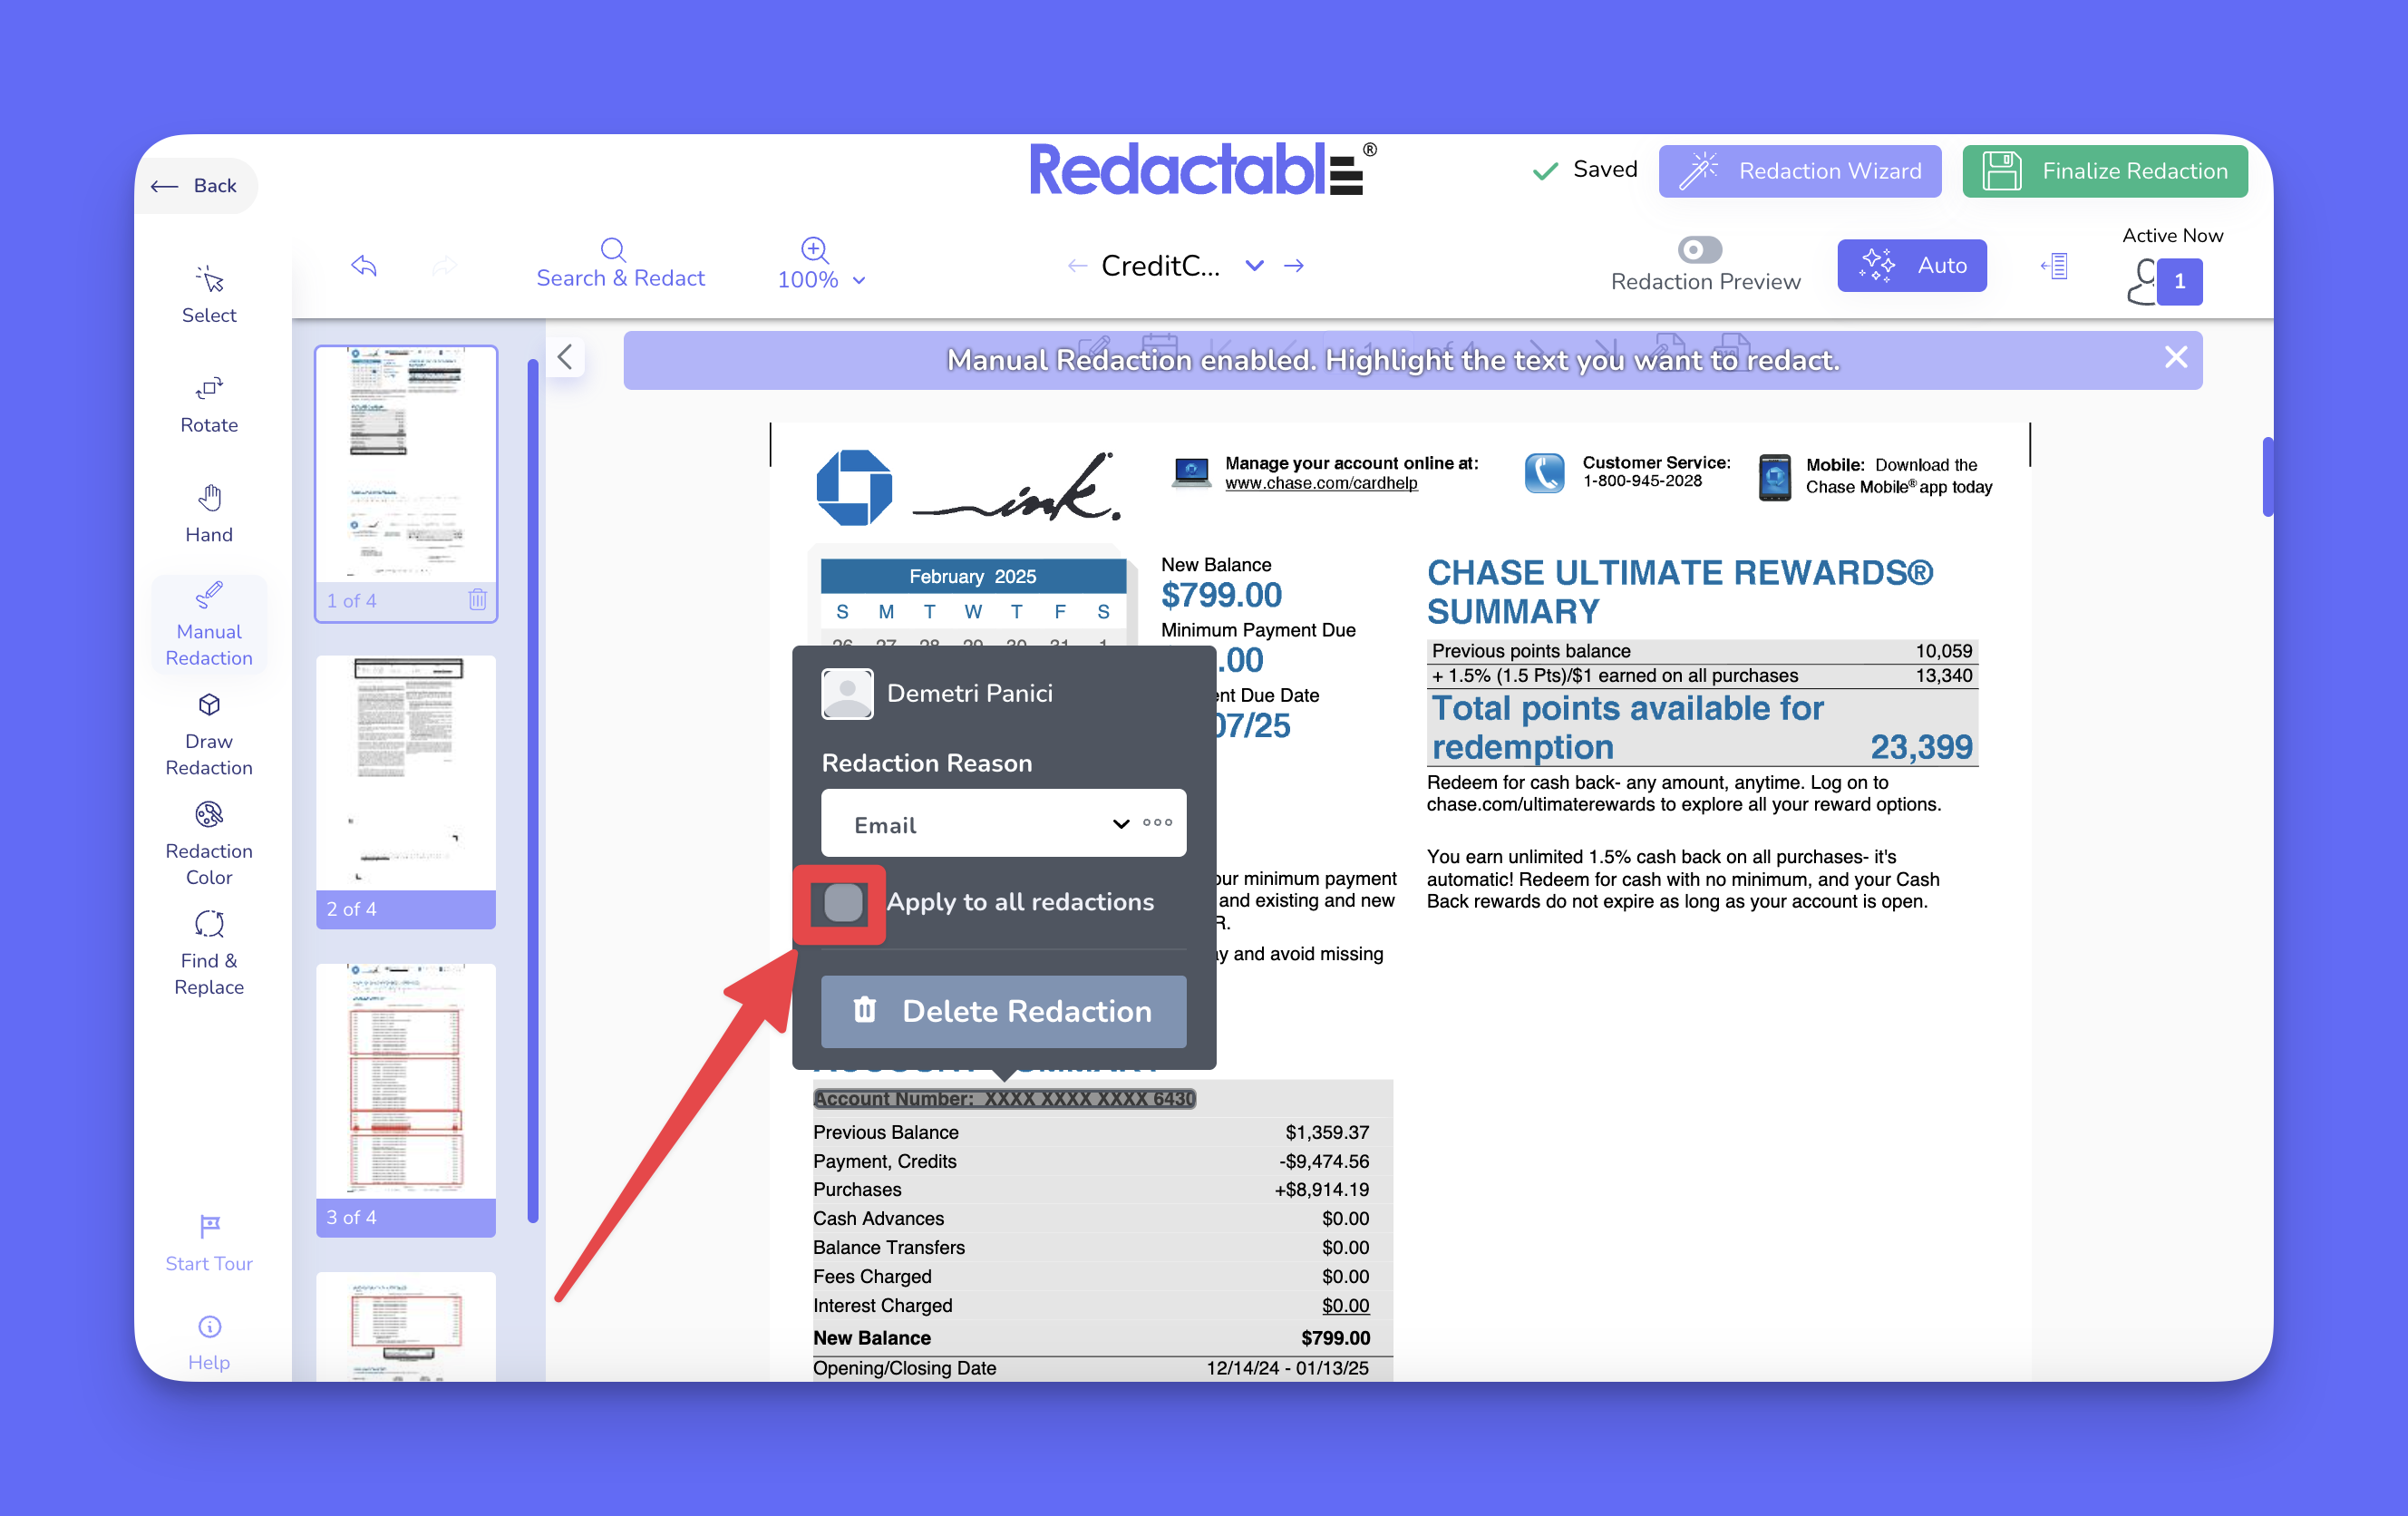
11. Once a reason has been applied, a three-dot menu will appear next to the applied reason.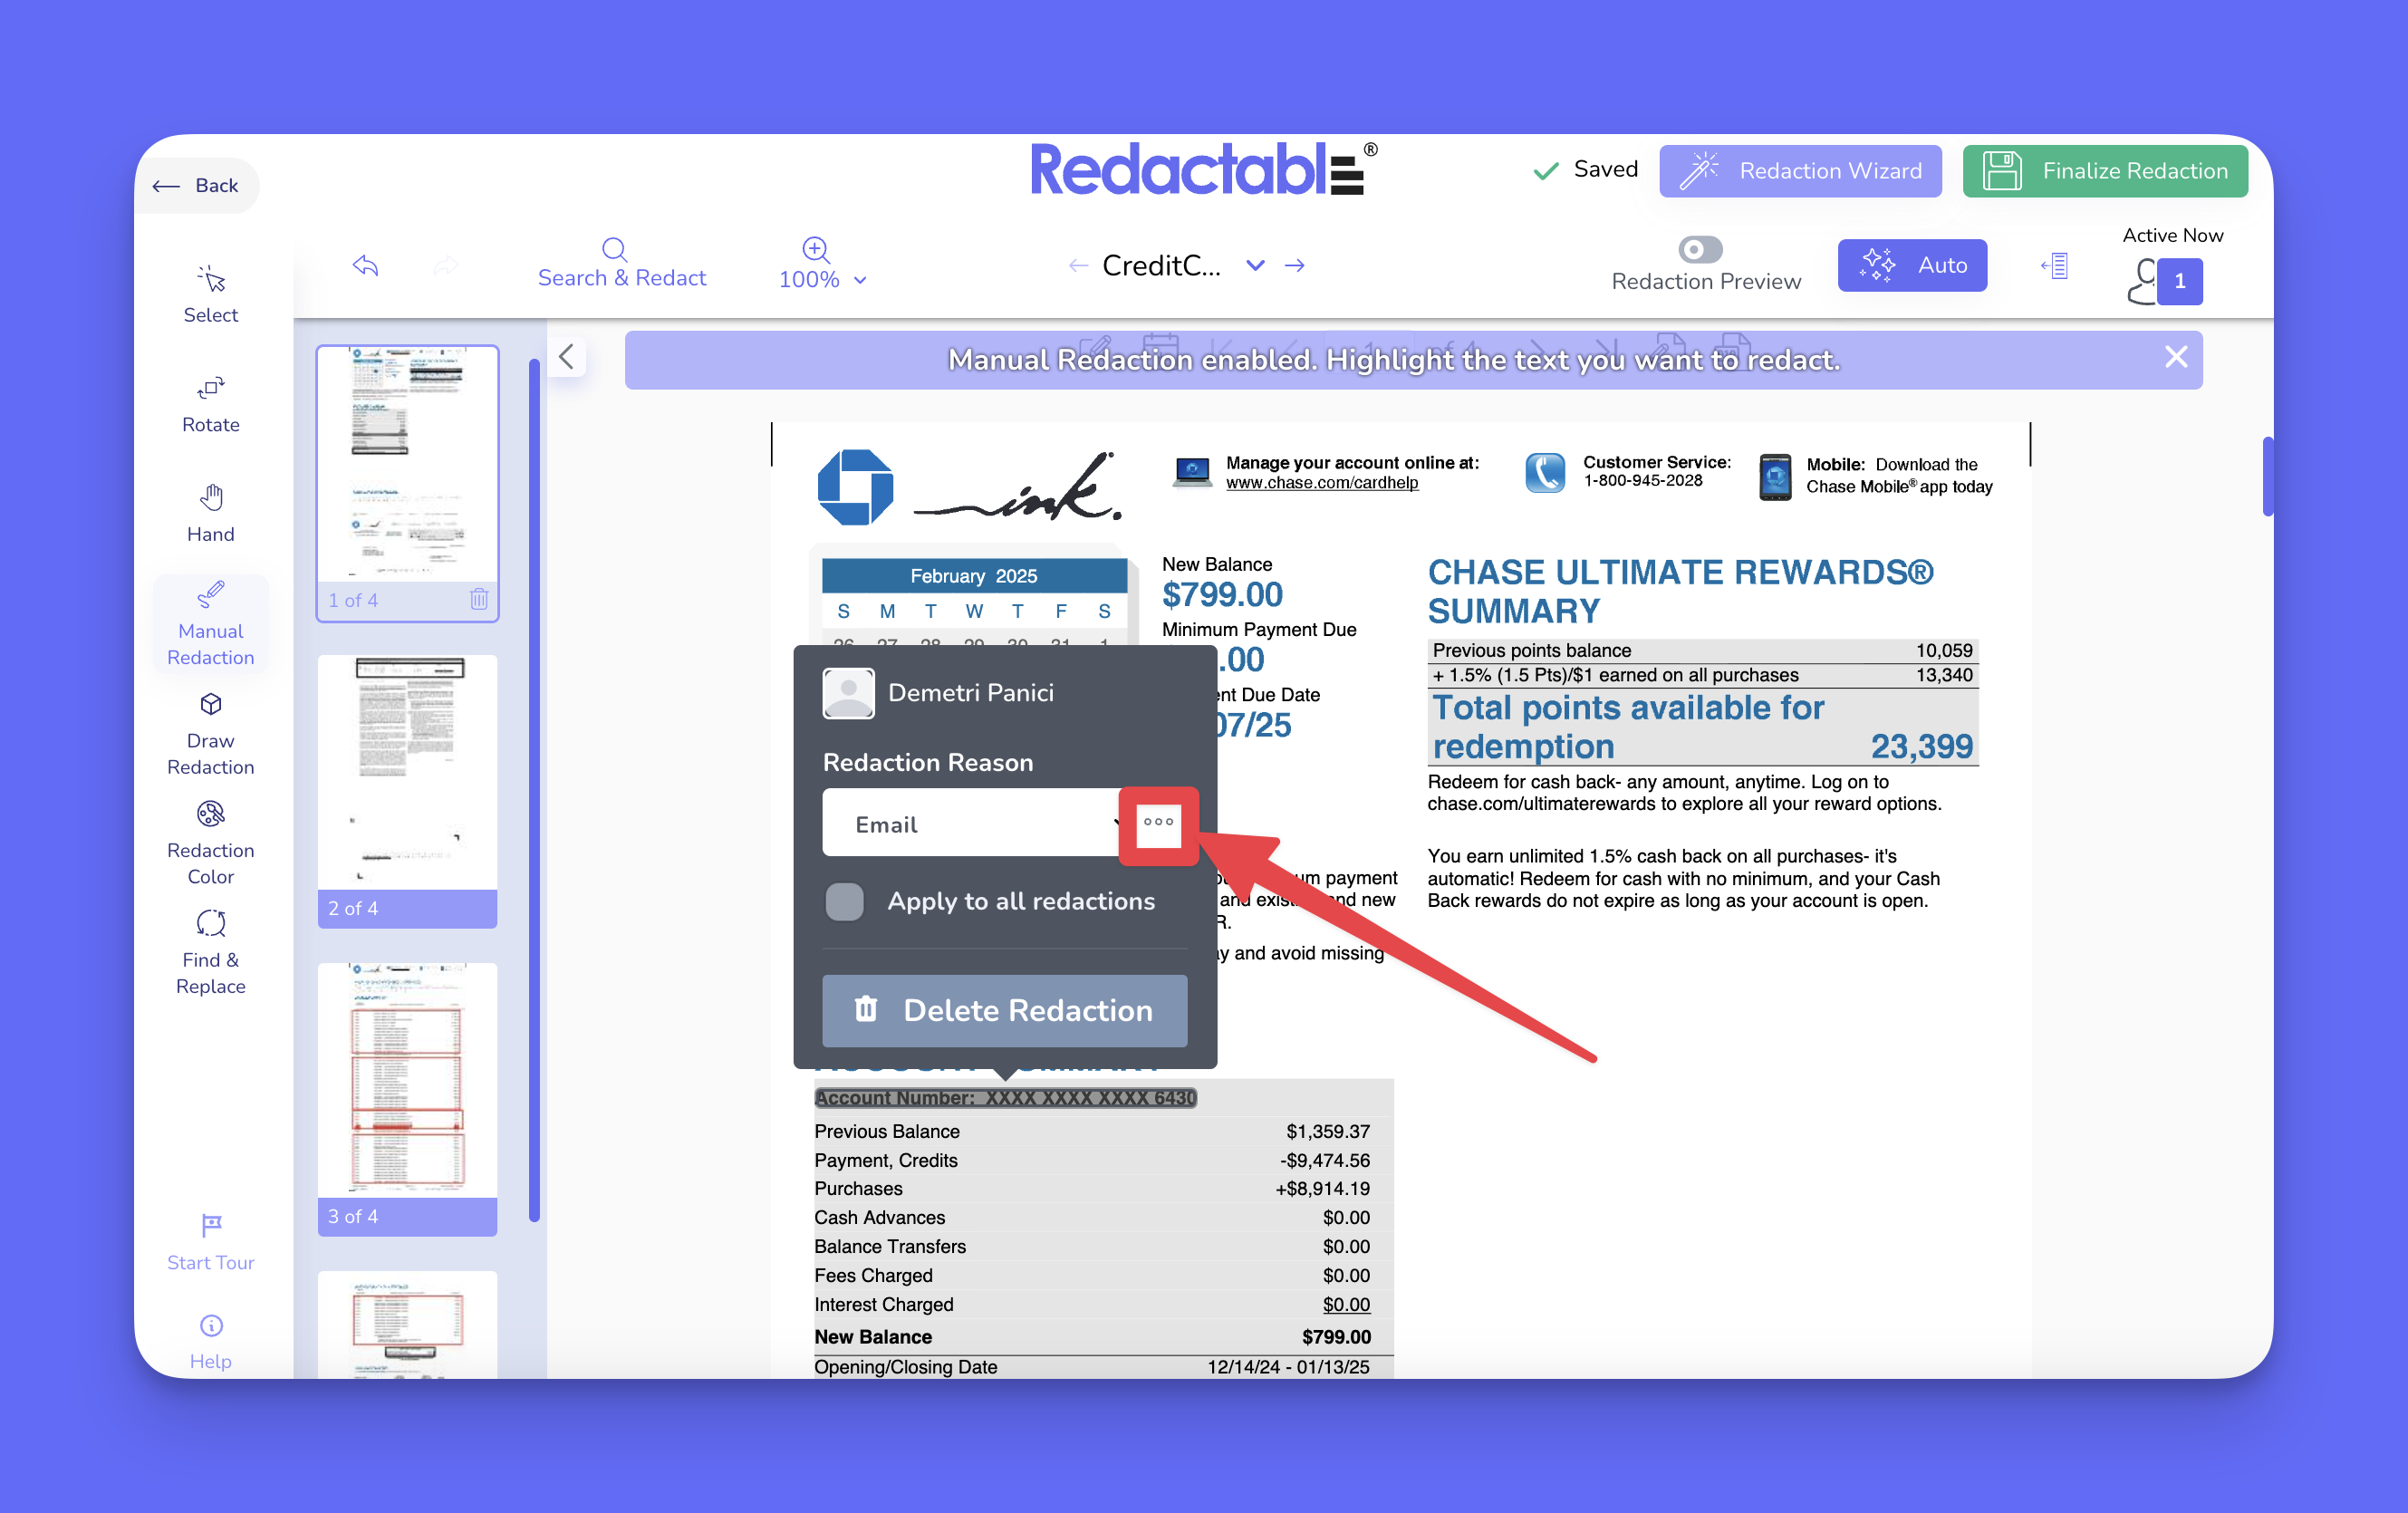
12. The three-dot menu includes the option “Delete This Reason Only” to remove the reason from the selected redaction. It also includes the option “Delete Reason From All” to remove the applied reason across all redactions in the document.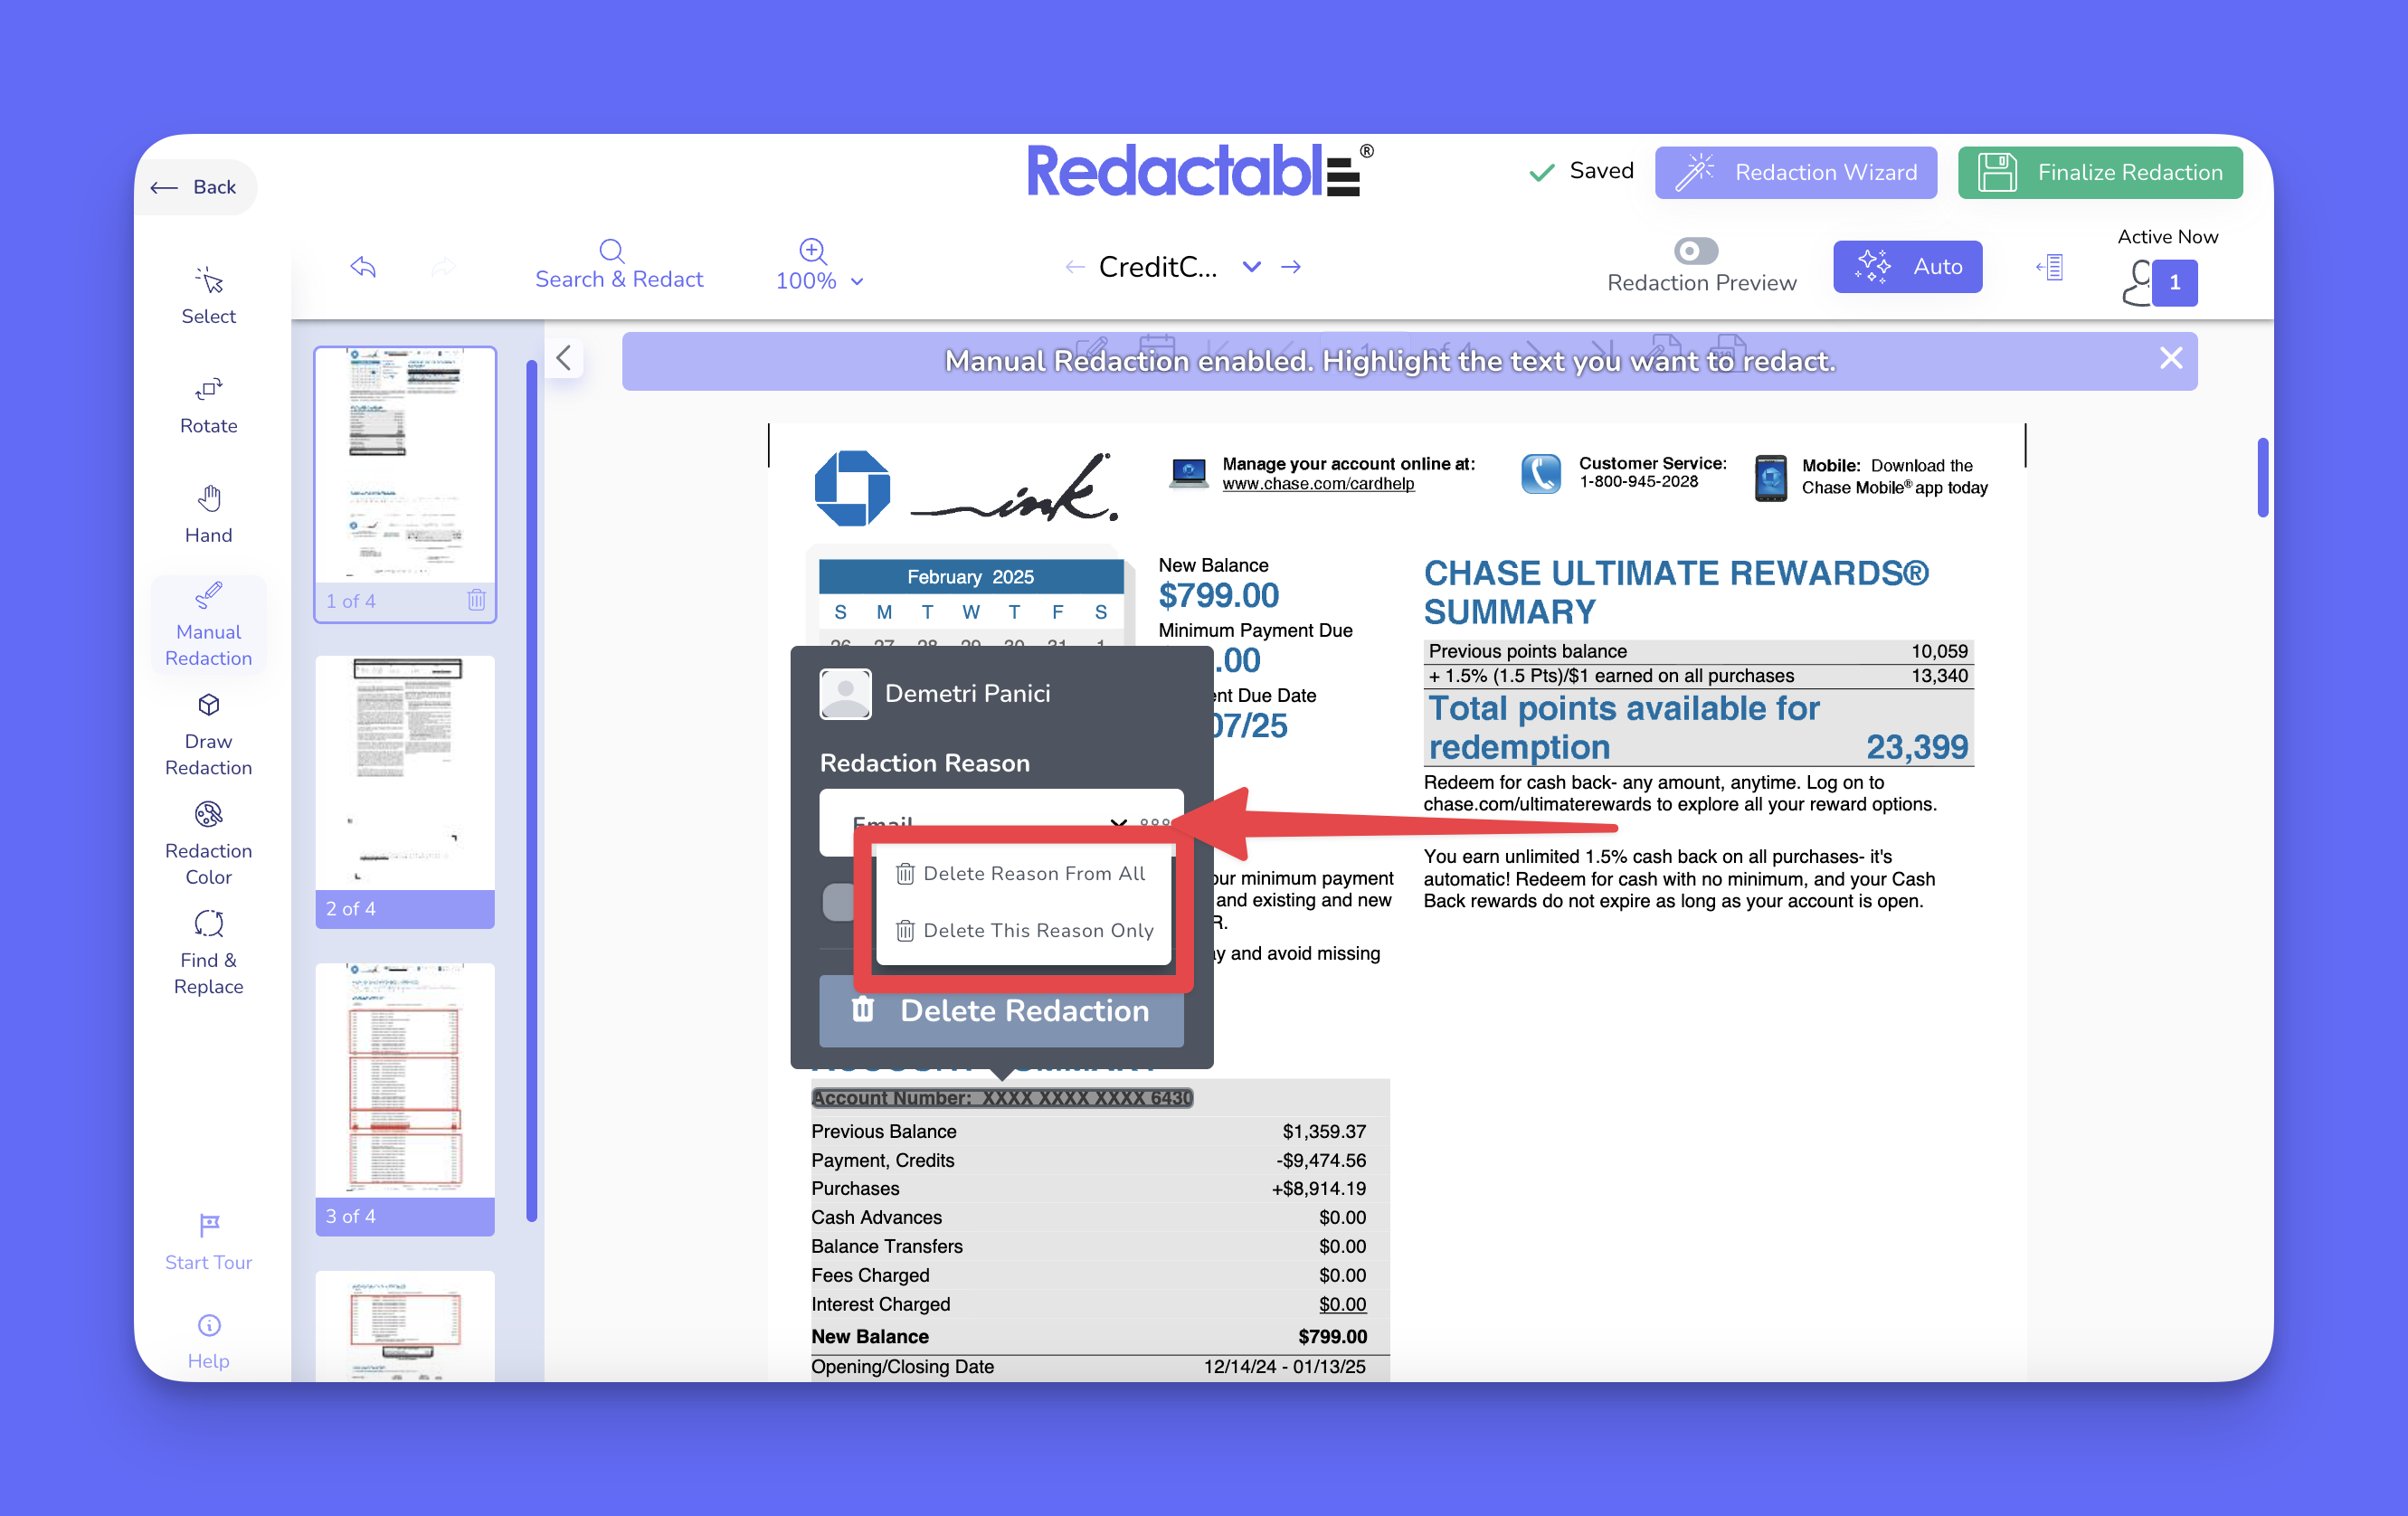
Removing or deleting redactions
13. To delete a redaction, click on the highlighted redaction in the document and select the “Delete Redaction” option.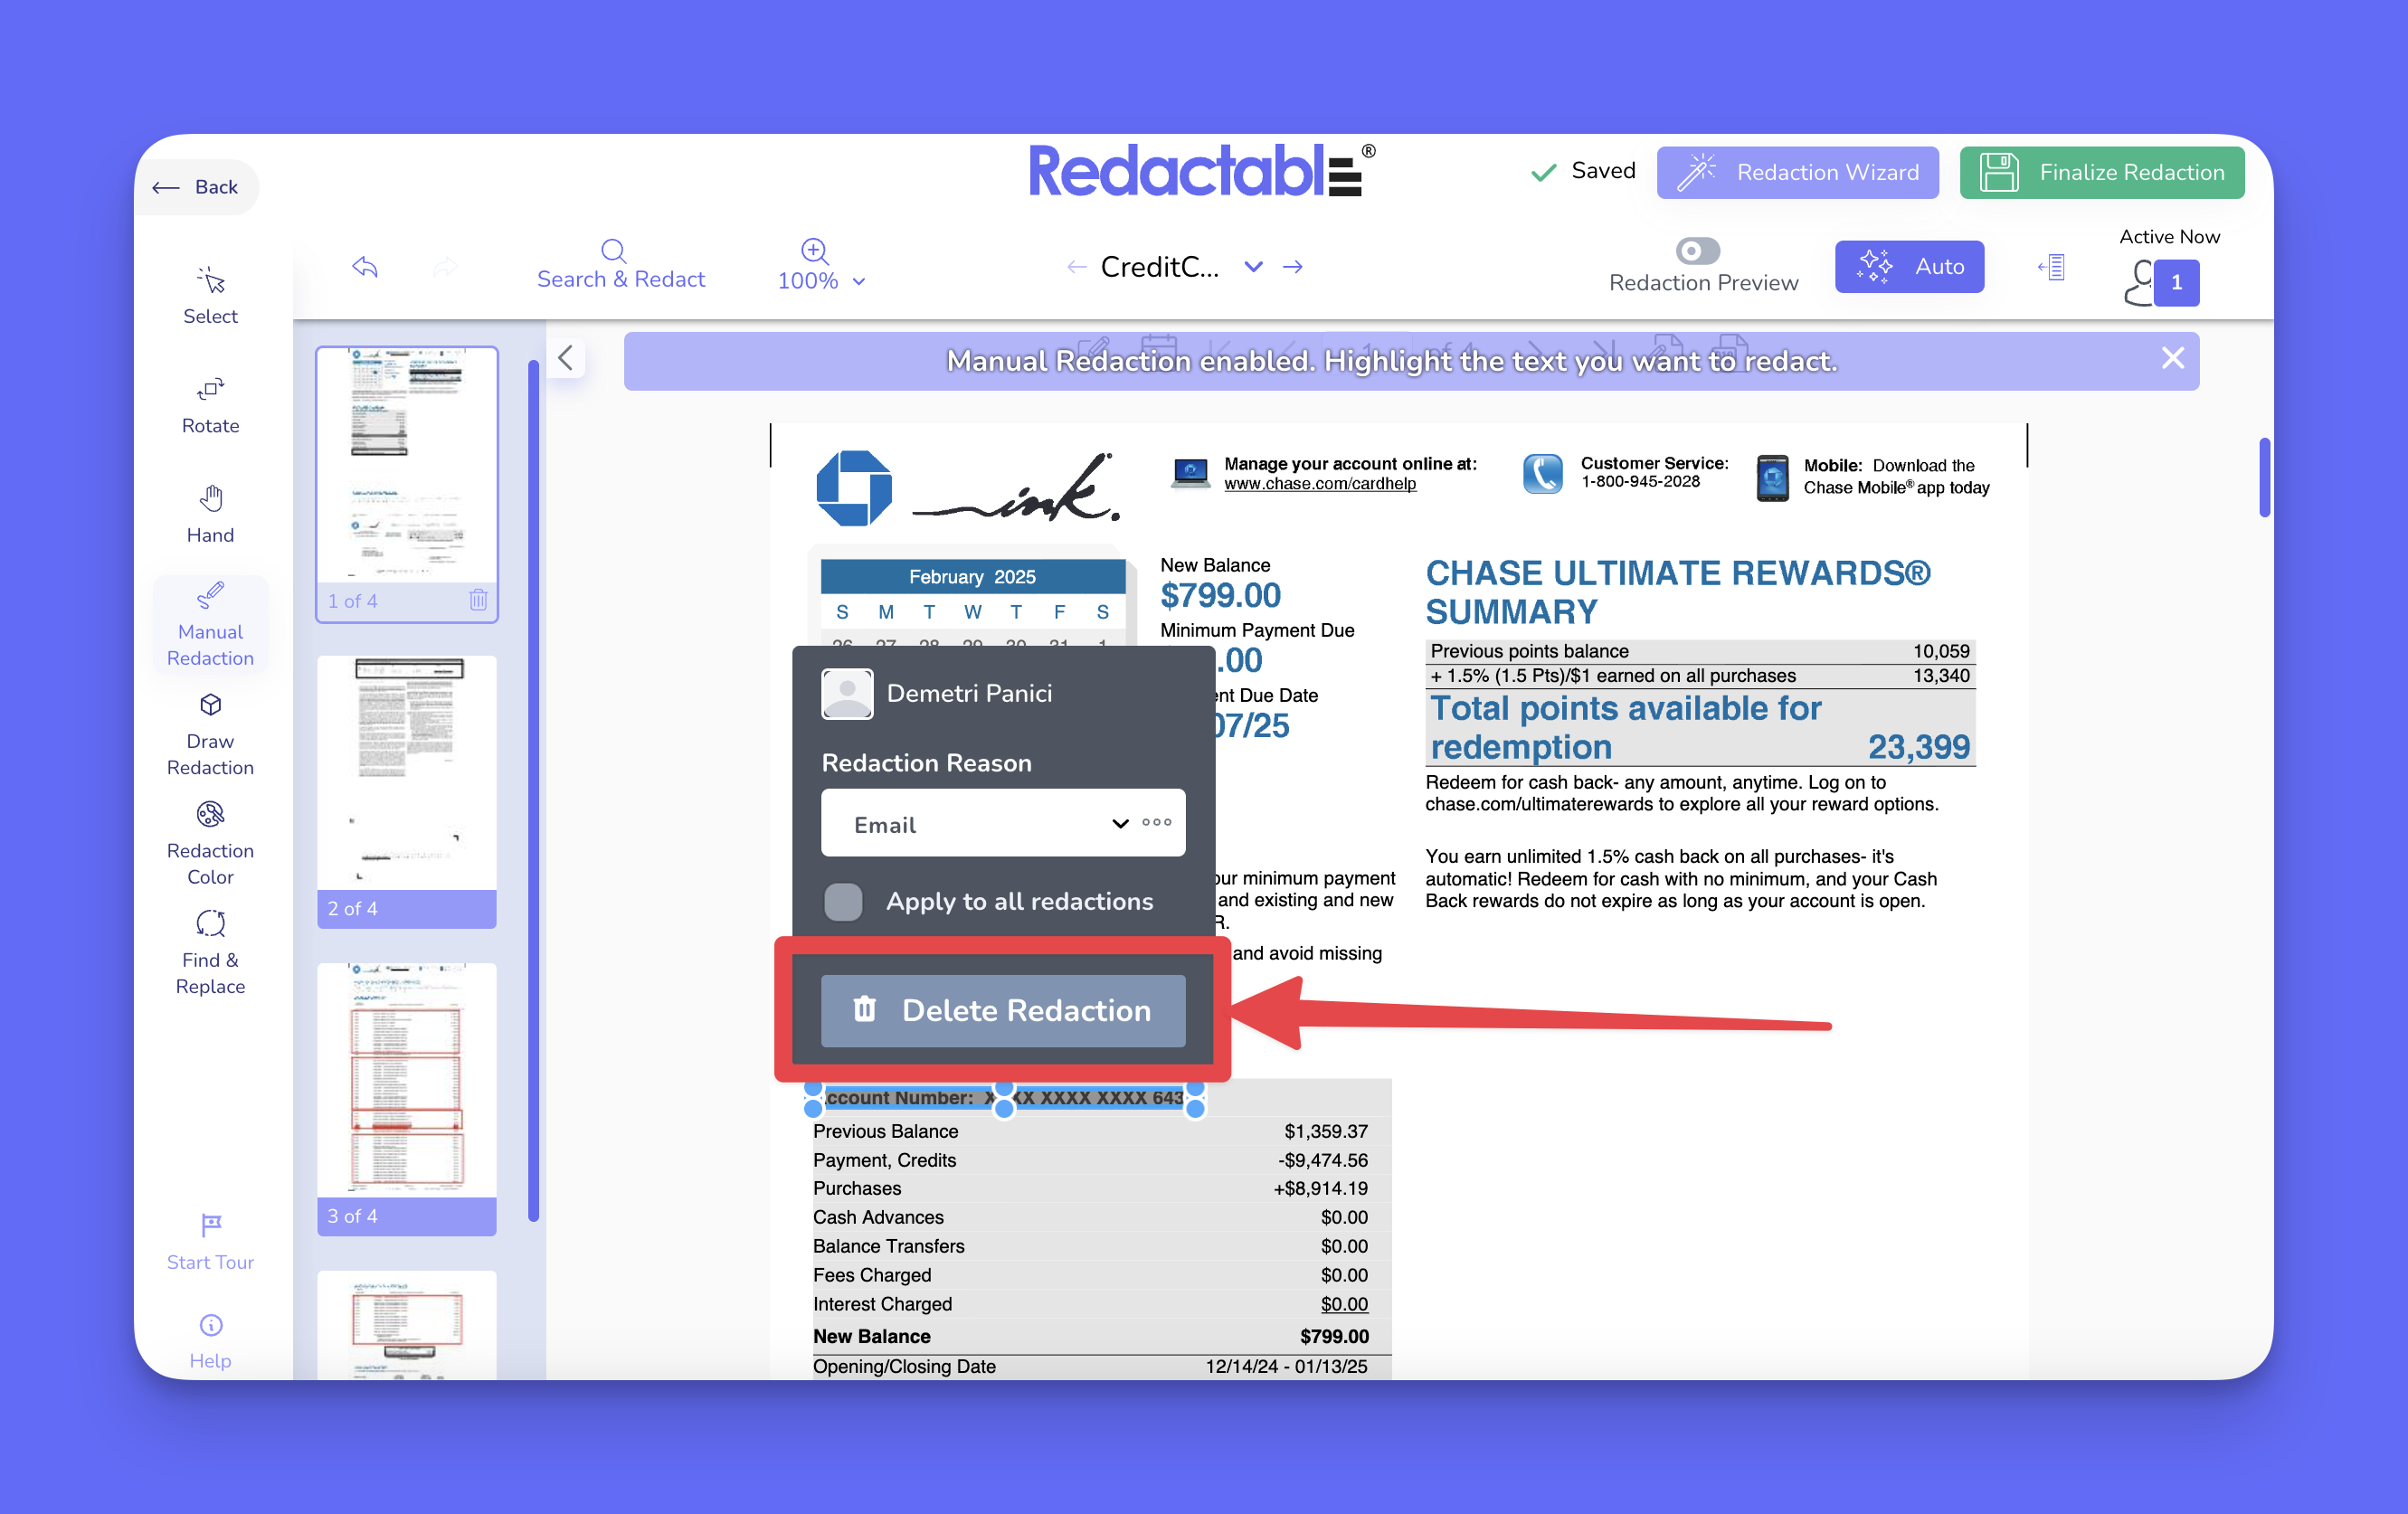
Finalizing your document
14. To complete the redaction process, review all applied redactions, and click on “Finalize Redaction” to permanently apply changes.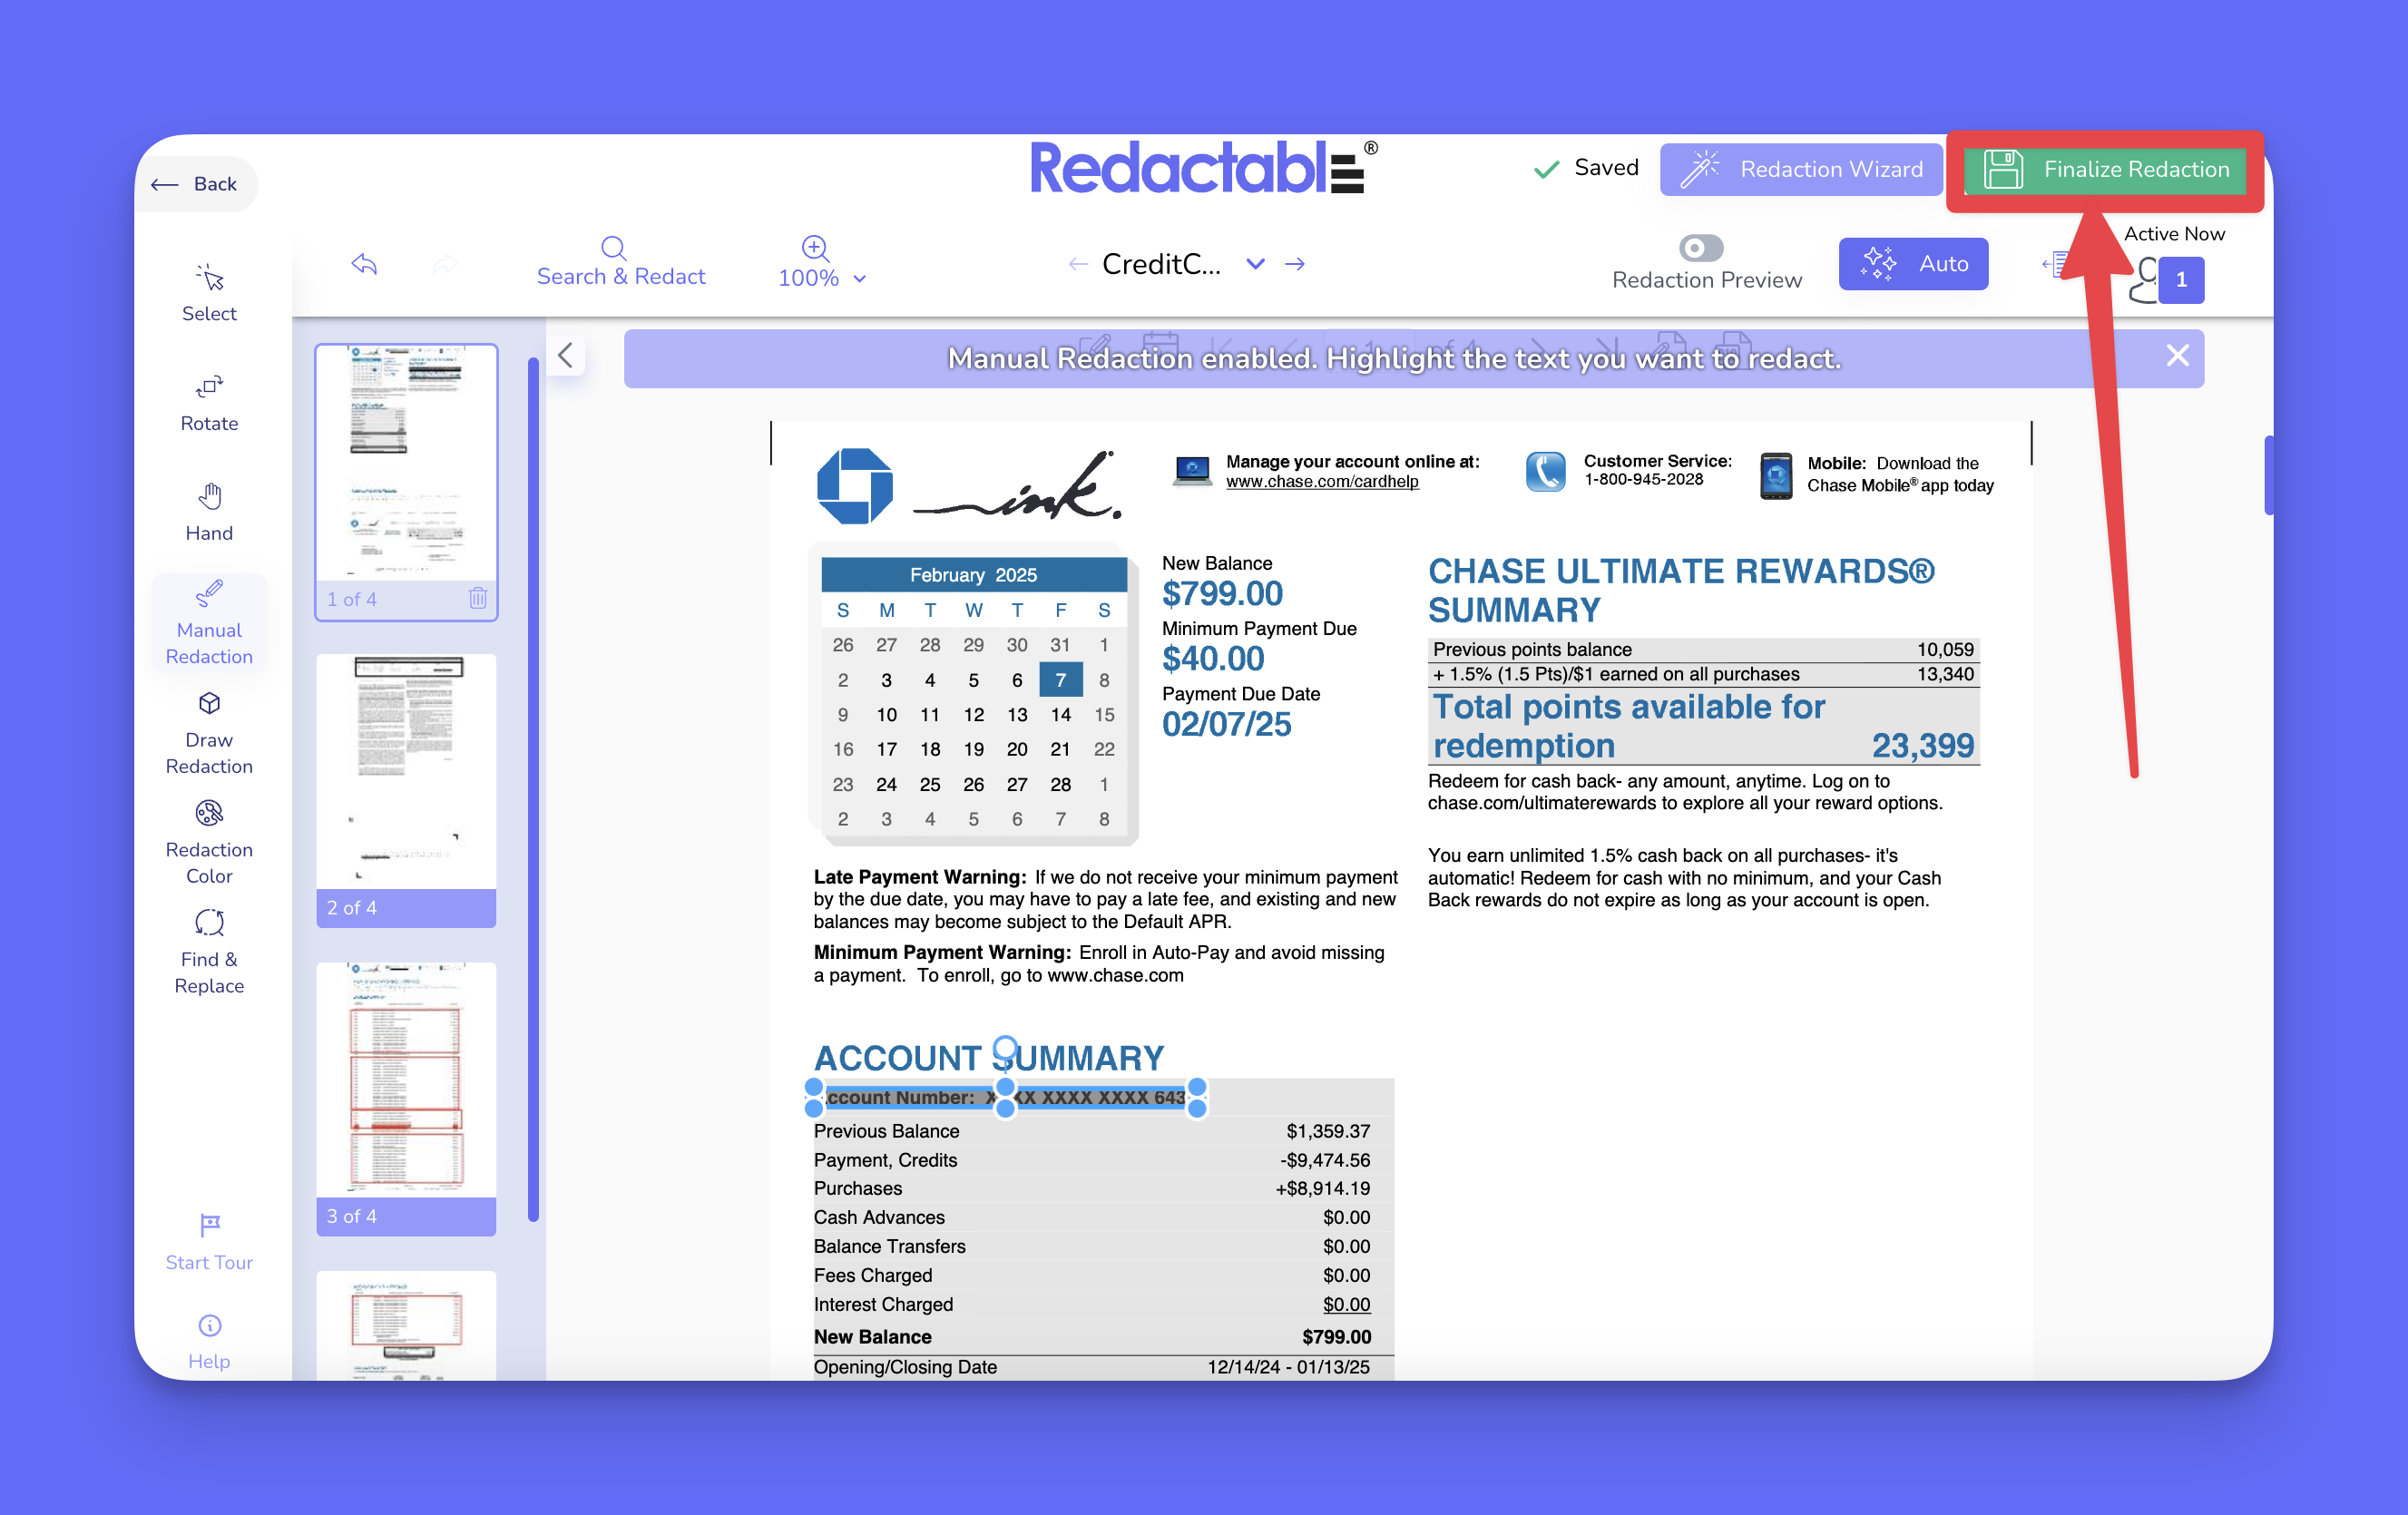
If you have additional questions or need help, please contact us at support@redactable.com.
Tip: For detailed instructions on how to use the Redaction Wizard, click here.
Was this article helpful?
That’s Great!
Thank you for your feedback
Sorry! We couldn't be helpful
Thank you for your feedback
Feedback sent
We appreciate your effort and will try to fix the article