Auto Redaction
Manually reviewing documents to find sensitive information is time-consuming and error-prone, especially when confidential data appears in different formats across multiple pages.
The Auto Redaction feature uses artificial intelligence to automatically find and suggest confidential data in your document for redaction. Once the scan is complete, you can review the suggestions, select what to redact, and apply changes in one step.
This is the quickest way to apply redactions especially useful for long documents, reports, legal files, and other records that contain repeated or scattered sensitive information.
Why It Matters
The Auto Redaction feature is designed to simplify the redaction workflow using:
- AI-powered identification: Surfaces potential sensitive data automatically across the document.
- Centralized review: Displays all suggested results in a single list for easier processing.
- Approval workflow: Accept, reject, or apply all suggested redactions in one step.
- Search & categories: Target specific data types by running category-based scans.
- Result management: Manage instances with options to select, remove, or assign reasons.
- Batch redaction: Apply redactions across multiple results in a single step.
Using the Auto Redaction feature
Accessing the tool
1. From your Redactable dashboard, open your document.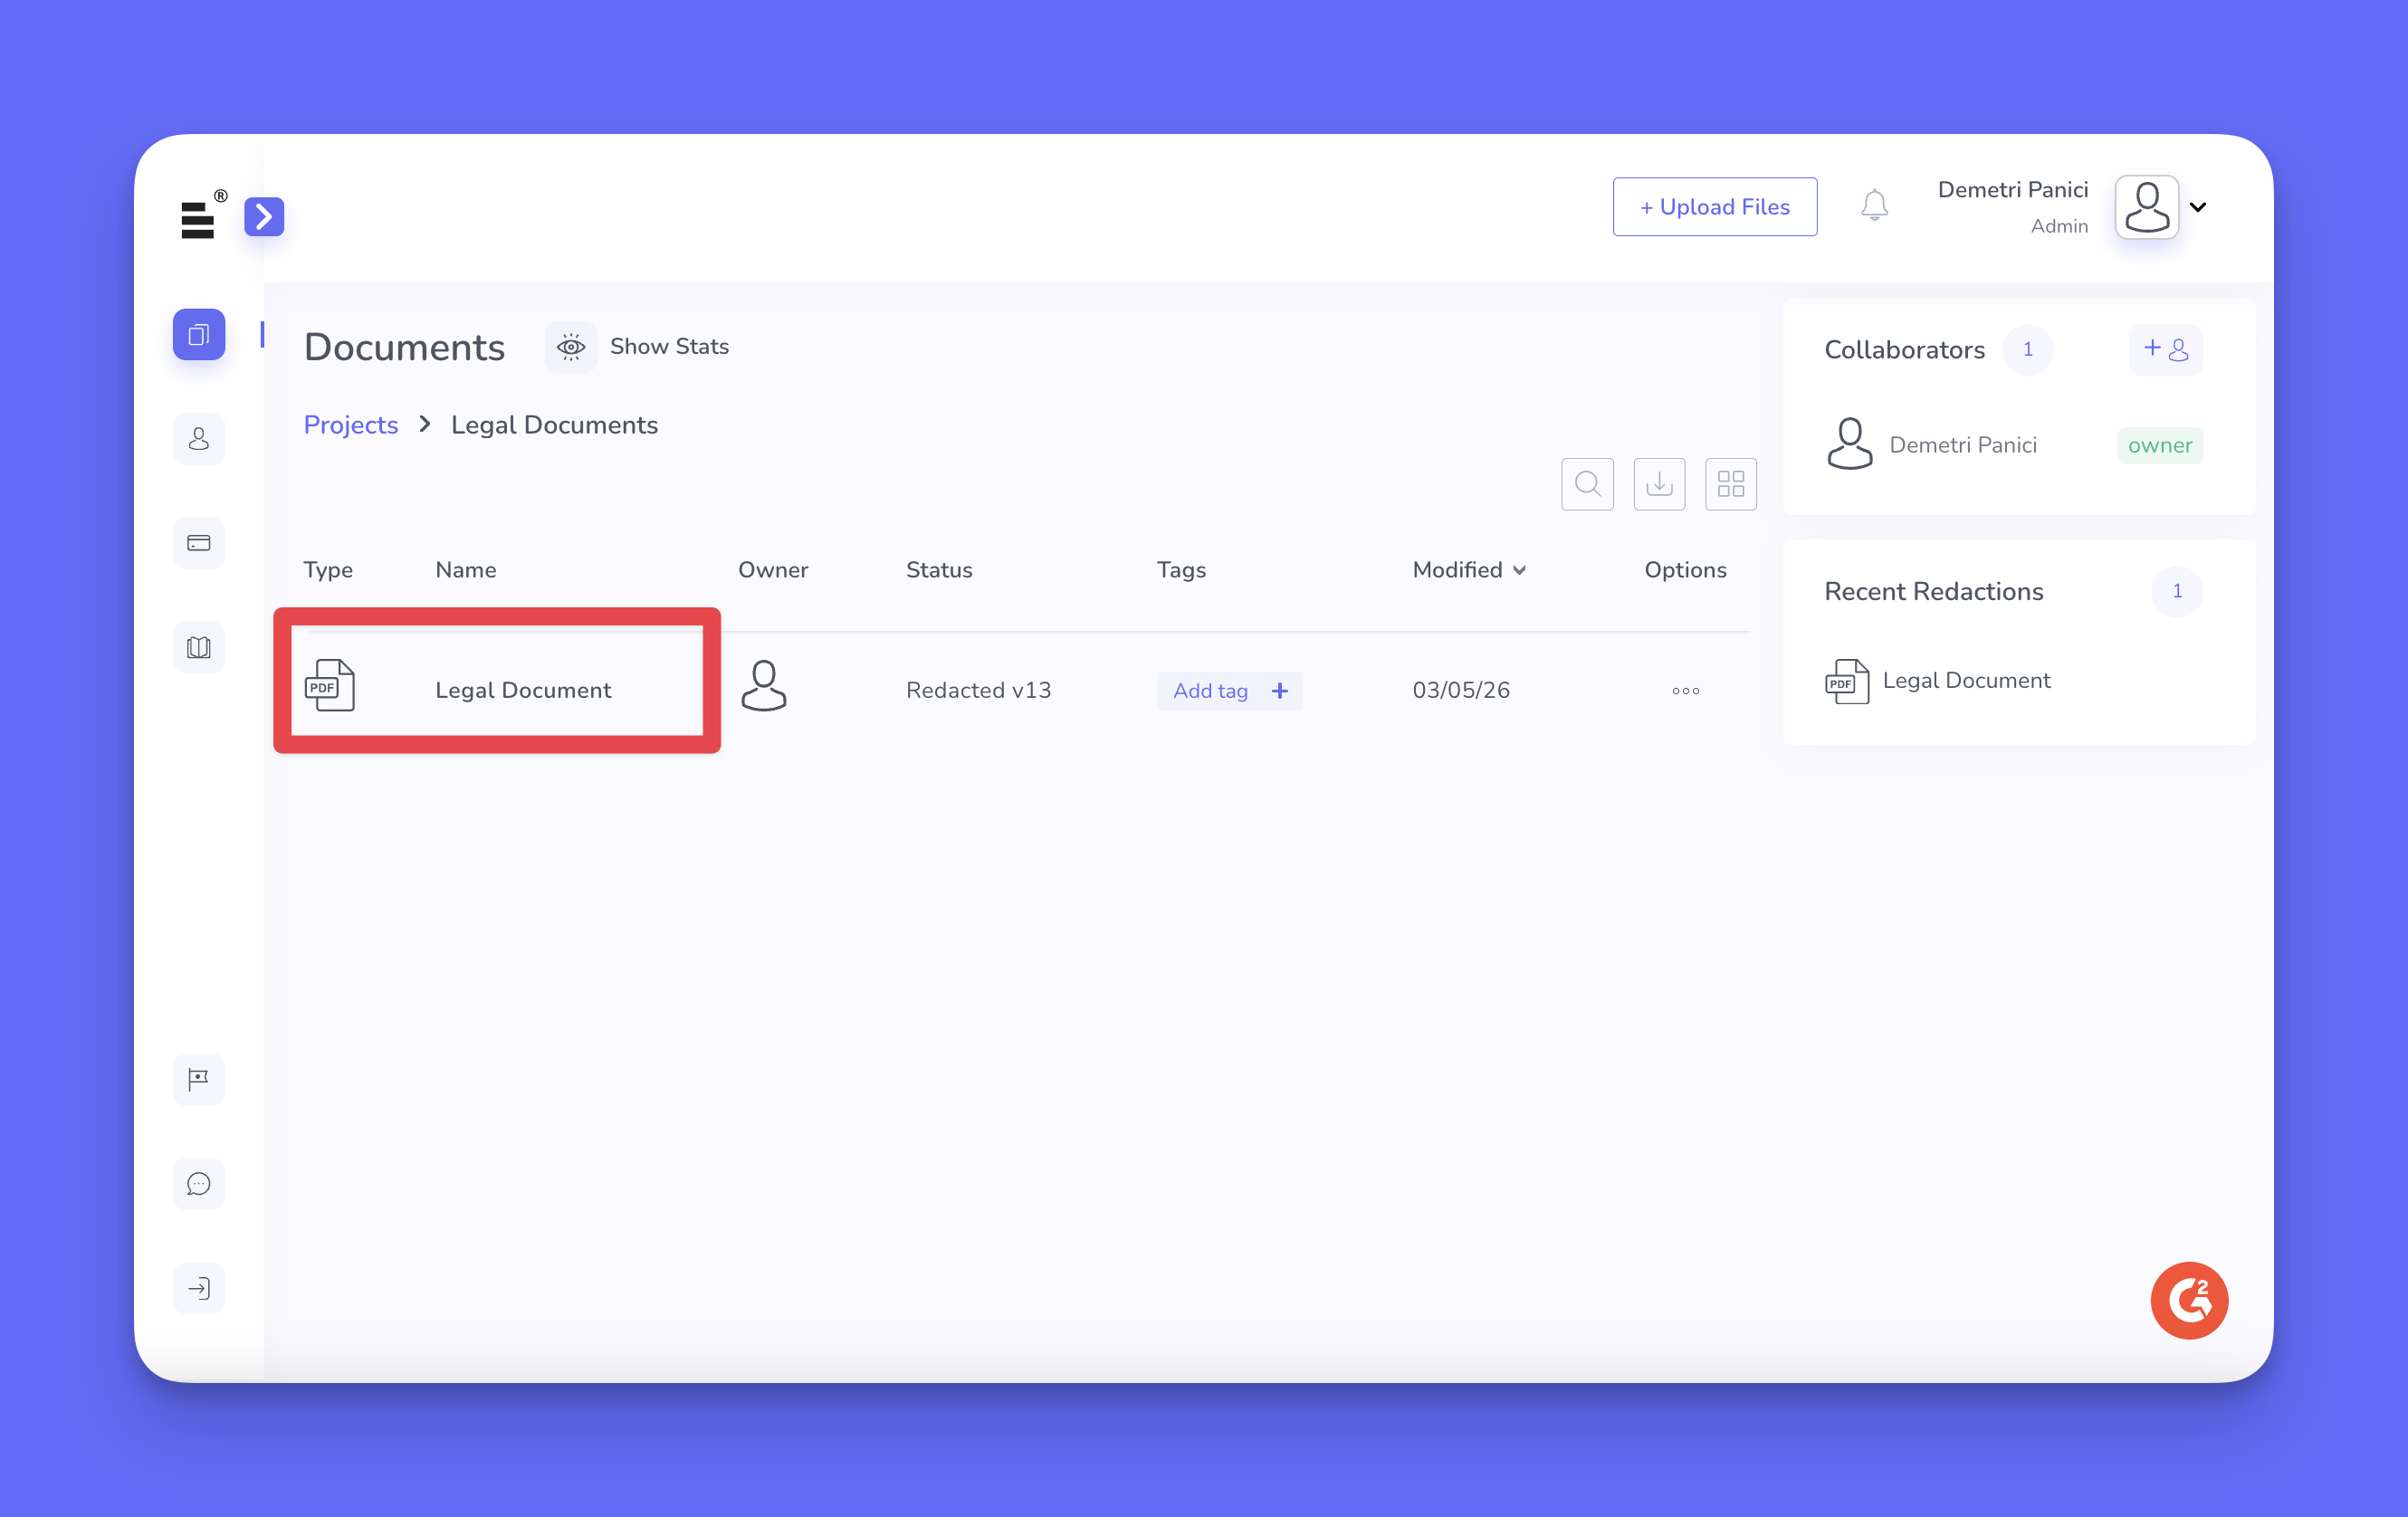
2. The “Redaction Wizard” appears automatically when the document opens. From the “Redaction Wizard” select the “Auto” option.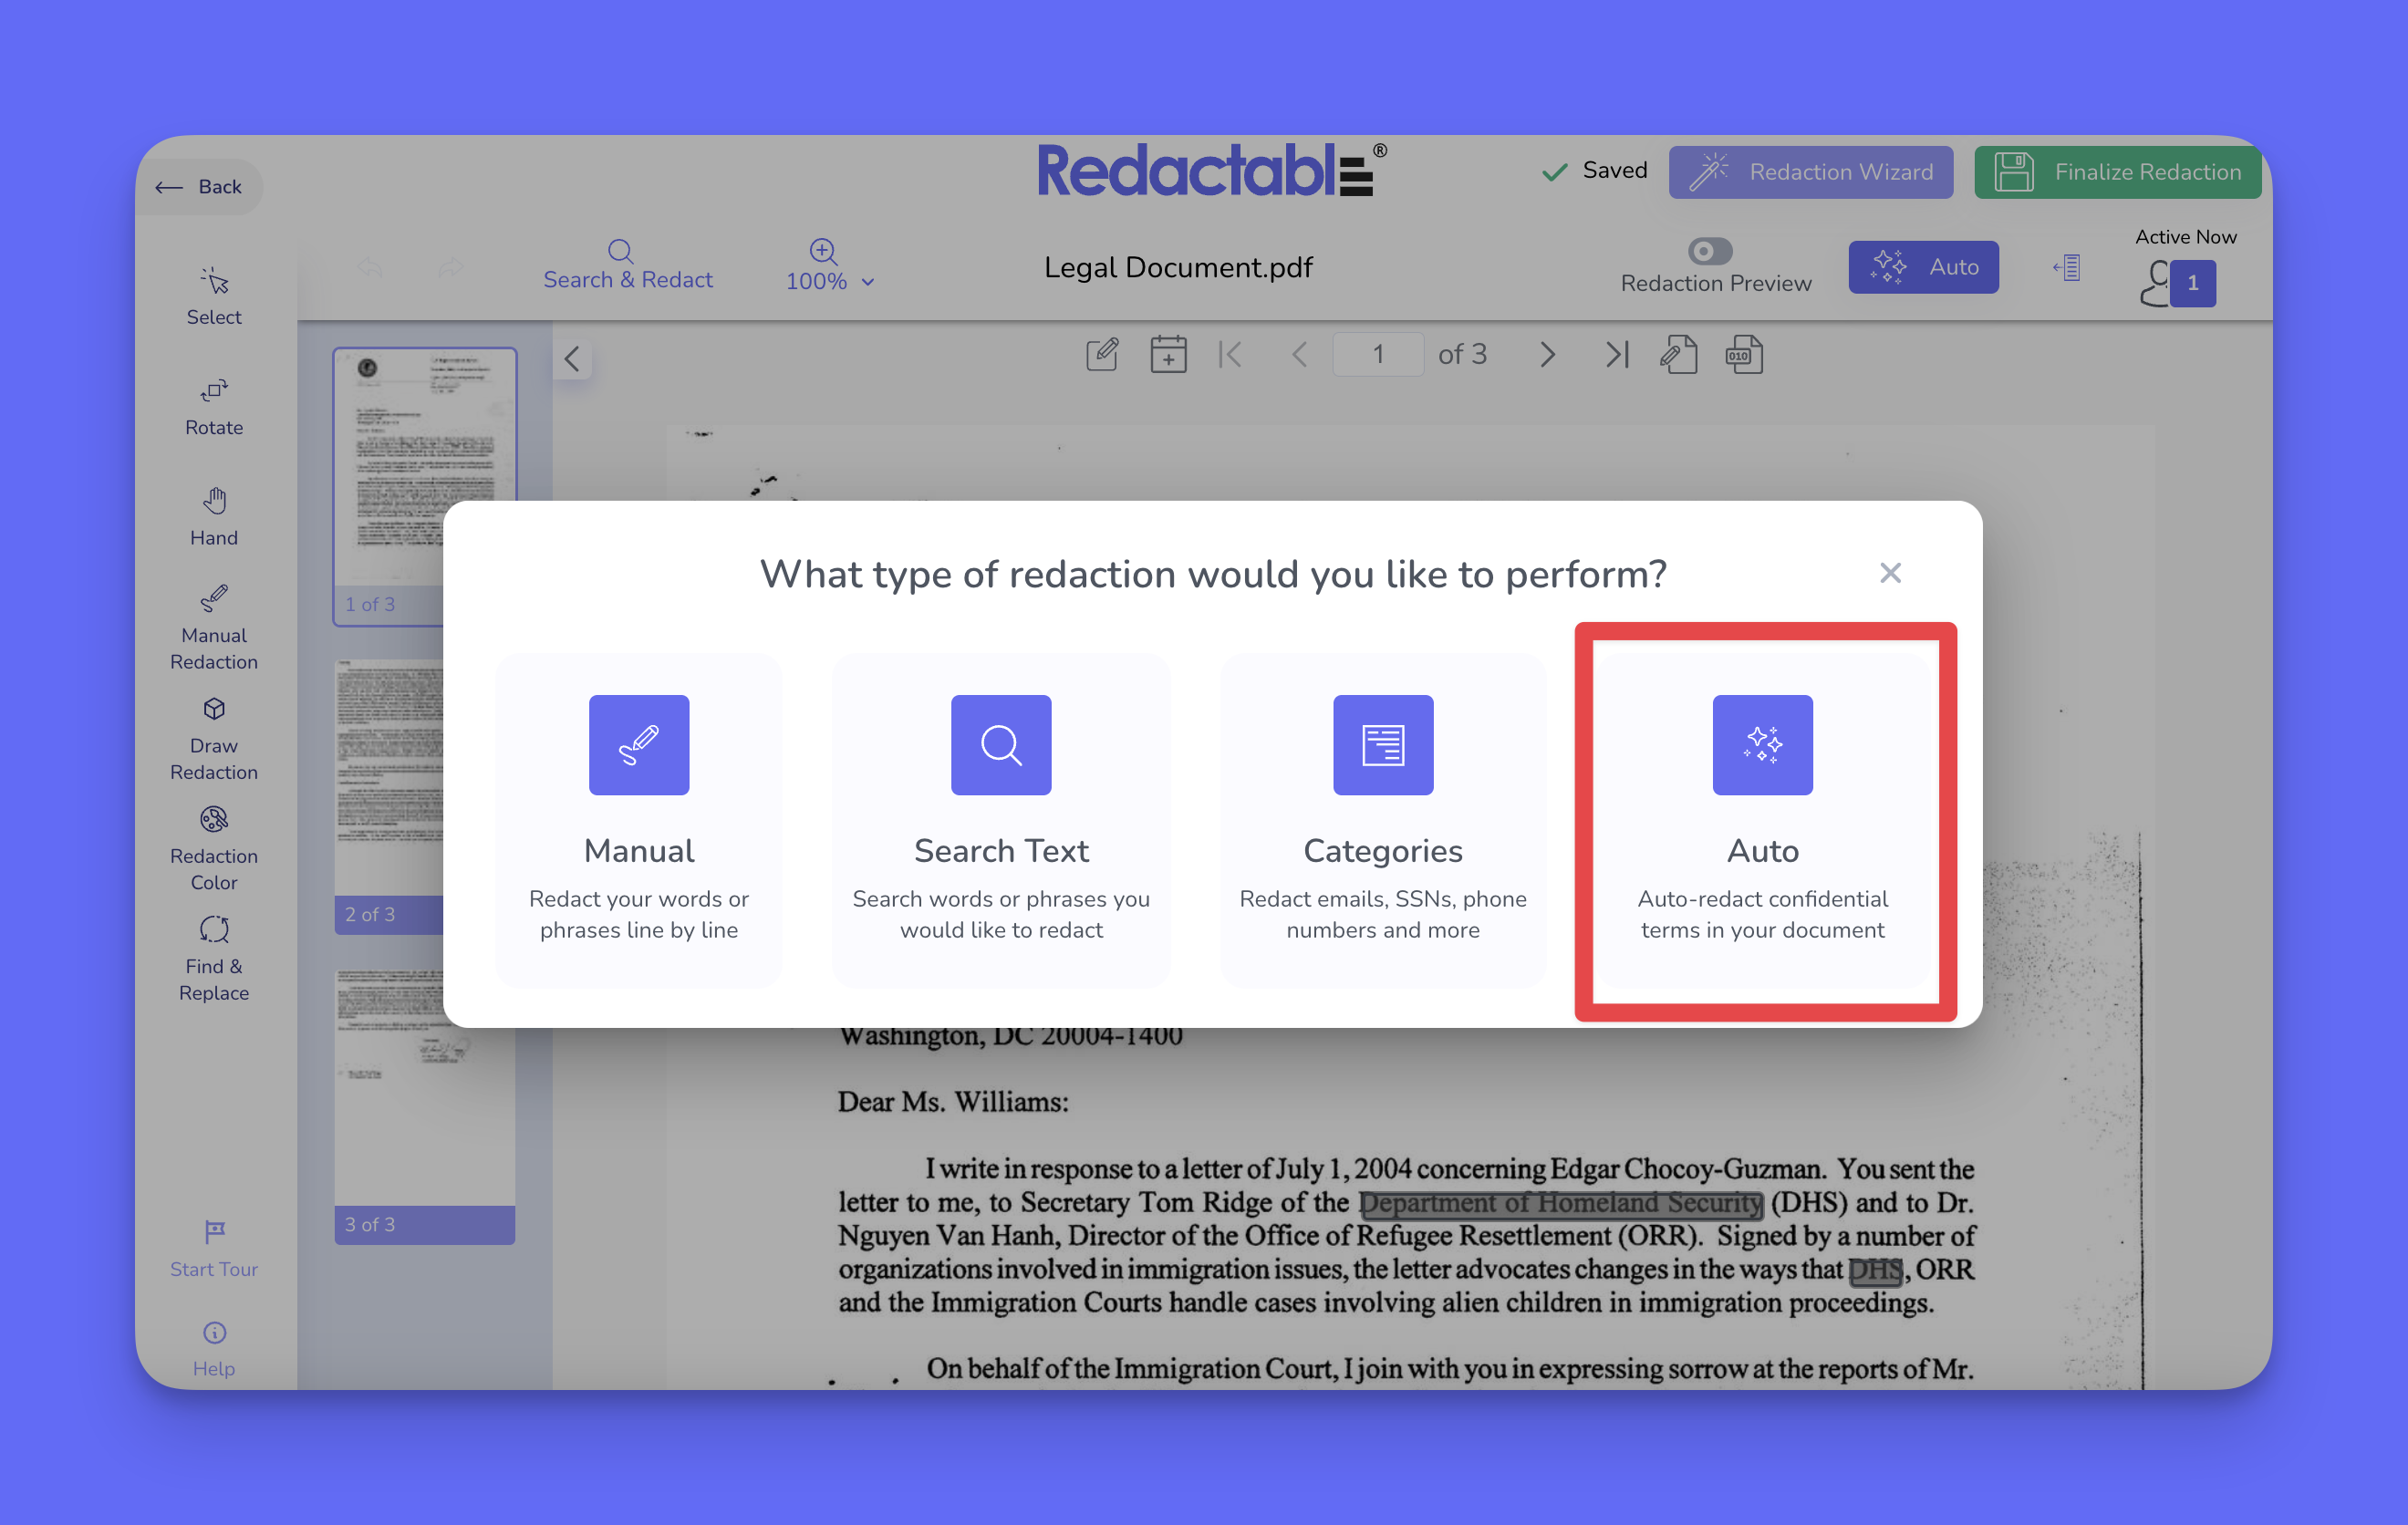
3. You can also select the "Auto Redaction" button (the star icon) on the top right navigation from the redaction toolbar.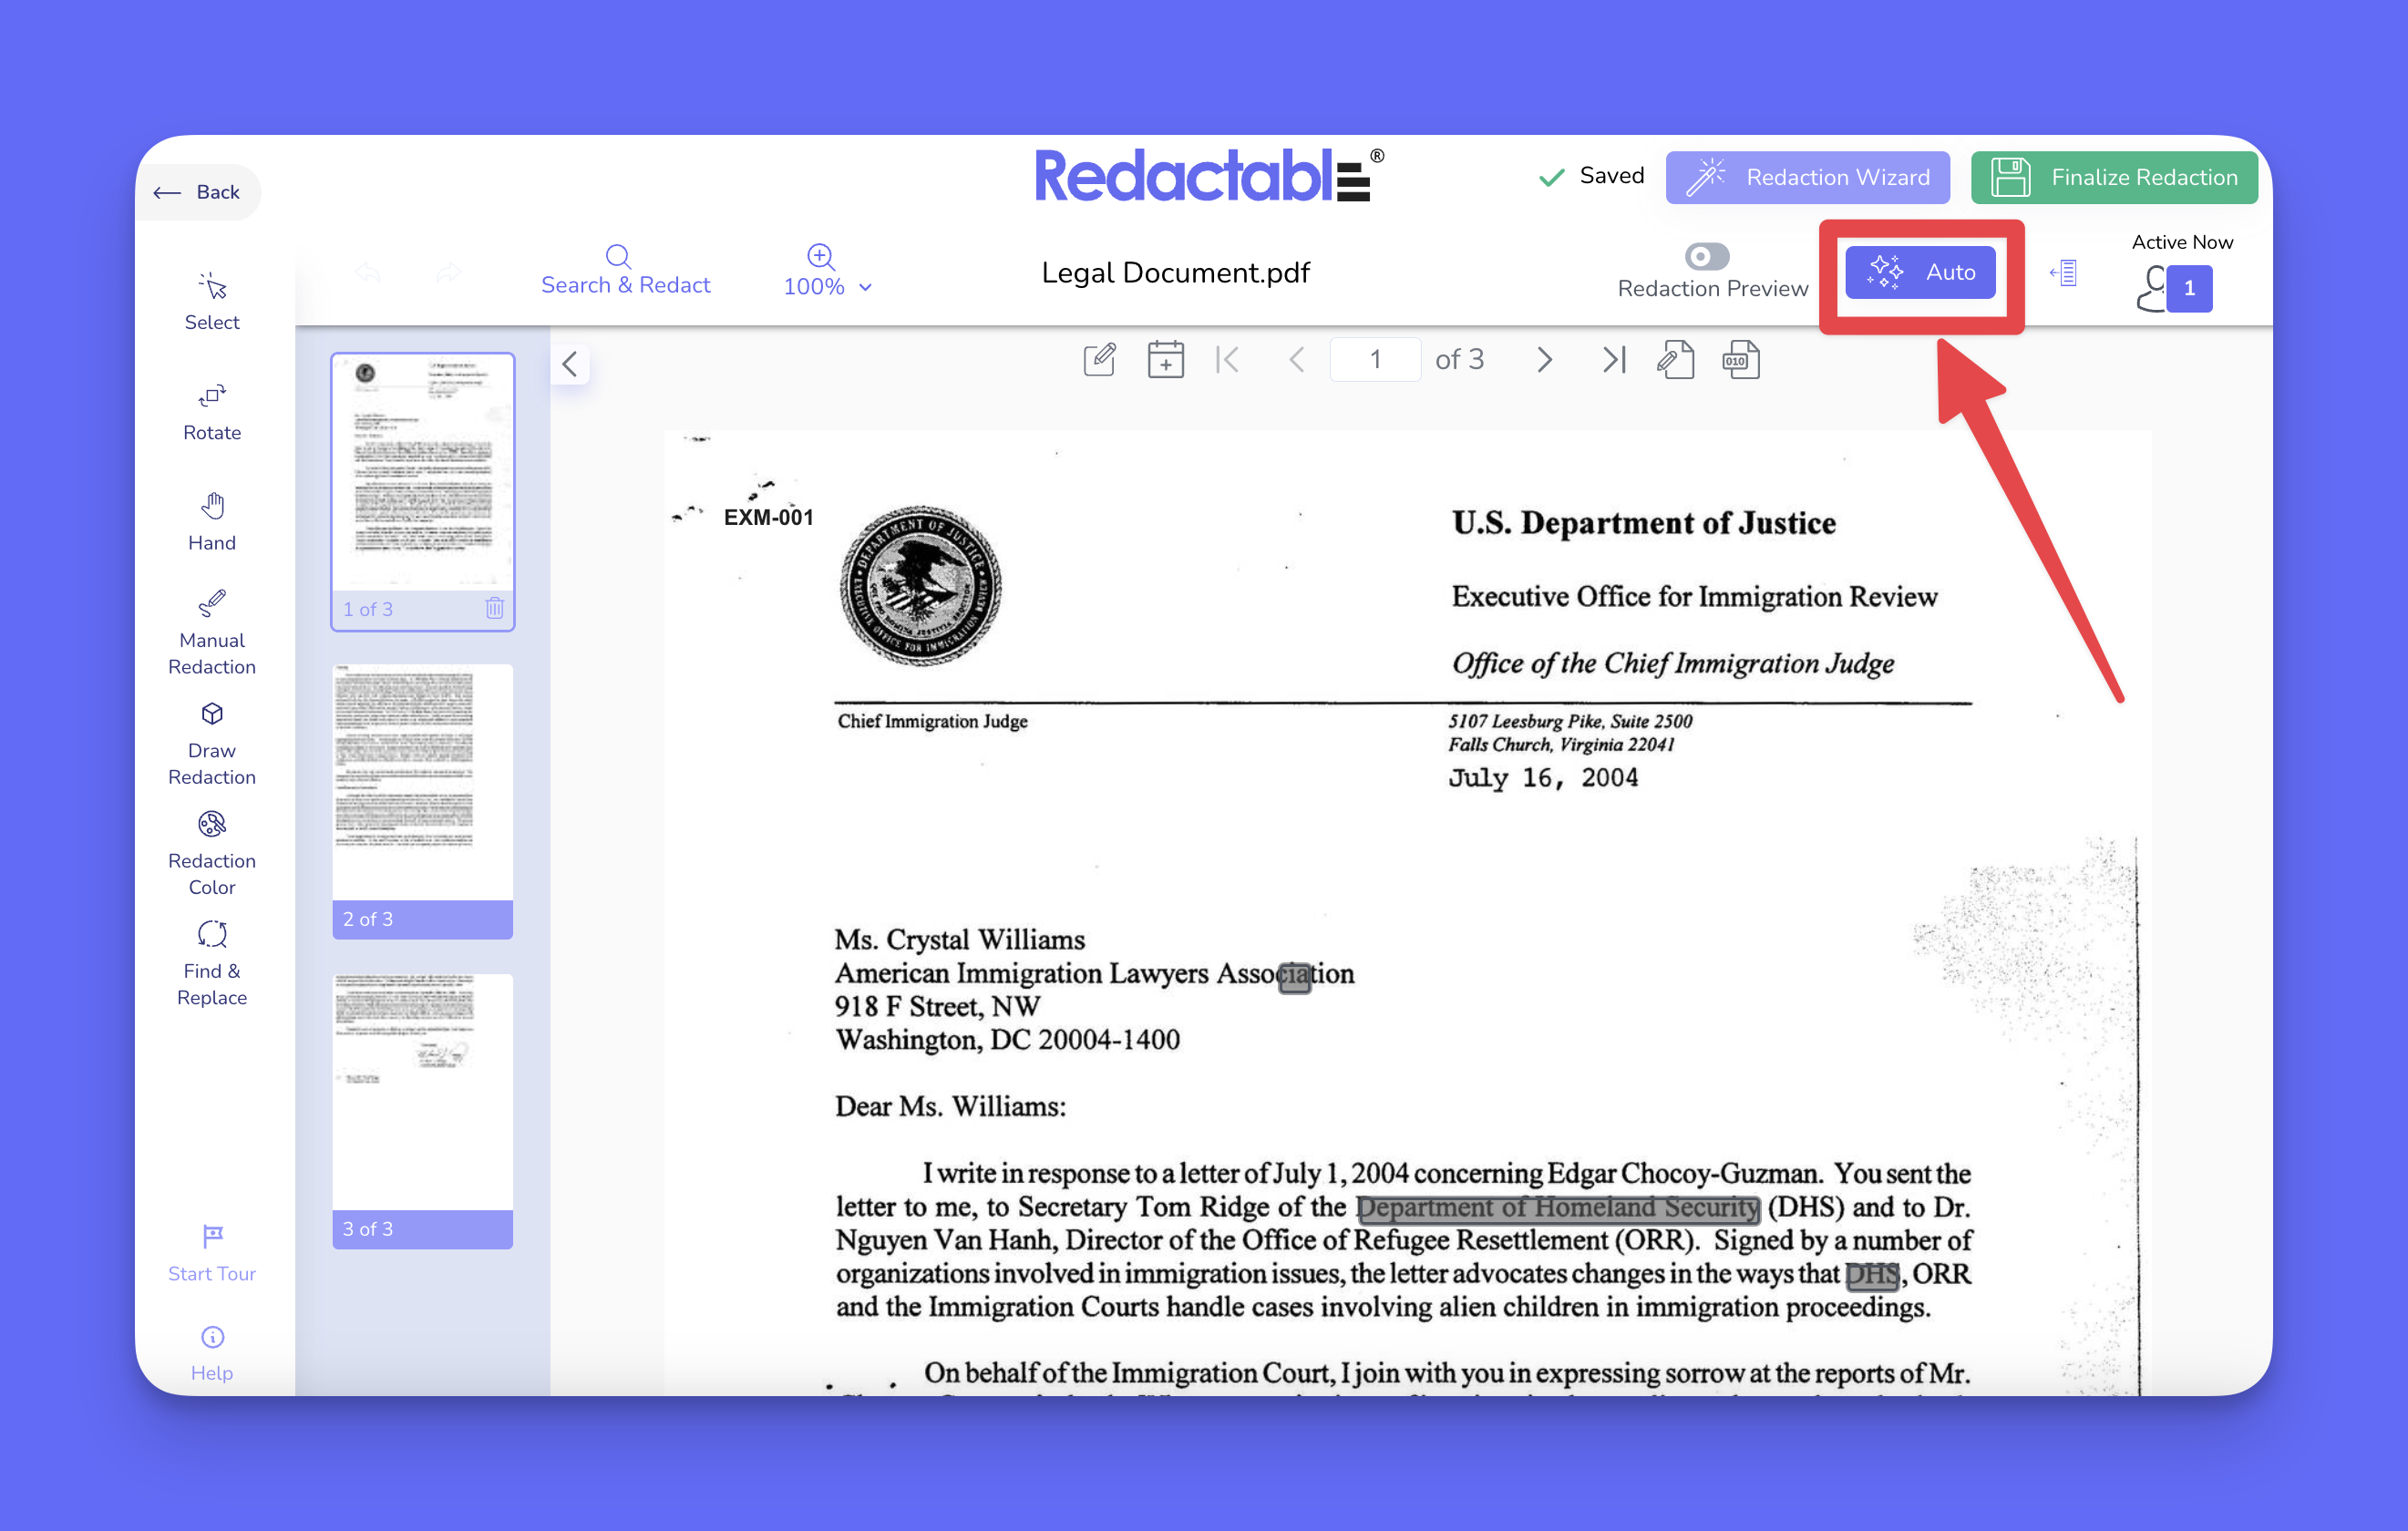
4. The system will automatically scan the document and generate suggested redactions.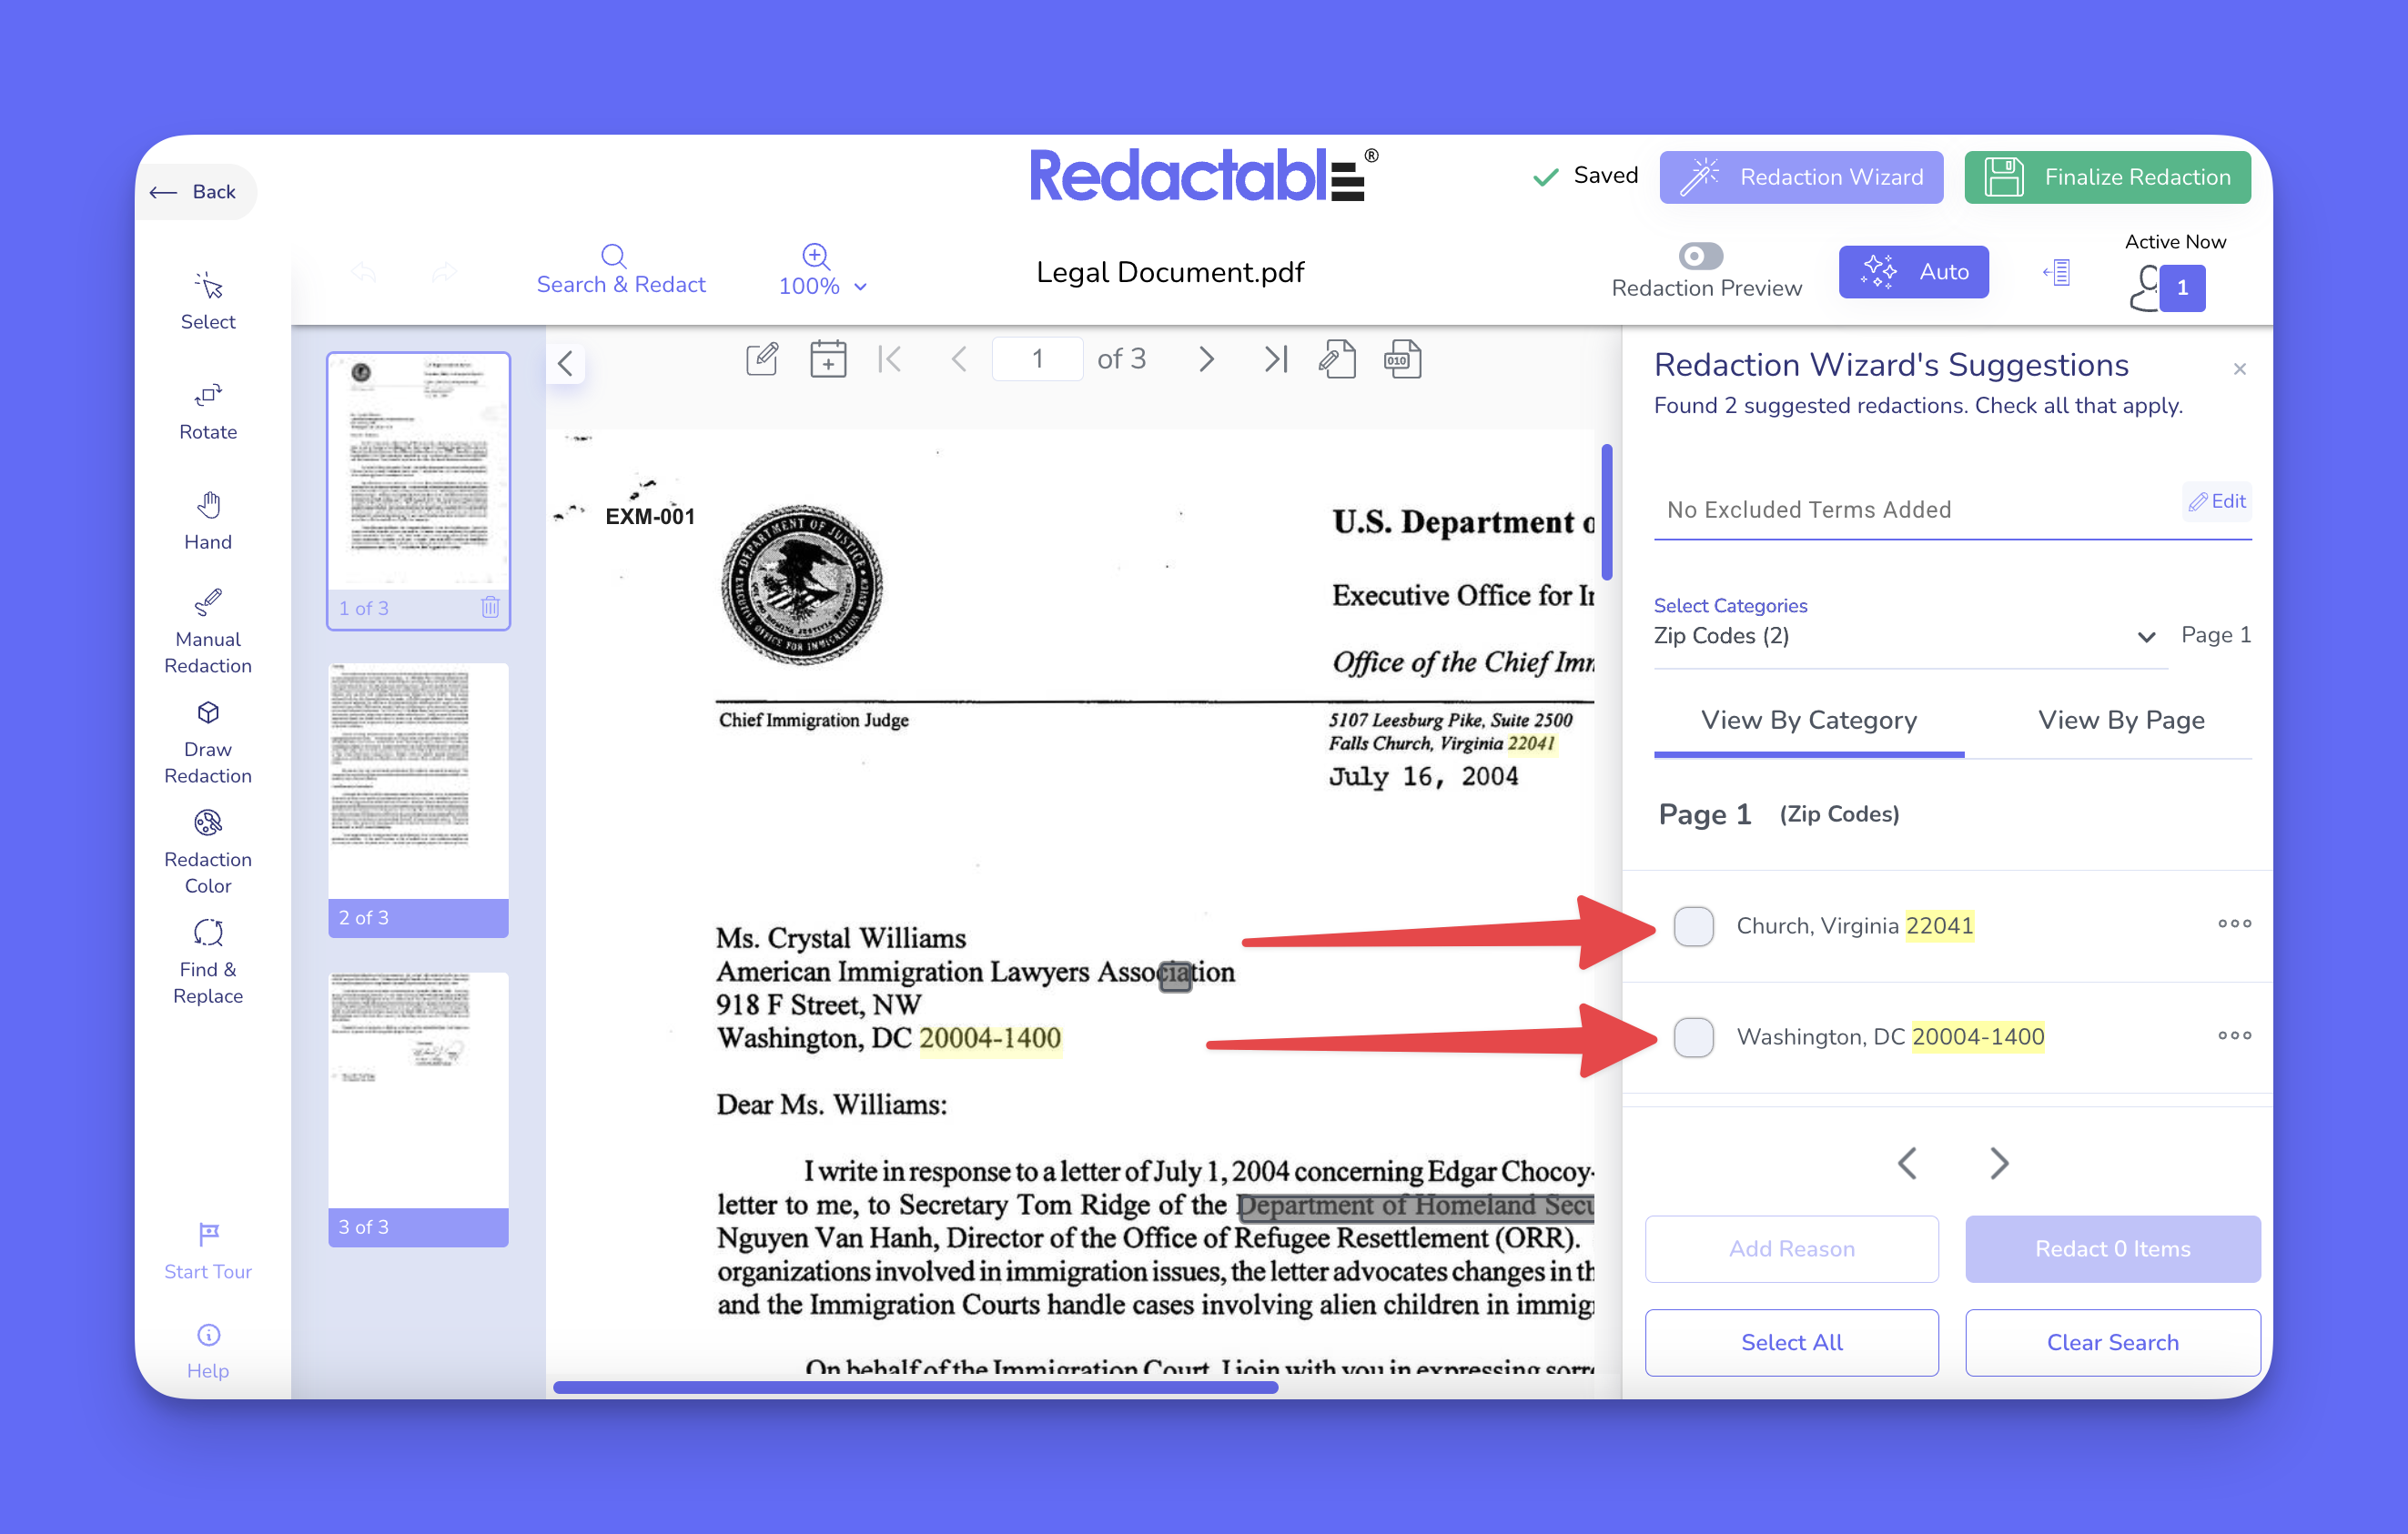
Reviewing results
5. Review the highlighted suggestions and select items to redact.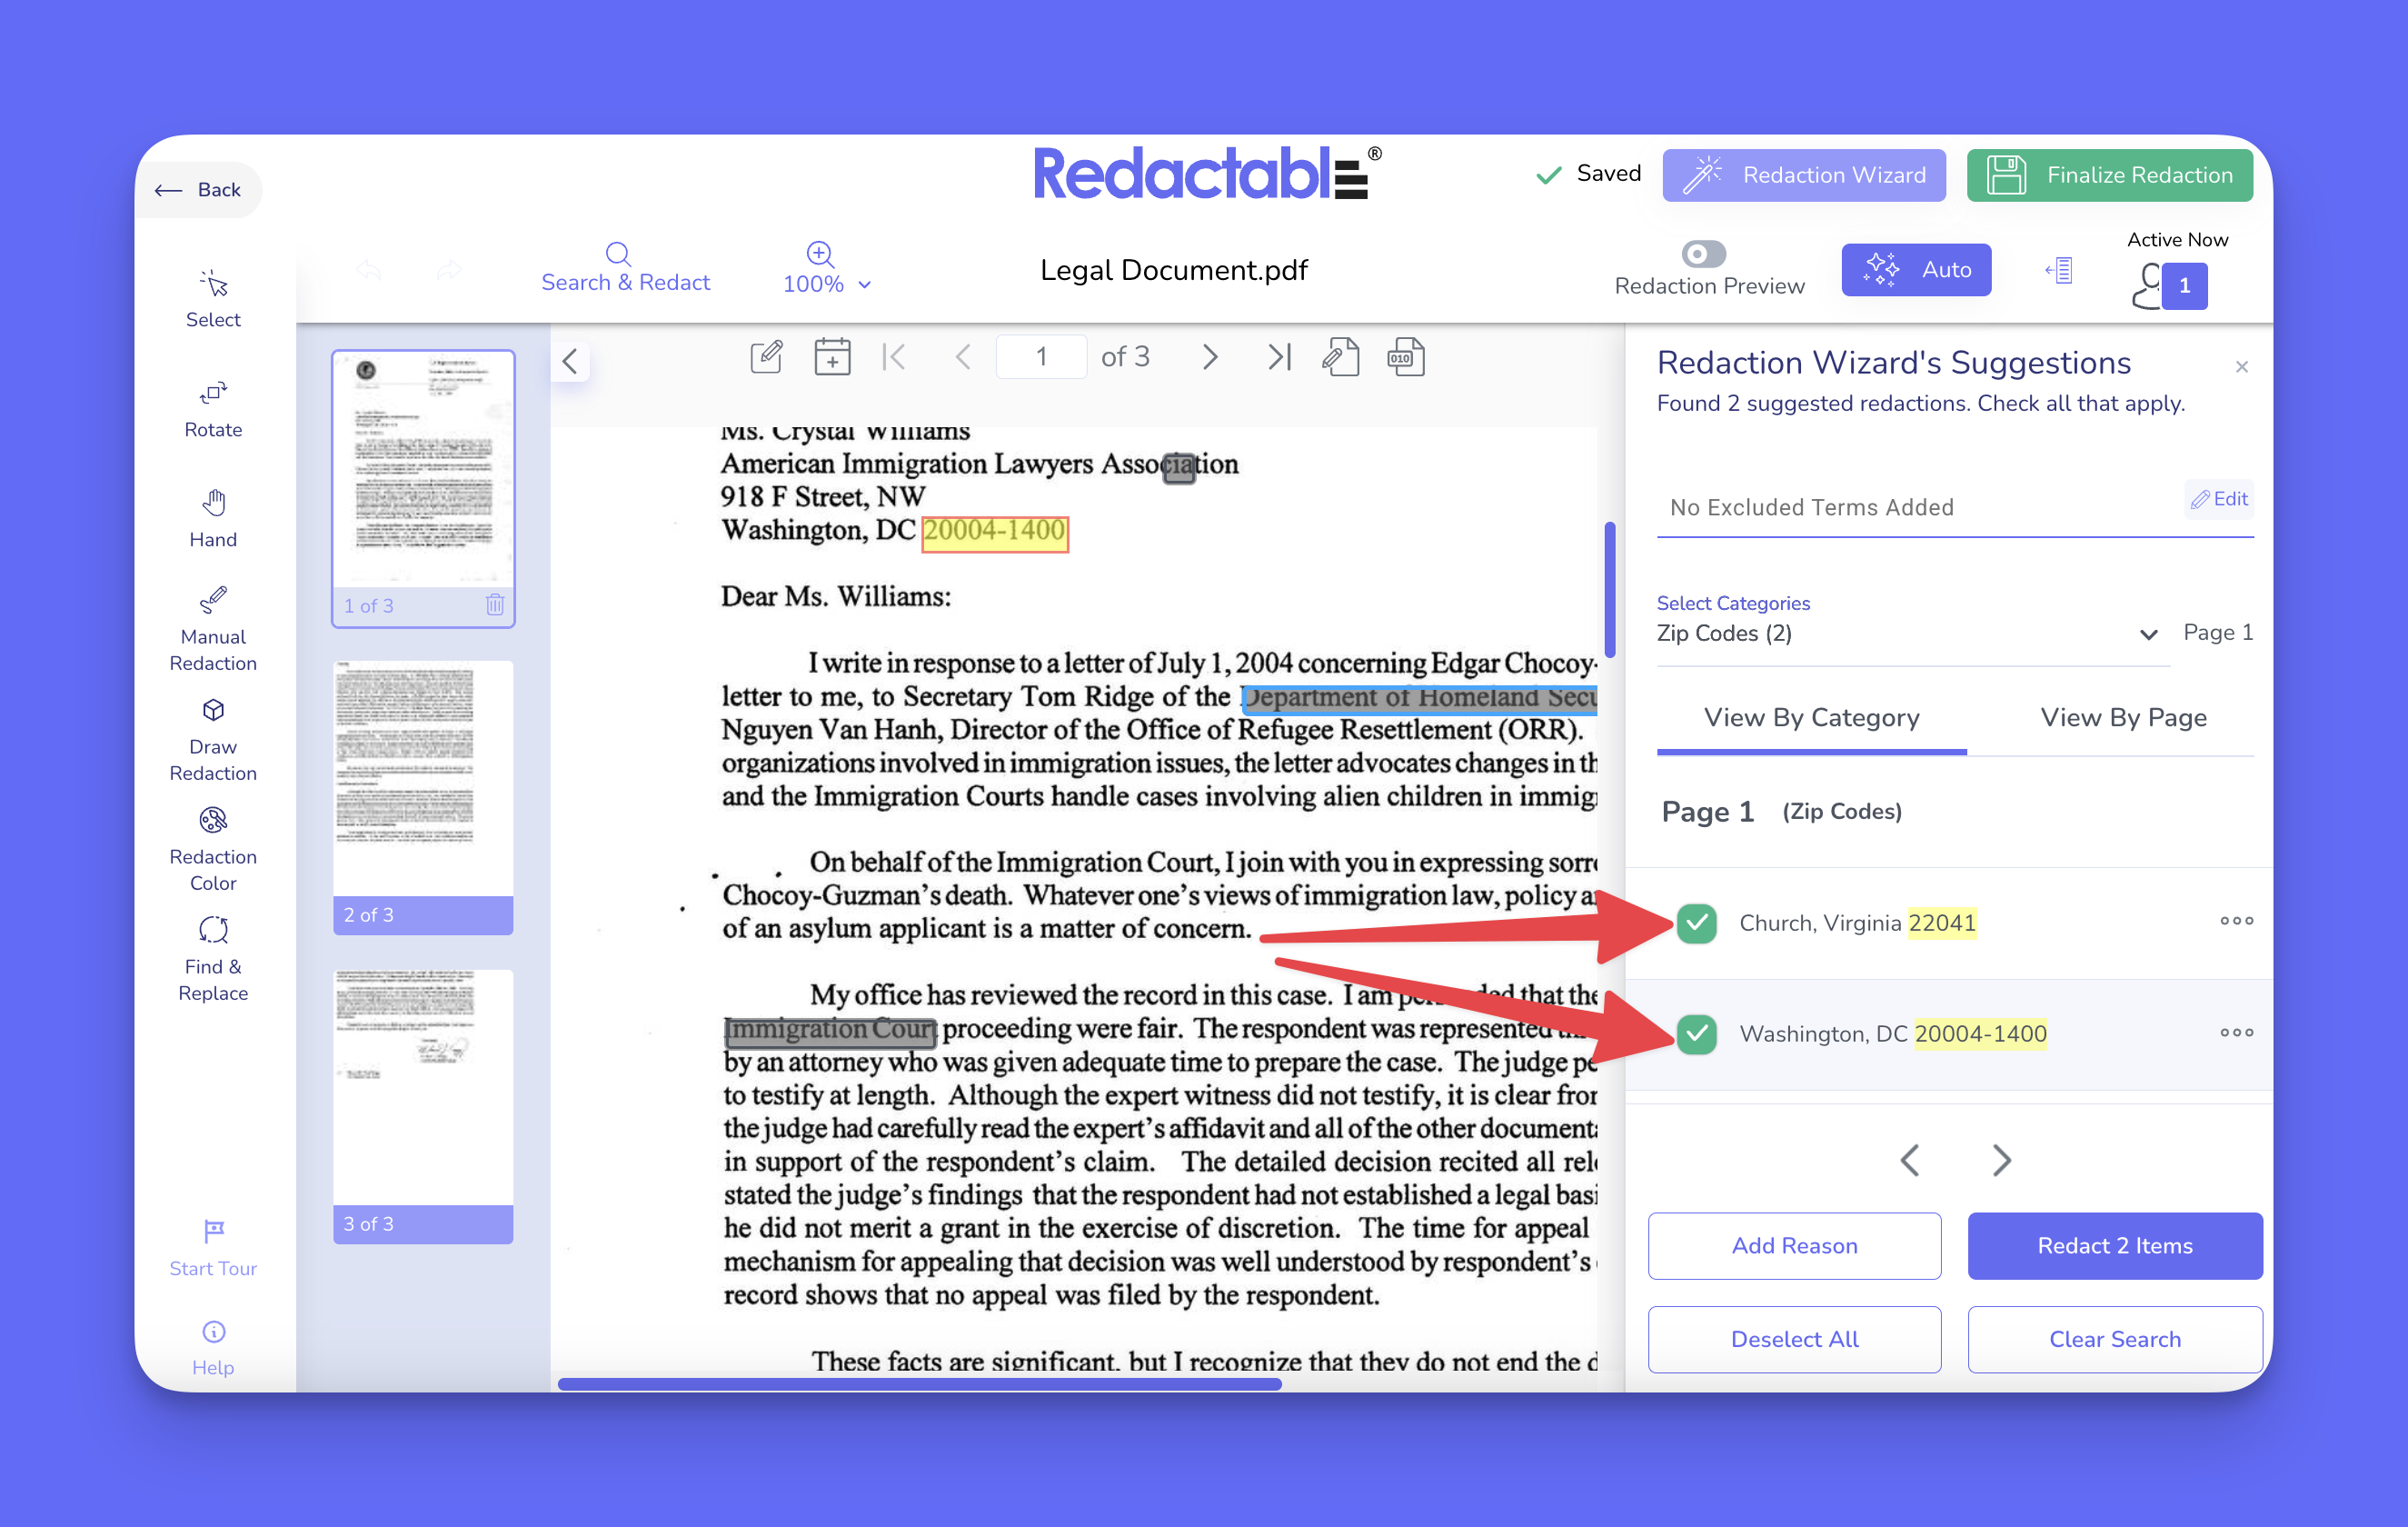
6. To change how results are displayed, switch to “View by Page” to see suggestions in document order.
Selecting items
7. To redact a specific item, click on a highlighted suggestion.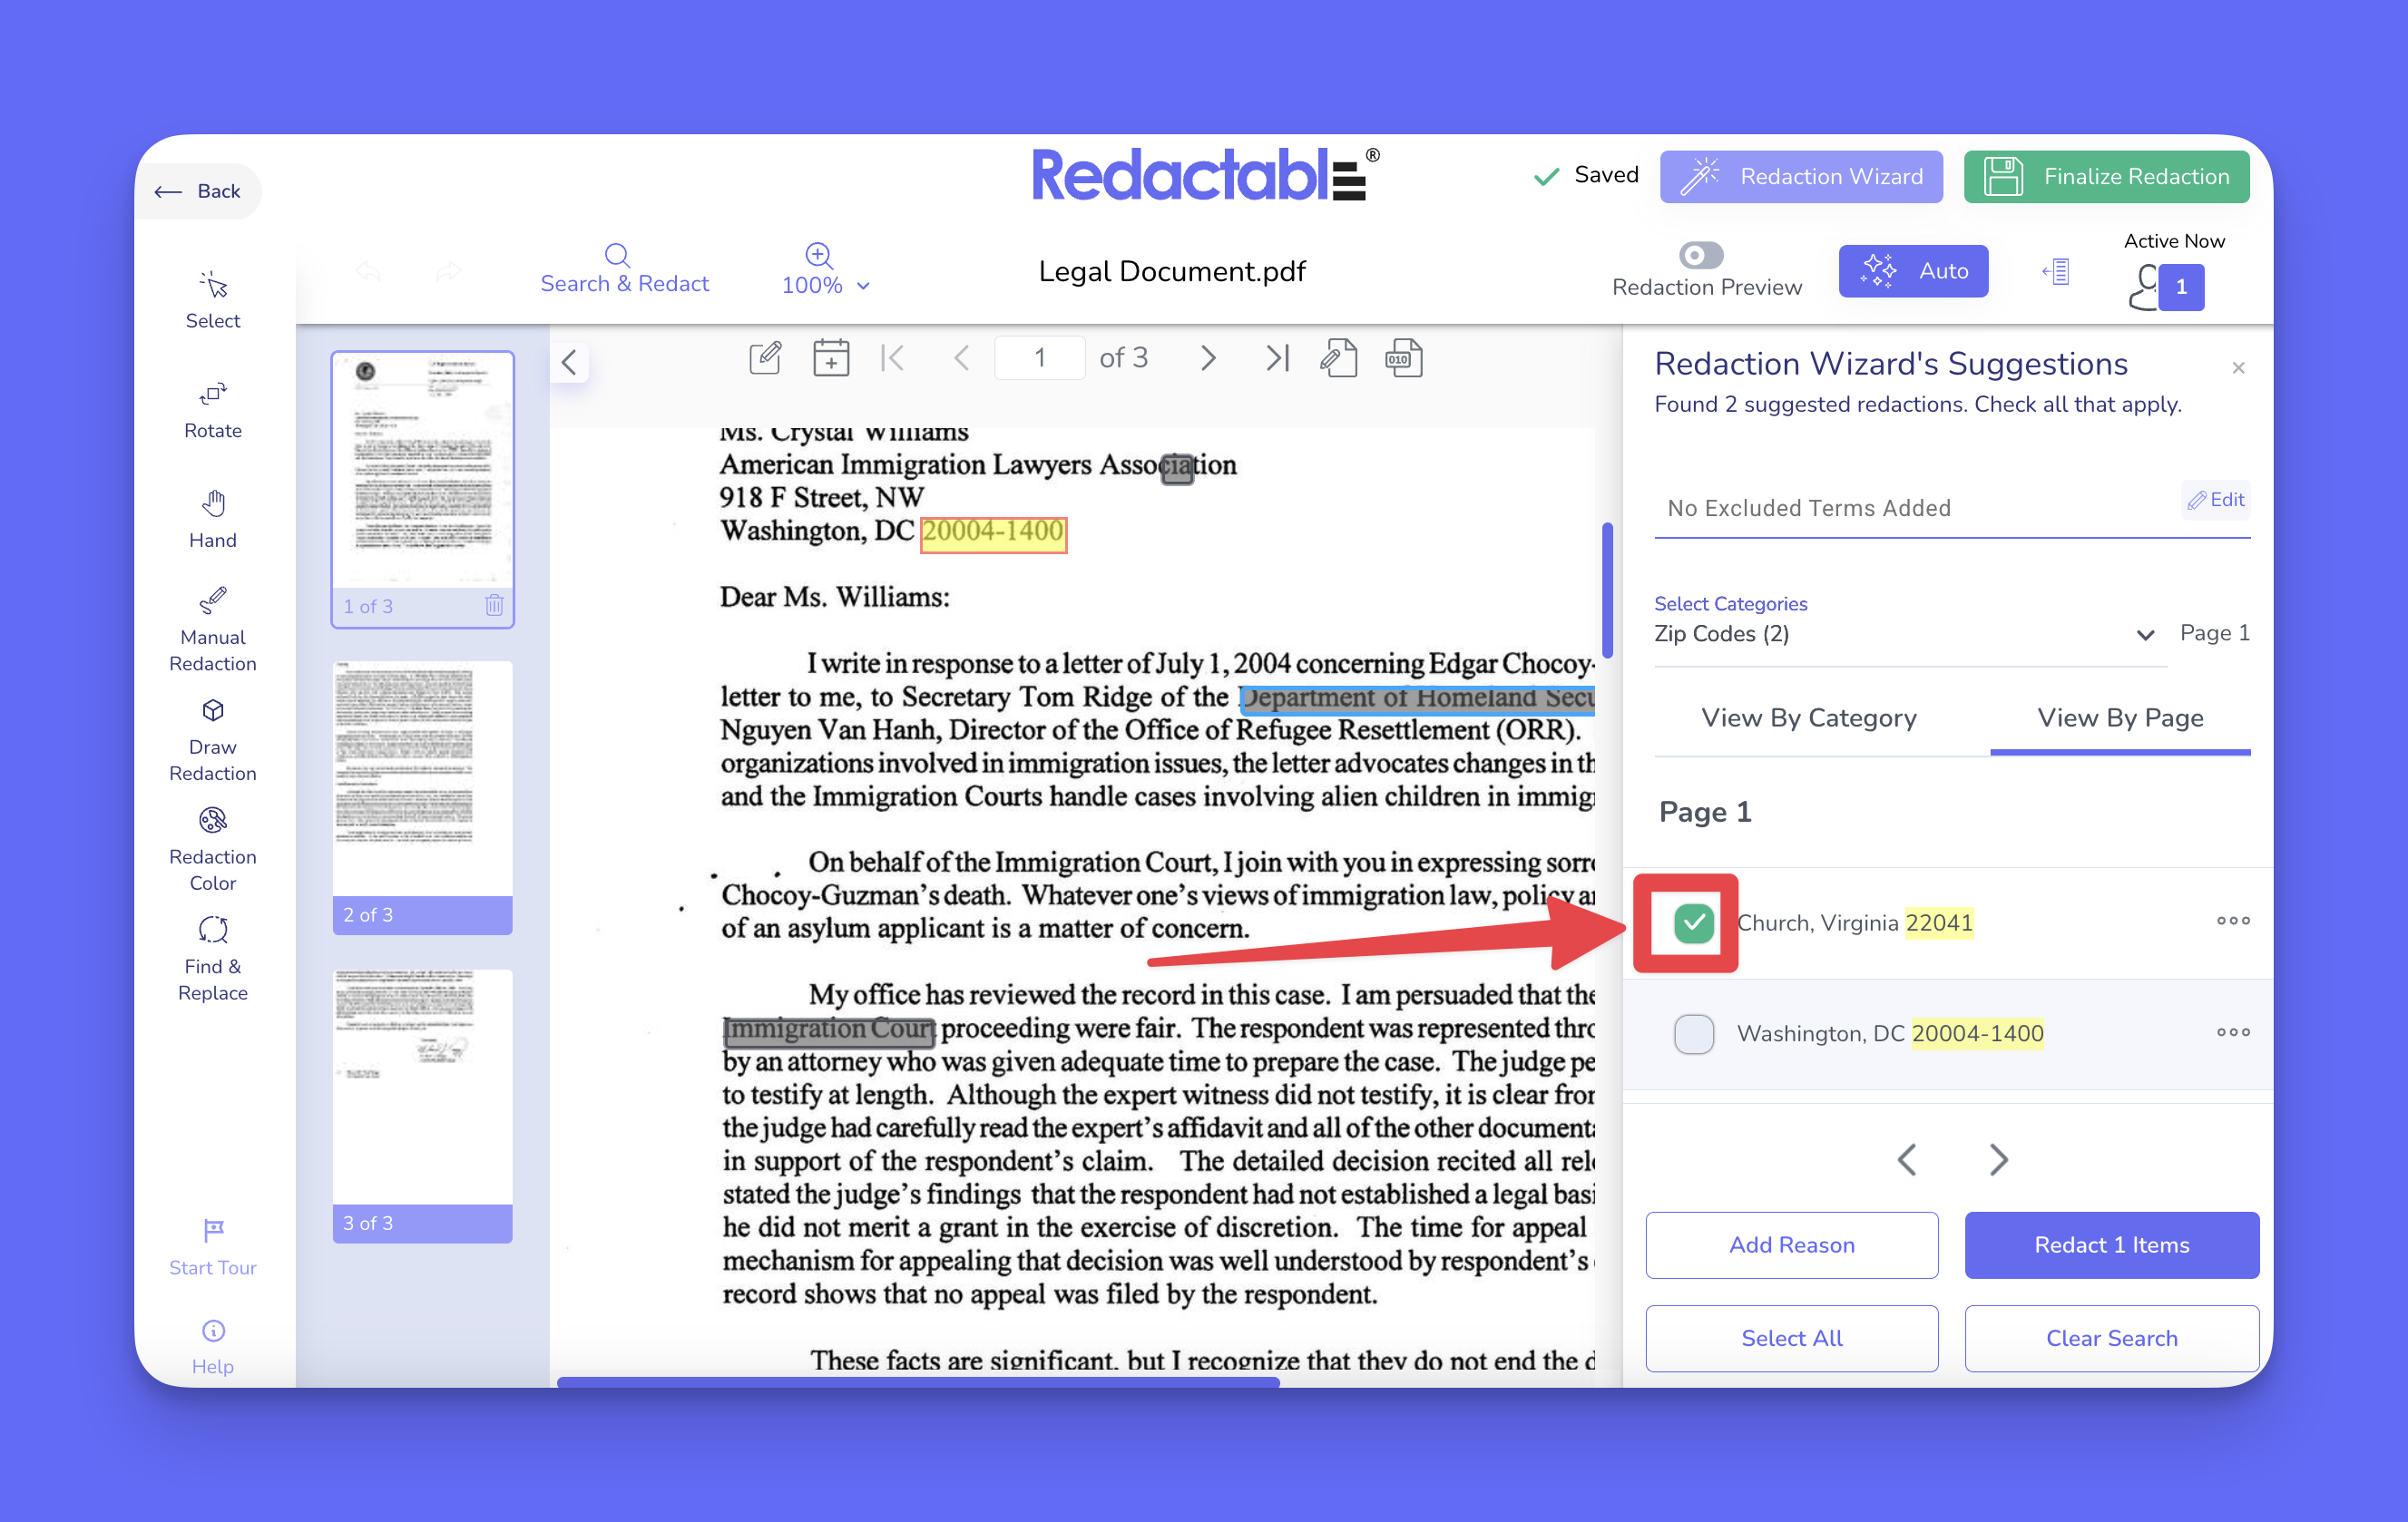
8. Click on “Redact Items” to apply the redaction.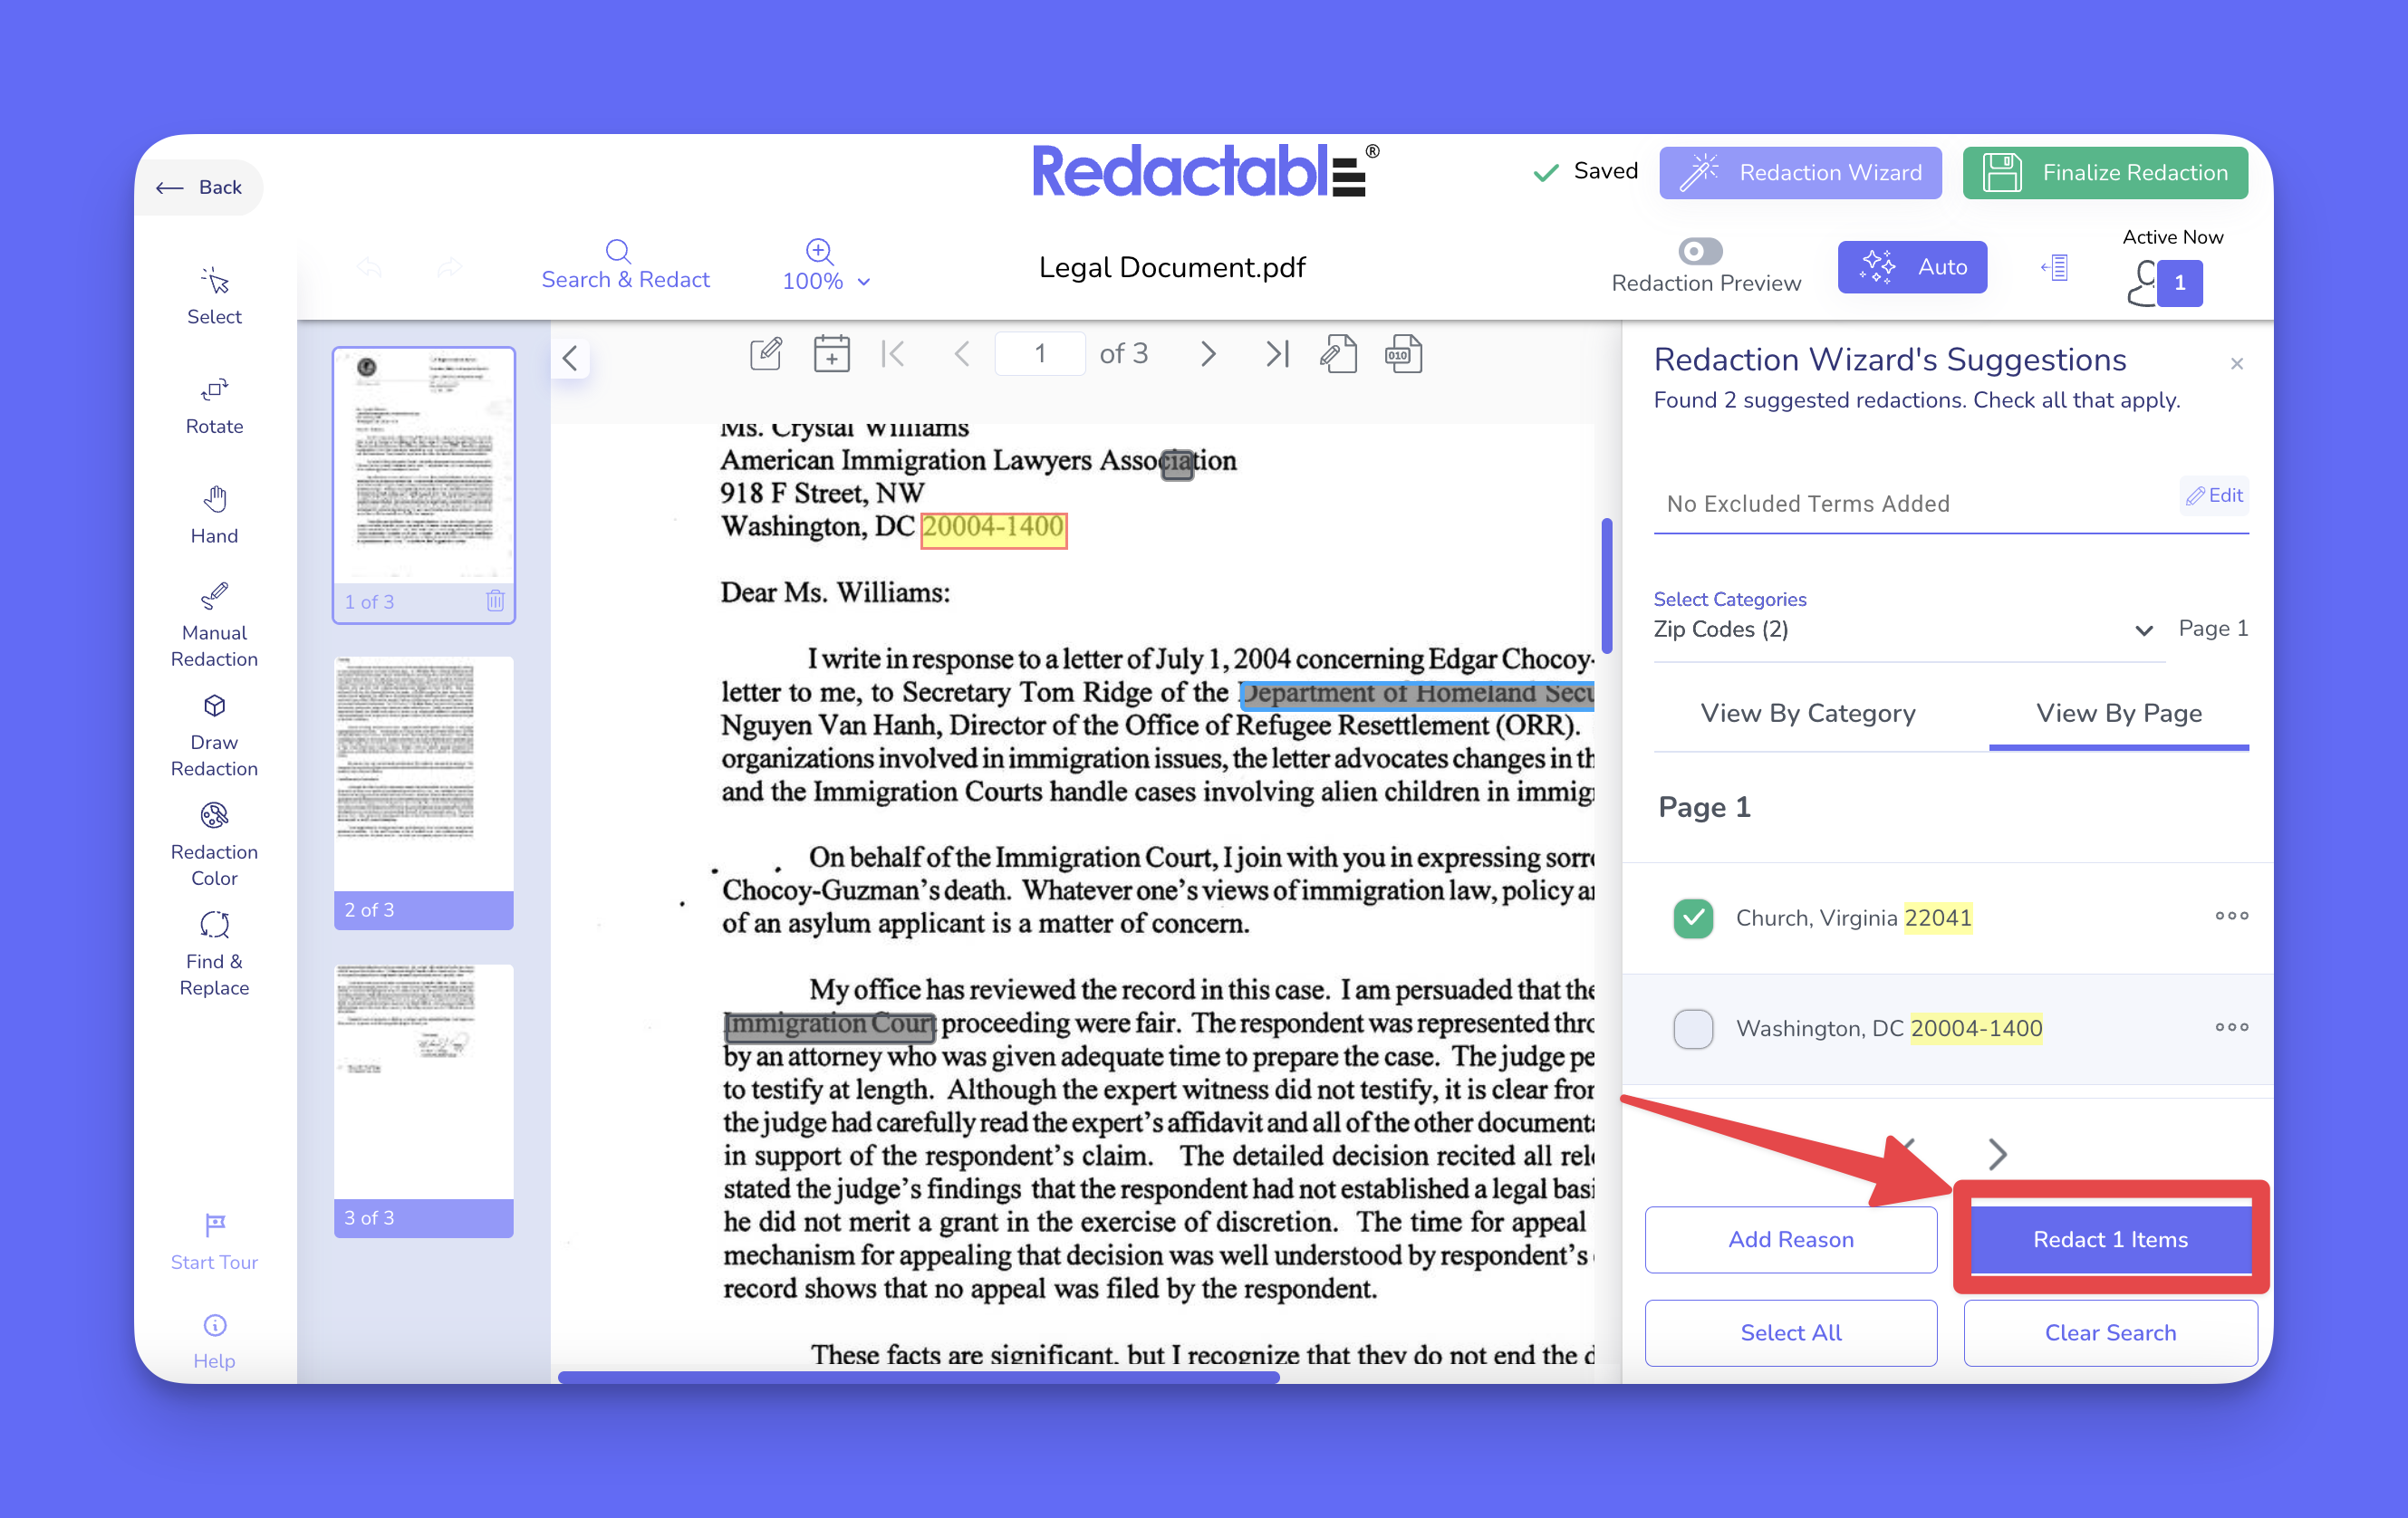
9. To select all suggested results, click on “Select All”.
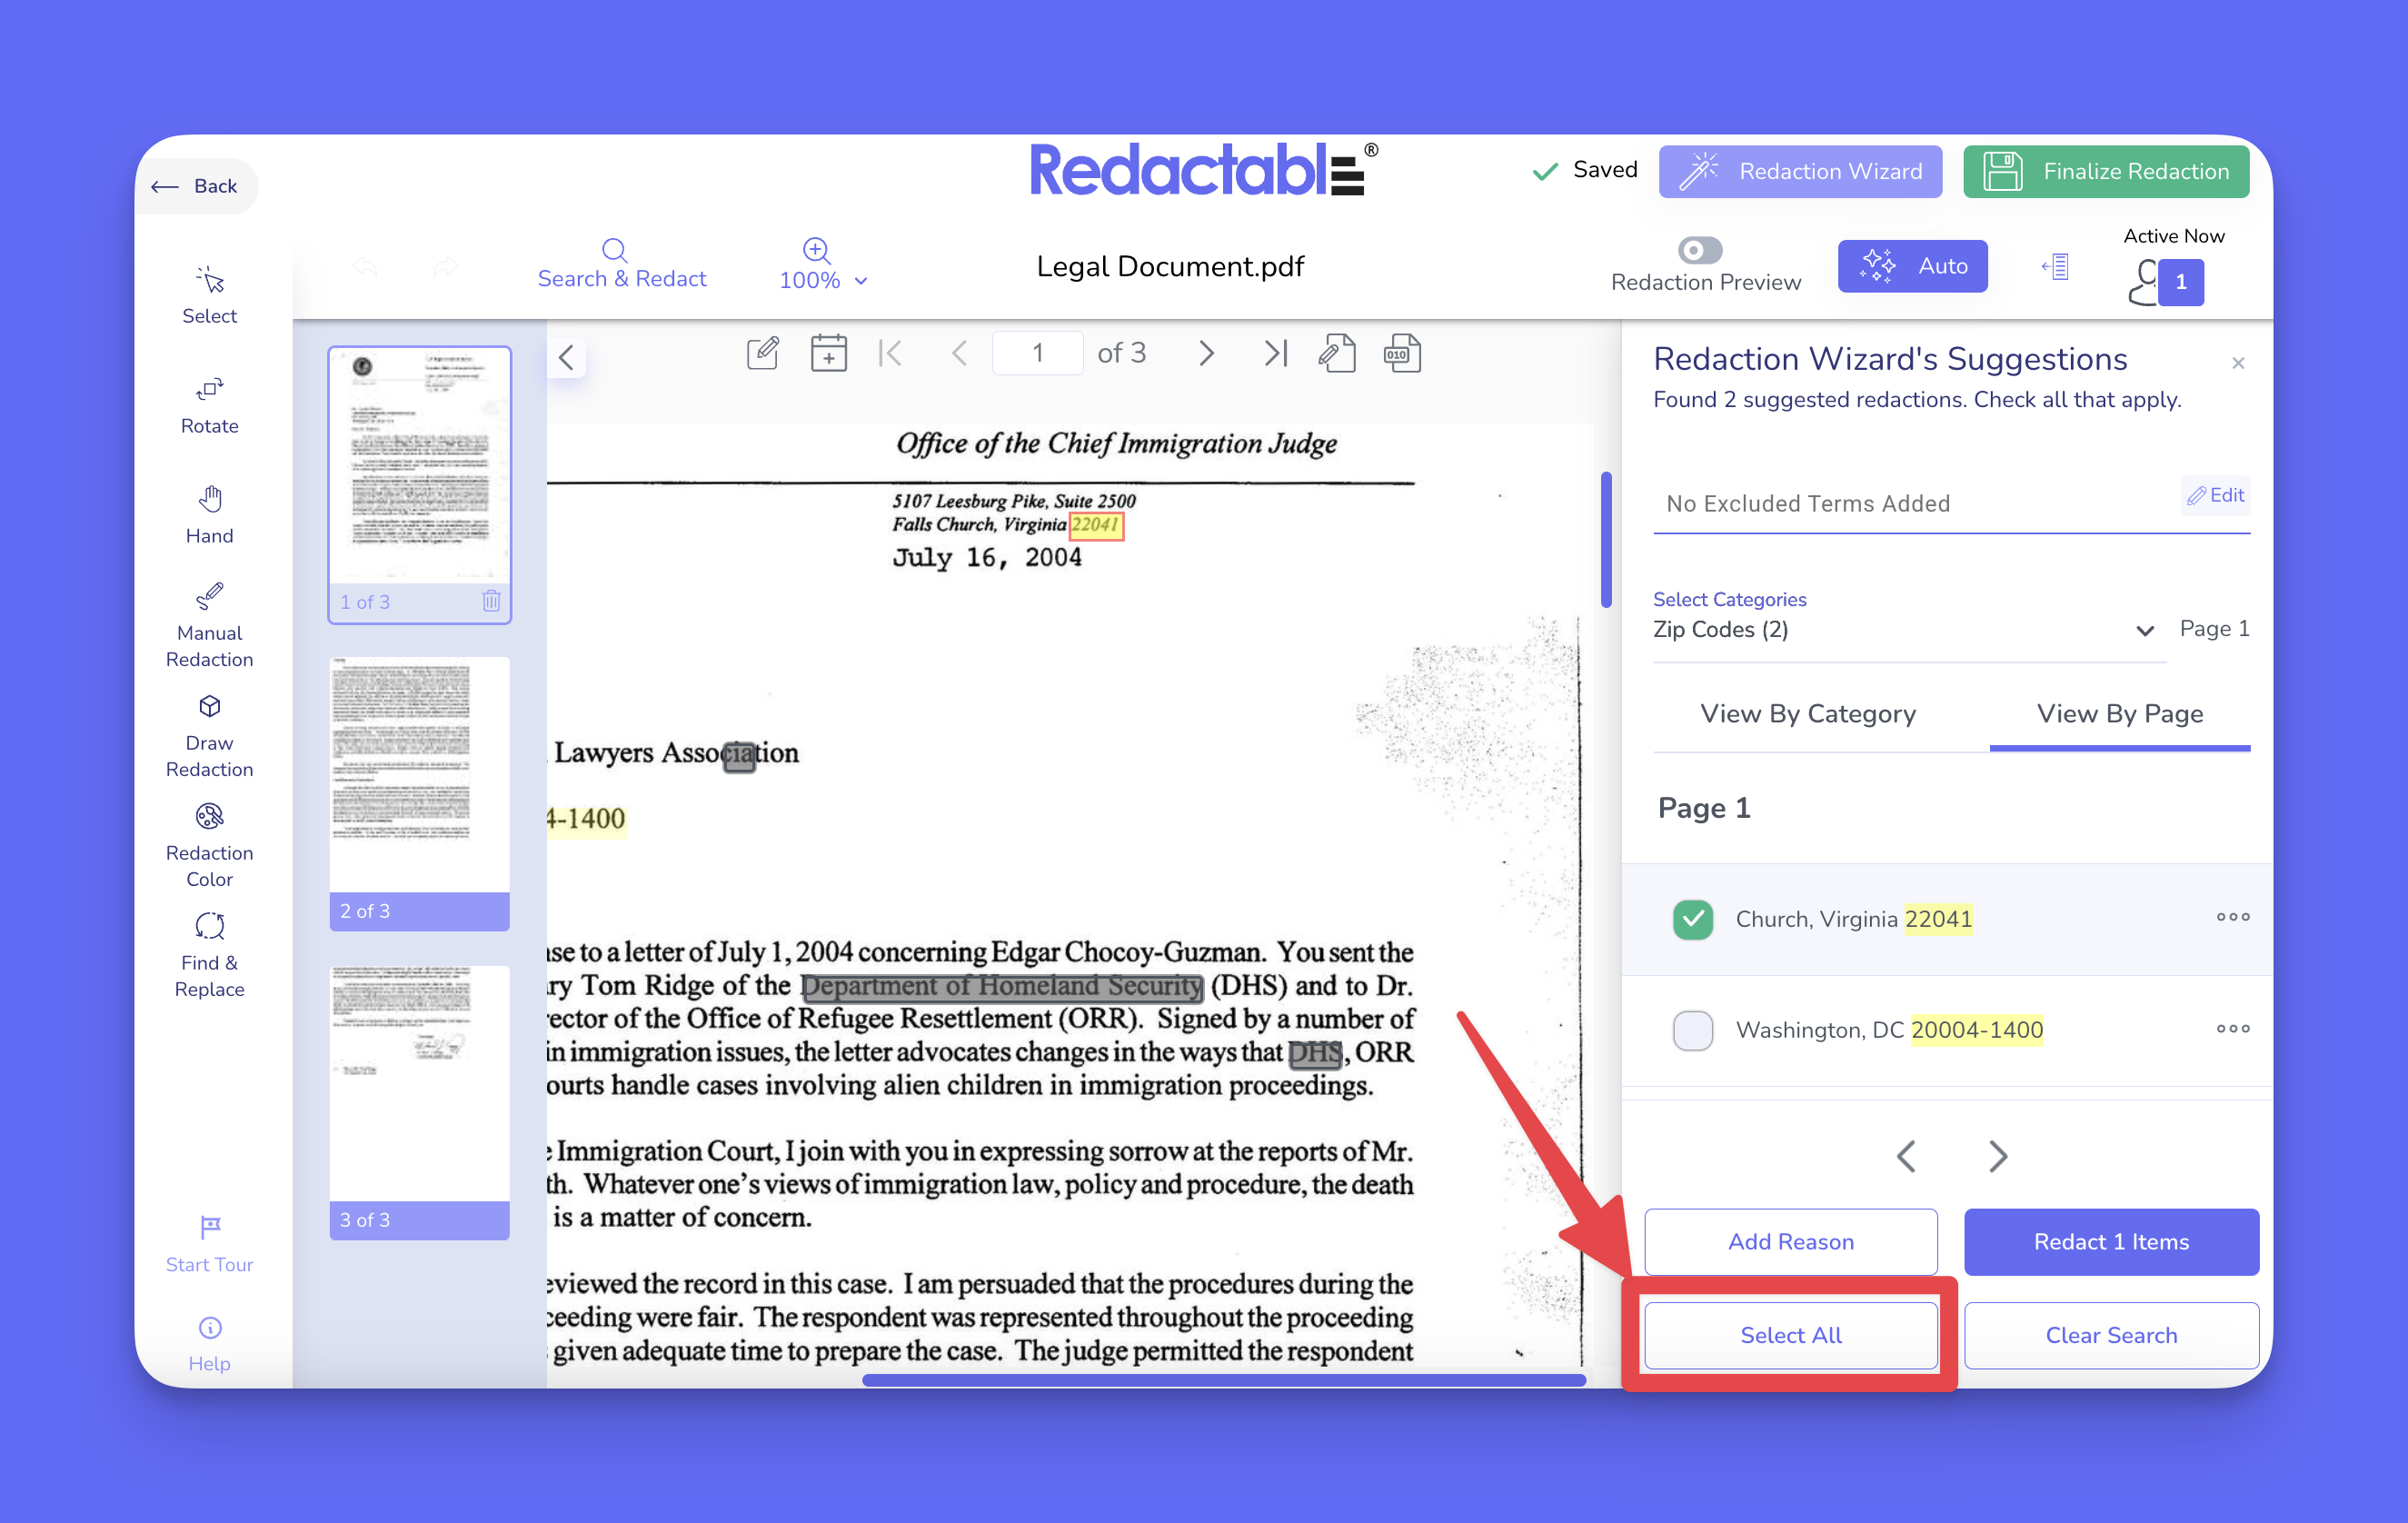
10. Click on “Redact Items” to apply all selected redactions at once.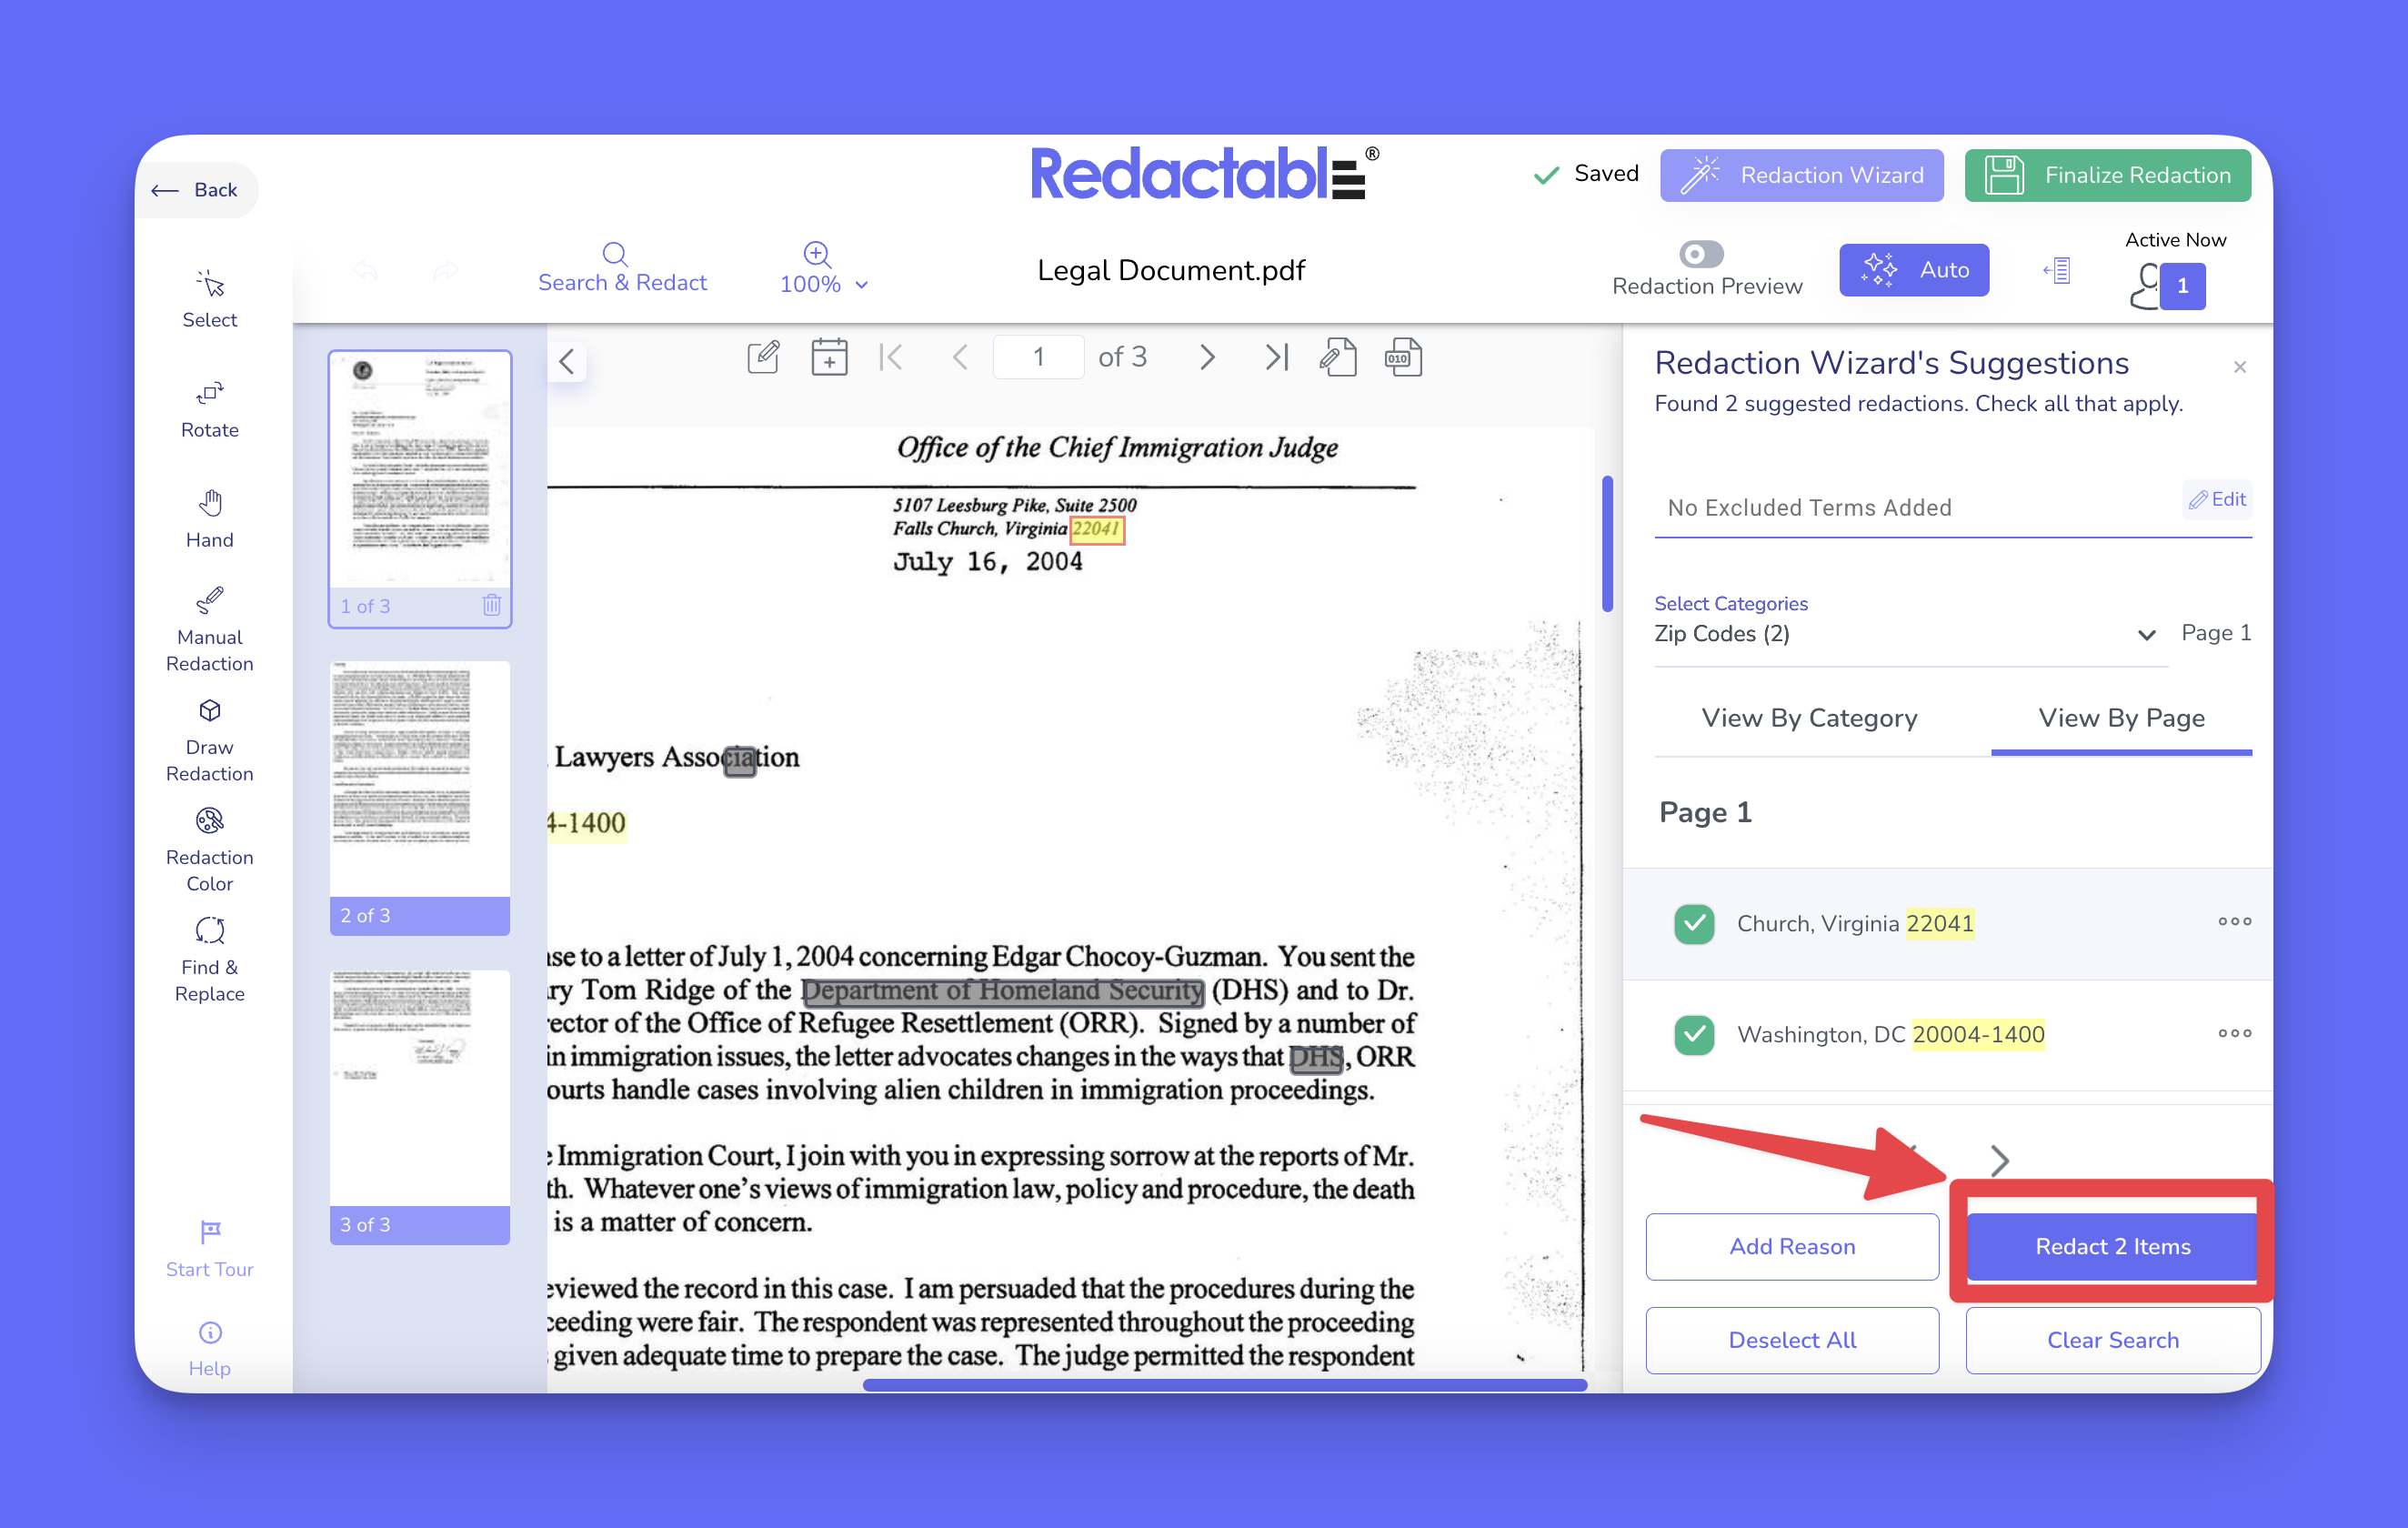
Managing results with the three-dot menu
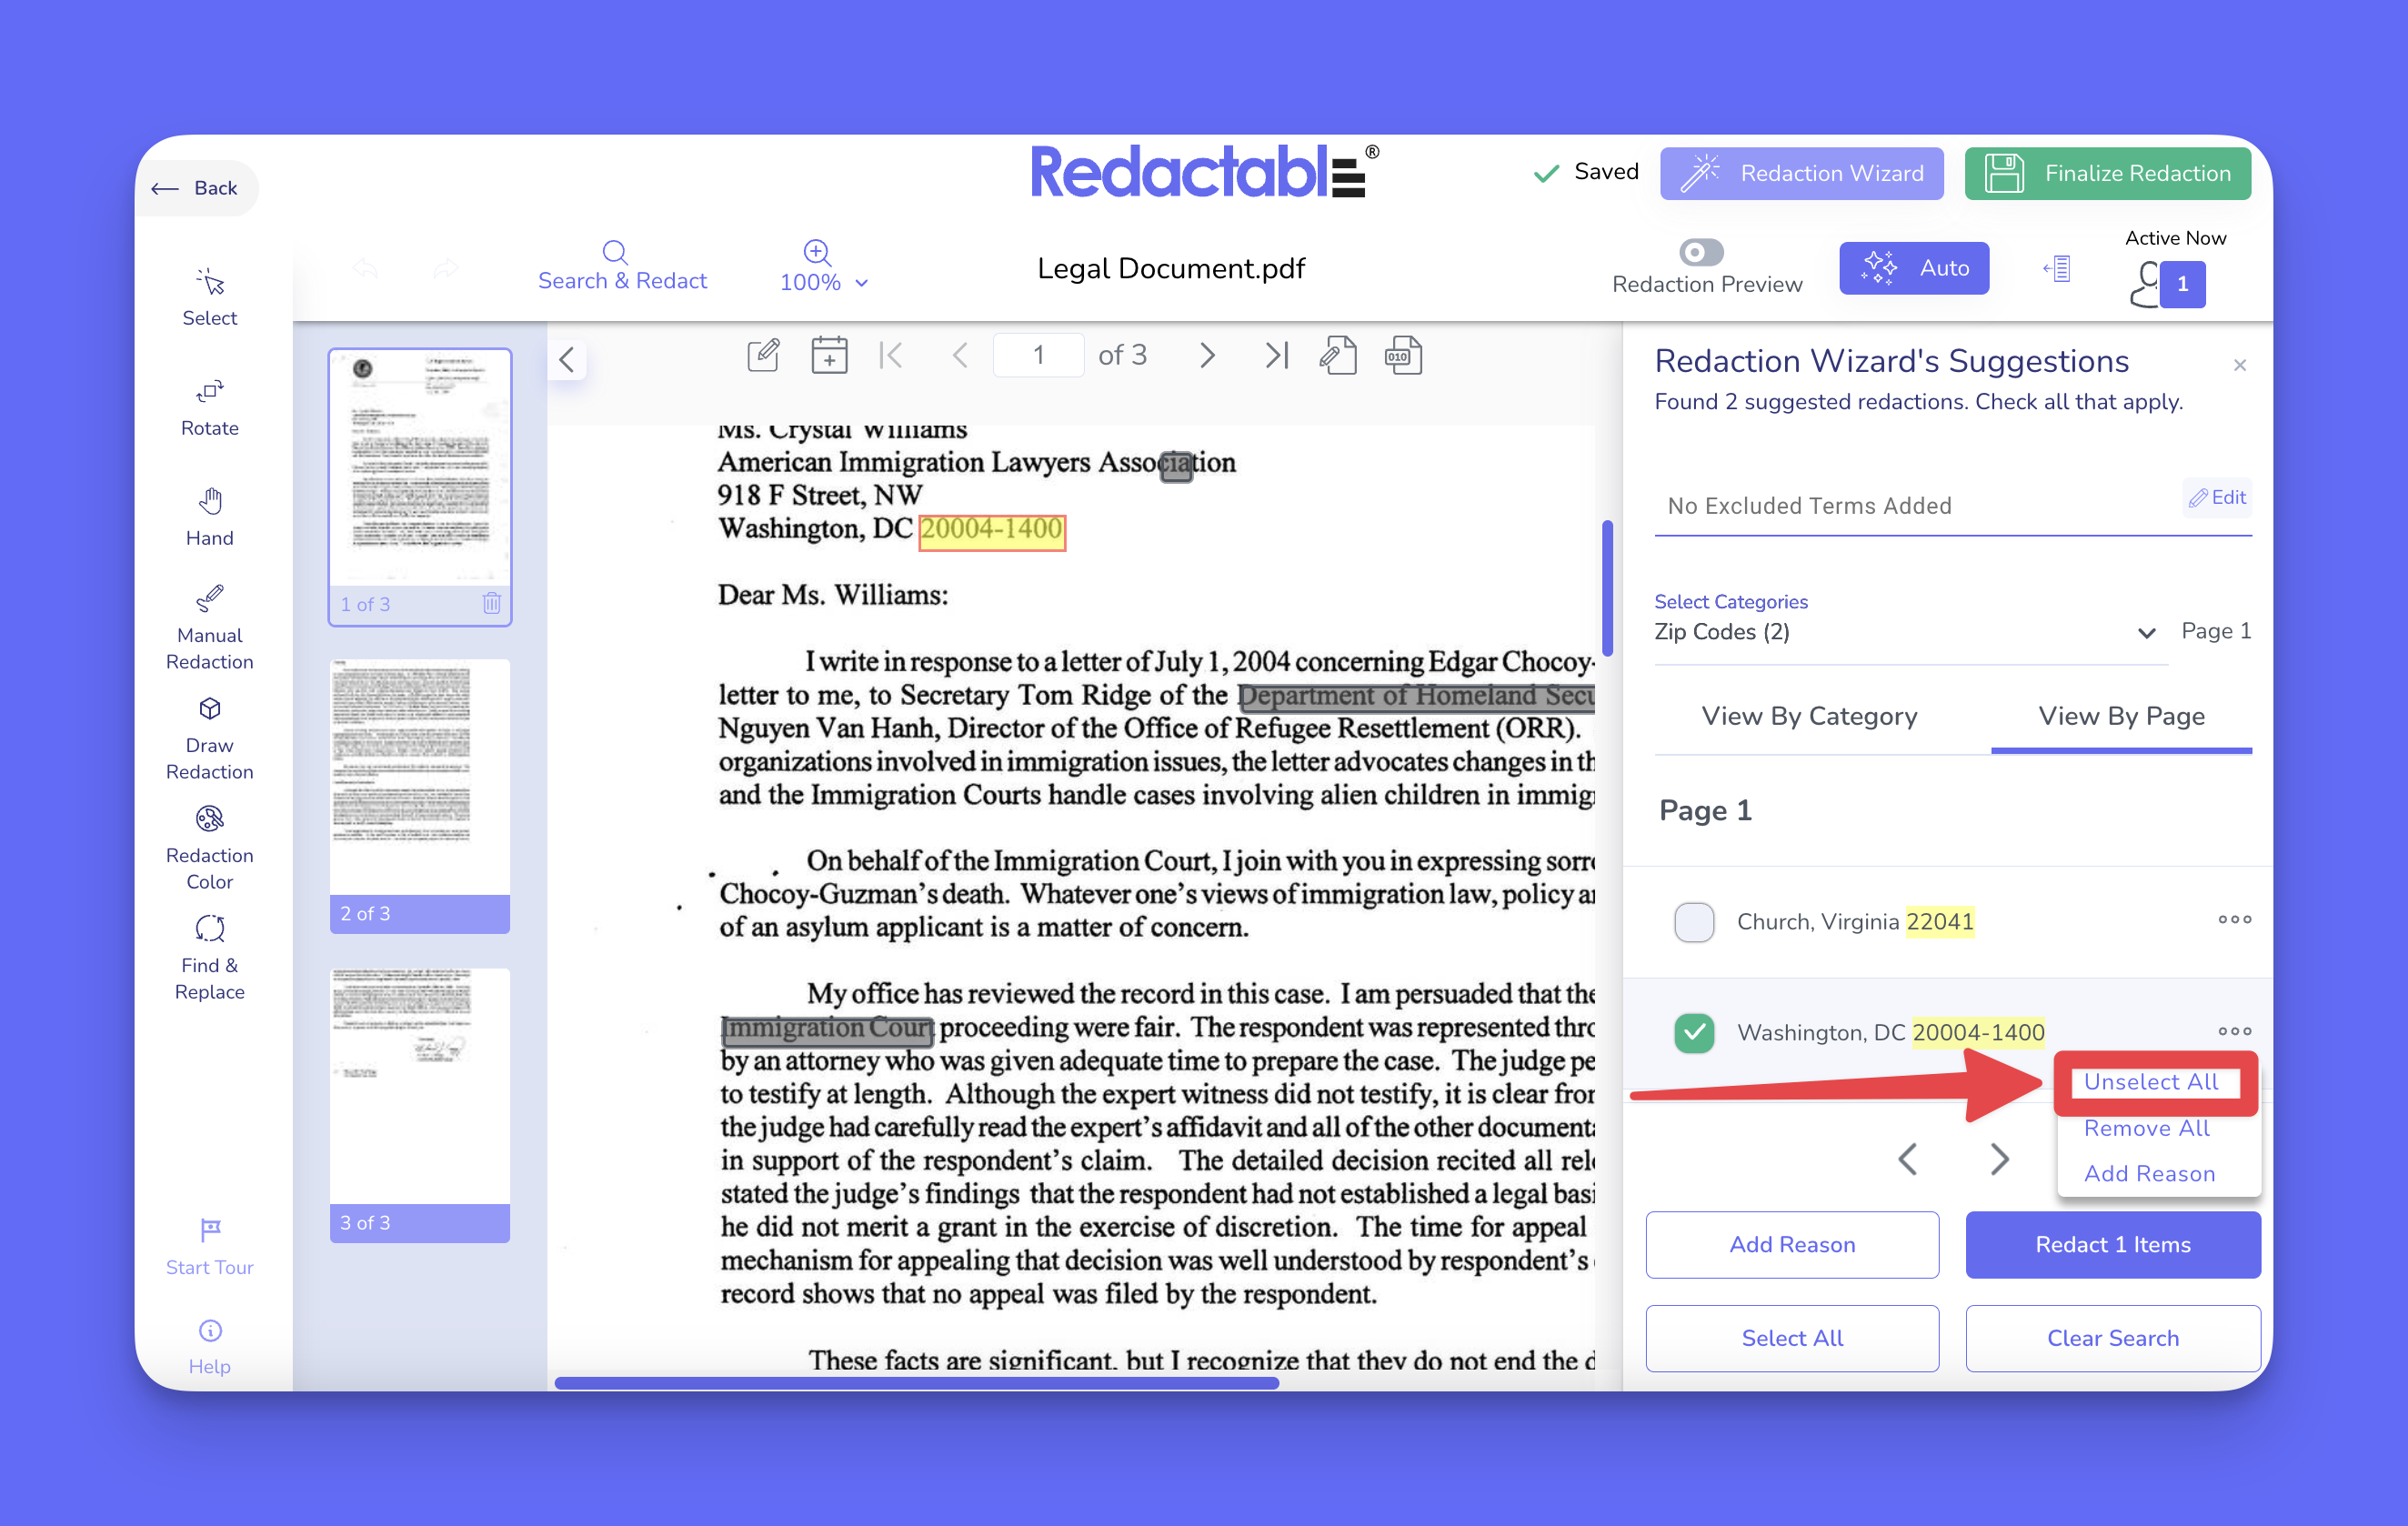
11. To manage a specific instance, click on the three-dot menu next to the result.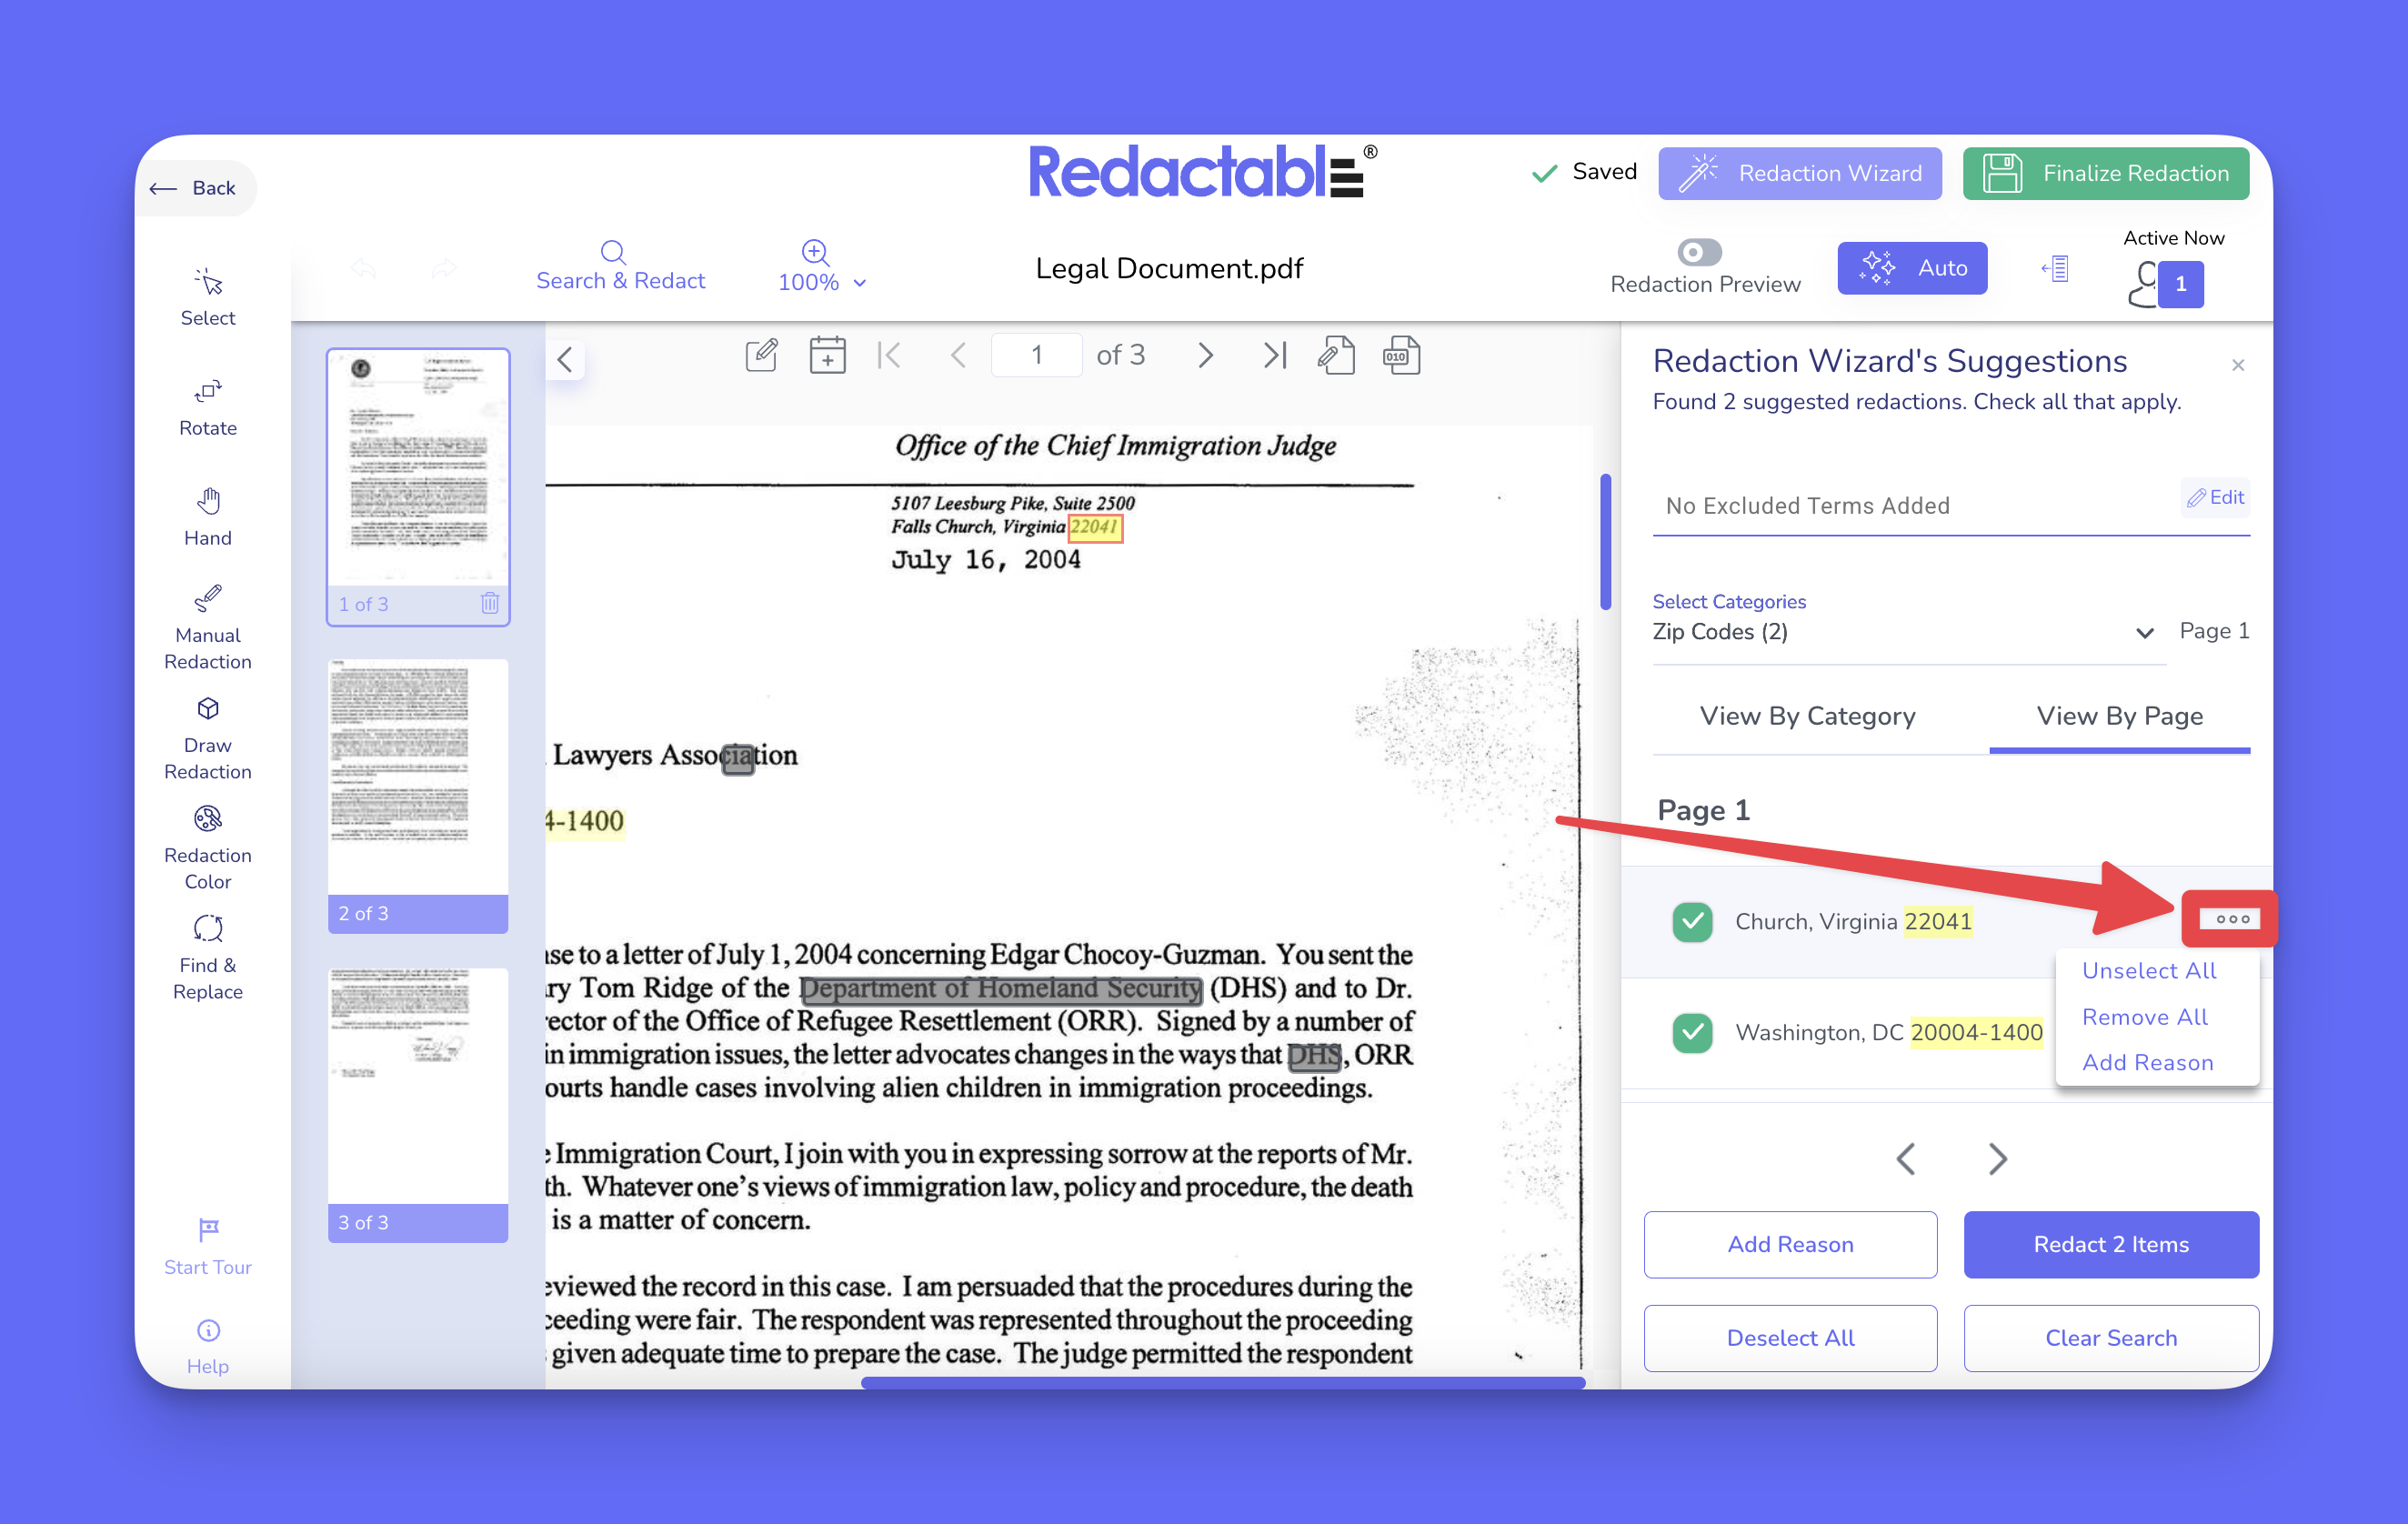
12. You can select all results for that instance, by choosing the option “Select All” (available when some items are unselected).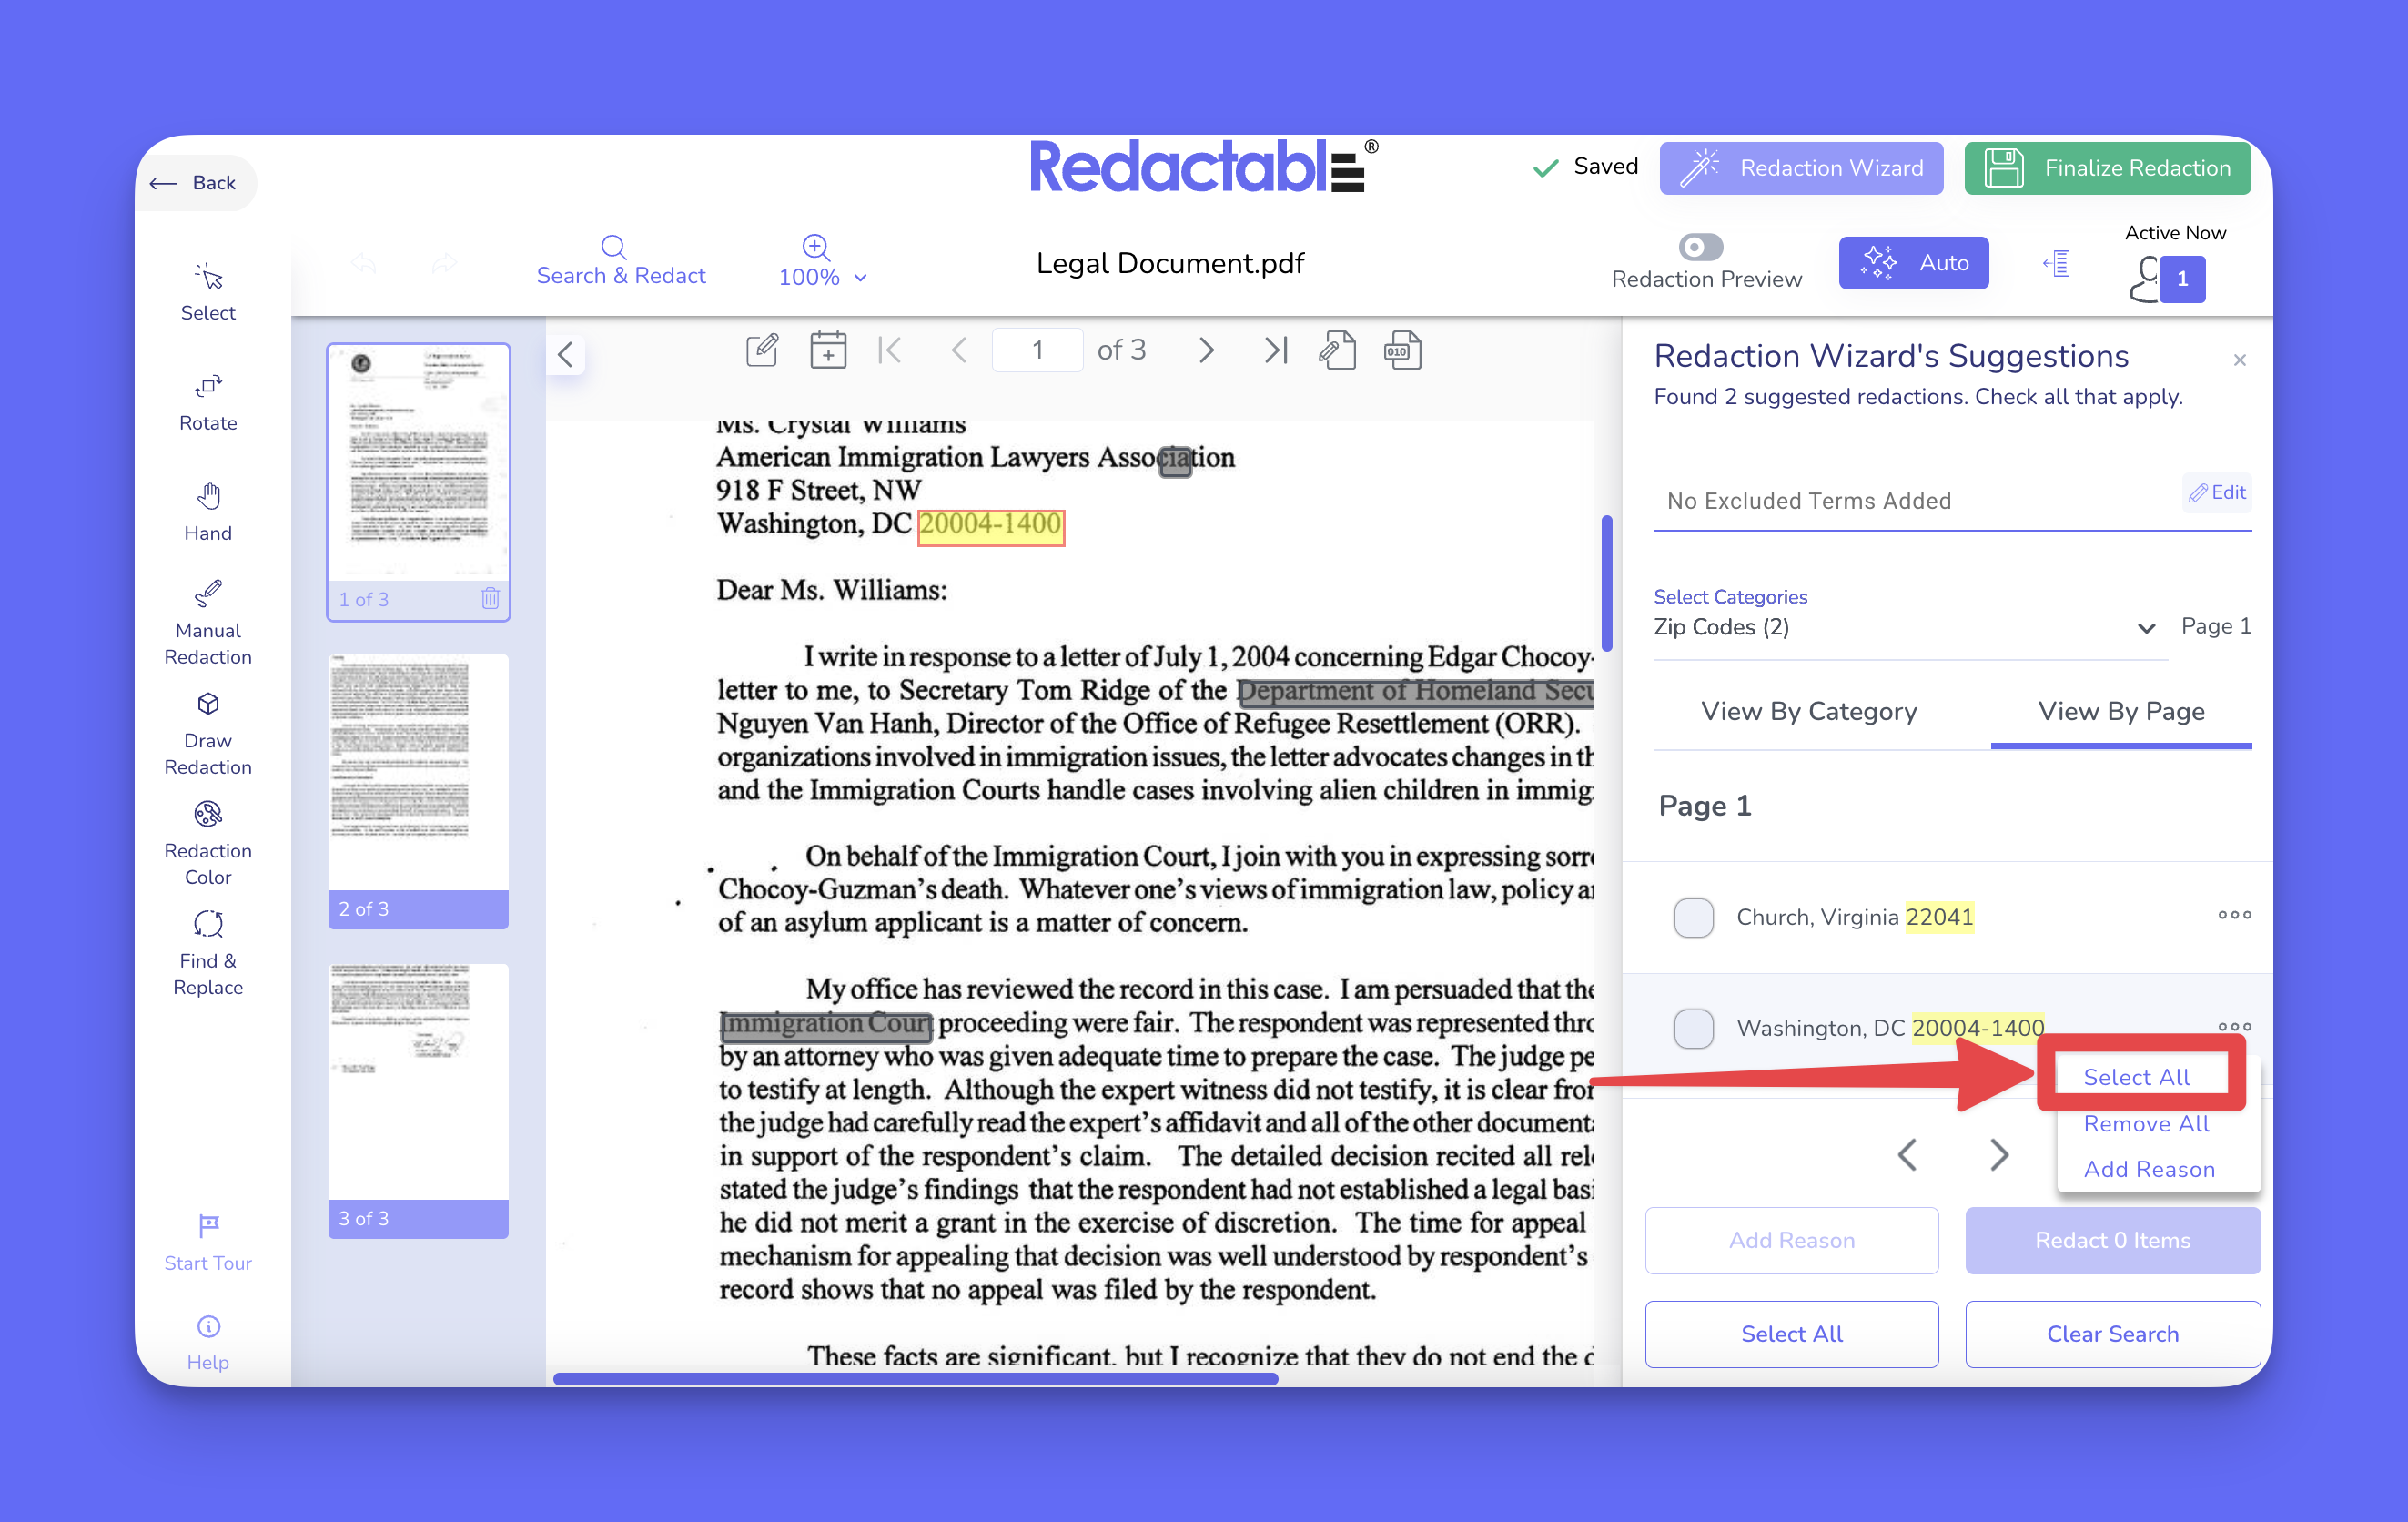
13. To remove all results for that instance, choose the option “Remove All”.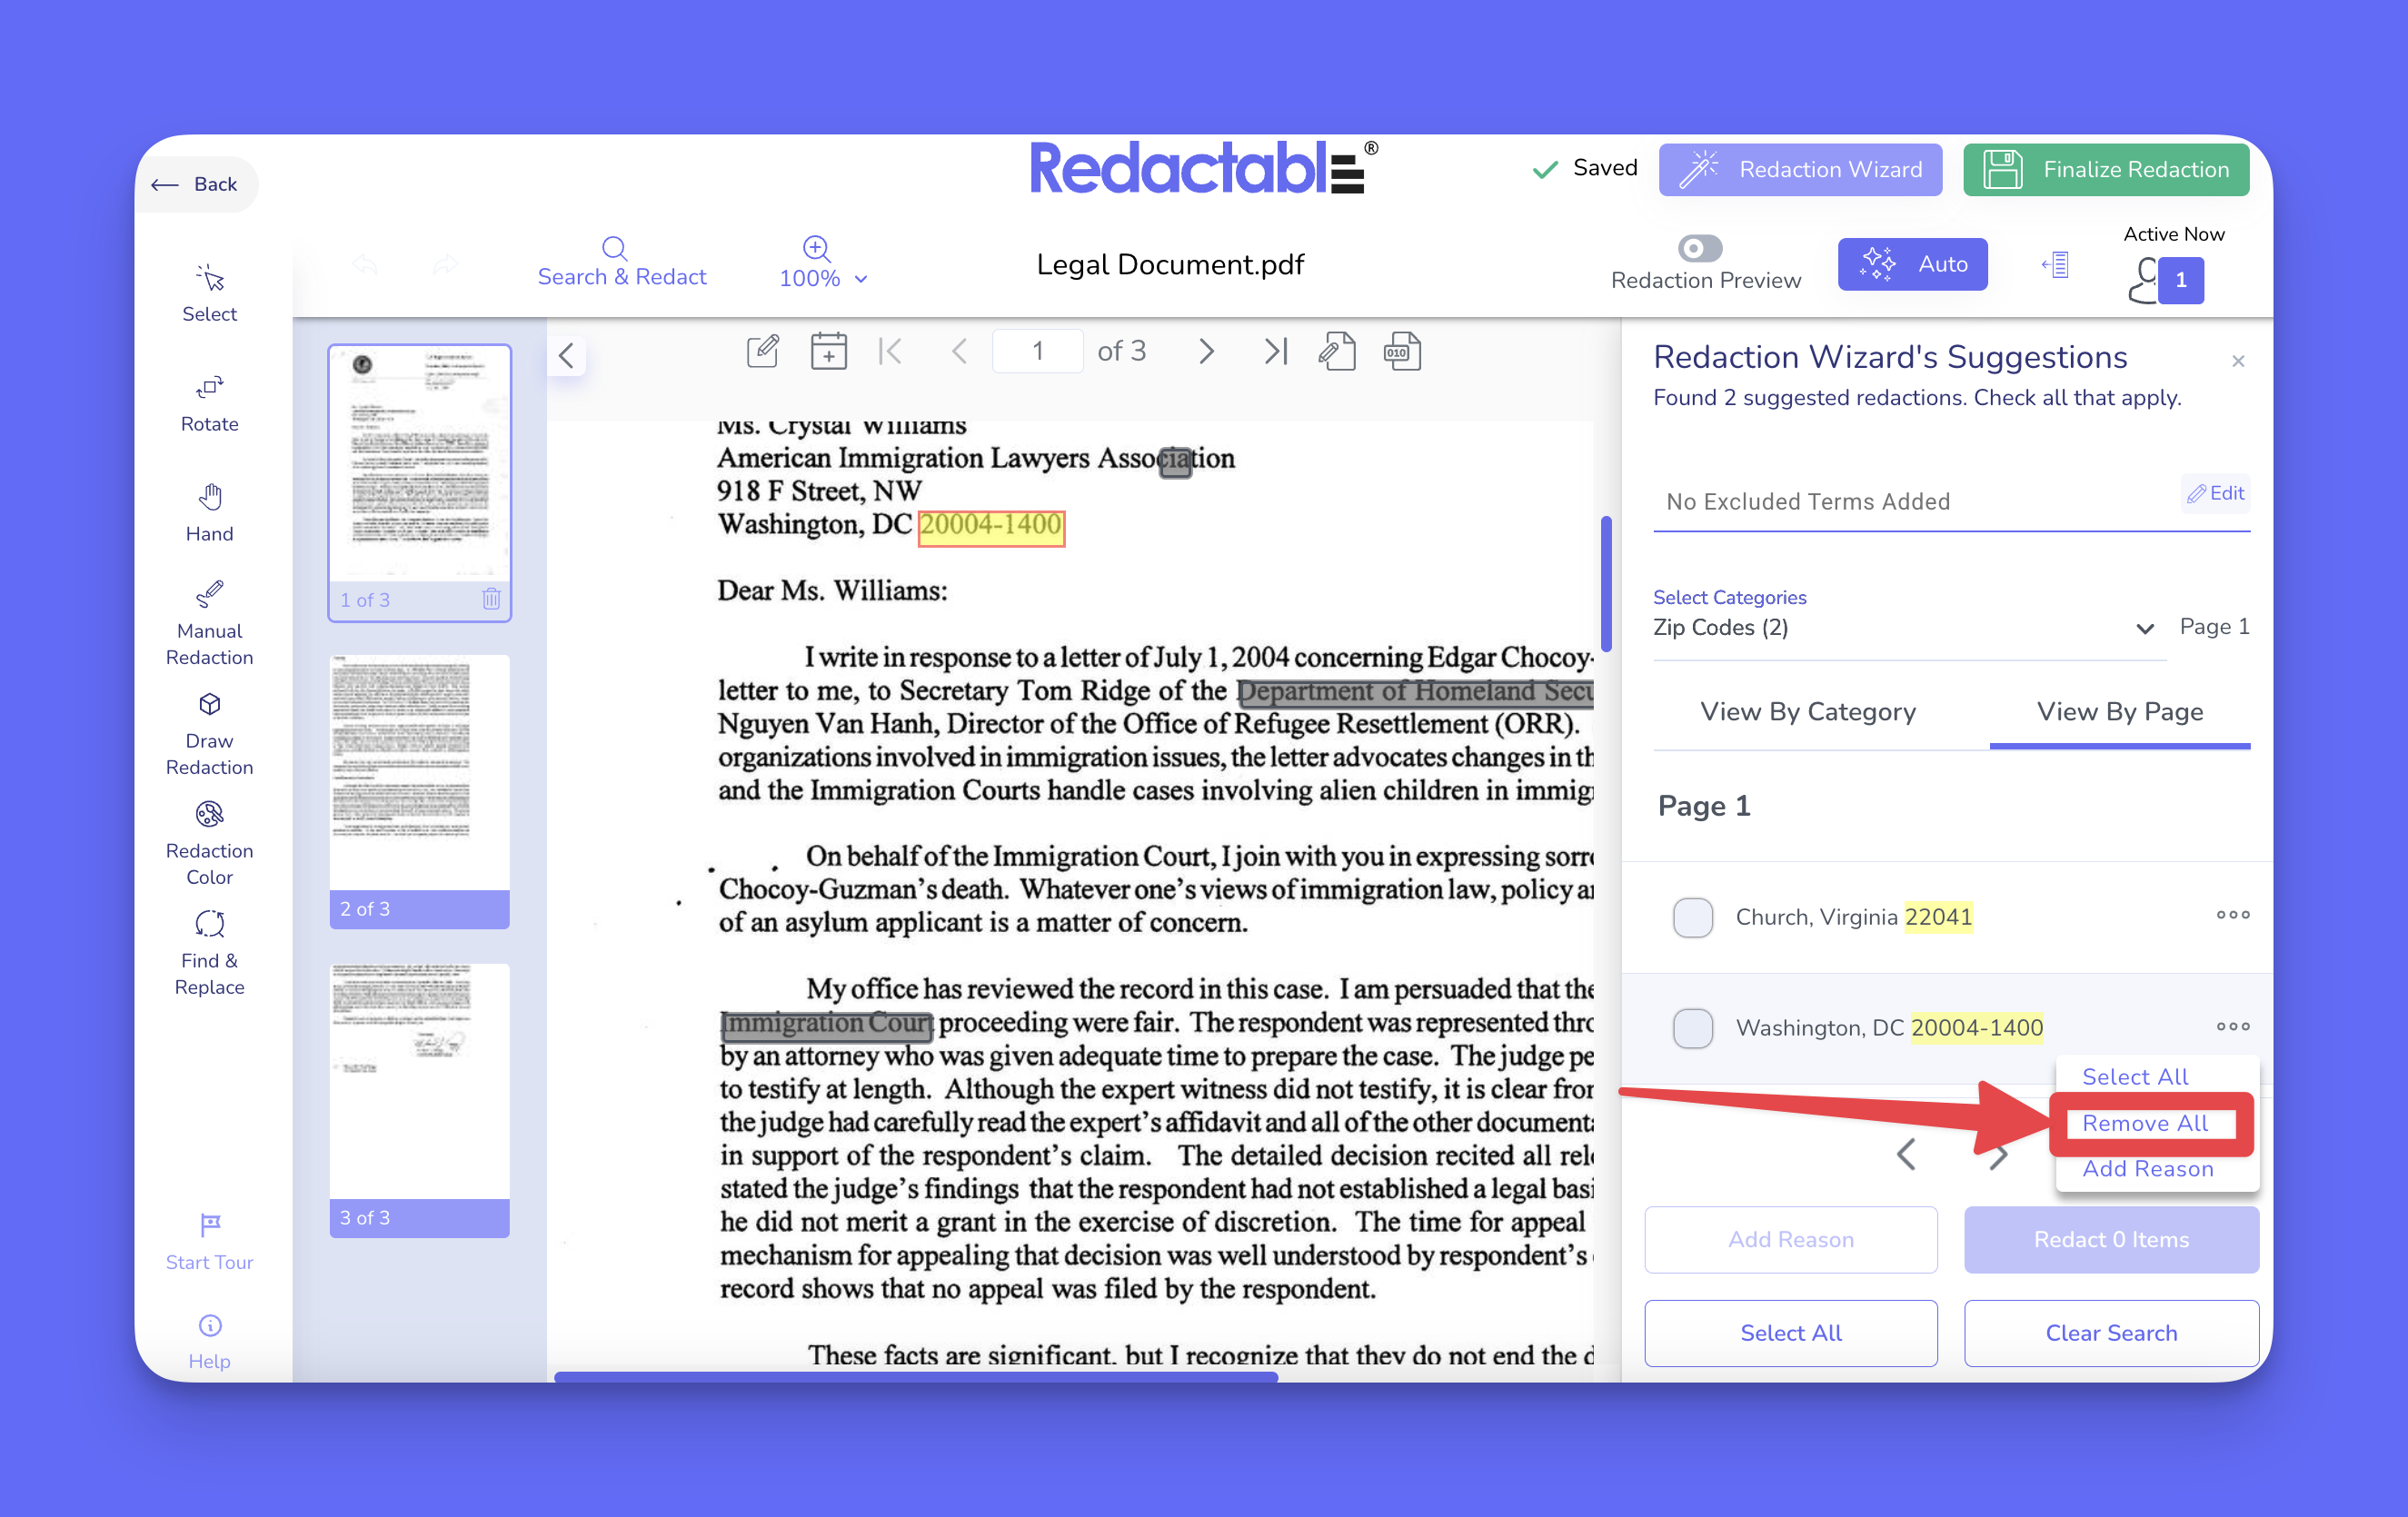
14. If you want to unselect all results, choose the option “Unselect All” (available when all items are selected).
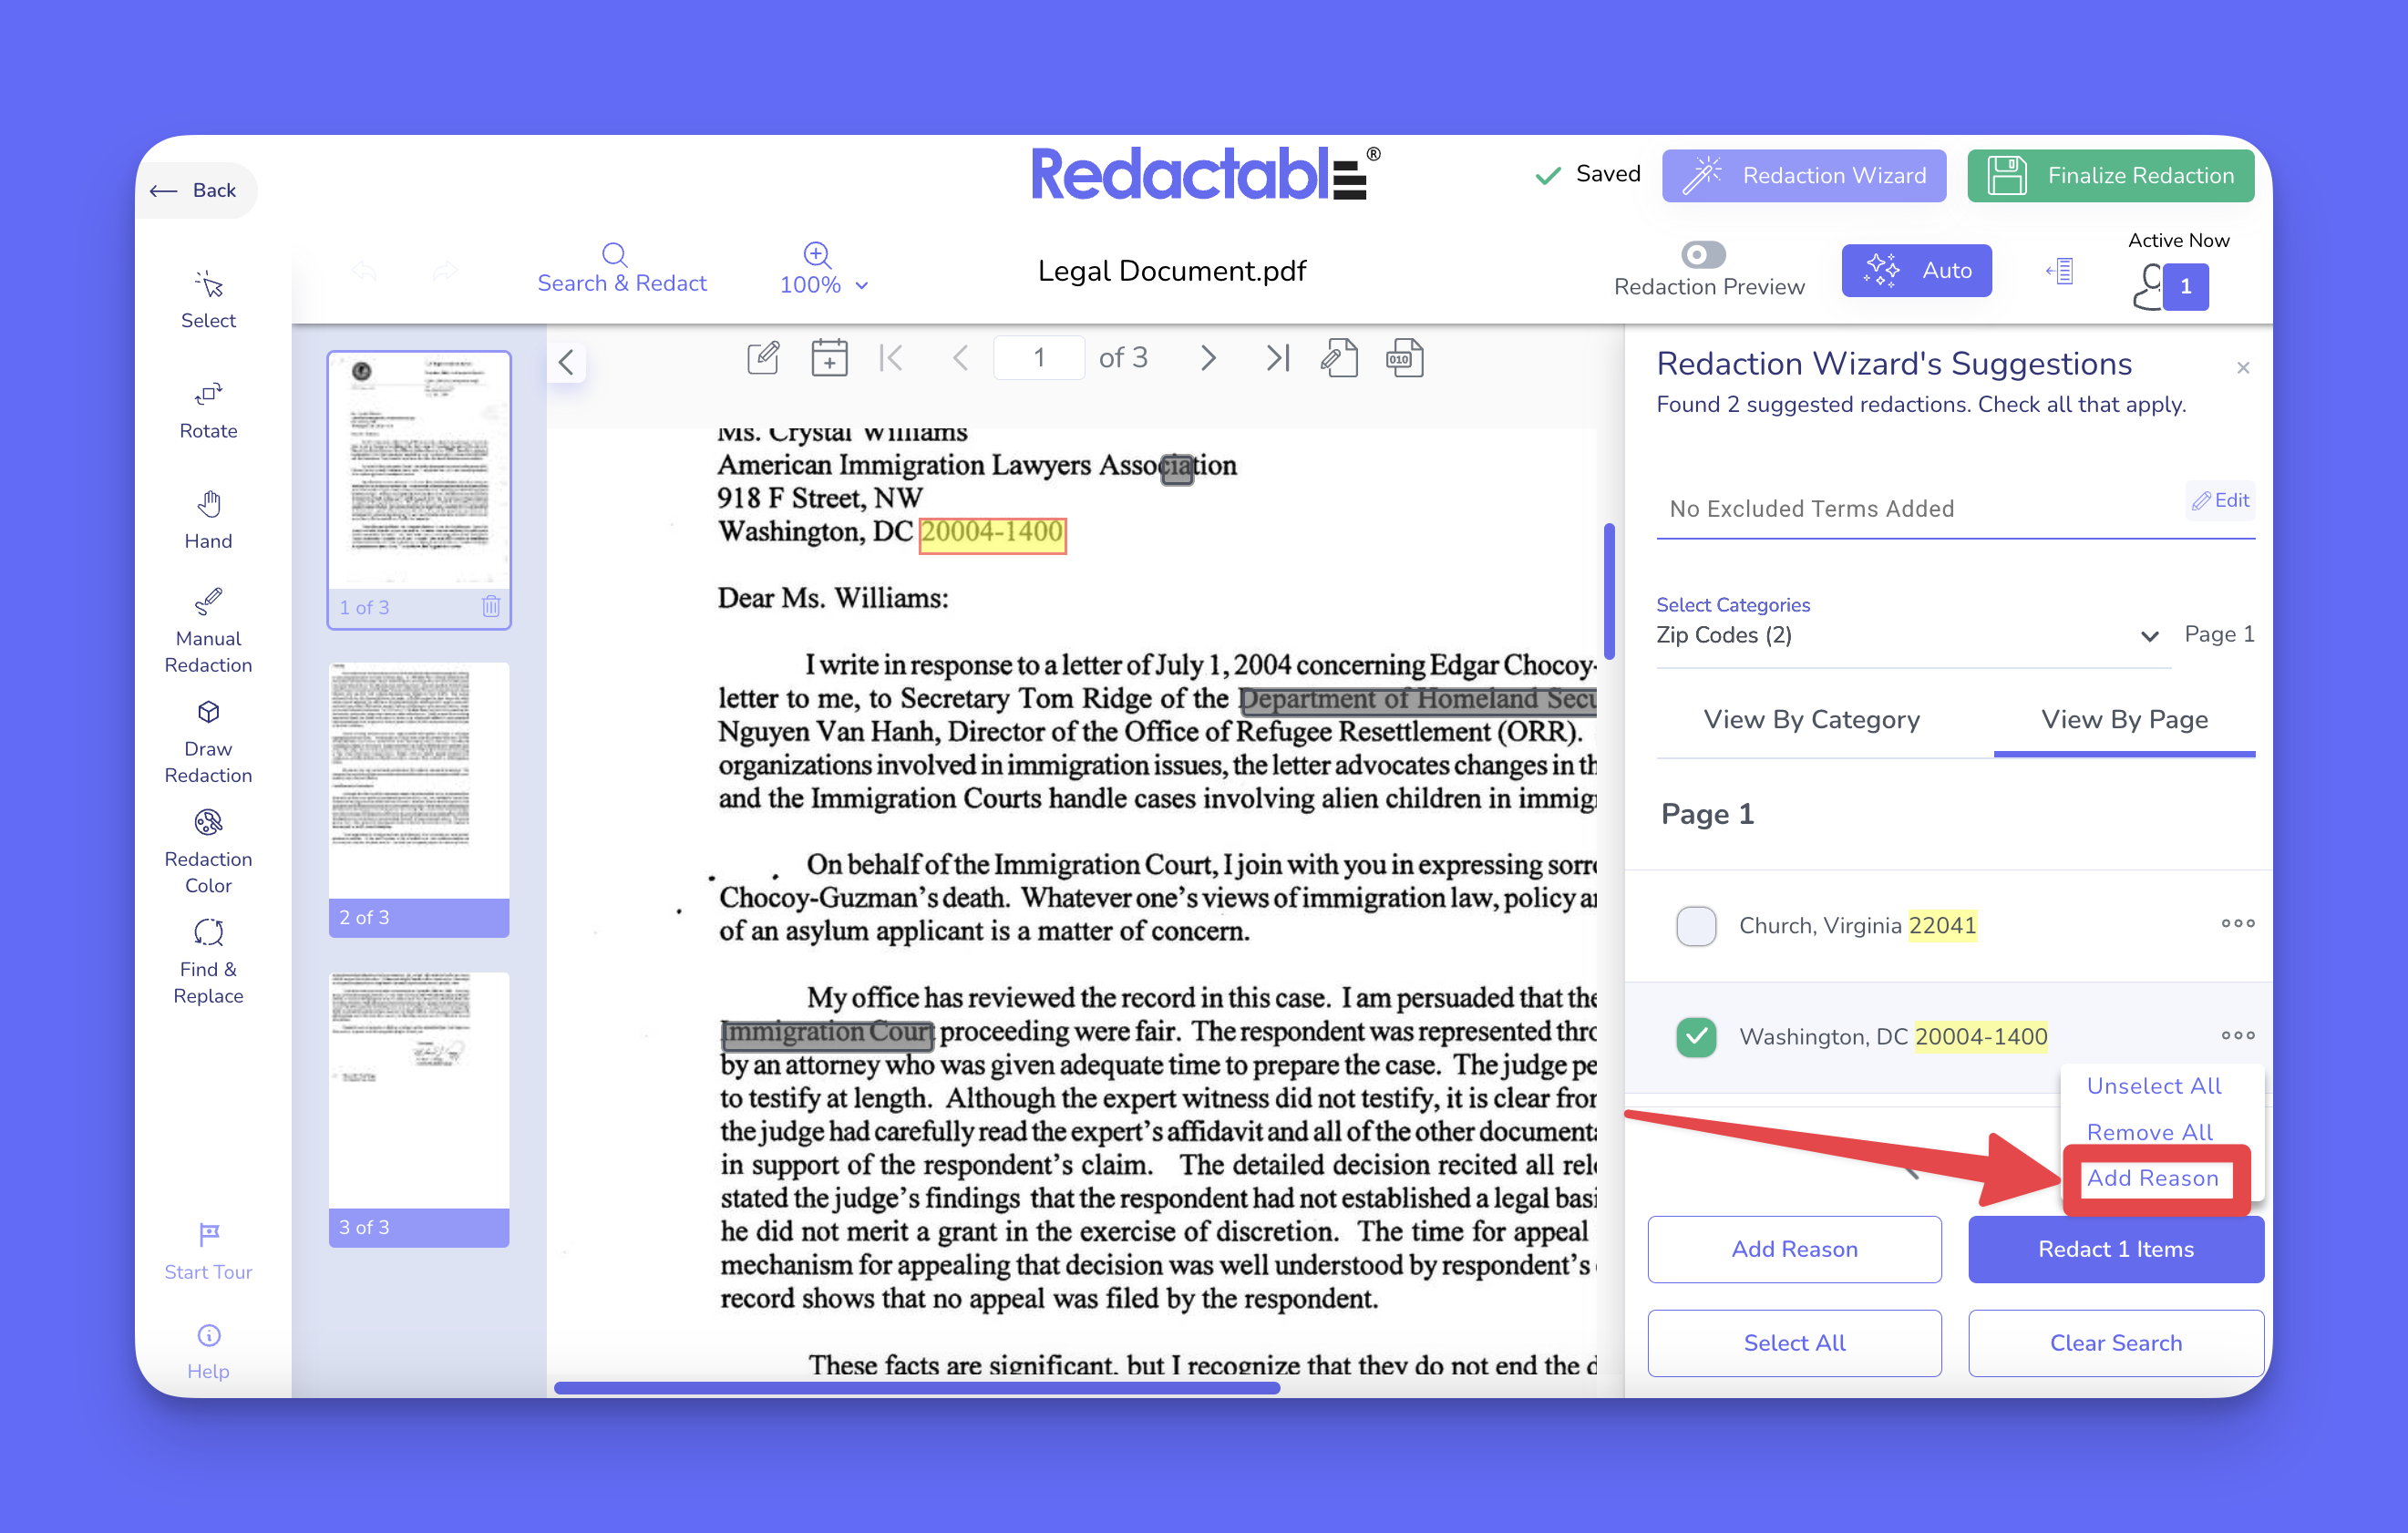
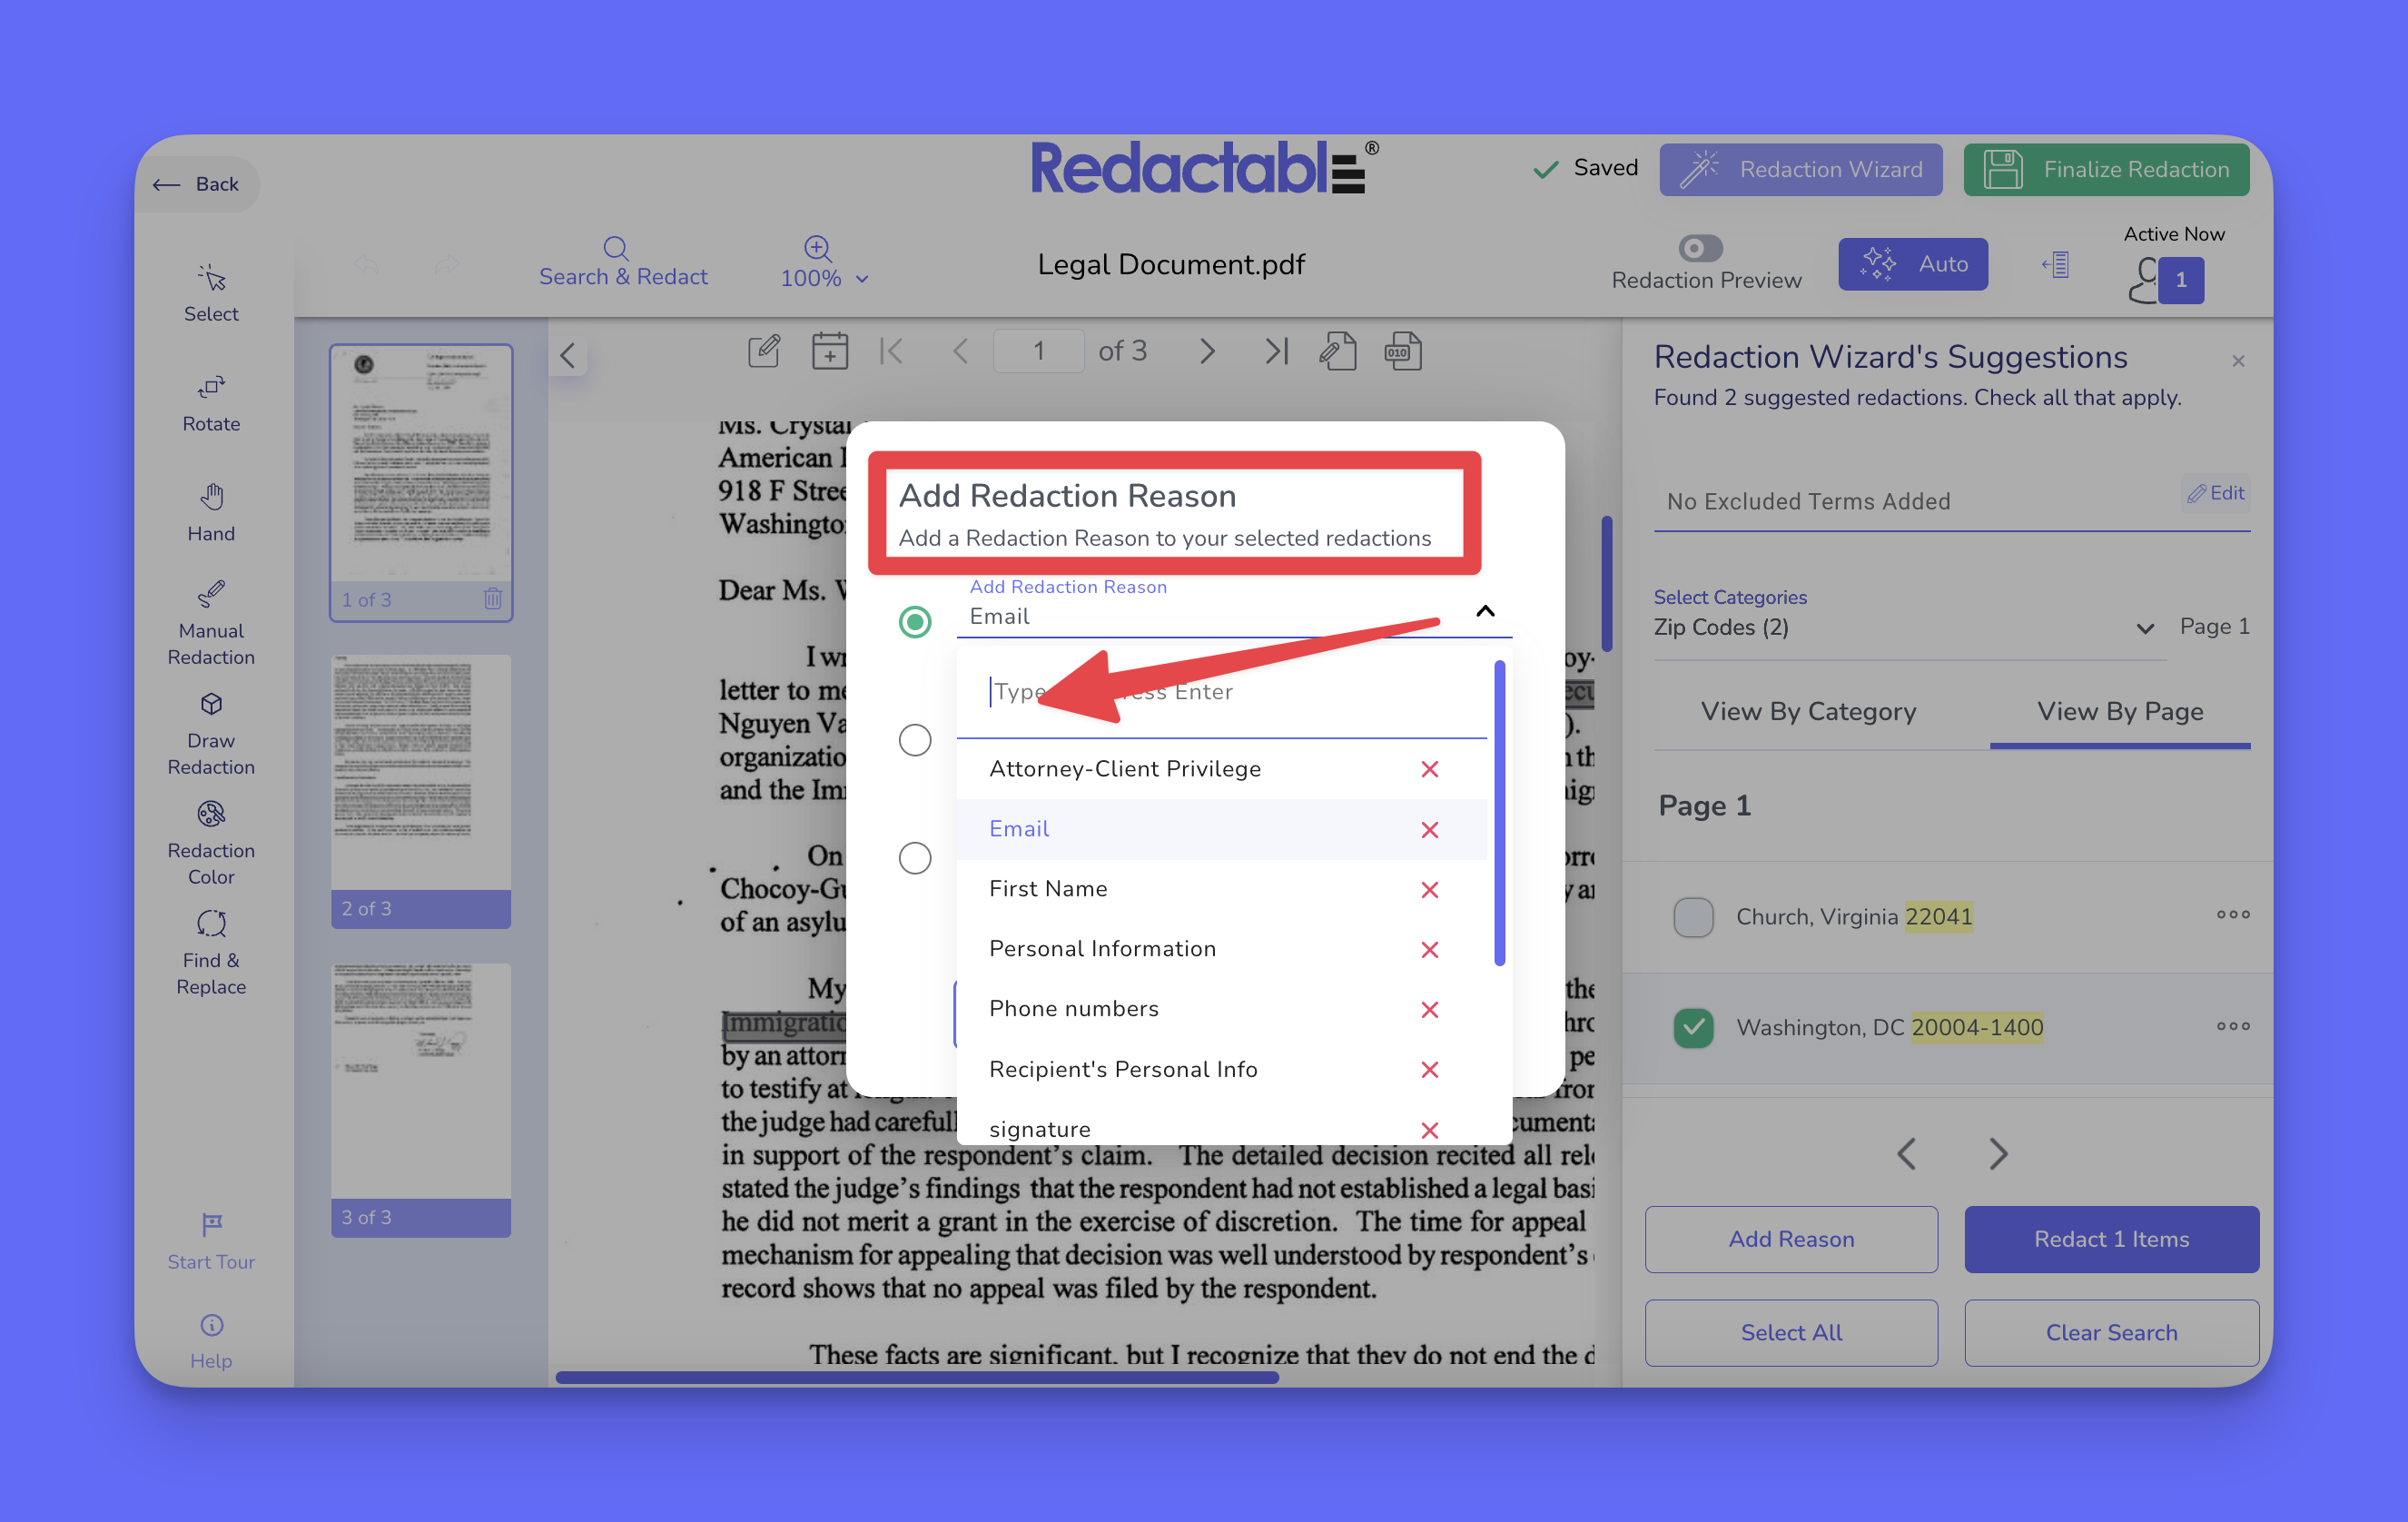
Adding a redaction reason
15. To add a reason to selected redactions, open the “Add Reason” modal from the three-dot menu.
16. A text input field allows users to add new redaction reasons. To add a custom reason, enter text in the input field.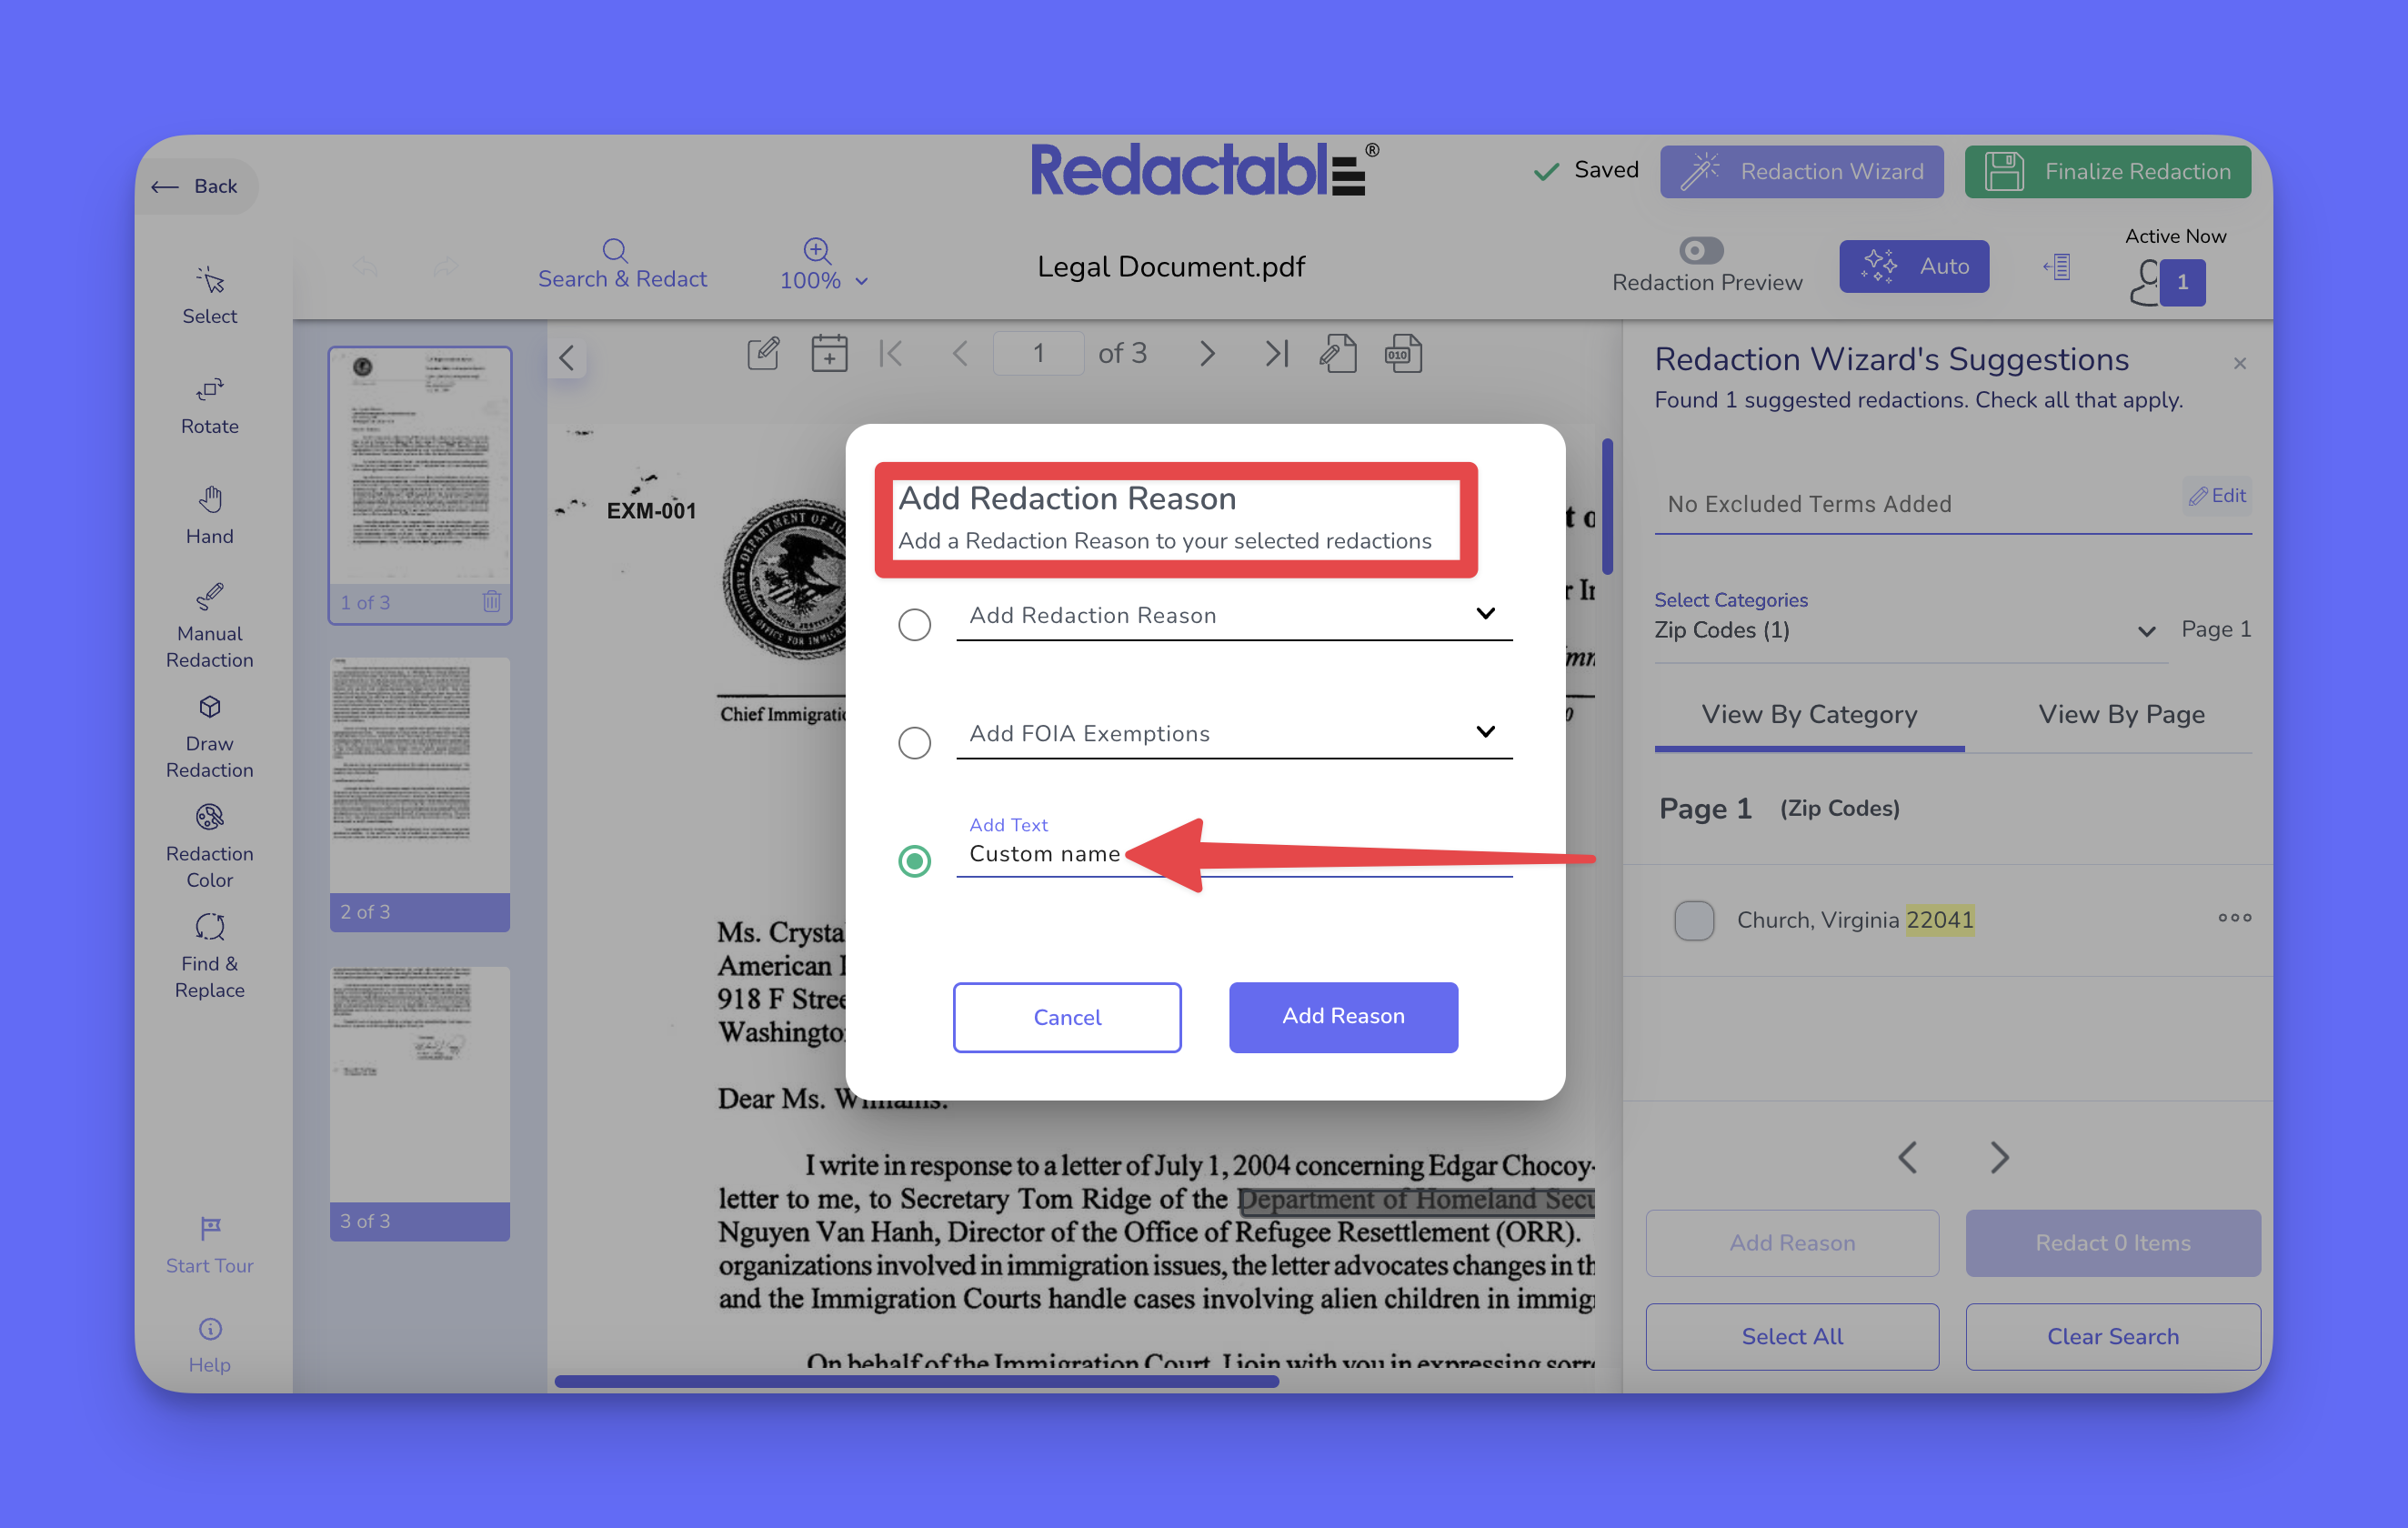
17. To apply the selection, click on the “Add Reason” button.
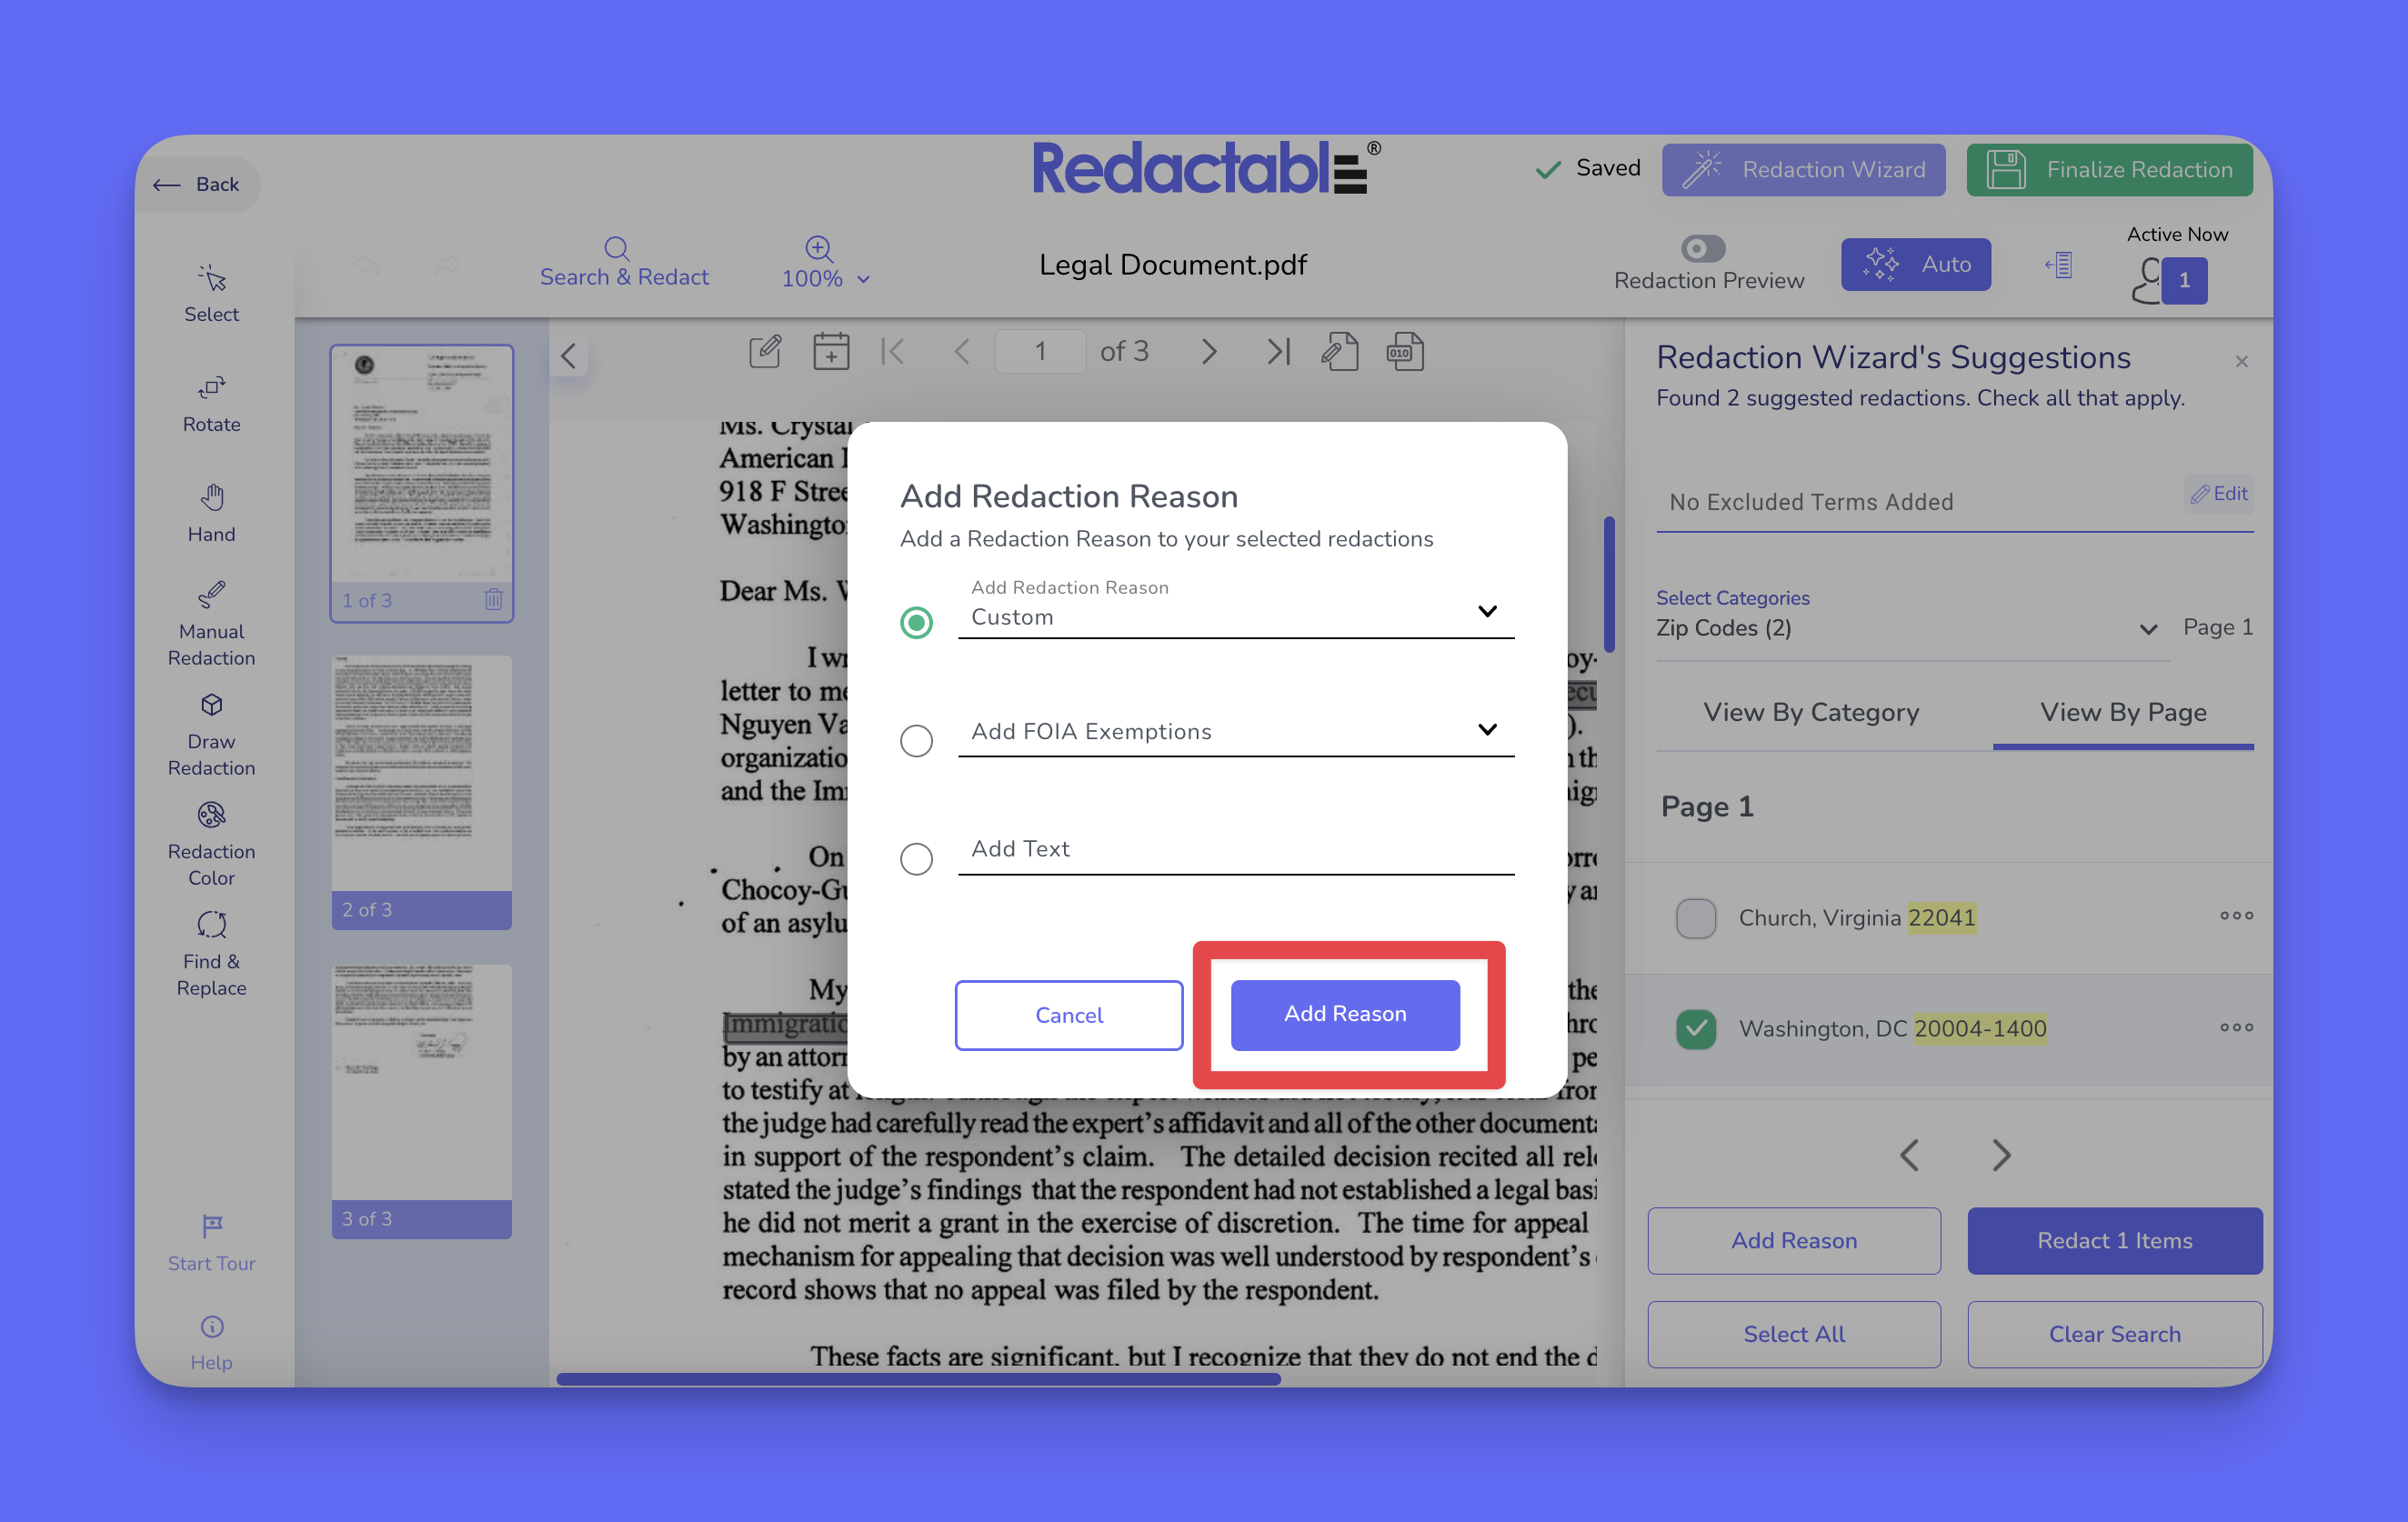
18. The dropdown menu contains predefined redaction reasons. To use a predefined reason, select one from the dropdown list.
19. To apply the selected redaction reason, click on the “Add Reason” button.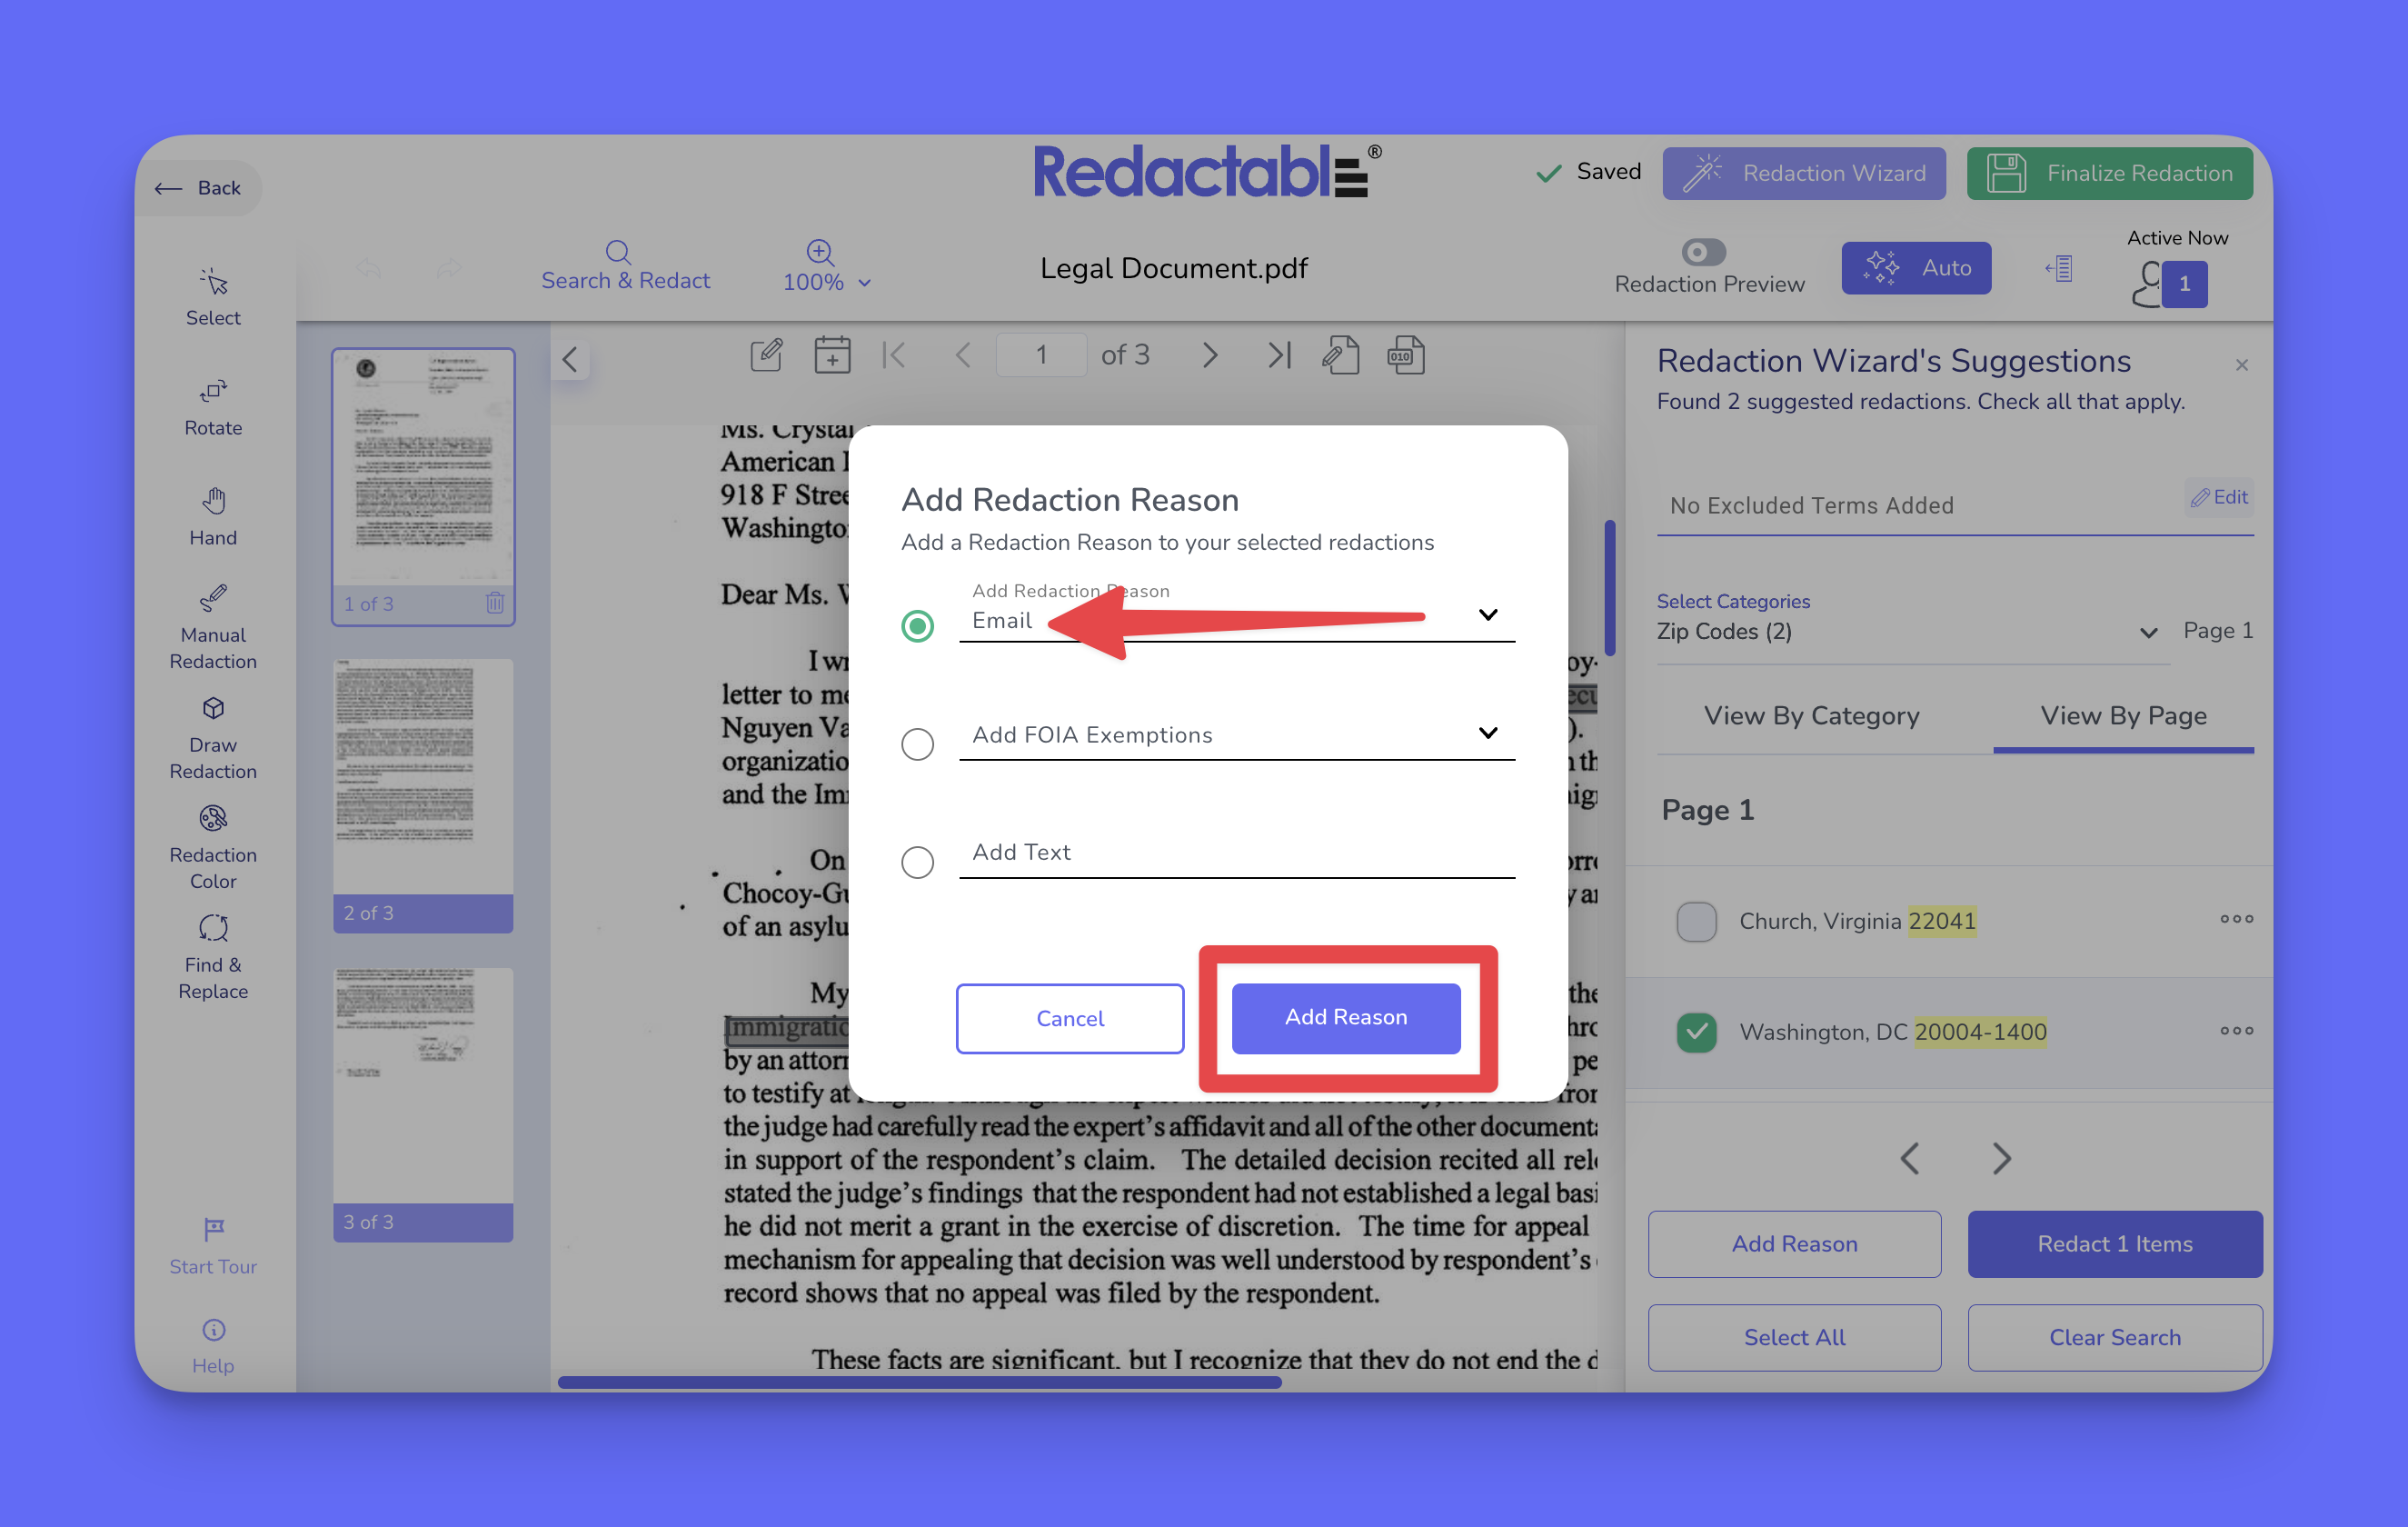
20. To apply a FOIA exemption, search and select a code (e.g., (b)(2), (b)(3)) from the dropdown list.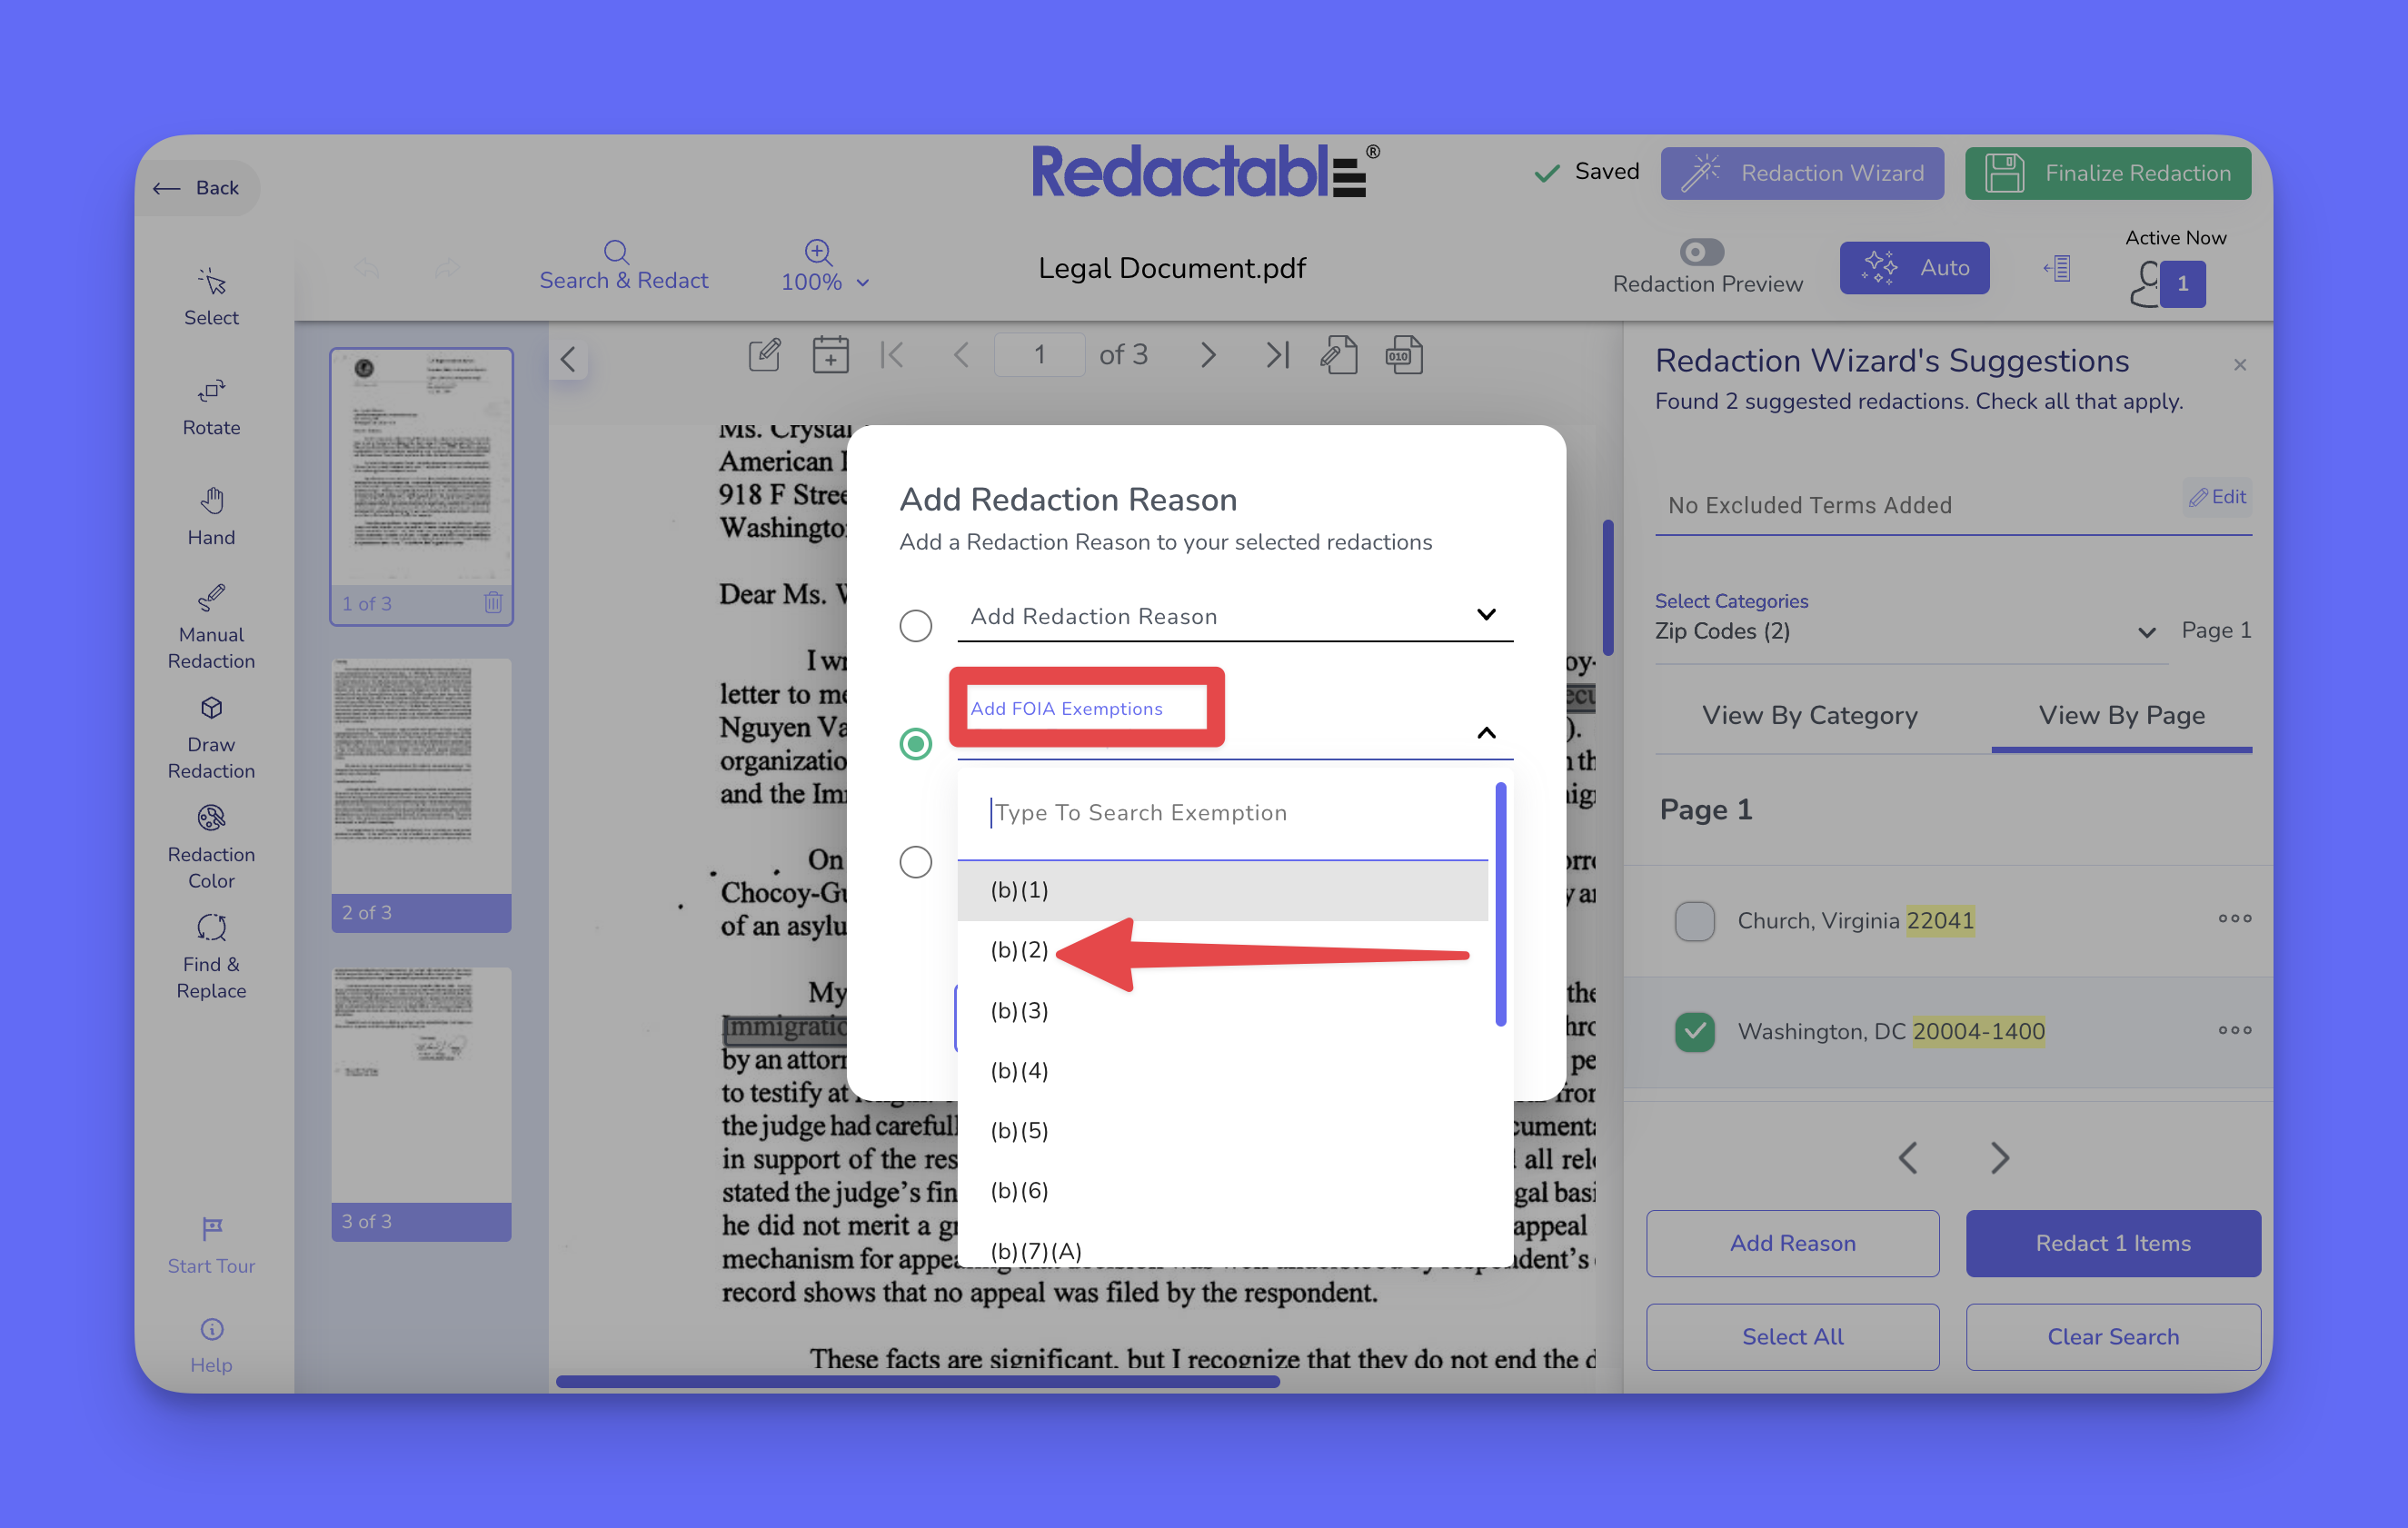
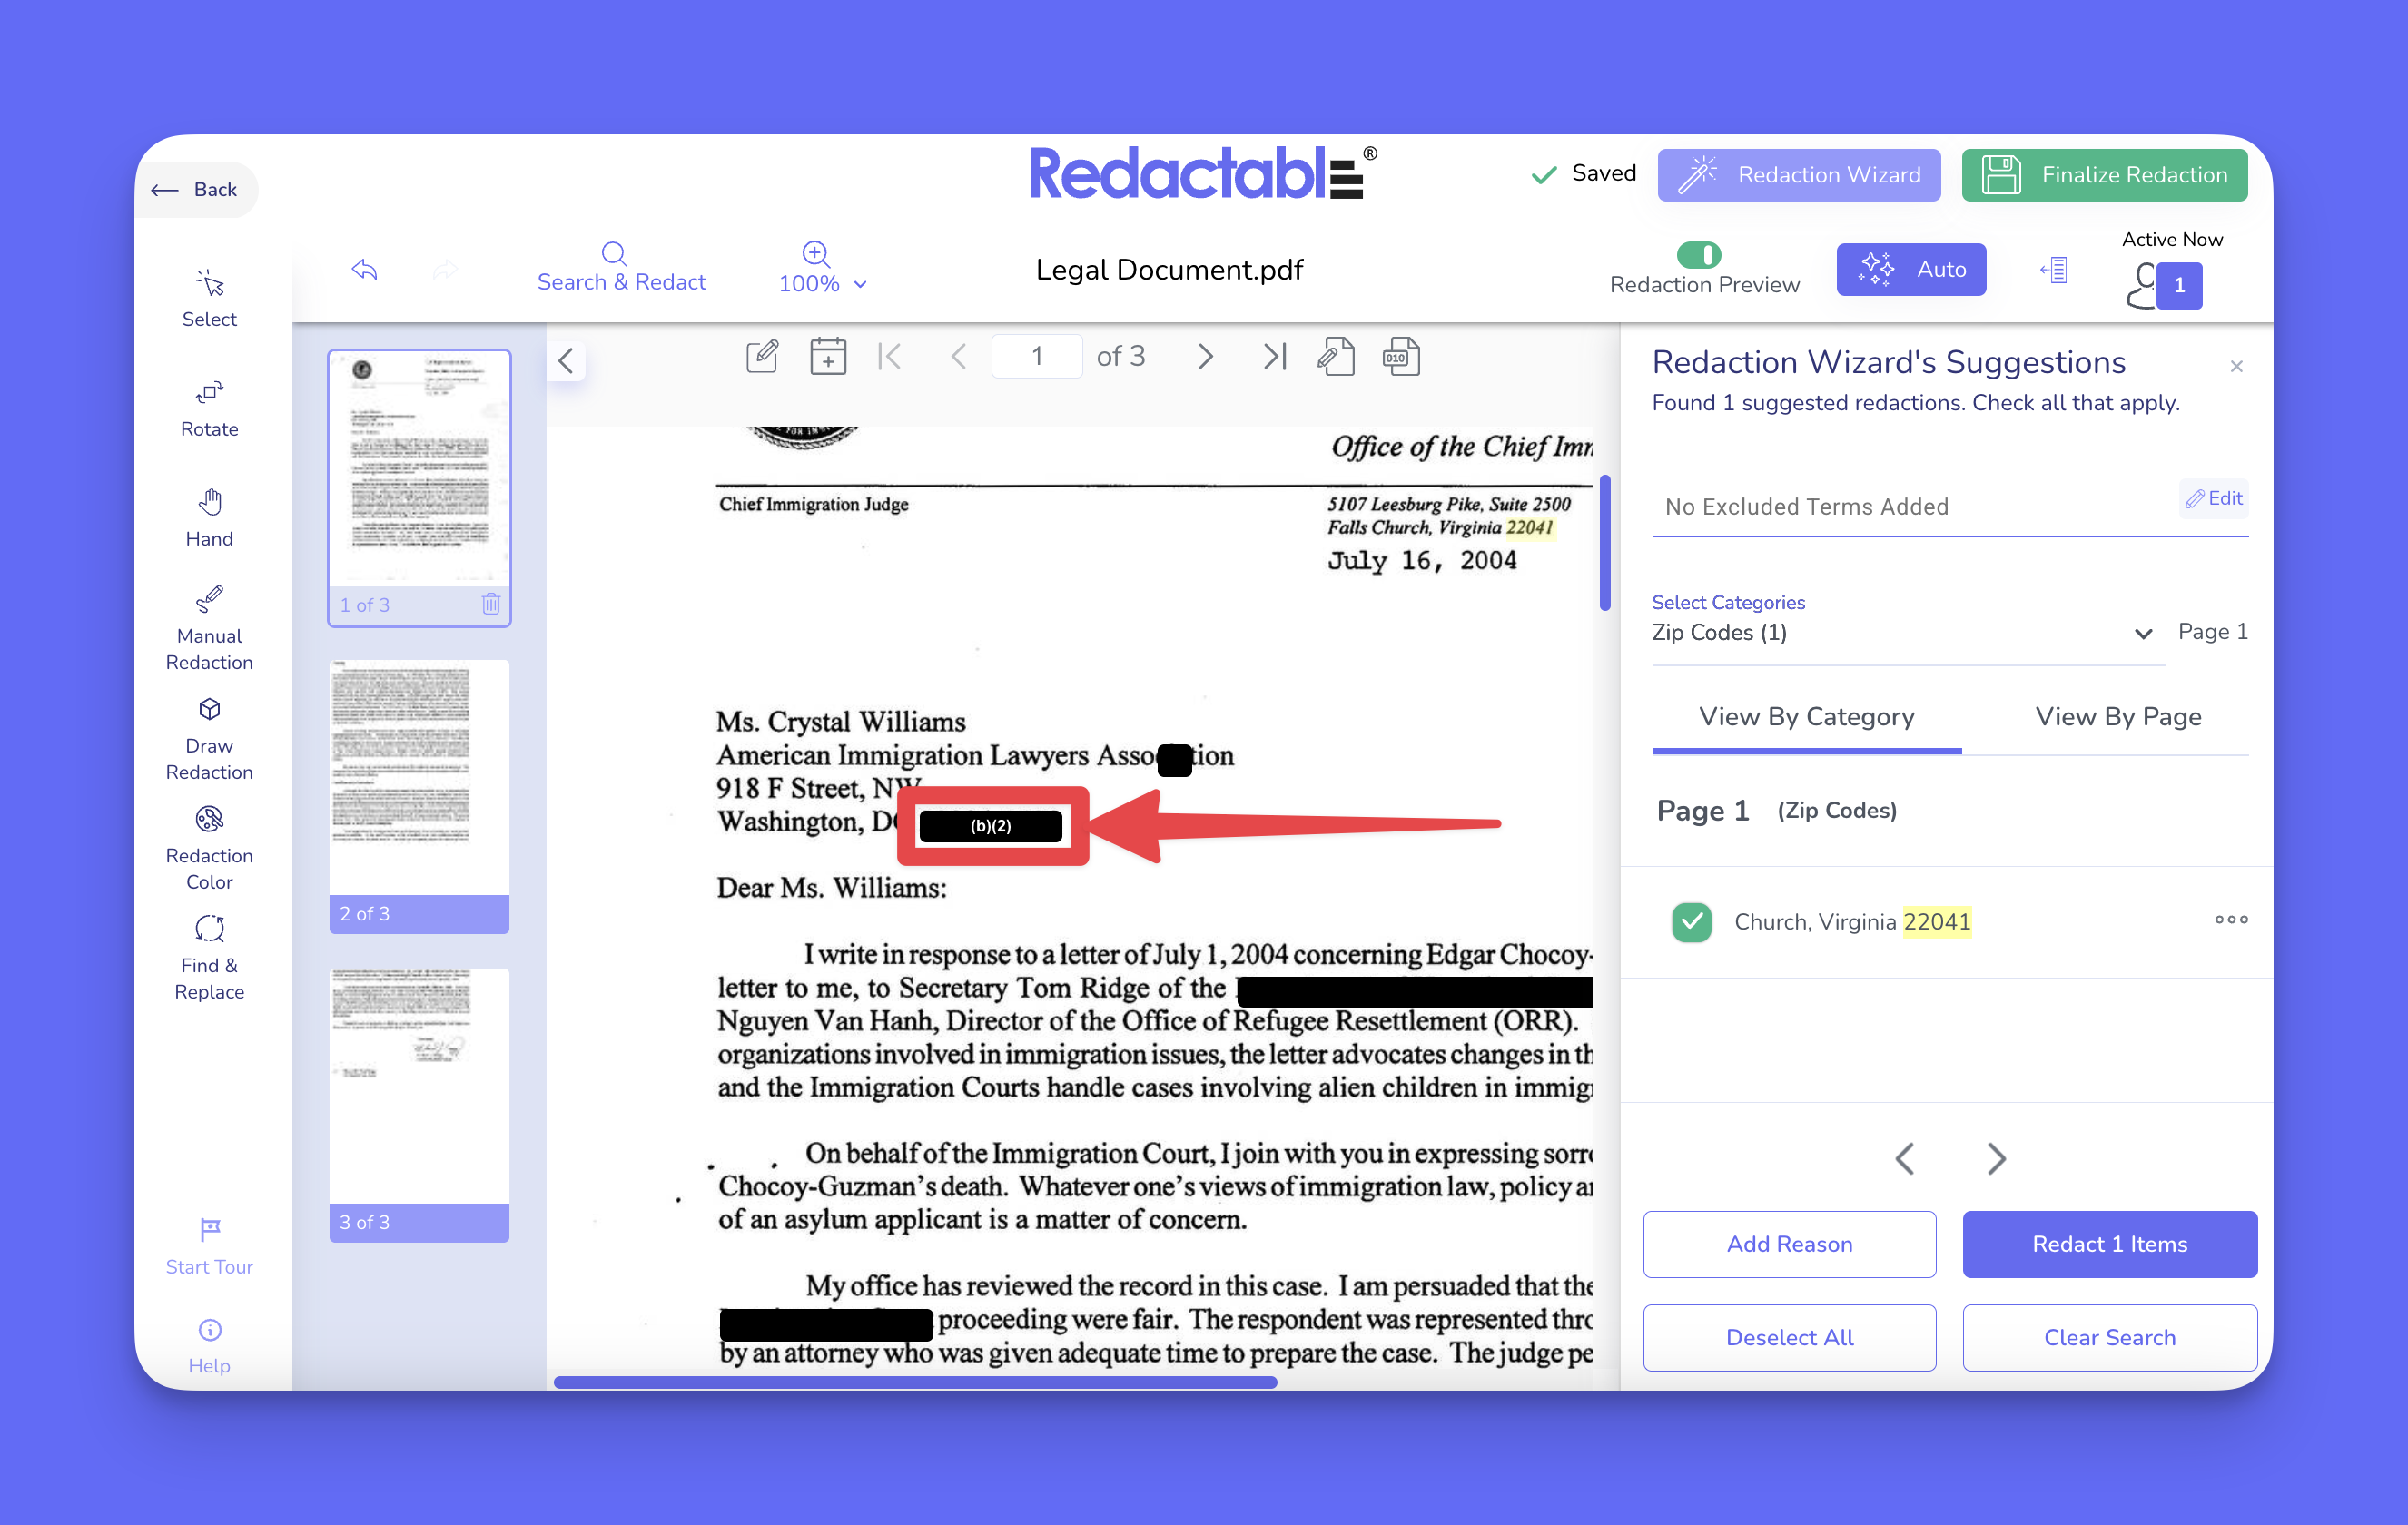
21. To apply the selected FOIA exemption, click on the “Add Reason” button. The selected reason, exemption, or text will be applied to the chosen redactions.
Removing or deleting redactions
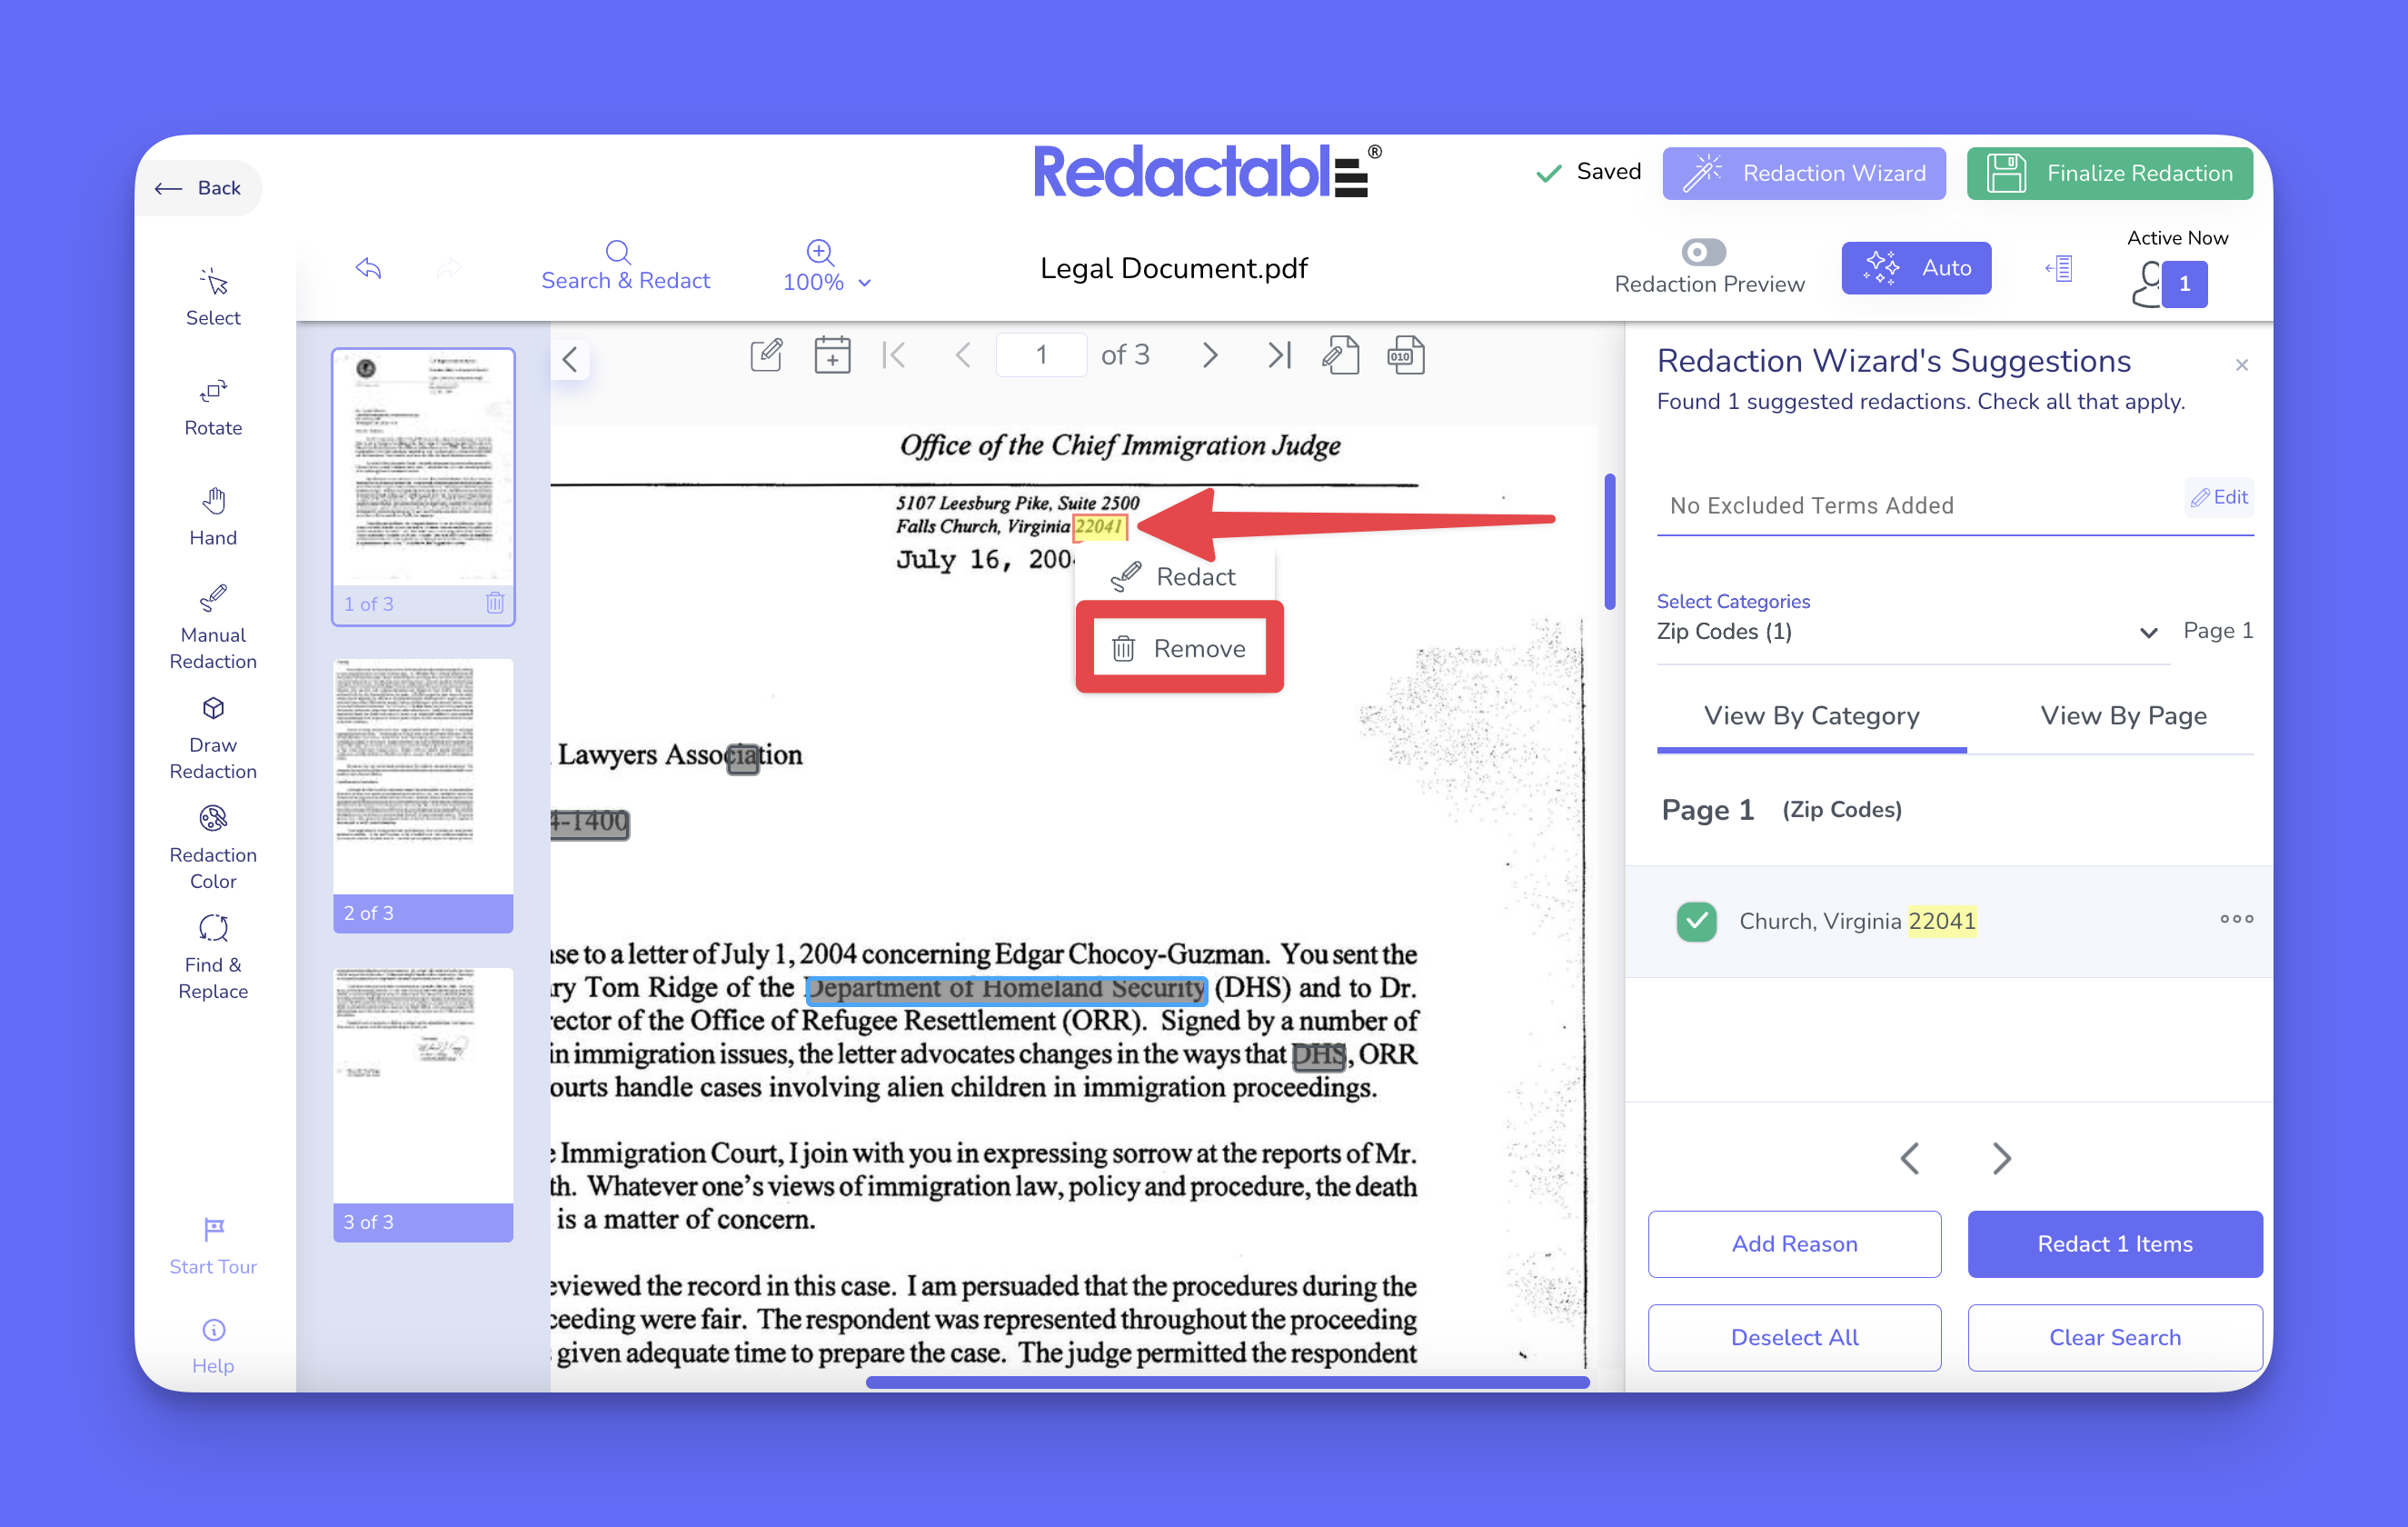
22. To remove the item from suggestions, click on a highlighted term and select the “Remove” option. Removed results will not reappear unless Auto Redaction is rerun or refreshed.
23. To delete a redaction, click on the highlighted redaction in the document and select the “Delete Redaction” option.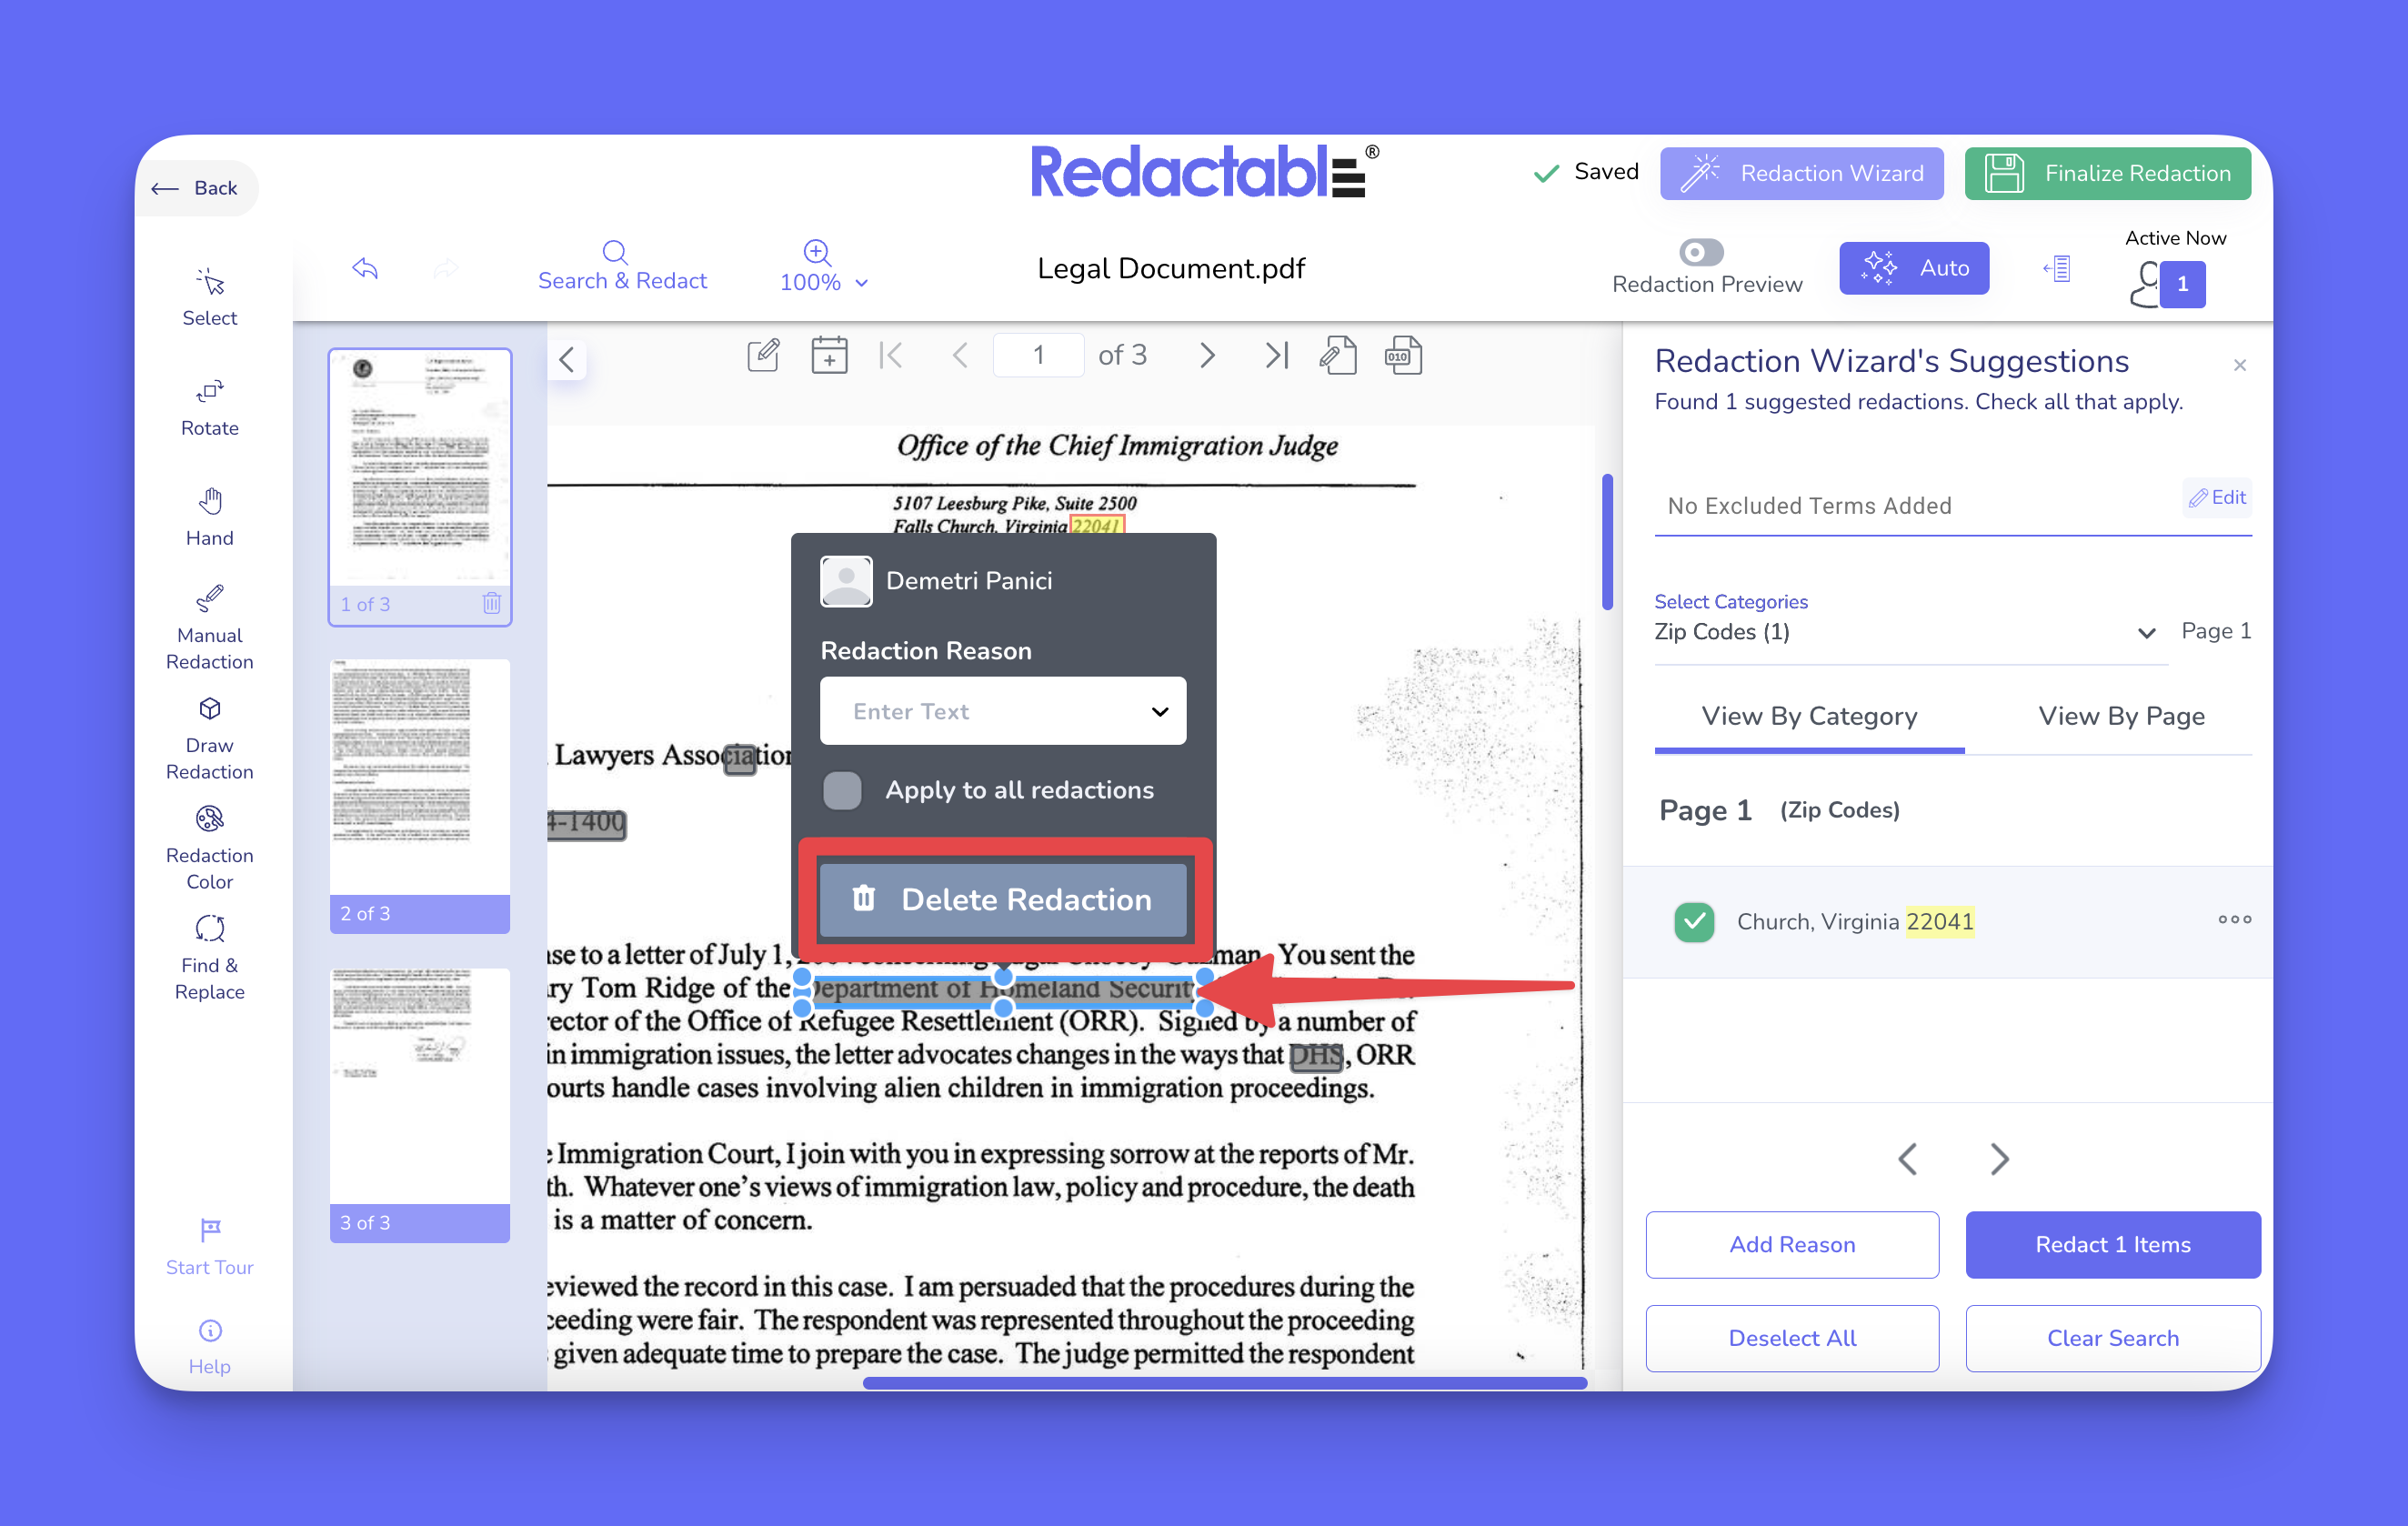
Finalizing your document
24. To complete the redaction process, review all applied redactions, and click on “Finalize Redaction” to permanently apply changes.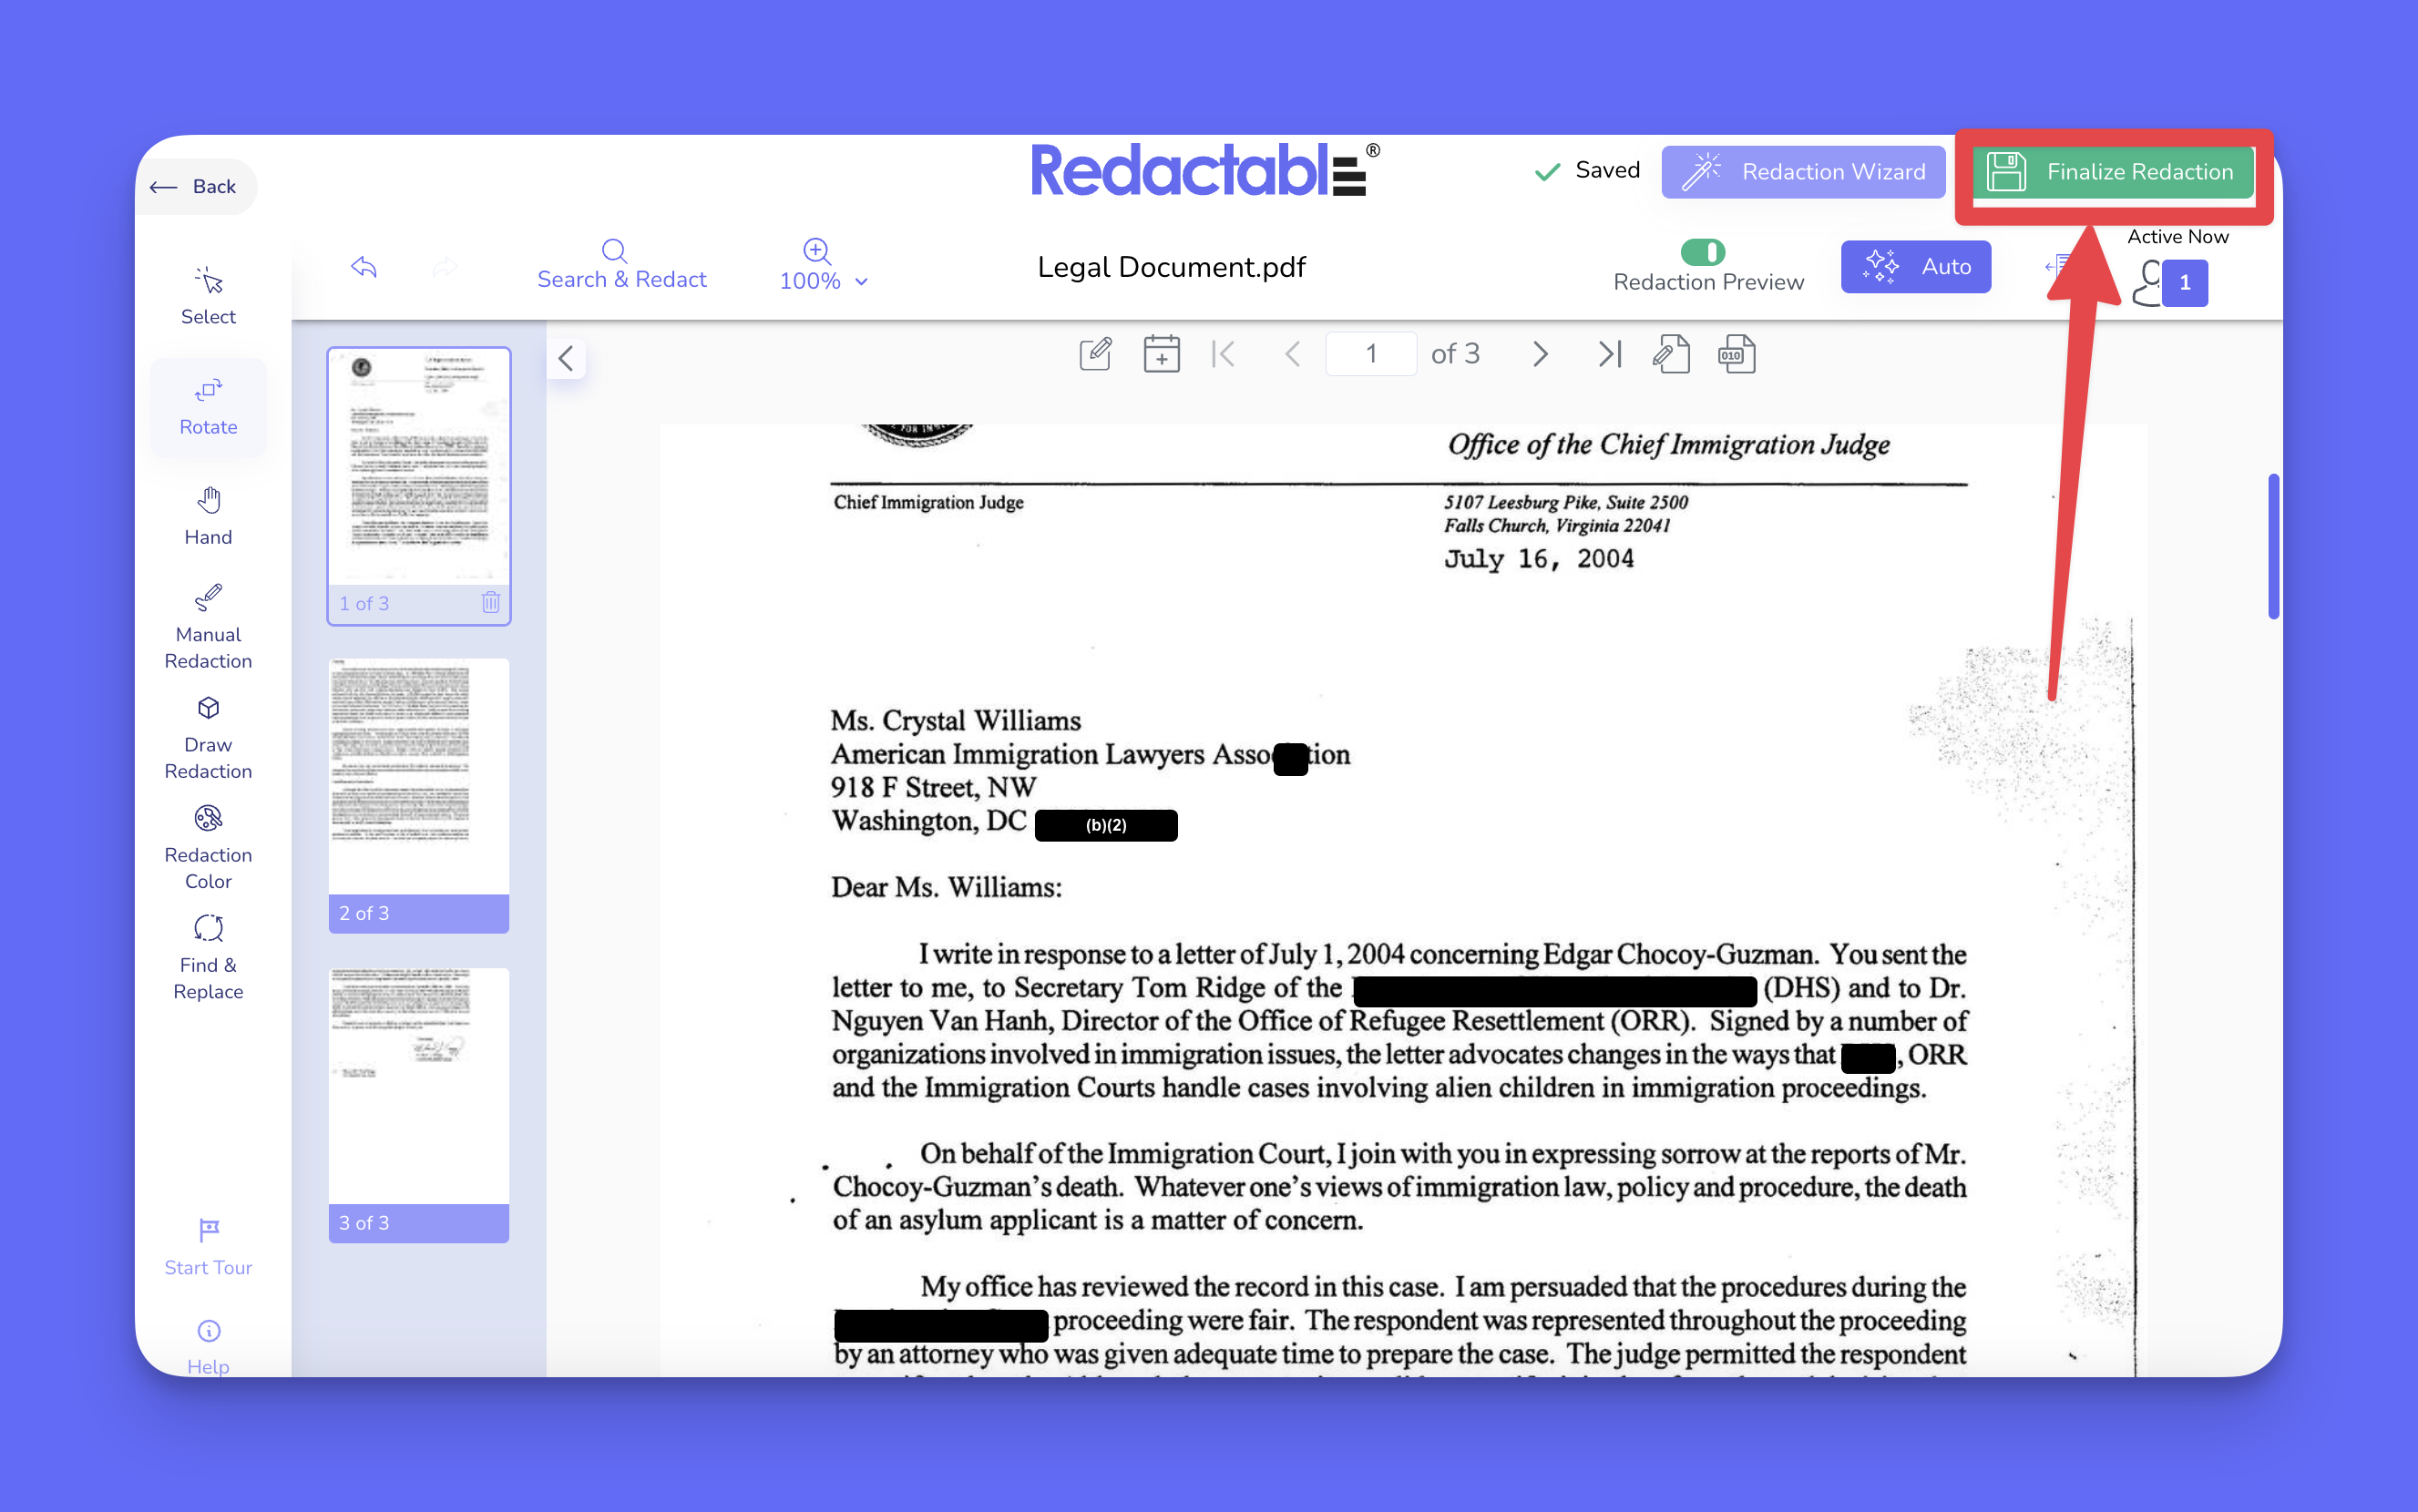
If you have additional questions or need help, please contact us at support@redactable.com.
Tip: For detailed instructions on how to use the Redaction Wizard, click here.
Was this article helpful?
That’s Great!
Thank you for your feedback
Sorry! We couldn't be helpful
Thank you for your feedback
Feedback sent
We appreciate your effort and will try to fix the article